Transcription
Configuring Audio Input and OutputRealtek ALC1220 CODEC.21-11-21-31-41-5Configuring 2/4/5.1/7.1-Channel Audio. 2Configuring S/PDIF Out. 5Stereo Mix. 5Using the Voice Recorder. 7DTS:X Ultra. 8ESS ES9280AC DAC chip ESS ES9080 chip.10-1-
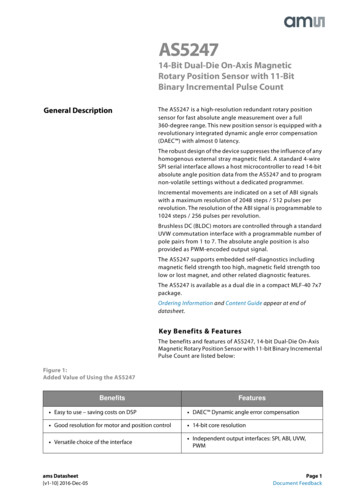
Realtek ALC1220 CODECAfter you install the included motherboard drivers, make sure your Internet connection works properly. the systemwill automatically install the audio driver from Microsoft Store. Restart the system after the audio driver is installed.1-1Configuring 2/4/5.1/7.1-Channel AudioThe picture to the right shows the default six audiojacks assignment.The picture to the right shows the default five audiojacks assignment.To configure 4/5.1/7.1-channel audio, you have to retaskeither the Line in or Mic in jack to be Side speaker outthrough the audio driver.The picture to the right shows the default two audiojacks assignment.Center/SubwooferSpeaker OutLine InRear Speaker OutFront Speaker OutSide SpeakerOutMic InCenter/SubwooferSpeaker OutLine InRear Speaker OutFront Speaker OutMic InLine OutMic InA. Configuring SpeakersStep 1:Go to the Start menu click the Realtek Audio Console.For speaker connection, refer to the instructionsin Chapter 1, "Hardware Installation," "Back PanelConnectors."-2-
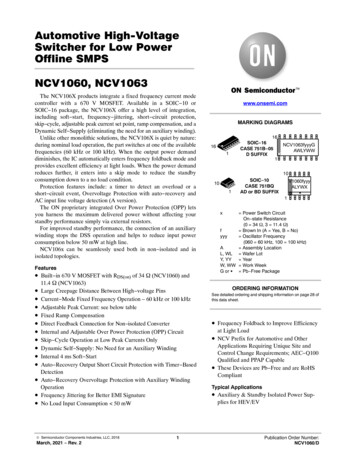
Step 2:Connect an audio device to an audio jack. The Whichdevice did you plut in ? dialog box appears. Selectthe device according to the type of device you connect.Then click OK.Step 3:On the Speakers screen, click the Speaker Configurationtab. In the Speaker Configuration list, select Stereo,Quadraphonic, 5.1 Speaker, or 7.1 Speaker accordingto the type of speaker configuration you wish to set up.Then the speaker setup is completed.B. Configuring Sound EffectYou may configure an audio environment on the Speakers tab.C. Enabling Smart Headphone AmpThe Smart Headphone Amp feature automaticallydetects impedance of your head-worn audio device,whether earbuds or high-end headphones to provideoptimal audio dynamics. To enable this feature, connectyour head-worn audio device to the Line out jack on therear panel and then go to the Speaker page. Enablethe Smart Headphone Amp feature. The HeadphonePower list below allows you to manually set the level ofheadphone volume, preventing the volume from beingtoo high or too low.-3-
* Configuring the HeadphoneWhen you connect your headphone to the Line out jack on the back panel or front panel, make sure the defaultplayback device is configured correctly.Step 1:Locate the icon in the notification area and right-clickon the icon. Select Open Sound settings.Step 2:Select Sound Control Panel.Step 3:On the Playback tab, make sure your headphoneis set as the default playback device. For the deviceconnected to the Line out jack on the back panel,right-click on Speakers and select Set as DefaultDevice; for the device connected to the Line out jackon the front panel, right-click on Realtek HD Audio 2ndoutput.-4-
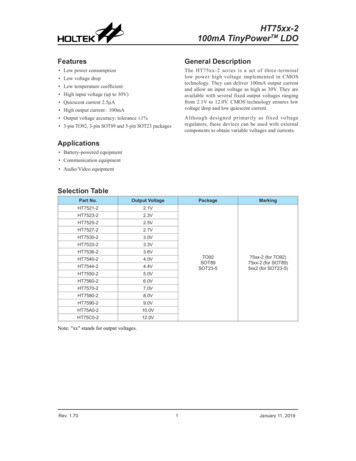
1-2Configuring S/PDIF OutThe S/PDIF Out jack can transmit audio signals to an external decoder for decoding to get the best audio quality.1. Connecting a S/PDIF Out Cable:Connect a S/PDIF optical cable to an external decoder for transmitting the S/PDIF digital audio signals.Connects to a S/PDIF optical cable2. Configuring S/PDIF Out:On the Realtek Digital Output screen, Select the samplerate and bit depth in the Default Format section.1-3Stereo MixThe following steps explain how to enable Stereo Mix (which may be needed when you want to record soundfrom your computer).Step 1:Locate the icon in the notification area and right-clickon the icon. Select Open Sound settings.-5-
Step 2:Select Sound Control Panel.Step 3:On the Recording tab, right-click on Stereo Mix item andselect Enable. Then set it as the default device. (if you donot see Stereo Mix, right-click on an empty space andselect Show Disabled Devices.)Step 4:Now you can access the HD Audio Manager to configureStereo Mix and use Voice Recorder to record the sound.-6-
1-4Using the Voice RecorderAfter setting up the audio input device, to open theVoice Recorder, go to the Start menu and search forVoice Recorder.A. Recording Audio1. To begin the recording, click the Record icon.2. To stop the recording, click the Stop recording iconB. Playing the Recorded Sound.The recordings will saved in Documents Sound Recordings. Voice Recorder records audio in MPEG-4 (.m4a)format. You can play the recording with a digital media player program that supports the audio file format.-7-
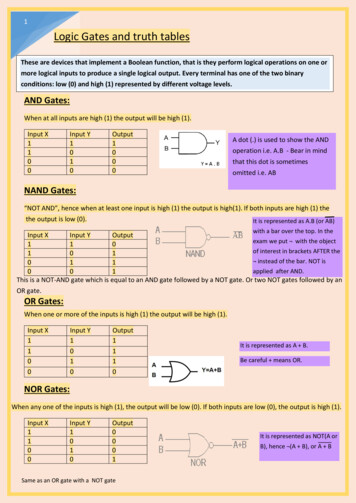
1-5DTS:X UltraHear what you have been missing! DTS:X Ultra technology is designed to enhance your gaming, movies,AR, and VR experiences on headphones and speakers. It delivers an advanced audio solution that renderssounds above, around, and close to you, stepping up your game play to new levels. Now with support forMicrosoft Spatial sound. Key features include: Believable 3D audioDTS latest spatial audio rendering that delivers believable 3D audio over headphones and speakers. PC sound gets realDTS:X decoding technology places sound where it would occur naturally in the real world. Hear sound as it was intendedSpeaker and headphone tuning that preserves the audio experience as it was designed.A. Using DTS:X UltraStep 1:After you install the included motherboard drivers, make sure your Internet connection works properly.The system will automatically install DTS: X Ultra from the Microsoft Store. Restart the system after it isinstalled.Step 2:Connect your audio device and select DTS:X Ultra on the Start menu. The Content Mode main menuallows you to select content modes including Music, Video, and Movies, or you can select specifically tunedsound modes, including Strategy, RPG, and Shooter, to suit different game genres. The Custom Audioallows you to create customized audio profiles based on personal preference for later use.-8-
B. Using DTS Sound UnboundInstalling DTS Sound UnboundStep 1:Connect your headphones to the front panel line out jack and make sure your Internet connection worksproperly, Locate theicon in the notification area and right-click on the icon. Click on Spatial Sound andthen select DTS Sound Unbound.Step 2:The system will connect to the Microsoft Store. When the DTS Sound Unbound application appears, clickInstall and follow the on-screen instructions to proceed with the installation.Step 3:After the DTS Sound Unbound application is installed, click Launch. Accept the End User LicenseAgreement and restart the system.Step 4:Select DTS Sound Unbound on the Start menu. DTS Sound Unbound allows you to use the DTSHeadphone:X and DTS:X features.-9-
ESS ES9280AC DAC chip ESS ES9080 chipConfiguring the Audio Input and OutputTo manage audio settings for the line out or mic in jack on the back panel, refer to the steps below:Step 1:Locate the icon in the notification area and right-clickon the icon. Select Open Sound settings.Step 2:Select Sound Control Panel.Step 3:This page provides audio jack related configurationoptions.- 10 -
Step 1: Connect your headphones to the front panel line out jack and make sure your Internet connection works properly, Locate the icon in the notificationarea and right-click on the icon. Click on Spatial Sound and then select DTS Sound Unbound. Step 2: The system will connect to the Microsoft Store.