Transcription
USERGUIDE FAXSOLUTIONSMasergy Fax SolutionsVirtual Fax and Fax LineUser GuideDocument Version 1.8March 2022
USER GUIDE FAX SOLUTIONSContentsGetting Started3Installation3Print to Fax7Web to Fax10Receiving Fax14E-mail to Fax14Custom Subject Line152
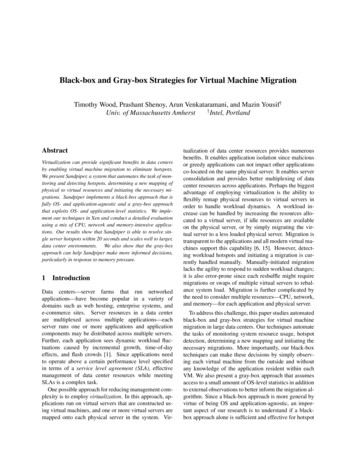
USER GUIDE FAX SOLUTIONSGetting StartedOnce your purchase of the Masergy Fax Solution has been processed, you will receive an e-mail that contains logininformation. Be sure to log this information below for future reference.User Name: Password: Fax #:Installation*IMPORTANT NOTE* this information is to install the PRINT DRIVER onto your computer, NOT TO ACCESSYOUR Masergy Fax Service web portal. The Masergy Fax Solutions web portal link is provided with the logininformation you received via e-mail at the time of purchase.Please visit: Masergy Fax Portal for access.Fax Print Driver Instructions (Optional)1.2.3.4.5.6.7.Go to this web site to download the “32-Bit” or “64-Bit” Internet FaxPrint Driver version of MS Windows. Masergy Software and DownloadsClick on the appropriate version and then save to your desktop.If you do not know which version of MS Windows you have please trythe following:a. Click on startb. Right click “My Computer” and then click “Properties”.c. In the “System” section, you will see an item called “SystemType”. It will be either 32-Bit or 64-Bit.Now find the file you saved to your desktop, extract to a folder or openwith WinZip. Click on the “setup.exe” to run the install program.If you get an Open File-Security Warning Click Run.In the “Select Setup Language” window, select the language youand click “OK”.In the new window that pops up click “Next”3
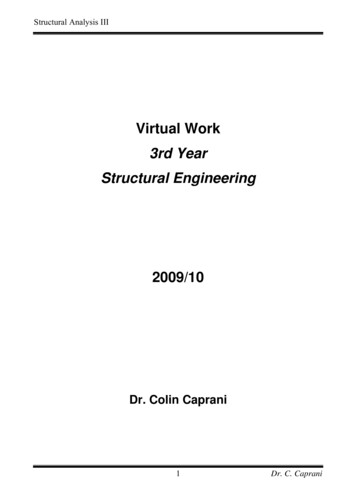
USER GUIDE FAX SOLUTIONS8.In the next window, keep the default folder location and click “Next”.9.In the next window, keep the default folder name and click “Next”.10. In the next window, click “Install”.4
USER GUIDE FAX SOLUTIONS11. Click OK in the second pop up that appears (or follow instructions on message if they apply).12. Click OK on next pop up that appears13. Click “Finish” in the install window.5
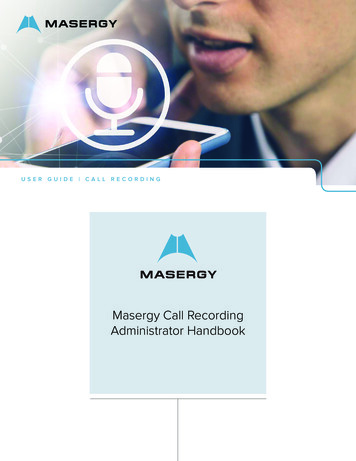
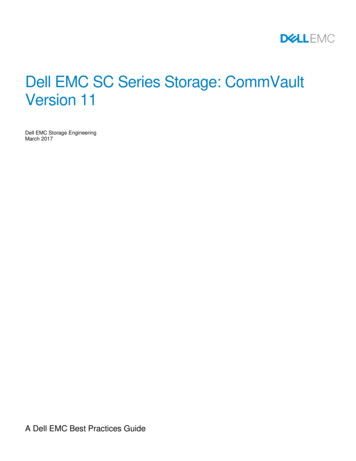
USER GUIDE FAX SOLUTIONS14. Now you will find the little white globe in the system tray. The system tray is the area withicons next to the clock in the lower right corner, usually of your start menu. “Right Click” onthe white globe and click show.15. In the Fax File Cabinet window, click the settings button.16. Fill out the new window.a. Populate the top section with your Name, Company, Email Address and Fax number. This information willbe displayed on any cover page if you choose to add one to an outgoing fax.b. In the Authorization section, enter your account information that was given to you when you signedup for the Masergy Fax service. (Username and Password in email from Masergy) Then click the savebutton.17. Now close the Fax File Cabinet window18. If you had to disable an Anti-virus or Anti-malware application in order to get the Internet Fax driversinstalled, please make sure to re-enable these applications.6
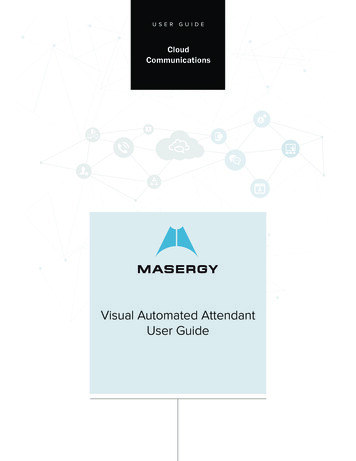
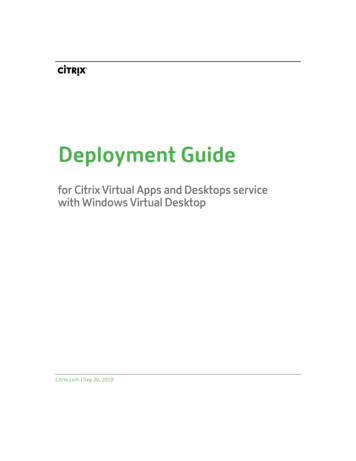
USER GUIDE FAX SOLUTIONSThe Fax File Cabinet window will also display all your fax status.Print to Fax*IMPORTANT NOTE* The Masergy Internet Fax is not compatible with Mac computers, only Window PCs.1.2.From the application that you’ve created the document that you want to fax, select File- Print.Then select the Masergy InternetFax printer from the list of printers.3.4.Select OK to print the document.Enter in the recipient information and “Click Add Recipient”.7
USER GUIDE FAX SOLUTIONS5.After you click “Add Recipient,” your recipient will be added to the list. (The “1” will automatically be addedto the phone number after adding recipient to the list.)6.Add another recipient if you want by entering the information and clicking “Add Recipient”.7.Add a cover page by clicking the “Cover Page” button.8
USER GUIDE FAX SOLUTIONS8.Select one of 3 cover page types.a.9.10.Click on “Text Coverpage” to fill out the data for cover page.Input the information that you want to be put on the cover page and click OK to save.To send your fax, click “Send”.9
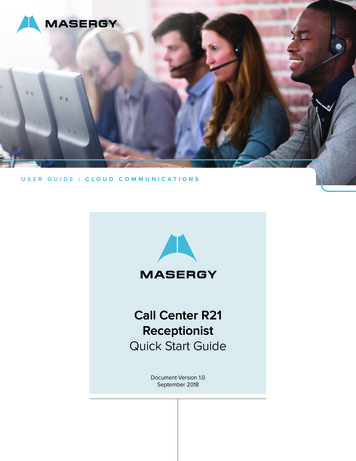
USER GUIDE FAX SOLUTIONS11.Note this screen which confirms that the system has received your fax and is attempting to send.12.To see your fax file cabinet (queue of faxes), click on the world icon on your computer’stool bar (lower right side).13.This shows your fax waiting to be sent. You can keep this open to see when your fax is successfully sent bythe system, or you can close it and wait for an e-mail confirmation.14.This screen can show both your pending, successful and unsuccessful faxes as well.Web to FaxWhen registering for Masergy Fax Services, you will receive an e-mail with your login information. Save this e-mail/information in a safe place. Note: If you misplace your login information, please contact ucsupport@masergy.comor call (800) 942-4700.1.2.Go to the user login page for Masergy Fax Solutions and enter your login and password at:https://secure.ipfax.netOnce logged in, to send an outbound fax from the web, select “Send Web to Fax” button.10
USER GUIDE FAX SOLUTIONS3.4.From this screen, you can send an outbound fax. Think of this as the cover page to your fax.You must complete the following required fields: To, Fax Subject, Fax Number(s), and Message.5.Once you have completed the required fields, attach the file you want to send by clicking the browse buttonand selecting the appropriate file.6.Once the fax has been sent, you will receive a confirmation message letting you know that your outboundfax has been processed.7.In order to determine whether or not your fax was successful, you can check the automatically generatede-mail or pull a report from the secure portal.An e-mail will automatically be sent indicating to you whether or not the fax was successful.8.11
USER GUIDE FAX SOLUTIONS9.If the fax was not successfully transmitted, the automatically generated e-mail may indicate why the fax wasunsuccessful in the fax field.10.You may also view the status of all your sent faxes by returning to the main screen and clicking on Fax ActivityReport.11.The Report screen allows you to do a search of your fax statuses. You may either view them on screen ordownload them as an Excel file. After selecting your options, click on Show Report to view your results.12
USER GUIDE FAX SOLUTIONS12.The Results page shows your fax transactions, based on criteria you selected. In the Status field, you candetermine whether or not your fax was successfully sent or not.13.14.All faxes can be resent by clicking on the Fax ID number. (Without the need to re-attach the document).Make sure that you placed a “1” before the area code and that your fax does not exceed 2 MB.15.View the faxes that were not sent in the reporting function, as well as, follow these steps to RESEND thefaxes missed.a. Go to https://secure.ipfax.netb. Log in to your account.c. Click on REPORT.d. Pick a date range that starts with the day faxes were no longer being received.e. Click on the Fax ID for the fax you wish to have resent.f. Click on the Resend button.13
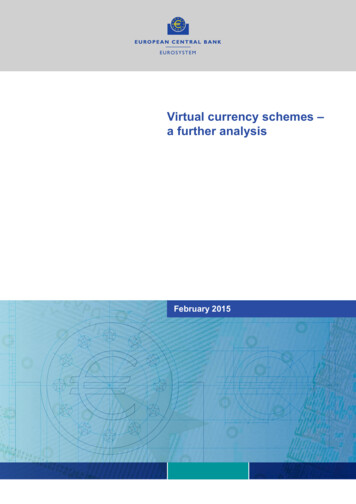
USER GUIDE FAX SOLUTIONSReceiving Fax1.Faxes will be delivered to your inbox as an attachment to an e-mail.2.3.4.Click on attachment to open fax.NOTE: DO NOT REPLY to e-mail, the fax sender will not receive your response.Receiving faxes to e-mail allows for:a. Greater privacyb. Improved method of storing and tracking faxes.Please Note: All faxes sent and received on Fax cloud server are stored for 7 days.E-mail to FaxIMPORTANT NOTE E-mail to Fax is only available for use by the original email address (login name) that theMasergy Fax Solution was registered with. The Fax user login name must be the “email address” and not the faxnumber.Steps to follow:1.2.3.4.5.Open a new emailSend to “Destination number”@ipfax.net (Destination number should be 11 digit number that includes a“1” and area code. (Example - 14243064668@ipfax.net)In the Subject field enter the word “pass” a space and then the Fax Portal Password (i.e. r433721)Body of email will act like the cover page to an attachment, or will serve as the fax if no attachment isadded.Press send to send faxPlease note: E-mail to Fax supports up to 3 attachments per e-mail in any format.14
USER GUIDE FAX SOLUTIONSExample of E-mail to Fax Generic FormatA Fax Confirmation will be sent to your e-mail address.Custom Subject LineOn the following page is an example of a more personalized subject line. The formatting must match what is shownin the example. You may place the name of the recipient, followed by “s XXXX” (without quotation marks), followedby pass with a space and then the Fax Portal Password (r433657)Example of E-mail to Fax with Custom Subject LineExample of what can be in the Subject: John Smith s Order pass r433657The Masergy Fax Solution services validates the outgoing e-mail with the user’s credentials in the Fax Portal. Theuser name needs to be the user’s e-mail address and Fax Portal password.For training on Masergy Fax Solutions please send an email to Masergy Training at uctraining@masergy.com toschedule an on-line session.CONTACT US: USA 1 (866) 588.5885 UK 44 (0) 207 173 6900 sales@masergy.com
Go to this web site to download the "32-Bit" or "64-Bit" Internet Fax Print Driver version of MS Windows. Masergy Software and Downloads 2. Click on the appropriate version and then save to your desktop. . In the Fax File Cabinet window, click the settings button. 16. Fill out the new window. a. Populate the top section with your Name .