Transcription
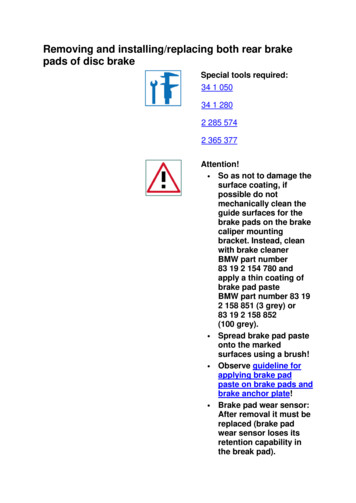
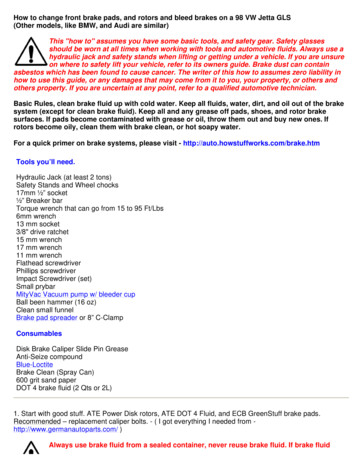
How to change front brake pads, and rotors and bleed brakes on a 98 VW Jetta GLS(Other models, like BMW, and Audi are similar)This "how to" assumes you have some basic tools, and safety gear. Safety glassesshould be worn at all times when working with tools and automotive fluids. Always use ahydraulic jack and safety stands when lifting or getting under a vehicle. If you are unsureon where to safety lift your vehicle, refer to its owners guide. Brake dust can containasbestos which has been found to cause cancer. The writer of this how to assumes zero liability inhow to use this guide, or any damages that may come from it to you, your property, or others andothers property. If you are uncertain at any point, refer to a qualified automotive technician.Basic Rules, clean brake fluid up with cold water. Keep all fluids, water, dirt, and oil out of the brakesystem (except for clean brake fluid). Keep all and any grease off pads, shoes, and rotor brakesurfaces. If pads become contaminated with grease or oil, throw them out and buy new ones. Ifrotors become oily, clean them with brake clean, or hot soapy water.For a quick primer on brake systems, please visit - http://auto.howstuffworks.com/brake.htmTools you’ll need.Hydraulic Jack (at least 2 tons)Safety Stands and Wheel chocks17mm ½” socket½” Breaker barTorque wrench that can go from 15 to 95 Ft/Lbs6mm wrench13 mm socket3/8" drive ratchet15 mm wrench17 mm wrench11 mm wrenchFlathead screwdriverPhillips screwdriverImpact Screwdriver (set)Small prybarMityVac Vacuum pump w/ bleeder cupBall been hammer (16 oz)Clean small funnelBrake pad spreader or 8” C-ClampConsumablesDisk Brake Caliper Slide Pin GreaseAnti-Seize compoundBlue-LoctiteBrake Clean (Spray Can)600 grit sand paperDOT 4 brake fluid (2 Qts or 2L)1. Start with good stuff. ATE Power Disk rotors, ATE DOT 4 Fluid, and ECB GreenStuff brake pads.Recommended – replacement caliper bolts. - ( I got everything I needed from http://www.germanautoparts.com/ )Always use brake fluid from a sealed container, never reuse brake fluid. If brake fluid
comes in contact with painted surfaces immediately wash them with plenty of cold water and soap.Brake fluid absorbs moisture, never leave the container open to atmosphere.Never put anything but brake fluid (as specified by the manufacturer) into a vehicles brake system.DOT (Department of Transportation) 3, 4, and 5.1 are all the same base fluid. DOT 5 is a silicone basedbrake fluid and has a pretty blue/purple color. DOT 5 should never be used in a brake system that takesDOT 3, 4, and 5.1. VW uses DOT 4 as the OEM (Original Equipment Manufacturing) fluid. Any fluid sold inNorth America marked as DOT 4 will be acceptable. DOT 3 will work as well, but has a lower boiling point.Clean brake fluid will be anything from a clear, to a gold color. More on brake fluids here and here. VWrecommends that you change your brake fluid every two years regardless of mileage. Fluid should bechanged any time it becomes contaminated, some North American makes never spec any brake fluidchange (I don’t feel this is a good idea, but how hard can you push a Ford Windstar?).While this is a very mild upgrade, these parts are better than stock, and will provide the sporting driver someadded brake control and prevent brake fade. The EBC pads also claim (and they do) to put out less dust andhave a better grip on the rotors. The slotting on the ATE power disks prevents gas fade (where the padbreaks down and a small layer of gas (fade) starts, and also acts as a “sweep” cleaning the pads formaximum bite.2. Park the vehicle on a level paved surface. Set the vehicles parking brake AND place it in either 1st gear,or PARK. Use wheel chocks on the opposite side to block the front and back of 1 wheel. Remove ignitionkey.3. Remove the wheel covers. Loosen the lug nuts (17mm). Do not remove them, only loosen them at this
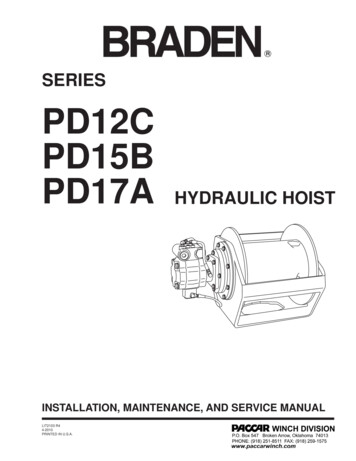
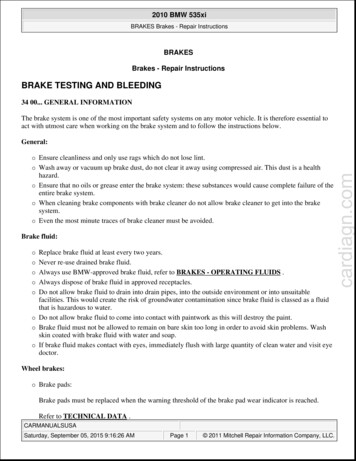
point. Only loosen the side you intend to work on at this point.4. Raise vehicle at the front lift point, support weight of vehicle with safety stand. It may be useful to use a2X4 block of wood to distribute the vehicle weight over the safety stand. On the Jetta and Golf models youcan raise an entire side of the vehicle with one stand at the front lift point.5. Remove the wheels and tires that you loosened.6. Inspect your brakes (front) rotors and pads.
While these are notbad, I am tired of them.Your Starting point
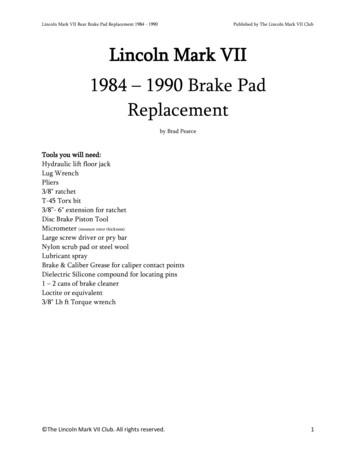
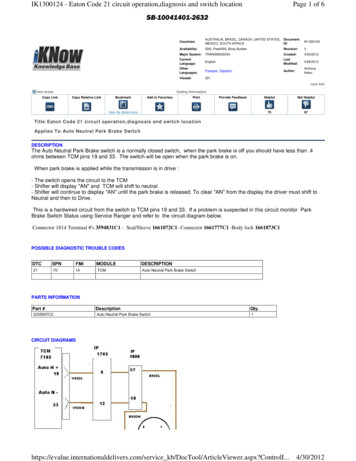
sir.7. Open the hood, and gain access to the master cylinder. If it is dirty wipe off any debris on to of it. It iscritical that no debris fall into the master cylinder. This is the “heart” of your brake system. Never use anyother fluid than specific by the manufacturer in a master cylinder.The mastercylinder has the yellow cover.8. Using your vacuum pump, and adapter (make sure you read how to use it) suck out the brake fluid in themaster cylinder. Don’t worry you can’t get it all right now, that’s ok.
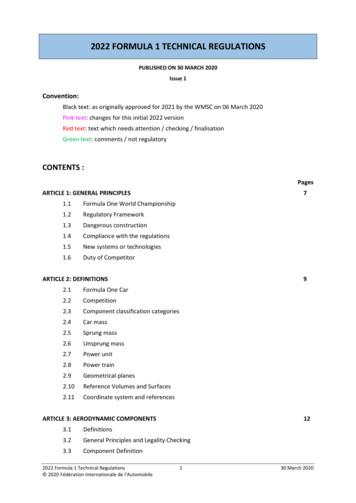
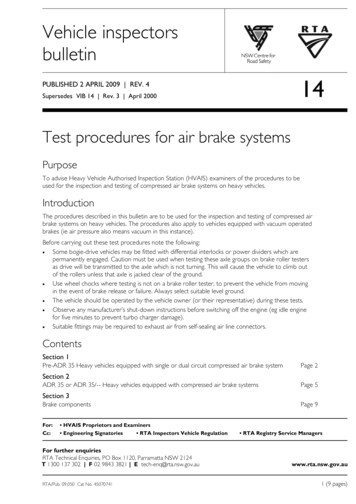
9. If you want to you can take a small screw driver and remove the filter, set it aside on a clean cloth. Thiswill allow you to get more of the fluid out. DO NOT STEP ON THE BRAKES AT THIS POINT! When doneempty out the vacuum pump. If you pump the brakes, you risk pumping air into the brake system. AT NOPOINT ALLOW THE MASTER CYLINDER TO RUN DRY!
Pulling out themaster cylinder filter.10. Fill the master cylinder up with clean DOT 4 fluid. Use a very clean funnel. I like to keep one that I onlyuse for brake fluid, and I do not allow any dirt to settle it side of it.
Fluid level is 1/2way full11. Go to the rear brake. For this example, we are looking at a drum brake. Remove the rubber dust capfrom the bleeder screw. Attach the bleeder hose to the end of the bleeder screw. Open the bleeder (6mm)about ½ a turn. Do not remove the bleeder. Old brake fluid should start to flow out into the tube.
If the bleeder screw is stuck, make sure that you are turning it the right way. If it continues to bestuck, as you try to turn it, gently strike the head of it with the ball peen hammer. Avoid using WD-40or other types of penetrating lubricants as they will harm the rubber components of the brakesystem. Do not use a torch to heat a stuck bleeder as it may cause the brake fluid to boil and thencome out and burn you. Do NOT open the brake fluid line (the metal line running into the back of thebrake assy.)12. With the bleeder line open, create suction with the vac. pump. Fill the vac. bleeder bottle once, thenclose the bleeder valve. Check the fluid level in the master cylinder, and if needed top it off again. Performthis cycle 2 times. MAKE SURE THAT AT NO TIME THE MASTER CYLINDER RUNS DRY, THIS ISVERY VERY SERIOUS. If you see bubbles, that's OK, what you are seeing is some air being drawn pastthe threads of the bleeder screw. This does NOT mean that there is air in the brake system. Air in a brakesystem is bad and will lead to a low, spongy brake pedal. For more help on bleeding brakes, visit here.Side note, with the wheel off, paint your ugly gray drums. Use a nice black high temperature paint, orthe color of your choice. Now is also a nice time to sit down and clean the wheel face and backside!Also, take a look at the condition of your tires, and check the brake lines for damage or abrasion.And make sure the tire pressure is set to spec!13. Torque the bleeder screw to 10-13 Ft Lbs, and replace the dust cap. The dust cap will keep crud out ofthe bleeder screw and prevent it from seizing up next time you have to bleed the brakes.
14. Check and top off the master cylinder fluid level, and depress the brake pedal. Check for leaks at thepoint where you just worked.15. Reinstall the rear wheel, and torque the lugs down to 81 Ft Lbs, in a “star” pattern. Congratulations, youjust flushed ¼ of your brake system with new fluid.16. Moving onto the front wheel. Remove the dust cap and open the front bleeder screw. (This will ensurethat it is not stuck when we bleed the brakes in the next few steps.) Close the bleeder screw.Caliper bleederscrew (w/ dust cap)17. Using the 13mm and 15mm wrenches remove the brake caliper by holding the 15mm and turning the13mm nut on the back side of the caliper carrier. Do this for the top and bottom bolts.
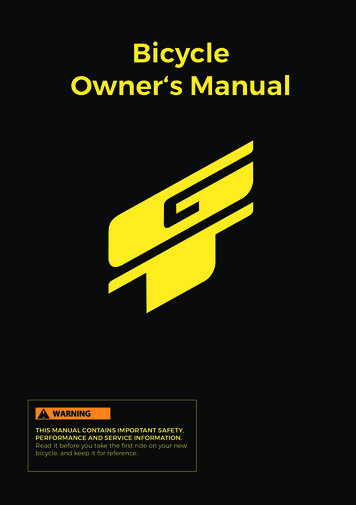
18. The caliper should come off. Do NOT overly flex, or allow the caliper to hang by the brake line. Doing somay damage the brake line. Use some wire, or the strut body to hold the caliper up while you are working onthe brakes. From this point on, do not step on the brakes or the piston will be forced out of the caliper!
Inspect the pads for equal wear, they should look like this, if so - everything is/was working as it should be.
Mmm. Padsandwich!If needed, hang the
caliper on the strut tower.19. Take the 17mm wrench and remove the caliper carrier (also know as the torque member, or caliperframe) bolts. These bolts are very tight. You may need to use the 17mm breaker bar you used to loosenthe wheels. Make sure you don't damage the caliper slide pins!20. Once the caliper carrier is removed, clean its mounting points, and remove the slide pins, and apply asmall amount of caliper slide grease to them. They should slide smooth and free. This operation is critical tothe performance and longevity of the brakes. Inspect the boots for tears or cracks that will allow water anddirt to enter the pins, and the grease to become contaminated.
21. Take some 600 grit sand paper and clean the mounting surfaces of the caliper carrier, and the padseats. Remove any rust, scale, or old brake dust. Doing this step will ensure a noise free brake system.22. Using the impact screwdriver remove the rotor hold-down screw. If this screw gets destroyed it will needto be drilled out and removed. The impact screwdriver is the fastest and safest way to remove this stubbornscrew.
23. If the rotor is stuck to the hub (And it will be). Strike the inner surface of the rotor face. A few goodhammer blows should shock the rotor off. Never strike the rotor brake surface, unless you are sure younever plan to use the rotors again. Rotors can crack and shatter.24. With the hub exposed, let’s clean it up a little. Use the 600 grit paper to clean any rust or scale off thehub and its center. This step ensures that the rotor will mate perfectly with your hub, and prevent brakeshutter and roughness.
BeforeAfter!
25. Apply a very thin film of anti-seize compound to the hub face. Take care in NOT getting it into the lugholes. This will prevent your new rotor from getting stuck like the old one did.
From this point foreword, we start to put stuff back together.26. Install your new rotor. If needed, clean off the rotor before hand with a clean rag, and brake clean toremove any chemicals that the rotor may have been treated with while it was in storage. (Note, the ATEPower Disks do not need to be cleaned, they can go on the vehicle as they come out of the box.)27. Coat the rotor hold-down screw with anti-seize compound and torque it to 11 Ft. Lbs.28. Reinstall the caliper carrier, and torque the carrier bolts (the big ones) to a whopping 92 Ft Lbs. Theseare the bolts that hold the brakes to your car.29. Reattach the vacuum pump the calipers bleeder valve. Open the bleed screw.30. Using your disk brake pad spreader, take an old pad and place it against the piston of the caliper. As youscrew the spreader in, it will force the piston back and force the old fluid into the bottle. Screw the piston inuntil it bottoms out.
31. With the bleeder line open, create suction with the vac. pump. Fill the vac. bleeder bottle once, thenclose the bleeder valve. Check the fluid level in the master cylinder, and if needed top it off again. Performthis cycle 2 times. AGAIN MAKE SURE THE MASTER CYLINDER DOES NOT RUN DRY.Side note, I prepped, and cleaned ½ of my caliper and used caliper paint for a flashy look. It’s notnecessary to do the whole caliper with my wheel setup. Follow the directions on the caliper paint.
32. Close the bleeder screw, and torque it to 10-13 FT LBS, and replace the dust cap.33. Compare the old brake pads to the new ones, to make sure they are a perfect match. Do not worry if theshim (the metal part that is stuck to the pads) is slightly different. This is ok.
34. Apply a small amount of disk-brake quiet to the backing plates of the pads. This material will harden up,and conform to the caliper carrier and caliper and prevent brake squealing. Do not use a ton of this stuff,
only a little.Silly monster garage glovesnot needed to do brake job.
35. Allow the anti-squeal compound to dry for 10 min (as per the directions). And then place the pads intothe caliper carrier.Add some Blue-Loctite to the threads of the caliper pin bolts. VW says to replace this hardware, butit’s only needed IF you do not re apply the blue-thread locker (My opinion).36. Swing the caliper down on to the pads assy. Reinstall the small bolts that held the caliper to its carrier.Hold the 15mm slide pins, and torque the bolts to 25 Ft Lbs.Note, make sure the caliper shim on the piston side does not shift out of place. This can be tricky.The Jetta/Golf pads on the GLS have small spring like clips to keep them from making noise. Thiscan be stiff and some force must be used to swing the caliper into position. Make sure all 4 of theselittle buggers are seated inside the caliper.Start with the top bolt in place (finger tight), and them swing the caliper down. Press firmly to get the lowerbolt to line up. Keep an eye out for the slide pin, if it’s out too far it can block the caliper from swinging intoposition.37. Reinstall and torque the wheel to 81 Ft Lbs. Remember, star pattern.
38. Lower vehicle.39. Do steps 1 - 38 on the other side.40.PUMP THE BRAKES BEFORE DRIVING!Road test the vehicle to confirm proper function of the brakes.USE CAUTION THE FIRST TIME YOU DRIVE YOUR CAR AFTER MODIFICATION TOENSURE THE PROPER FUNCTION OF ALL VEHICLE SYSTEMS!41. Bed in your new shoes enjoy your perfect brake job, quiet, and good stopping!Finished Pictures!
End of article - Questions? Comments - danjreed@gmail.com
Back
DOT 3, 4, and 5.1. VW uses DOT 4 as the OEM (Original Equipment Manufacturing) fluid. Any fluid sold in North America marked as DOT 4 will be acceptable. DOT 3 will work as well, but has a lower boiling point. Clean brake fluid will be anything from a clear, to a gold color. More on brake fluids here and here . VW