Transcription
Resource Scheduler Setup GuidePage 2: SetupPage 3: Adding/Editing Categories, Staff, & ResourcesPage 7: Assigning Resources to ServicesPage 9: Notifying Staff of ScheduleResource Scheduler is a feature that will allow you to manage your staff, vehicles, rooms, andother resources that will be used for different scheduled services.The Resource Scheduler can be viewed in the E-View section using the 1 Day Calendar view.Before being able to schedule anything, some customized setup will need to be completed.1
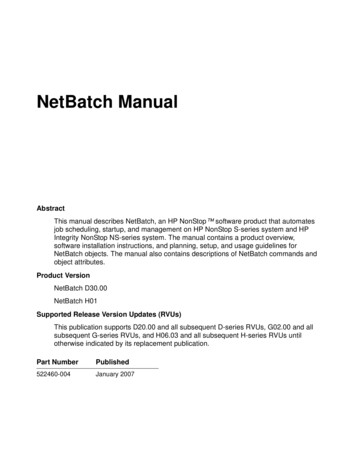
Go to Settings and click on the Resource Setup tab.This section will allow you to see existing Resource Categories (1), as well as add new ones. Youmay add as many categories as you would like. You may then assign staff (2) to certaincategories, or use resources (3) for things such as vehicles, rooms, or special equipment.2
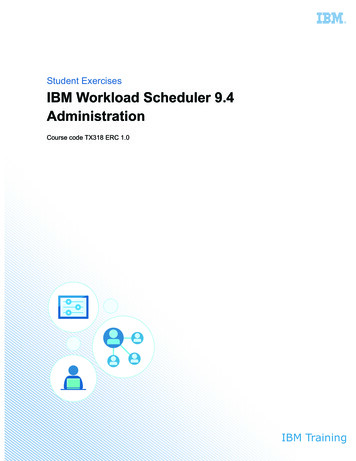
Adding New Categories, Staff & ResourcesTo add or edit a Category, click on the Edit Categories button (1) next to the Category Setuptitle. Click New (2) to add a new category or select and existing from the list. Enter theCategory Name (3), select an icon, and check Staff Type is this category will include staffmembers. Save when completed. The category will now display in the list.3
To add staff to a Resource click the Add Staff Resource button. Select the staff member youwould like to assign and click the Save Resource button.A list of available staff resources will appear. Select the categories that the staff member shouldbe a part of, as well as the branches they work from. Click the Save Resource button to save.4
To add a General Resource click the Add General Resource button. Type the name of theresource you would like to add (vehicle, room, etc) and click the Save Resource button.A list of available resources will appear. Select the categories that the resource should be a partof, as well as the branches it is available to. Click the Save Resource button to save.5
Once saved, the staff and general resources will appear under the assigned categories.6
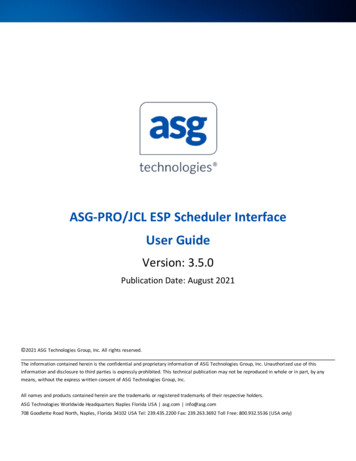
Assigning Resources to ServicesOnce your resources are complete, you can assign them to scheduled services in E-View.1. Choose the resource you would like to assign from the dropdown2. Select the Service that needs the resource scheduled for by clicking on it3. Use the timeline to select the available time and resource for the serviceEach Resource will need to be scheduled individually. Use thedropdown to select each.A green exclamation point will appear next to the staff if they are scheduled at thesame time for multiple services to alert of a possible conflict.A red exclamation point will appear next to a resource, such as a room, if it is doublebooked during the same time slots to alert of the conflict.7
As resources are scheduled a summary will build in the right side of the window showing whatall has been assigned.If more than 1 service is scheduled at a time, it will show the other available resources duringthose times.8
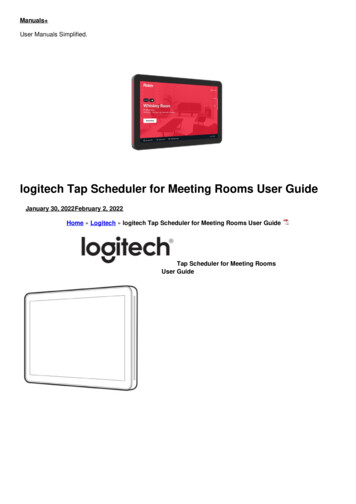
Notifying Staff of ScheduleYou will be able to notify your staff of services they are scheduled on a few different ways.One way is to email them a copy of the service information by clicking on the @ symbol in thesummary section of the service they are scheduled for. This will work for all Outlook users.Make sure that the staff member has an email address entered in Settings. You may also add aspecific note by clicking on the pencil icon.Another way is to print the Daily Service Resource Schedule and give to your staff.SRS can set this report up to be automatically emailed to your staff at a certain time of day,each day for a small setup fee. If you are interested in this ability, please contact your accountrepresentative.9
Lastly, your staff will see their assignments for the day on the Dashboard when they start theprogram. These assignments will show in the bottom left corner under My Assignments Today.10
Resource Scheduler is a feature that will allow you to manage your staff, vehicles, rooms, and other resources that will be used for different scheduled services. The Resource Scheduler can be viewed in the E-View section using the 1 Day Calendar view. Before being able to schedule anything, some customized setup will need to be completed. 1