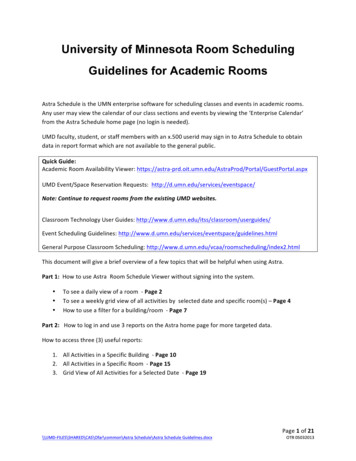
Transcription
Astra ScheduleQuick ReferenceCampus Reservations, Events, & Technical ServicesApril 20161
Table of ContentsAstra Schedule Quick ReferenceContentsNavigation . 3Logging Into and Out of Astra Schedule . 3Tab Bar . 3Calendar Tab . 4Viewing the Calendar . 5Calendar Search Filter . 6Creating a Calendar Search Filter . 6Saving and Displaying a Calendar Search Filter . 6People Tab . 7Viewing the People List . 8Editing a Person . 8Adding an Existing Person as a Customer Contact . 9Adding a New Person as a Customer Contact. 10Viewing the Customer List . 11Editing a Customer . 11Adding a Customer. 12Event Tab . 13Viewing the Events List . 14Using the Event Wizard . 15Editing an Event . 162
NavigationAstra Schedule Quick ReferenceNavigationLogging Into and Out of Astra Schedule1. Open an internet browser and enter the following address into the URL bar:https://astra.stuact.uga.edu/2. The Astra Schedule home page will be displayed. The log in area is located in the upper right ofthe page. To log in, type your UGA MyID into the User Name field and your MyID password intothe Password field, then click the Log In button.3. Once you have successfully logged in, the log in area will be replaced with a log out link.4. The log out link is static, and will always be displayed as long as you are within Astra Schedule.To log out of Astra Schedule, click the link.Tab BarTabs provide direct access to thevarious areas of the application.Similar to the log out button, thetab bar is static and remainsavailable as long as you are withinAstra Schedule. Each tab reveals alist of possible choices for viewinginformation, performing tasks,and configuring data relative to ageneral area of the application. Abrief description is provided foreach of the options. Click on a link from the tab page to interact with a specific option.Links from a tab page are mirrored across the top of the page as well. You may access these areas at anytime to jump to a new option from a different page within the tab.3
Calendar TabAstra Schedule Quick ReferenceCalendar TabThe Astra Schedule calendar is a traditional, activity‐based calendar that can help users quickly findevents and/or academic classes that are taking place on UGA campuses.4
Calendar TabAstra Schedule Quick ReferenceViewing the Calendar1. Click the Calendar tab on the Tab Bar.2. Click the Scheduling Calendar option to open the default Astra Scheduling calendar homepageas defined by the calendar permissions within your role.The “All Campuses”view includes activitiesin Athens (Main),Griffin, and Gwinnett,but not Tifton.The calendar defaults to the currentdate (“Day”) view. Other options areview by “Week” or “Month” and bysearching for a specific day.Informationabout using afilter beginson page 6.Use the scroll bars toview more times andbuilding/rooms.Buildings and rooms are displayed on the left ofthe calendar, activities are displayed on the right.Hover your mouse over an icon to seemore detail about the activity.5Typically, blueicons indicate ascheduled classand green iconsindicate an event.
Calendar TabAstra Schedule Quick ReferenceCalendar Search FilterIf desired, you may create a custom filter that will display a select amount of information when you viewthe calendar.Creating a Calendar Search Filter1. From the Scheduling Calendarshomepage, click the “Edit SearchFilter” button located in the topright of the page.2. An Edit Filter window will bedisplayed. Enter one or morekeywords, and/or select desiredfiltering options.3. Click the “View Calendar” buttonlocated at the bottom of the EditFilter window.A campus must be selected inorder to view activities in aspecific building or region.Saving and Displaying a Calendar Search Filter1. From the Scheduling Calendars homepage, clickthe “Manage Filters” button located in the topright of the page.2. The Save Calendar window will be displayed.Enter a name for your filter into the “Savecurrent calendar settings as:” box then click the“Save” button.3. Once your filter has been saved, your SchedulingCalendars homepage will include a Custom Filtermenu. Click the dropdown button to see aselection of saved filters.4. Click a filter to display the associated calendar.6Click this box toautomaticallydisplay the filteredcalendar wheneveryou access thecalendar homepage.To quickly move from a filtered calendarto the Astra Schedule default calendarthat has all activities, save the defaultcalendar as a filter.
People TabAstra Schedule Quick ReferencePeople TabAstra Schedule users, instructors, students, customer contacts and institution contacts can all be Peoplerecords in the application. Specifically, a “person” is the individual who makes a request for event spaceand who will ultimately use the space. Individuals who simply enter event information on the behalf ofanother, and will not serve as a customer contact, need not be entered into Astra Schedule as a person.A person can be associated with one or more of these various roles, or responsibilities, depending ontheir relationship to the institution. Each person in Astra Schedule has the same basic contactinformation that may be recorded. This information includes name, address, phone and fax numbers,email and instant messaging, employer, title, employee identification, a primary responsibility, andother responsibilities or group membership. Additionally, other information may be recorded that isunique to certain groups to which the person may belong. For example, Astra Schedule users,instructors, and event customer contacts have unique properties that may need to be captured.Also on the People tab are customers. A customer is a client, business, organization, or other entity usedin event scheduling to which one or more customer contacts are associated. Both the customer andcontact record are used during event scheduling.7
People TabAstra Schedule Quick ReferenceViewing the People List1. Click the People tab on the Tab Bar.2. Click the People option to open the People List homepage as defined by the people permissionswithin your role.Sort the data by clicking on anyof the column labels. Click againto reverse the sort order. Anarrow is shown on the columnto indicate the sort direction.You may customize the order of the columnsdisplayed on the page by clicking and dragginga column to the desired position. Arrows willappear to indicate your position.Define which columns aredisplayed in the list byhovering over any column,clicking the dropdown arrowthat appears, and thenclicking “Columns". Checkthe box next to any columnto add or remove it.Limit the number ofrecords being displayed inthe People List bychoosing one or morefilter options then clickingthe “Search” button.Filters can be saved byclicking the “Save” iconPagination features allow you to scroll through the PeopleList by typing in a specific page number, by using navigationarrows, or by using the navigation slider bar.Editing a Person1. After displaying the person in the People List, click the person’sedit icon.2. The person’s People Info record will be displayed. Edit theinformation as necessary then click “Save”.8Click this boxto export thelist to Excel.
People TabAstra Schedule Quick ReferenceAdding an Existing Person as a Customer Contact1. After displaying the person in the People List, click the person’s edit icon.2. The person’s People Info record will be displayed in editing mode.3. Click the “Associate New Customer” button. To display the person’s Customer Contact Infoform.4. Associate a customer with the existing person by selecting the desired customer, entering anycontact information that is unique to their association, then clicking “Save”.Click here toselect acustomer.9
People TabAstra Schedule Quick ReferenceAdding a New Person as a Customer Contact1. After accessing the People List homepage, click the “Add a Person” buttonlocated in top left area of the People List.2. A new People record form will be displayed. Enter required and any desired optionalinformation. Required information: First Name, Last Name, Phone, Email, and Responsibility (besure to click the Customer Contact box).Clicking theCustomer contactbox opens theCustomer ContactInfo area of the form.3. Click the “Associate New Customer” button.4. A warning will be displayed. Click “Yes” to save your person and open a Customer Contact Infoform.5. Associate a customer with your person by selecting the desired customer, entering any contactinformation that is unique to their association, then clicking “Save”.Click here toselect acustomer.10
People TabAstra Schedule Quick ReferenceViewing the Customer List1. Click the People tab on the Tab Bar.2. Click the Customers option to open the Customer List homepage as defined by the customerpermissions within your role.Sort the data by clicking onany of the columnlabels. Click again to reversethe sort order. An arrow isshown on the column toindicate the sort direction.You may customize the order of the columnsdisplayed on the page by clicking and dragginga column to the desired position. Arrows willappear to indicate your position.Define which columns aredisplayed in the list byhovering over any column,clicking the dropdownarrow that appears, andthen clicking"Columns". Check the boxnext to any column to addor remove it.Limit the number ofrecords being displayed inthe Customers List bychoosing one of morefilter options then clickingthe “Search” button.Filters can be saved byclicking the “Save” iconPagination features allow you to scroll through theCustomer List by typing in a specific page number, byusing navigation arrows, or by using the navigation sliderEditing a Customer1. After displaying the customer in the Customers List, click thecustomer’s edit icon.2. The customer’s Customer Info record will be displayed. Edit theinformation as necessary then click “Save”.11Click this box toexport the listto Excel.
People TabAstra Schedule Quick ReferenceAdding a Customer1. After accessing the Customer List homepage, click the “Add a Customer”button located in the Customer List area.2. A new Customer record form will be displayed. Enter required and any desired optionalinformation. Required information: Name and Group.3. If no Customer Contact is needed at the time the Customer is created, click “Save”. To add aCustomer Contact, click the appropriate Customer Contact Information button.Always perform acustomer search beforeadding a new customer.This step preventsduplication of an existingcustomer.The Add Existing CustomerContact window will be displayed.Enter the desired Contact into the“Associate Existing Contact” boxthen click “OK”.A warning will be displayed. Click “Yes” to save your customerand open a new Customer Contact Info form.Enter name and email information into the PersonalInfo area of the form then click “Save”.Click here tosearch for acustomer.12
Events TabAstra Schedule Quick ReferenceEvent TabEvents in Astra Schedule may be viewed in the Scheduling Calendar (see page 5) or in the Events form.An event record includes the event name, event type, customer, contact(s), and date, time, and locationinformation for each meeting. Additional information such as setup and tear down times, scheduledresources, notes, and other more detailed information may be recorded per meeting as well.The following events must be scheduled in Astra Schedule: Recurring and invited events (i.e., facultymeetings, faculty research group meetings, and seminar programs, etc.). Single use or single timemeetings do not have to be scheduled in Astra Schedule, but those that do will be given priority.Due to Prioritization of Scheduling, schedulers and academic units must not block or reserve classroomspace for any period in the future other than the designated academic term. If future scheduling occurs,events scheduled in the future will be deleted by Central Scheduling. The only exception to thisrequirement are for events in the future that require the department, college and/or UGA to enter intoa contractual commitment with outside parties or partners. Requests for future events requiringcontractual commitments from UGA should be submitted to the Centralized Scheduling AppealsCommittee. If the Committee authorizes the scheduling of a future event, the event may be scheduledsubject to possible modifications in the scheduled rooms on campus, but not the dates.13
Events TabAstra Schedule Quick ReferenceViewing the Events List3. Click the Events tab on the Tab Bar.4. Click the Events option to open the Events List homepage as defined by the event permissionswithin your role.You may customize the order ofthe columns displayed on thepage by clicking and dragging acolumn to the desiredposition. Arrows will appear toindicate your position.Group data by hovering over a column, clickingthe dropdown arrow that appears, and thenclicking the "Group By This Field" option. The datawill be grouped by the selected field. Each groupmay be expanded or collapsed as needed.Sort the data by clicking on any of thecolumn labels. Click again to reverse thesort order. An arrow is shown on thecolumn to indicate the sort direction.Define which columns are displayed in the list byhovering over any column, clicking the dropdownarrow that appears, and then clicking"Columns". Check the box next to any column toadd or remove it.Use the Filter to limit thenumber of records beingdisplayed in the Event List.14
Events TabAstra Schedule Quick ReferenceUsing the Event WizardNote: You may click “Save and Close” after any step in the wizard to save your work in progress as anincomplete event. You can return to the event form at a later time to complete your work.1. Click the Event tab on the Tab Bar.2. Click the Event Wizard option.3. Enter data into the Event Information tab.a. Required information on this tab: Event Name, Event Type, Est. Attendance, Customer,and Customer Contact.b. If notification of the event is to be sent to a contact, click the “Notify” box.c. If desired Customer and/or Customer Contact is not found in the dropdowns, they canbe created from this form by clicking the appropriate “Create” button.d. If the event will have multiple contacts, they can be created in the Additional Contactsarea of the form.4. Enter data into the Meeting tab.a. Required information on this tab: Meeting Name and Meeting Type.b. In the Meeting Recurrence area, select the tab for the type of meeting(s) you would liketo create, enter the required date and time information and/or specify the recurrencepattern, then click “Create” to add your meeting(s) to the meetings panel on the right.5. Enter data into the Rooms tab.a. Click to select an available room in the Rooms List.b. If necessary, you may search for a room by entering one or more search options into theFilter and clicking “Search”. The search results will be displayed in the Rooms List. Clickto select an available room.6. Finish Event.a. Review the details of the event and make any final changes here or click “Previous” orclick directly on a tab to add or change meetings or assignments.b. When all is correct, click “Finish” to save your event.7. Click “Send Event Summary” to send an event summary message to contacts for whom the “Notify”box was checked.15
Events TabAstra Schedule Quick Referencea. Add a Subject and if desired, acomment.b. To add additional recipients tothe message, click “Add FromContacts” or “Add Recipient” toeither select an Astra Schedulecontact or enter an additionalemail address.c. Click “OK” to send the message.Editing an Event1. After displaying the event in the Events List, click the event’s edit icon.2. The event’s Event form will be displayed. Edit theinformation as necessary then click “Save”.16
The following events must be scheduled in Astra Schedule: Recurring and invited events (i.e., faculty meetings, faculty research group meetings, and seminar programs, etc.). Single use or single time meetings do not have to be scheduled in Astra Schedule, but those that do will be given priority.
