Transcription
Academic SectionScheduling and MaintenanceInstructional ManualLast updated: December 7, 20171
Table of ContentsINTRODUCTION . 3LOGIN . 3VIEWING THE SECTION LIST . 4CUSTOMIZE THE LIST . 5NAVIGATE PAGES . 5FILTER THE LIST. 6SECTION VIEW . 7SCHEDULING CLASSROOM FROM THE SECTIONS VIEW . 8SCHEDULING GRID . 10FINDING A ROOM FOR A POTENTIAL CLASS . 13REPORTING . 16RUNNING THE REPORT . 162
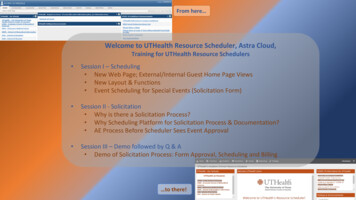
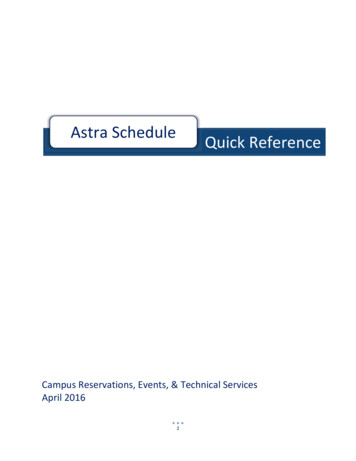
Using Ad Astra for Academic SchedulingAd Astra is a scheduling tool that coordinates class scheduling and calendaring of events, resources, invoicing,notifications, timetables, and exams. Utilizing this tool can help optimize space and help you identify space foryour academic needs quickly.This instructional guide is for scheduling courses and the resources for Academic department purposes. Forevent scheduling please see Ad Astra Event Request Instructions.LoginLog on to Ad Astra at the following link: https://www.aaiscloud.com/ARTechU/Default.aspxYou will log-in clicking “sign in” in the top right corner using your Arkansas Tech campus log-in information.When you log in your screen should look like this:3
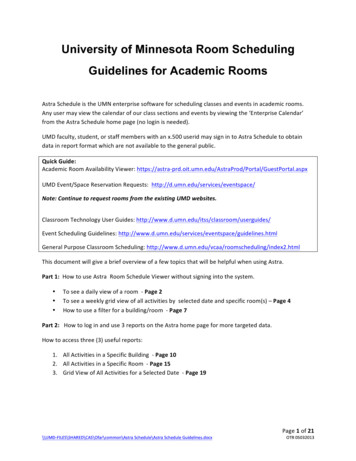
Viewing the Section ListAcademic sections in Astra Schedule can be located from the Academics Tab. Click the Academics Tab atthe top of the page and then select the Sections option to search and view the list of sections.A list of sections for every term that we have entered in Ad Astra will be produced. It should look similar tothis:4
Customize the ListOnce the list is returned you may wish to change how the data is displayed within the list.You may sort the data by clicking on a column label to change the way the list is sorted. Click again to reversethe sort order. An arrow is shown on the column to indicate the sort direction. (Some columns may not besortable).You may customize order of the columns displayed on the page by clicking and dragging a column to thedesired position. Arrows will appear to indicate your position.You may define which columns you would like displayed on the list by clicking on the menu option for anycurrent column and choosing Columns. Check the box next to any column to add or remove it.Navigate PagesThe section list may include a number of pages. You use the pagination controls at the bottom of the list topage through the results, configure the number of records displayed per page, and jump to a specific page.You can also export the date to different formats including an excel spreadsheet by utilizing the export optionat the bottom of the list.5
Filter the ListTo limit the number of records being displayed you may also filter criteria in the panel on the left. You mayselect one or more subjects, courses, instructors, days of the week, campuses, buildings, and/or rooms asdesired to further limit the section record list to just those records you wish to view. Just click the arrow above“Filter” on the left side.The Filter Panel will look like this:You can filter the list as needed. You can expand filters by clicking theplus signs and select the filter you need. Search and filter criteria arecombined as you enter more options. Filter criteria are retained andwill continue to be displayed if you leave the section list and return.Click Search to retrieve your records.Once you have ran your search, if you wish to expand your search youcan clear filters individually by clicking the individual clear option onthe filter or you can clear all at the top:6
You can also, save your filters. If you wanted to set up a custom filter for your own department for a specificterm you would make your appropriate selections and the click the floppy disk to save. You will get thefollowing message for you to name your filter:Type your filter name and save. Your filter name will now show in your drop down menu whenever you openAd Astra and if you select default it will automatically open to that schedule.Section ViewFrom your section list you can view section information quickly by hovering over the bull’s eye to the left of theclass information:It will open a pop up like this:7
You can also click on the blue course information to see the section form that contains all the details of thecourse including general information, the subject, course, title, campus, delivery, term, and section number.Scheduling Classroom from the Sections ViewIf you have a class that is built in INB, but does not have a room assigned you can find the course in thesection list using your filters. Once you find the class you will select the blue course/section information.Clicking the course will open the section detailed course information.To find an available room and schedule the room you will click the little house under the room section:Clicking the house will bring up a new filtering panel:8
You can filter by campus, and then make “sure show only available rooms” and then click Search and a list ofavailable rooms for your class will show. The score listed next to the course shows optimization of theclassroom. In this example using COR 116 meets the requirements for this course (capacity and campus)100%.You can look at details of the room by hovering over the bull’s eye to the left of the room.To select the classroom select the bulls eye, and the “Available” mark will turn green and say “Selected” thenclick Ok to schedule and the room will be scheduled:Make sure you click Save and Close in the top left corner to save your changes before exiting.You can use this same method to look for a different classroom for your course even if it has a scheduledlocation.9
Scheduling GridClick Calendars at the top of your page and select Scheduling Grid:Making this selection will produce a view of the scheduling grid which will look similar to this:A user may choose to view either the Day or Week grid format, and navigate through a list of either roomsor resources. The list of rooms or resources is presented on the left, and activities using the applicable room orresource will appear as shaded cells in the grid to the right.The grid toolbar, shown below, can be used to edit the date, filters, format, and settings of the grids.The day view of the grid displays each item’s schedule on a single row. This view provides immediate feedbackon room availability and usage for a single day, for a page full of rooms at the same time.10
The week view of the grid requires that you select the room or resource you would like to view from the list onthe left. This view provides immediate feedback on availability and usage for a full week (or date range – seebelow) at once.Additionally, the Week view includes a feature that allows you to specify a date range. When viewing a daterange instead of a single week, all activities that occur during the entire range will be shown together. Thisfeature is useful when searching for an available time slot for a recurring activity.To specify a date range while in Week view, click the End Date option to the right of the date selector.11
When an end date is selected, the grid will refresh, and the selected date will be displayed to indicate that youare viewing a date range.You can filter the scheduling grid in the same way that you filtered the section list, but this filter panel is foundby selecting the magnifying glass in the top left corner.Your filter panel will have a scroll bar with many options for filtering.Some useful filters for academics are in the Academic Filters box. This gives options tofilter by subject, course, and instructor.Make sure if you are using the scheduling grid to find a room that you make sure that“include events” is checked so that you see if an event is already scheduling in the spaceyou are looking at.You can add as many filtering options as necessary. Again, you will just click search toapply your filters to the scheduling grid.To remove filters to expand your search you can clear individual filters by clicking clearon the filter or you can clear all once you have ran your search.12
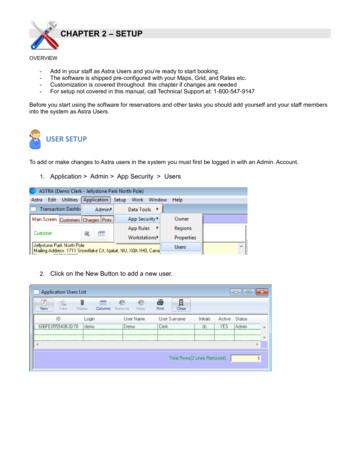
Finding a RoomThe Available Rooms tool is a quick way to identify an available room and/or equipment and services for apotential class you might want to offer. Resulting available items may be printed or selected to create a classmeeting. Click the calendar’s box at the top of the screen and then select “available rooms”That will take you to a screen similar to this:To perform a search, you will create one or more time/date entries, enter filter criteria, and search foravailability. Finally, you may print or save the results. This process may be repeated as desired torefine results or perform additional searches.1. In the Search Type Box you will select whether you are searching for a location for your class, or if youare searching for a location with specific equipment. The purpose of your search will be sectionbecause you are using this for the purpose of academic scheduling.2. Select the Add Meeting(s) Box. You will get a pop up that looks like this:13
If you are looking for a space that will only meet one time you will leave the Single Meetingselected, but if you are searching for a course that will meet multiple days (ex. MWF 8-8:50) youwill select the Recurring Meeting option. Selecting Recurring Meeting will expand your box tolook like this:Fill out the information requested, Click OK to add your meeting to the search page.Note: The drop down for start and end times are entered by every half hour. You can type in themeeting time if it is not in the drop down box (ex. 8:50 pm).Note: Make sure if you are wanting a room for a course that meets every week you changeselection to weekly and change the “recur every” box to say “1”.3. You will use the Filter Options box to filter out your specific needs for your course. By default, allfilter options are set to “Any”, meaning that all rooms and equipment service items are searched, andany available item is returned in the list. However, complex filtering is also supported, allowing multiple14
filter options to be provided to restrict the list as desired. Click the icon to the right of the filter typeyou would like to set and make selections for your search criteria. (ex: to schedule your class on themain campus you click campus and select main). Make your selections and then click OK.a. This is where you can select features or resources you need for your class.b. You will also tell it the capacity of the classroom you need.4. To run the query for available rooms you will click Search in the Search and Results box.A list will generate based on the meetings and filters provided:You have scroll bars to scroll through the available rooms. You will have to pay attention to the rooms andmake sure they are actually able to be scheduled. Some spaces appear in this inventory specific for events,unfortunately they cannot be filtered out (Ex. You would not schedule a class in BazTech or the Administrationbuilding).5. You can use Print Results to print your search results to reference later.15
ReportingAd Astra Schedule includes a collection of commonly used reports that are available for use. To navigate to ourlibrary of reports, perform the following:1. Click on the reporting tab.2. Click on the reports option.The list of available reports will be displayed.3. If you know all or part of the report name and/or its group name enter this information in the filterpanel and choose search.4. Grouping by the Report Group field is a convenient way of organizing reports. If grouped, first expandthe report group to see a list of reports.5. When a list of reports is displayed, you may click on Name, Description, or Report Group to sort thelist. You may toggle between ascending and descending order by repeating the click on the columnheading.Running the Report1. Identify the report you would like to view and click the report name.2. If the report includes any user-configurable parameters, these options are displayed in the panel to theleft of the report viewer. Click the edit button to the right of the parameter you wish to change andenter or select the required value in the dialog box.3. Click apply to refresh the report to reflect your parameter entries. You may edit these parameters atany time and re-run the report.Note: The report viewer remembers the parameters used the last time you ran the report and enters these bydefault the next time you visit. This is a time-saving convenience for reports that are used frequently.16
Ad Astra is a scheduling tool that coordinates class scheduling and calendaring of events, resources, invoicing, notifications, timetables, and exams. Utilizing this tool can help optimize space and help you identify space for . Academic sections in Astra Schedule can be located from the Academics Tab. Click the Academics Tab at