Transcription
PureConnect 2021 R1Generated:12-February-2021Content last updated:08-May-2019See Change Log for summary ofchanges.Microsoft Outlook ContactConfiguration for FaxRecipientsTechnical ReferenceAbstractThis document contains instructions for enabling public Outlookcontacts to appear as Fax Viewer recipients.For the latest version of this document, see the PureConnectDocumentation Library at: http://help.genesys.com/pureconnect.For copyright and trademark information, pyright and trademark information.htm.1
Table of ContentsTable of ContentsIntroductionConfiguring a Public Outlook Contacts FolderConfiguring a Private Outlook Contacts FolderSelecting an Outlook Contact as a Fax RecipientChange Log23478102
IntroductionYou can configure Outlook contacts through Interaction Administrator so they appear in an address book in Interaction Fax whereusers can select them as fax recipients.Administrators can use this feature to configure a public Outlook Contacts folder available to all users. In addition, users can selecttheir private Outlook contacts from their local computers as fax recipients.Configuring a Public Outlook Contacts FolderConfiguring a Private Outlook Contacts FolderSelecting an Outlook Contact as a Fax Recipient3
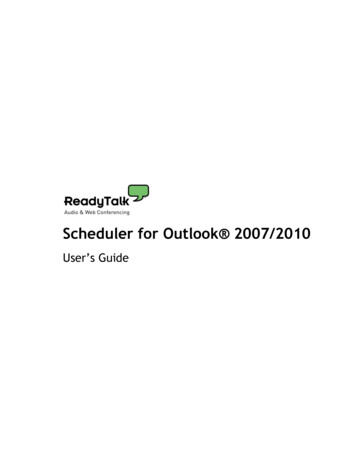
Configuring a Public Outlook Contacts FolderSystem administrators should follow these steps to configure a public Outlook Contacts folder to appear in Interaction Fax:1. On the Outlook File menu, select File New Folder.The Create a New Folder dialog box displays.2. In the Create New Folder dialog box, enter the name Contacts.3. In the Folder contains drop-down menu, select Contact Items.4. Use the Select where to place the folder scroll bar to locate and select All Public Folders and then click OK.Note:The Name of the new folder does not have to be Contacts, but if you want to use a different name, you need to add thatfolder name to the Outlook IC Data Source in Interaction Administrator.5. Once the Contacts folder is created under Public Folders, create a new contact and save it.4
Note:Contacts must have a fax number to display in Interaction Fax.6. In the IC Data Sources container in Interaction Administrator, create an IC data source using the following information:NameOutlook Contacts or whatever name you choose to use.TypeMAPISubtype OutlookFolderContactsNote:The Folder name is case sensitive.7. In the Contact List Sources container, create the contact list source that you will select in the Interaction Fax Address Book.Use the following information:5
IC Data Source Name given for IC Data Source in a previous step in this procedure.LabelAny name you wantDriverIC Outlook ContactsThe public folder configuration is now complete. To test the configuration, see Selecting an Outlook Contact as a Fax Recipient.6
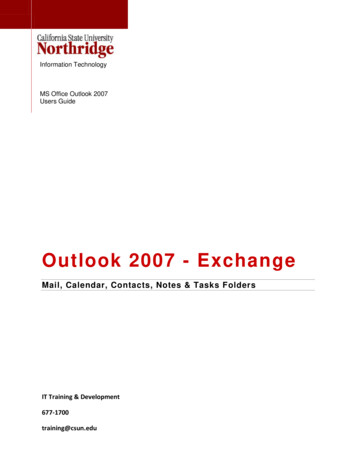
Configuring a Private Outlook Contacts FolderUsers do not need to perform any configuration steps to access their private Outlook contacts in Interaction Fax. Users add theirprivate contacts in Outlook then select the Private Outlook Contacts address list in Interaction Fax.Add or View your Private Contacts in Outlook:1. In Outlook, select the Contacts tab.2. On My Contacts, click the Contacts folder.The Contacts folder displays your private Outlook contacts.Add additional contacts1. Right-click on the Contacts list and select New Contact.2. See the next section to select from your list of Outlook contacts in Interaction Fax.7
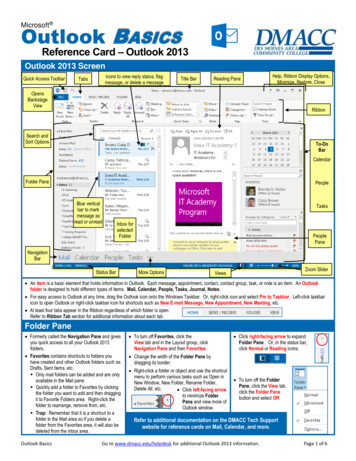
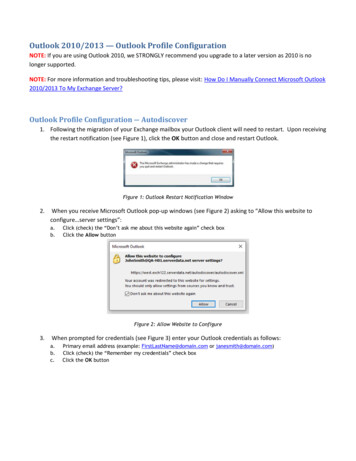
Selecting an Outlook Contact as a Fax RecipientOnce the appropriate configuration has been completed, users can access their Outlook contacts as fax recipients in InteractionFax.1. Click on Start All Programs PureConnect Interaction Fax.The Interaction Fax window displays.2. Do one of the following:On the Main toolbar, click the New Fax icon.To open an existing fax, click the Open Fax icon.On the Annotation toolbar, select the Rectangle, Line, Freehand, Text, Stamp, or Date Stamp tools to create the fax.On the Main toolbar, click the Send Fax icon.The Send Fax dialog box displays.In the Send Fax dialog box, click the indicated area (blue arrow) to display the list of address books.Select the Outlook Private Contacts address book to access your Outlook contacts from your local computer, or select the publicOutlook Contacts folder that contains the list of contacts accessible to all users.8
Remember that only the contacts with fax numbers appear in the address book.9
Change LogDateChanges09-January-2012 Updated Copyright and Trademark Information page.01-August-201425-June-201529-July-2015Updated documentation to reflect changes required in the transition from version 4.0 SU# to CIC 2015 R1, suchas updates to product version numbers, system requirements, installation procedures, references to companyProduct Information site URLs, and copyright and trademark information.Rebranding changes, new logo and font colors.Updated Copyright and Trademark Information page.IC-131357 Checked for final Rebranding changes.18-January-2018 Rebranded this document to apply Genesys lexicon.06-February-2018 Converted to HTML.08-May-2019Reorganized content. Adding links. See CICDOC-182.10
On the Main toolbar, click the Send Fax icon. The Send Fax dialog box displays. In the Send Fax dialog box, click the indicated area (blue arrow) to display the list of address books. Select the Outlook Private Contacts address book to access your Outlook contacts from your local computer, or select the public Outlook Contacts folder that .