Transcription
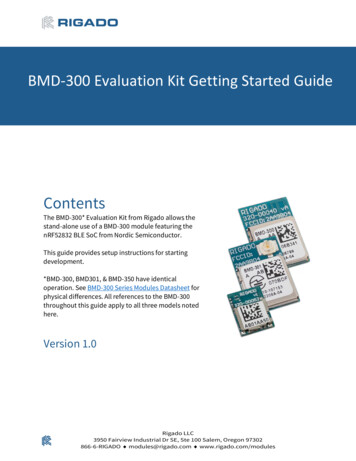
BMD-300 Evaluation Kit Getting Started GuideContentsThe BMD-300* Evaluation Kit from Rigado allows thestand-alone use of a BMD-300 module featuring thenRF52832 BLE SoC from Nordic Semiconductor.This guide provides setup instructions for startingdevelopment.*BMD-300, BMD301, & BMD-350 have identicaloperation. See BMD-300 Series Modules Datasheet forphysical differences. All references to the BMD-300throughout this guide apply to all three models notedhere.Version 1.0Rigado LLC3950 Fairview Industrial Dr SE, Ste 100 Salem, Oregon 97302866-6-RIGADO modules@rigado.com www.rigado.com/modules
BMD-300 Evaluation Kit Getting Started GuideContents1Overview . 31.1BMD-300 Key Features . 31.1.1 BMD-301 Specific Key Feature . 32Useful Tools . 43Hardware Kit. 53.1BMD-300 EVAL / BMD-350-EVAL . 53.1.1 Additional components in BMD-301-EVAL . 54Out of the Box: BMDware . 54.1Using the Rigado Toolbox with BMDware . 54.1.1 Beacon Configuration . 64.1.2 UART Configuration . 64.1.3 AT Mode Beacon Example:. 74.2BMDware Version . 95Custom Application Firmware Development. 95.1Set-up SDK Directory . 95.2Set-up Keil µVision . 95.3Set-up Segger J-Link Utilities . 105.4Set-up nRFgo Studio (Windows and Linux only). 116Erase Prior to Application Development . 116.1Erase . 117Example Project: Create a Beacon . 127.1Using a HEX File . 127.2Using Keil µVision . 127.2.1 Create Hex File in Keil µVision . 121. Select project Options for Target 'project'. . 128Factory Restore . 138.1Erase and Restore . 139Using Rigado’s Bootloader Tools . 149.1Preparing for OTA Update . 159.2OTA Update . 159.2.1 Update from BMDware. 159.2.2 Update from RigDFU . 1610 Contact Information. 17Appendix A – References . 18Appendix B – Tables . 18Appendix C – Figures . 18Appendix D – Revision History . 19Version 1.0Copyright 2017 Rigado LLC2
BMD-300 Evaluation Kit Getting Started Guide1 OverviewThe BMD-300 is based on the advanced nRF52832 BLE SoC from Nordic Semiconductor,bringing the latest Bluetooth connectivity coupled with class leading performance. Itcombines a Bluetooth 4.2 compliant 2.4GHz transceiver, 64MHz ARM Cortex M4F CPU,512kB of flash memory, 64kB RAM, a suite of analog and digital peripherals, and a DC-DCconverter with advanced power management into a miniaturized package. The BMD-300enables tomorrow’s most demanding IoT and wearable applications.Figure 1. BMD-300 Modules1.1 BMD-300 Key Features Complete Bluetooth 4.2 and 5.0 low energy solution with integrated antennaBased on the nRF52832 SoC from Nordic Semiconductor, allowing you to run yourown codePowerful and efficient 32-bit ARM Cortex M4F CPU with 512kB flash and 64kB RAMHighly flexible GPIO & a rich digital and analog peripheral set that can interact withoutthe CPUOver-the-Air updates and Direct Test Mode enabled. Many other example applicationsavailable!Bluetooth Certified Component qualified, FCC and IC certified, CE compliant1.1.1 BMD-301 Specific Key Feature Complete Bluetooth 4.2 and 5.0 low energy solution with U.FL for external antennaVersion 1.0Copyright 2017 Rigado LLC3
BMD-300 Evaluation Kit Getting Started Guide2 Useful ToolsBelow is a list of tools that aid in development with the BMD-300 Bluetooth modules.ToolDescriptionRigado maintains software repositories at github.com. Requestaccess on our contact page.Rigado GitHub RepositoriesThis guide uses the “bootloader-tools” and “programmers”repositories.The Rigado Toolbox provides a way for Rigado Modulecustomers to configure their Rigado Beacons and other out ofRigado Toolboxthe box firmware features. The toolbox also provides the ability(iPhone Android)to securely update device firmware. The secure update featureis available to module customers.nRF ConnectNordic app that allows communication and scanning for BLE(iPhone Android PC)devices.nRF ToolboxNordic mobile app that demonstrates BLE profiles within(iPhone Android)Nordic SDKBluetooth Beacon ScannerA mobile app of your choice to view broadcasting BLE beaconsNordic nRF5 SoftwareDevelopment KitA development environment designed for microcontrollerapplications that enables development using the nRF52 SDKapplication and example files.Software and documentation pack for the Segger J-LinkinterfaceThe Nordic software suite is used to program and configureNordic nRF devices. It supports programming of nRF52application, bootloader, and soft device. This tool uses the onboard Segger J-Link programming interface.Command line utility enabling programming of nRF5x devicesthrough J-Link programmers/debuggers.Contains libraries, APIs and examples for softwaredevelopment on the nRF5x devicesPuTTYA terminal program for using UART commands.Keil µVision IDE/DebuggerSegger J-Link SoftwareNordic nRFgo StudionRF5x Command Line ToolsTable 1. Useful Tools for BMD-300 SeriesVersion 1.0Copyright 2017 Rigado LLC4
BMD-300 Evaluation Kit Getting Started Guide3 Hardware KitFigure 2. BMD-300 Evaluation Board Overview (top view)3.1 BMD-300 EVAL / BMD-350-EVAL 1x Evaluation Board1x Micro-USB Cable3.1.1 Additional components in BMD-301-EVAL 2x Bluetooth Antennas – patch and tilt-whip styles 1x U.FL to RP-SMA jumper cable4 Out of the Box: BMDwareAt factory, Rigado loads the BMDware firmware package on BMD-300 Evaluation Boards.BMDware provides Beacon, BLE-UART bridge, GPIO and Direct Test Mode functions. Thisapplication firmware may be sufficient for your application allowing quick time-to-market.4.1 Using the Rigado Toolbox with BMDware1. Open the Rigado Toolbox app on a mobile device (iPhone Android)2. Connect to RigCom. If there are multiple devices advertising, choose the one with thecorrect MAC Address (see figure 6). This should also have the highest RSSI value whenthe mobile device is near the evaluation board.Figure 3. Where to Find MAC Address on BMD-300 SeriesVersion 1.0Copyright 2017 Rigado LLC5
BMD-300 Evaluation Kit Getting Started Guide4.1.1 Beacon Configuration1. Navigate to the Beacon Config tab2. Enable Beacon:Figure 4. Toolbox Beacon Configuration3. Return to the scanning screen in order to save this setting.4. Open a BLE Beacon app on your mobile device and scan. A beacon with the UUID“00112233-4455-6677-8899-aabbccddeeff” should appear4.1.2 UART Configuration1. Connect to RigCom again.2. Navigate to the UART Config Tab3. Make sure the device is connected to a computer4. Enable UART and open the test console:Figure 5. Toolbox UART Configuration5. On the computer, start a terminal program6. Check which COM port to use by opening Device Manager. The device should read“JLink CDC UART Port (COM#)”7. Ensure the serial speed matches the baud rate set in Rigado ToolboxVersion 1.0Copyright 2017 Rigado LLC6
BMD-300 Evaluation Kit Getting Started Guide8. Open the terminal9. In the Test Console, write “Rigado is awesome!” in the send data field and hit the enterkey to send the message:Figure 6. Toolbox Test Console "Rigado is awesome!"10. On the computer, “Rigado is awesome” should appear in the PuTTY terminal:Figure 7. UART Incoming Data11. Conversely, text entered in the PC terminal will appear in the Rigado Toolbox.4.1.3 AT Mode Beacon Example:The AT command interface allows a device or microcontroller connected via a UART interfaceto configure BMDware through a physical connection rather than over the Bluetooth LowEnergy interface. Note: When AT Mode is enabled, the Pass-through UART is not availablefor use by default.1. Enable the AT Mode by holding button 2 (P0.14) while pressing reset. Continue to holdbutton 2 for approximately 3 seconds.2. Open a terminal program. This example uses PuTTY3. Under connection type, select Serial:Figure 8. PuTTY Connection Type SerialVersion 1.0Copyright 2017 Rigado LLC7
BMD-300 Evaluation Kit Getting Started Guide4. Open the terminal configuration form the category panel5. Select “Implicit CR in every LF” to avoid a “stair step” display of text in the terminal6. Change the local echo setting to “Force on” to see text typed into the terminalFigure 9. PuTTY Terminal Settings Configuration7. Open the serial configuration from the category panel8. Ensure the serial line is the correct COM port for the device (check Device Manager)9. Correct the following: Baud rate: 57600 Data bits: 8 Stop bits: 1 Parity: None Flow Control: NoneFigure 10. PuTTY Serial Configuration10. Click Open11. Test the connection by entering “at” and hitting enterVersion 1.0Copyright 2017 Rigado LLC8
BMD-300 Evaluation Kit Getting Started Guide12. The BMD-300 will send the response “OK”, displayed in the terminal:Figure 11. AT Command Expected Response Terminal4. Change the beacon UUID by typing: at buuid ffeeddccbbaa00112233445566778899 enter 5. Enable the beacon by typing: at ben 01 enter 6. Check that the beacon is visible through the BLE Beacon app used in section 4.1.17. Notice the beacon UUID matches the UUID input previously8. Disable the beacon by typing (note: the beacon must be disable to change beaconparameters): at ben 00 enter 9. Check that the beacon is no longer visible through the BLE Beacon app4.2 BMDware VersionBMDware AD is programmed to BMD-300 modules at factory. If necessary, BMDware can beupdated through a Windows programming utility or OTA. See the Factory Firmware MigrationHelp Center article for the latest information on updating BMDware.5 Custom Application Firmware DevelopmentFor applications that require custom functions, before firmware can be developed andloaded onto the BMD-300, a few tools need to be installed.5.1 Set-up SDK DirectoryThe Nordic Semiconductor Software Development Kit (SDK) contains the necessary libraries,APIs, support files and code examples for software development on the nRF52 Series MCUsused in the Rigado BMD-300. Rigado’s RigDFU bootloader supports SDK v11.0.0 and v12.x.x.This guide will use v12.x.x, although the BMD-300 is compatible with any version whichtargets the Nordic nRF52832.1. Navigate to http://developer.nordicsemi.com/nRF5 SDK/2. Download the most recent nRF5 SDK v12.x.x zip file3. Extract the zip file to a location off the C drive such as “C:\Rigado”5.2Set-up Keil µVisionKeil µVision is a development environment designed for microcontroller applications thatenables development using the nRF52 SDK application and example files.1. Navigate to http://www.keil.com/download/product/2. Click “MDK-ARM”3. Complete the contact form4. Download and run the EXE file5. Complete the installation with default settings6. Wait for the install to complete7. If the Keil Pack Installer does not open, click the(pack installer) buttonVersion 1.0Copyright 2017 Rigado LLC9
BMD-300 Evaluation Kit Getting Started Guide8. Click the(update) button in the left corner9. If you receive an error “Cannot install Pack NordicSemiconductor.nRF DeviceFamilyPack.8.3.1”,download and install the most current device pack from s/nRF51822/nRF5x-MDKPack/4880310. The pack installer should now contain the Nordic Semiconductor packs:Figure 12. Keil Pack Installer Showing nRF Device Familiy Pack11. Close the Pack Installer once the update is complete5.3 Set-up Segger J-Link UtilitiesThe Segger J-link utilities are a software and documentation pack for the Segger J-Linkinterface.1. Navigate to www.segger.com/downloads/jlink2. Click “Click for downloads” under “J-Link Software and Documentation Pack”3. Download the appropriate package for your OS4. Accept the License Agreement5. Run the installation program with default configurations6. Ensure Keil µVision is selected. (It’s usually a good idea to associate alldisplayed IDEs with the new J-Link version)Figure 13. Segger J-link DLL UpdaterVersion 1.0Copyright 2017 Rigado LLC10
BMD-300 Evaluation Kit Getting Started Guide5.4 Set-up nRFgo Studio (Windows and Linux only)The Nordic software suite is used to program and configure the Rigado modules containingNordic nRF devices. It supports programming of nRF52 application, bootloader, and softdevice. This tool uses the Segger J-Link-OB programming interface on the BMD-300-EVAL.The Nordic Command Line Utilities are usually installed along with nRFgo Studio, thoughthey may be obtained separately.1. Navigate to https://www.nordicsemi.com/eng/node 176/2.4GHz-RF/nRFgoStudio#Downloads2. Download and run the appropriate version for your operating systemNote: Guides are available for installing nRFgo Studio on OSX and Linux.6 Erase Prior to Application DevelopmentWhile RigDFU provides means of sending UART and OTA updates, using the SWD debug portduring development is useful. Modules with version AB factory firmware are configured withread-back protection and require a full chip erase prior to using any debugger tools. Moduleswith AD firmware do not have read-back protection enabled, yet an erase gives a freshdevelopment starting point.6.1 EraseThe Rigado “Erase and Recovery” utility from the GitHub “programmers” repository may beused to perform the full chip erase:1. Clone the “programmers” GitHub repository to a convenient location on your system.2. Navigate to where the programmers repository is stored programmers BMD-300Erase & Recovery3. Run BMD300 Erase.exe4. Click Program:Figure 14. BMD-300 Erase & Recovery DefaultVersion 1.0Copyright 2017 Rigado LLC11
BMD-300 Evaluation Kit Getting Started Guide5. Wait for the operation to complete. The grey idle square should read success and turngreen when done:Figure 15. BMD-300 Erase & Recovery Complete7 Example Project: Create a BeaconThis is an example of how to program a BMD-300 Evaluation Board using various methods.After each method, the device should be visible on a beacon scanner mobile app.7.1 Using a HEX FileThis is a quick check with the Nordic supplied HEX file to see how the program should behave.1. Navigate to C:\Nordic\nRF5 SDK 12.2.0 f012efa\examples\ble peripheral\ble app beacon\hex2. Copy the ble app beacon pca10040 s132.hex file. This contains both the beaconapplication and the S132 SoftDevice merged into a single hex file3. Navigate to the JLINK drive and paste the hex file4. Once the device is programmed, a red LED should start blinking7.2 Using Keil µVision1. Navigate toC:\Nordic\nRF5 SDK 12.2.0 f012efa\examples\ble peripheral\ble app beacon\pca10040\s132\arm5no packs2.3.4.5.6.Open the .uvprojx fileClick the(build) button and wait for the build to completeClose the pack installer and return to µVisionClick the(program) buttonOnce the device is programmed, a red LED should start blinking and the device will bevisible in the nRF Toolbox7.2.1 Create Hex File in Keil µVision1. Select project Options for Target 'project'.2. Navigate to the "Output" tabVersion 1.0Copyright 2017 Rigado LLC12
BMD-300 Evaluation Kit Getting Started Guide3. Optionally, change the name of the HEX file in the “Name of Executable” field4. Ensure "Create HEX File" is selected:Figure 16. Keil µVision Configuration for HEX FIle5. Click OK6. Click the(build) button and wait for the build to complete7. The HEX file should now be available in the project’s “ build” folder8 Factory RestoreIt may also be desirable to restore the entire factory-loaded image. This can also be donewith the programmers repository using a SWD connection.8.1 Erase and Restore1. Navigate to where the programmers repository is stored programmers FactoryImages BMD-300 BMD-300 AD wMAC (or the newest version)2. Run the BMD300 Programmer.exe3. Enter the last 6 digits of the MAC address as seen in Figure 54. Click Program:Figure 17. BMD-300 Programmer DefaultVersion 1.0Copyright 2017 Rigado LLC13
BMD-300 Evaluation Kit Getting Started Guide5. Wait for the operation to complete. The grey idle square should read success and turngreen when done:Figure 18. BMD-300 Programmer Complete9 Using Rigado’s Bootloader ToolsRigado’s “bootloader-tools” repository on GitHub contains tools for programming via J-Linkor generating custom firmware update images to update OTA (“Over-The-Air”) with a mobileapp such as Rigado’s Toolbox app, a Mac or Linux PC, or by UART. Download the RigDFUDatasheet from our downloads page for full details.Version 1.0Copyright 2017 Rigado LLC14
BMD-300 Evaluation Kit Getting Started Guide9.1 Preparing for OTA UpdateAn application HEX file must be prepared to perform an OTA Update with RigDFU.1. Navigate toC:\Nordic\nRF5 SDK 12.2.0 89a8197\examples\ble peripheral\ble app beacon\pca10040\s132\arm5no packs\ build2. Note the full path, or copy the hex file to where the “bootloader-tools” repository wasstored, then bootloader-tools-master\image-tools\genimage3. Open a command prompt in this location4. To generate an unsigned OTA BIN file, run:python genimage.py --hexfile nrf52832 xxaa s132.hex -o beacon example OTA.hex -f config\nrf52832-sd132v3.x.0.cfgNote: RigDFU supports the Nordic SoftDefice S132 v2.0.0 and v3.x.0. Be sure to select the configfile that matches the S132 version.Note: If required, an encrypted update file may be generated by using the signimage utility onthe output of genimage. See the RigDFU datasheet for details.9.2OTA UpdateThe OTA Update can be completed while running BMDware or directly from RigDFU. Makesure the mobile device does not go into sleep mode during the update. This will cause RigadoToolbox to disconnect and the original firmware to restart.9.2.1 Update from BMDware1. Place the OTA .bin file somewhere easy to navigate to on your mobile device (for iOS,email the file to an account accessible on the iPhone or iPad).iOS – Update from BMDware2. Open the BIN file with Rigado Toolbox3. Connect to RigCom4. Tap on the first "Unknown"characteristic5. Tap on "Firmware" (top right corner)6. At the next screen under "Command toStart", enter: 03563057, then tap "Start"in the upper right. This will start theupdate process and display a progressbar on the appAndroid – Update from BMDware2. Open Rigado Toolbox3. Connect to RigCom4. Tap "Firmware Update"5. Tap "Firmware Image File", select theBIN file6. Tap "Activation Characteristic", select2413B33F-707F90BD-2045-2AB8807571877. Select “Unknown Characteristic”8. Tap "Activation Command", enter035630579. Tap Begin Update. This will start theupdate process and display a progressbar on the appWhen complete, stop and restart the Bluetooth on the mobile device to clear any cachedadvertised names.Version 1.0Copyright 2017 Rigado LLC15
BMD-300 Evaluation Kit Getting Started Guide9.2.2 Update from RigDFU1. Email the OTA BIN file to an account associated with on the mobile device.2. Download and open the BIN file with Rigado Toolbox3. Connect to RigDFU(i.e. highest RSSI when the device is nearby). If the device disconnects,tap “attempt reconnect” and power cycle the device at the same timeiOS – Update from RigDFU4. Tap on the first "Unknown"characteristic5. Tap on "Firmware" in the upper rightcorner of the app.6. At the next screen under "Command toStart", enter: 00, then tap "Start" in theupper right. This will start the updateprocess and display a progress bar onthe appAndroid – Update from RigDFU4. Select the first "ActivationCharacteristic"5. Select the first “UnknownCharacteristic”6. Enter “00” for the "ActivationCommand", then tap “Send Command”.This will start the update process anddisplay a progress bar on the appWhen all complete, stop and restart the Bluetooth on the mobile device to clear any cachednames. Note: RigDFU only runs for 2 seconds then passes control to the application firmware. Ifno firmware or a "bad" image is present, then RigDFU will run for 3 minutes. RigDFU can be toldto run for 3 minutes by selecting Unknown Characteristic and using the command 96dff40b. Seethe RigDFU datasheet for example application firmware code.Version 1.0Copyright 2017 Rigado LLC16
BMD-300 Evaluation Kit Getting Started Guide10 Contact InformationHeadquartersRigado LLC3950 Fairview Industrial Dr SE, Ste 100Salem, Oregon 97302866-6-RIGADO modules@rigado.comPortland BranchRigado LLC1001 SW Water Ave, Ste 290Portland, OR 97214866-6-RIGADO modules@rigado.comSales NetworkPlease visit the Partners page of our Rigado Website for the contact details of ourdistributor(s) and sales representative(s) in your region.Version 1.0Copyright 2017 Rigado LLC17
BMD-300 Evaluation Kit Getting Started GuideAppendix A – ReferencesItemDescription / LinkRigado Documentshttp://rigado.com/supportNordic i.com/index.jspTable 2. ReferencesAppendix B – TablesTable 1. Useful Tools for BMD-300 Series . 4Table 2. References . 18Table 3. Revision History. 19Appendix C – FiguresFigure 1. BMD-300 Modules. 3Figure 2. BMD-300 Evaluation Board Overview (top view) . 5Figure 3. Where to Find MAC Address on BMD-300 Series . 5Figure 4. Toolbox Beacon Configuration. 6Figure 5. Toolbox UART Configuration . 6Figure 6. Toolbox Test Console "Rigado is awesome!" . 7Figure 7. UART Incoming Data . 7Figure 8. PuTTY Connection Type Serial . 7Figure 9. PuTTY Terminal Settings Configuration. 8Figure 10. PuTTY Serial Configuration . 8Figure 11. AT Command Expected Response Terminal . 9Figure 12. Keil Pack Installer Showing nRF Device Familiy Pack . 10Figure 13. Segger J-link DLL Updater . 10Figure 14. BMD-300 Erase & Recovery Default . 11Figure 15. BMD-300 Erase & Recovery Complete . 12Figure 16. Keil µVision Configuration for HEX FIle . 13Figure 17. BMD-300 Programmer Default . 13Figure 18. BMD-300 Programmer Complete . 14Version 1.0Copyright 2017 Rigado LLC18
BMD-300 Evaluation Kit Getting Started GuideAppendix D – Revision HistoryRevision Changes1.0DateInitial Release2017-05-05Table 3. Revision HistoryVersion 1.0Copyright 2017 Rigado LLC19
Mouser ElectronicsAuthorized DistributorClick to View Pricing, Inventory, Delivery & Lifecycle Information:Rigado:BMD-301-EVAL BMD-350-EVAL BMD-300-EVAL
application and example files. Segger J-Link Software Software and documentation pack for the Segger J-Link interface Nordic nRFgo Studio The Nordic software suite is used to program and configure Nordic nRF devices. It supports programming of nRF52 application, bootloader, and soft device. This tool uses the on
