Transcription
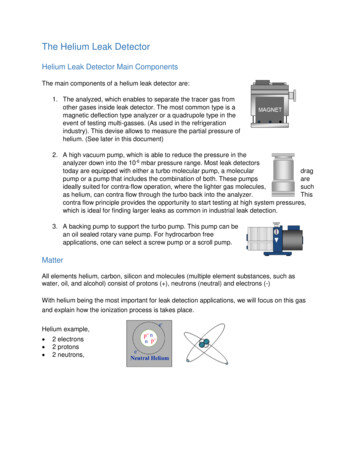
Procedure for Filling 2 T Bruker Magnet with HeliumNote: Helium transfer requires two people at all times.Guiding Principles:A: Keep rubber bung over helium fill port when the port is open to the air.B: Achieve a “Bunsen” plume before attempting to insert transfer siphon into magnet.C: Thoroughly dry everything to avoid getting ice into magnet or dewar.D: Act quickly to achieve 3 psi pressure when siphon is inserted to get an effectivetransfer.Transfer of He from Dewar to Magnet1) Get log book from workshop.2) Go into the equipment room and plug in the He/N2 monitoring unit into the wall. This isleft unplugged by default to avoid the possibility of being left in Run mode when on (andhence increasing boil off).3) Press the “Manual” button (Fig 1) to get the system to start sampling. (Note that on thenitrogen channel the button is slightly “sticky” and may indefinitely sample – in which casetry jiggling the button).4) Take the initial readings for the He and record the value in the log book.5) Double check that the dewar is non magnetic (should have a sticker on it saying “nonmagnetic”).6) Remove cap from top of dewar (over yellow fill valve). NOTE: SOME DEWARS MAYHAVE DIFFERENT COLOURED HANDLES TO THOSE DSECRIBED HERE, SOCHECK.7) With dewar still in corridor, vent off the dewar using the red vent valve (Figs 2, 3). Directthe vent out the door. When the dewar is practically vented, close the vent valve.8) Open the back doors of the magnet room from inside the magnet room and wheel thedewar into the room and park it just below the skylight nearest the door (Figs 4, 5). (This isneeded to provide ceiling height when inserting transfer siphon).9) Move the helium gas bottle in the corridor to the chained area near the 2T magnet room(but still in the corridor!). Note that the helium bottle and the stand are magnetic and mustnot be brought into the magnet room itself!10) Chain the helium gas bottle to the wall for safety.
11) Note the level in the helium gas bottle. The helium fill will require at least ¼ bottle ofhelium gas, so check the gas bottle level is at least 50 psi (200 psi is approx full bottle). If thelevel is below 50 psi then best to switch to a full bottle.Optional Procedure: checking level with dip sticka) Get dip stick from just outside magnet room (magnetically attached to steel platesusing the magnetized crocodile clips). Note that the croc clips are magnetic so becareful. Place the croc clips somewhere safe.b) Vent down dewar with red vent valve. Open yellow valve.c) Check that dip stick is clean, and close red valve, leaving yellow valve open.d) With thumb over dip stick end, fairly swiftly insert the dip stick, keeping a thumbover the end of the dip stick. Insert until the dip stick hits the bottom of the dewar(Fig. 6).e) Clip one of the croc clips to the dip stick at the point where it is level with the neckof the dewar.f) Reasonably swiftly, raise the dip stick while keeping thumb over the end. Shouldfeel a slow vibration against the thumb. When the dip stick gets above the top of theliquid the vibrations will increase in frequency (to a quite high frequency). At thispoint, clip the other croc clip to the dip stick at the point where it is level with the neckof the dewar.g) Remove the dip stick and close the yellow (fill) valve.h) Measure the distance between the croc clips (tape measure in workshop) andcompare this with the chart printed on top of the dewar. E.g., 27.5 inches between thecroc clips is approx. 254 litres. Note, not all the dewars supplied by Air Productshave a chart!12). Get the leybold clamp and O ring from the drawer in the magnet room. Note that theleybold clamp is magnetic, so be careful.13) Vent down dewar with red valve. Open yellow fill valve on dewar.14) Take the transfer tube from the wall. Check that the extension attachments on the transfertube are tight (Fig. 7).15) Place O ring over the top collar of the dewar neck. Place the long end of the transfer tubea short distance into the He dewar. Need to lower it in to the dewar so that the fill tube is justat ceiling height (i.e., not yet in the liquid helium itself). (Fig. 8). There should not be asignificant boil off – otherwise the tube is in the liquid, so pull out slightly.16) Lower the locking collar from the top of the transfer tube and lock the height of thetransfer tube in the dewar using the leybold clamp (Fig. 9).
17) Wheel the dewar to the far side of the magnet, to the same location as is used for N2 fills.18) Run out the rubber hosing (Fig 12) from the helium bottle into the magnet room (avoidingkinks). Attach to the plastic tube attached to the long end of the transfer tube.19) Go on to top of magnet and unscrew the locking collar on the helium fill port on themagnet turret (Fig. 10).20) Carefully lift out the helium baffle (Fig. 11) from the helium fill port of the magnet andquickly put the rubber bung over the fill port to avoid moist air from getting into helium fillport of magnet.21) Remove the O ring, brass collar and locking collar from the baffle (Fig. 11).22) Thoroughly dry all the components to avoid moisture from getting into helium fill port.Use the towel on top of the magnet. Also clean and dry the siphon.23) Place the locking collar, brass collar and O ring on the short (magnet) end of the transfertube (Fig. 10).24) Check that the green and red valves on the dewar are closed (and obviously the yellowvalve must be open).25) Slowly lower the long end of the transfer tube into the dewar whilst holding onto the shortend. Will start to get warm helium gas flowing from end. May get some “chuffing”. Makesure that pressure doesn’t build up beyond approx 3 psi in dewar. Important to gently lowerthe transfer tube, and raise it if chuffing gets too intense, or if pressure in the bottle increases.At this point the transfer tube should be a couple of inches into the liquid helium itself.26) Eventually, the gas emerging from the fill tube will start to cool (to touch) and eventuallya gas plume will form. This process is gently cooling the transfer tube.27) Look out for a “Bunsen burner” type plume emanating from the end of the transfer tube.This is the point at which it is safe to insert the short end of the transfer tube into the magnetturret.28) Fairly quickly insert the short end of the transfer tube into the magnet fill port on themagnet turret. Gently push it down until it hits the locating cone within the magnet turret.Then lower the O ring and brass collar and gently clamp the locking collar to the helium fillport. Then pull the tube back approx 1 inch from this point, and tighten the nut fully.29) The second person should quickly open the main (black) valve of the helium gas bottle(Fig 12) and turn the gold pressure valve clockwise to increase the pressure until it readsapprox 3 psi (lbf/in2). This needs to be done fairly quickly to maintain the transfer.30) Check the gauge on the dewar. It should read approx. 3 psi. Keep watching this and checkthat pressure doesn’t fall or rise too much.
31) Slowly start to lower the transfer tube further into the dewar, checking that it doesn’tincrease the pressure too much (indicating too much boil off and too fast an insertion). Thisprocess will take 5-10 mins, slowly inching the transfer tube into the dewar until there isabout 8-10 inches of pipe sticking out of the dewar. This is achieved when the transfer siphonis lowered approx. 2 feet from the point of the “Bunsen” plume. Don’t want to push it to thebottom until near the end of the fill to avoid gunk getting into transfer tube and blocking it.32) Quench pipe should quickly start to get cold to touch (Fig. 14) indicating a successfultransfer. Eventually the quench pipe will ice over (Fig, 16) indicating successful transfer.33) While waiting for the magnet to fill (approx 20-30 mins) can switch the He monitor to“fast” sampling (Fig 1). Note that the system needs to be in “Run” mode (Fig 1). Keep an eyeon the monitor (should slowly climb to close to 95-96%) and also keep an eye on the pressurein the dewar (aiming to keep it at approx. 3 psi).34) When the monitor indicates that the level is close to 90% gently lower the transfer siphonto the bottom of the dewar and then pull back about 1 inch.35) Monitor will eventually max out at about 95% and will stop increasing when full, oralternatively may hear a whistling sound from dewar indicating that the dewar is empty.36) When full, close the main (black) valve of the helium bottle and pull the rubber tube offthe transfer tube. Expect a pop and depressure.37) Should have yellow clamp still open (since transfer siphon still in dewar), but red andgreen valves closed on dewar.38) Will need the blow dryer (Fig. 17) from drawer in workshop (Fig. 18) and extension cablefrom workshop (Fig. 19). Note that the dryer is magnetic so be careful!39) Vent down the dewar using the red valve and then gently blow warm air onto the magnetturret close to the helium fill port. Aim is to warm up the locking collar so that it can beundone without significantly heating the transfer pipe itself. This takes about 1-2 mins withair blower on the hotter of the two settings.40) When the locking collar can be loosened, gently pull the siphon out of the magnet turretand remove the O ring, brass collar and locking collar. Place the rubber bung back over thehelium fill port on the magnet turret. Thoroughly dry the baffle and the O ring, brass collarand locking collar and reassemble (Fig. 11).41) Gently insert the baffle into the magnet, resting the locking collar on the thread. Thescrew thread will likely need a further warm with the air blower before the locking collar canbe tightened. Then tighten up the locking collar.42) Move the dewar back to under the skylight.43) Remove the magnetic air blower from the magnet room and replace in the workshop.44) Remove the leybold clamp and remove the transfer siphon from the dewar. Place thetransfer pipe back against wall, attaching with cable tie to be off the ground.
45) Replace the leybold clamp and the O ring in the drawer in the magnet room.46) Take a further dip-stick reading (as detailed above) if required. Note the result in the logbook.47) Close the yellow valve and put the cap back on the dewar top (to protect it from rainwater). Close the red valve and open the green valve.48) Coil up the rubber tubing and place on helium bottle. Turn the gold pressure valve on thehelium bottle fully anti clockwise and replace the He gas bottle to the other end of thecorridor. Make sure it is chained to the wall.49) Move empty dewar into courtyard.50) Go into equipment room and record the final reading of the He fill in the log book.51) Switch the He monitor back to “slow” sampling (Fig 1) and switch the unit to “hold” (Fig1).52) Turn the monitor off at the wall and take out the plug to avoid the unit being accidentallyswitched on between fills.53) Close magnet room doors and return log book to workshop.54) Return gloves to top of He bottle in corridor.55) Remember to lock all doors and return chains to corridor.56) Phone Air Products (01235 816484) to tell them that the empty dewar is ready for pickup.Other Notes1) Helium is ordered from Air ProductsOrder “250 litres in a non magnetic loan dewar”Air Products PlcHarrier ParkHawksworthDidcotOX11 7PLPhone 01235 816484Doug Haden or John Kingdom will assistAccounts/Admin Dept: 01235 706210Confirm telephone order with a puchase order through Dept.2) If Transfer Stops:
This will be noted by the quench pipe failing to freeze (or get significantly cold).If this happens, lift the siphon out of the magnet and raise the siphon in the dewar. Place bungover helium fill port in magnet turret and thoroughly dry all components.Try to obtain “Bunsen plume” again.If the siphon becomes blocked (by lowering it into gunk at the bottom of the dewar tooquickly), often get ice or blockage. Need to take the transfer pipe out of the dewar, warm it upand dry it off.3) If Magnet Helium Fill Port Ices UpThis is a serious problem, that will be evident at a subsequent fill by the baffle having ice onit. If this happens, need to call OMT and seek advice.4) If transfer Pipe Start to Ice UpIf the transfer pipe ices up or becomes uncomfortably cold to the touch then it has probablylost its vacuum and will need to be pumped down. It will be impossible to achieve a “Bunsenplume” if the transfer tube loses its vacuum. Need to contact Nick Soffe in the Rex RichardsBuilding to have this done using the turbo pump. Maybe an idea to have it pumped down inFeb/March regardless.5) Fill LevelsNeed to fairly urgently get a helium fill sorted out if the helium level drops below 50%.
Figure 1Manualbuttonto nMainsoutlet
Figure 2CapYellowfillvalveGreensafetyvalveRedVentvalve
Figure 3
Figure 4
Figure 5
Figure 6
Figure 7ExtensionelementsTransfertube
Figure 8
Figure 9
Heliumfilll portFigure 10Magnet turretTo dewarLocking collarBrass collarO ringTransfersiphon
Figure 11LockingcollarBrasscollarO ring
Figure 12Gas pressure(ideally about3 psi (lbf/in2)when fillingmagnet)Rubberpressurizertube to transfersiphonBottle levelmeterPressurevalve (clockwiseto increase pressure,anti-clockwise toreduce pressureMain bottlevalve
Figure 138-10 inches
Figure 14
Figure 15
Figure 16
Figure 17
Figure 18
Figure 19
21) Remove the O ring, brass collar and locking collar from the baffle (Fig. 11). 22) Thoroughly dry all the components to avoid moisture from getting into helium fill port. Use the towel on top of the magnet. Also clean and dry the siphon. 23) Place the locking collar, brass collar and O ring on the short (magnet) end of the transfer tube (Fig .