Transcription
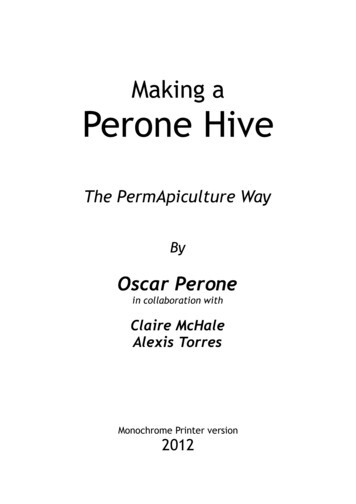
Making aPerone HiveThe PermApiculture WayByOscar Peronein collaboration withClaire McHaleAlexis TorresMonochrome Printer version2012
Making a Perone Hive2(www. peronehive. com)
Table of ContentsIntroduction.3What is PermApiculture?.3Overview.4About the Size.4Materials Needed to Build the Hive.5What kind of wood is good?.5The Boxes.6Option 1. Using 1x4″ boards for (almost) all the boxes.6Option 2. Using 1x4″ boards for the three supers and larger-sized boards for the bees’ part.8Additional Options for the Hive Body.8Transforming the shape of the hive’s interior.8Installing support bars in the Bees’ Part.9The Entrance(s) and the floor.10The Entrance(s).10The Floor.10The Comb Grids.12Comb Grid Dimensions.14How to Make the Comb Grids .15The “Attaching the top-bars directly to the top box in the Bees’ Part” Option.16Mass-production Mold Idea.17Trying to Make a Perone Hive with Movable Top-Bars.17The Roof.18Flat Roof Design with Overhang.18Gable Roof.19Making a Gable Roof in Images.19Making a Perone Hive3(www. peronehive. com)
IntroductionWhat is PermApiculture?PermApiculture (Permanent Apiculture) is a system of beekeeping designed to imitate the bees’habitat in nature as closely as possible. It utilizes the Perone hive, a vertical top bar hive whichprovides the bees with their three greatest needs: Lots of Space Lots of Honey Lots of PeaceThese three needs in combination with the design of the hive yield large powerful colonies that arecapable of managing disease, Varroa, and cold winters without chemical treatments or expensiveequipment.Perone hives are divided into two parts: the bees’ part, where the bees keep their brood and honeyreserves, and the beekeeper’s part. Once occupied by bees, Perone hives are only opened once ayear to harvest honey from the beekeeper’s part. The beekeeper makes no other interventions andnever enters the bees’ part.PermApiculture and the Perone hive were created by Argentinian Oscar Perone, who has been abeekeeper for over 40 years.There are currently thousands of Perone hives throughout Mexico, Central, and South America. ThePerone hive and PermApiculture system of beekeeping holds great promise in reversing the trend ofColony Collapse Disorder. This year several of the beekeepers in the Latin AmericanPermApiculture network loss several of their Langstroth families to CCD. Their Perones on theother hand continue to live and thrive. Some of these beekeepers are in their third year of usingPerones.Making a Perone Hive4(www. peronehive. com)
OverviewA diagram detailing one of the many ways to build a Mk 2 Perone HiveAbout the SizeThe Perone Hive’s size is based on two factors:1. 1. A capacity of 280 L (282 L to be exact): In his 40 years of beekeeping, Oscarexperimented with various sized hives, but observed that the colonies he was working withwere strongest, most resilient, and most productive when they had around 280 L of space.2. 2. The Golden Ratio - The hive has the proportions of a Golden Rectangle. For centuriesmathematicians, artists, and architects have been fascinated by the Golden rectangle, whichis believed to be more “ascetically pleasing” than rectangles whose sides do not have thegolden ratio. The Golden Ratio is found repeatedly throughout nature, in the spiral ofnautilus shells, the base of pine cones, and the distance or length of various human bodyparts. For a more visually enriching presentation of the Golden Ratio and Rectangle, you cancheck out the video:http://www. youtube. com/watch?v fmaVqkR0ZXgMaking a Perone Hive5(www. peronehive. com)
Materials Needed to Build the HiveThe main materials will be: Saw Hammer Nails Measuring tape, chisel, and a square can also be handyUNTREATED WOOD: Most commercial lumber, for preservation purposes, is treated withchemicals that also serve as fungicides and insecticides – substances that can have a big effect onlittle bees.What kind of wood is good?Truthfully, the topic of bees’ wood preferences isn’t a very well-researched area, though Dr. ThomasSeeley, author of Honeybee Democracy mentions that when he was studying wild bee hives in the1970s, he observed that the bees didn’t seem to favor one species of tree over another when it cameto making their home. In the northeastern U. S. , he found hives equally dispersed throughout pines,hickories, oaks, elms, maples, walnuts and ashes.In many parts of the world Red cedar is a traditional choice for bee hives because the oils it containsnaturally help preserve the wood without any type of chemical treatment. Due to our personalenvironmental convictions regarding sustainability, we recommend using species that are native orlocal to your area.Making a Perone Hive6(www. peronehive. com)
The BoxesThis is probably theeasiest part of buildingthe hive and you cango about doing it a fewdifferent ways:Option 1. Using 1x4″ boards for (almost) all the boxesPros: You don’t need too many cuts of wood.Cons: The bees’ part won’t be as united as it potentially can be.To make a box, cut 4 boards so that they are57 cm. long the thickness of the board.(Each one of your boards should be around59. 5 cm long). Assemble them and nailthem together in the following way: (Viewfrom above)In this method you can think of the hive in“eighths:” 3 parts beekeeper’s part, 5 partsbees’ part:So then, using 1″ by 4″ boards you willneed to make eight boxes (3 supers for thebeekeeper’s part and 5 boxes that will beput together to form the bee’s part)Making a Perone Hive7(www. peronehive. com)
Angled view of how to assemble and connect the boardsNote: In order to complete the interior dimensions of the bees’ part of the hive (57 x 57 x 57 cm).you’ll need to make one small box too, a box in which the boards are 1″ x 4. 4 cm. This small boxwill be joined to the other five boxes. You can see the small box, outlined with stripes, in the picturebelow:Making a Perone Hive8(www. peronehive. com)
Option 2. Using 1x4″ boards for the three supers and larger-sized boards for thebees’ partPros: The bees’ part will have less gaps.Cons: You’ll need more than one measurement of board to build the hive body.The most important thing about the bees’ part is that its internal dimensions should be 57 x 57 x 57cm.How you get that 57 x 57 x 57 cm is really up to you. Technically, if you have a board that’s 57some cm. high, you could assemble the bees’ part by building just one really big box.As you can see in this hive below, (location: Island of Chiloe, Chile) the Bees’ Part was assembledusing three boxes.Additional Options for the Hive BodyTransforming the shape of the hive’s interiorOscar Perone is a firm believer in “sacred geometry”, the belief that the universe was createdaccording to a certain geometrical plan and that by copying the shapes nature provides us, wemaintain a connection with the universe. Applying this concept to PermApiculture, Oscar cuts longwooden bars (24 mm x 24 mm, the same cut used for the top bars in the comb grids) in half at 45degree angles and places one each corner of the hive, so the hive goes from having a square interiorMaking a Perone Hive9(www. peronehive. com)
to an octagonal interior. Mr. Perone chooses to do this because 90 degree angles barely exist innature. By making the interior of the hive an octagon we come a bit closer to having a circle, ashape that does reoccur in nature.Notice the corners are in angle.You can see the same has been done here in thecorners of the super.Installing support bars in the Bees’ PartThis is an alternative to placing branches inside the brood area (prior to the bees’ arrival) and also adesign recommendation if you absolutely want/need to move your hives for pollination services orany other reason, a difficult but not impossible task with Perone hives.With a hammer and chisel you can make notches in the hive boxes and then fit the bars inside.Making a Perone Hive10(www. peronehive. com)
The Entrance(s) and the floorThe Entrance(s)The entrance to the hive is 9 mm high by 5 cm wide. You will need to make an entrance in thebottom box of the bees’ part.1. Measure and mark the width and heightof the entrance at the bottom center ofthe board where you wish to make theentrance.2. Using a saw, make small two cuts (nodeeper than 9 mm) on either side of themarks you’ve outlined for theentrance’s width.3. Using a hammer and chisel, remove thewood within the outline and sculpt outthe bees’ entrance.If you wish you can place a second entrance in thelowest super. This is very useful because when thebees first move into the hive they will be a bit farfrom the floor. Having a second entrance near thecomb grid helps young colonies come and go fromthe hive more efficiently while they are in theprocess of growing. Their combs may not reach thevicinity of the floor until the end of their secondyear, at which point they will start using the lowerentrance more often. Entrances can also be closedoff with adobe and reopened as needed.The FloorOnce you’ve got your entrance chisled into the lowest box of the bees’ part, you’re ready to add onthe floor.Basically all you need to do is take the box in which you made the entrance (the lower entrance, ifyou are choosing the two-door hive route) and nail boards to its underside, so that you have a floor.Perone emphasizes the importance of letting one tablet stick out on the entrance side so that theedge of the board forms a landing pad for the bees.If you choose to build the hive mainly out of 1″ by 4″ tablets, you can construct the floor using five1″ x 4″ boards one 1″ by 6″ board, positioning the last board so that it jets out and forms thelanding pad.Making a Perone Hive11(www. peronehive. com)
However, you can use whatever dimensions you find convenient. Below are photos of NicolasCabezas adding the floor onto a hive in Chiloe, Chile.Making a Perone Hive12(www. peronehive. com)
The Comb GridsPerone hives have three comb grids – one on top of the bees’ part, one between the first and secondsuper, and one between the second and third super. In lieu of the roof, you do not need to place acomb over the uppermost super. (Though if you really want to make an additional comb grid, youcan).The 3 comb grids’ positions in the hive, marked in black rectanglesMaking a Perone Hive13(www. peronehive. com)
Comb Grid DimensionsThe most important thing about the comb grid is that the distance from the center of one bar to thecenter of the next bar measures 33 mm. This 33 measurement is key to the temperature control ofthe hive – helping the bees to form a tighter cluster at night and in the winter. The tighter cluster andlack of wide gaps (from which hot air can easily escape) enable the bees to maintain a temperaturethat’s too hot for Varroa to handle. The distance between the centers of the comb may also have amajor influence on the diameter of the cells that bees build; the closer the combs, the smaller thecells.In a Perone hive then, the combgrid bars are 24 mm high by 24mm wide with a distance of 9mm between each one.The comb grid that goes overthe Bees’ Part will consist ofthe frame and 17 bars. Theremaining two comb grids, theones that go in between thesupers, can be made with just16 bars, placing a greaterdistance between the bars,because the bees do not need toworry about heating the upperpart of the hive. This designdetail is also meant to yield aslightly larger honey harvest(than if the upper comb gridshad 17 bars).Bar lengthsMaking a Perone Hive14(www. peronehive. com)
How to Make the Comb GridsYou will need wood that is 24 mm wide by 24 mm high.For one hive you will need 49 bars that are 57 cm long. These are the bars that will go in the interiorof the comb grid. (17 for the comb grid that goes over the Bee’s part and 16 and 16 for the twocomb grids that go in between the supers).For the frames of the comb grid, you will need a total of 12 bars that are around 59. 5 cm (the samelength as the boards used in the boxes).Bars cut for the comb gridTo make the frame arrange four 59. 5 cm longbars just like you arranged the boards for theboxes, and nail them together.Next, take the 57 cm bars. Now, this part isvery important and probably the trickiest partof making the hive: you need to make sure thateach 57 cm bar is spaced 9 mm from itsneighbors.Making a Perone Hive15(www. peronehive. com)
We recommend making a very simple mold out of a fine but raw wood like the one shown below.Spacer with dimensionsEach prong should measure 9 mm. This way you can stick each 57 cm bar between the two prongsof the mold and hold it in position with the proper spacing while you nail one side of the bar to theframe. You can then remove the mold and position the next bar likewise.We recommend positioning and nailing several bars on one side first, before firmly nailing the barsin place on the other side, so that you can make sure the spacing between them is as accurate aspossible.The “Attaching the top-bars directly to the top box in the Bees’ Part” OptionIn this option, you only need to make two comb grids for the Beekeeper’s Part. Instead of making athird comb grid for the Bee’s Part, you can simply nail the top bars inside the uppermost box of theBees’ Part, since you shouldn’t ever have to lift these.The bars have been nailed directly in the top box of the Bees’ PartMaking a Perone Hive16(www. peronehive. com)
Mass-production Mold IdeaIf you plan on building a lot of Perone hives, you may want to consider making a larger-scale moldfor the comb grid like the one below:More substantial mold for Perone comb gridPutting slats inTrying to Make a Perone Hive with Movable Top-BarsWe personally haven’t tried this, because, quite frankly, beekeeping is not as regulated in SouthAmerica as it is in many English-speaking countries, so there hasn’t been a pressing need for us toexplore this area. (“Necessity is the mother of invention” so they say). However, we do realize thatmany of you who are reading this right now, may live in places with a law requiring that your bees’combs be removable. You may also face the possibility of an inspector stopping by and asking youto open up your hive.There are a few beekeepers in the U. S. who have replaced the comb grids with top bars. Since thisis new territory for the Perone hive, we really can’t tell you how well this will or will not work. Wecan only tell you that this is something that a few people are trying out. We do have someobservations though:1. If you are in a position in which removable combs are an issue for you and you wish to trythis method, you should not place any branches or support bars (like the ones shown here)inside the body of the bees’ part. If you do, it will be very difficult to remove the top barswith the comb.2. Make sure that you give the underside of the top bars a lot of texture so that the bees canattach their comb as firmly as possible. You can do this with a chisel.3. If an inspector does ask you to see the brood, handle the top bars very gently. These are bigcombs and they really aren’t meant to be removed from this hive.Unfortunately that’s all we can really say about that for now. As new developments and ideas comein regarding the “Perone Hive removable comb regulations” we will post them in this section ofthe website.Making a Perone Hive17(www. peronehive. com)
The RoofTo decide what kind of roof you want to make for your hive, you want to consider your localclimate conditions.If you live in a place where it’s rather warm or temperate and you receive little rainfall, a flat roof isappropriate.If you live in a place where you get a lot of rain, you probably want to consider a gable roof with anoverhang.If you live in a place with extreme cold, think about making a Warré-style quilt with a gable roof.At any rate here are a few designs to get you thinking.The Original Flat Design:This roof can be built with six 1″ x 4″ boards. Cut the boards so that they are 62 cm. long. Nailthem directly to the top super.Flat Roof Design with OverhangThis design is somewhat reminiscent ofa Langstroth roof and is commonlyused throughout central Chile. A tarp orother impermeable material can beattached to the exterior of the roof ifyou like.Making a Perone Hive18(www. peronehive. com)
Gable RoofThis may take a bit more time to make, but if you’re in a corner of the world where you see morerain than sun, it’s a good option.You can put a cover board or cloth between the top super and the roof if you wish, but most of thetime it shouldn’t be necessary.The exception is if you place a small swarm in the hive; because it is weak it may try to make thebrood in a smaller higher space – like the roof.Making a Gable Roof in ImagesMaking a Perone Hive19(www. peronehive. com)
Making a Perone Hive20(www. peronehive. com)
Perone hives are divided into two parts: the bees' part, where the bees keep their brood and honey reserves, and the beekeeper's part. Once occupied by bees, Perone hives are only opened once a year to harvest honey from the beekeeper's part. The beekeeper makes no other interventions and never enters the bees' part.