Transcription
USER GUIDE
TABLE OF CONTENTSWELCOME TO myCSA . 4LOGGING IN . 5FORGOT PASSWORD . 5FIRST TIME REGISTRATION . 5ACCESS TYPE . 5GETTING STARTED . 6SETTING PREFERENCES . 6CONTACT US . 7DASHBOARD . 8MANAGING YOUR DEVICES . 9MY DEVICES . 9Assigning Devices . 9Note 1 & 2 . 9Action Buttons . 9Removing a Device . 10Request Devices . 10METER READINGS . 11SUBMIT METER READS . 11DOWNLOAD/UPLOAD METER READS . 11METER READ HISTORY . 12PRODUCTS & SUPPLIES . 13CONTRACTED SUPPLIES . 13OTHER CANON PRODUCTS . 16OPEN/CLOSED SUPPLY ORDERS . 19ORDER INQUIRY . 202
AUTO TONER . 21AUTO TONER INFORMATION . 21AUTO TONER LEGEND . 21AUTO TONER PROGRAM DETAILS . 22ADD DEVICES . 23SERVICE . 24REQUEST SERVICE . 24OPEN SERVICE REQUESTS . 26CLOSED SERVICE REQUESTS . 26INVOICE INQUIRY AND PAYMENTS . 27INVOICE INQUIRY - CANON SOLUTIONS AMERICA INVOICES . 27MAKE PAYMENT . 27INVOICE INQUIRY - CANON FINANCIAL SERVICES INVOICES . 29CONTRACT BILLING REPORTS . 29ACCOUNT MANAGEMENT . 30ACCOUNT DEVICES . 30ACCOUNT SUPPORT . 30USER REGISTRATION . 31REGISTRATION OPTIONS . 31SINGLE USER REGISTRATION . 31MULTI USER REGISTRATION . 32USER MANAGEMENT . 32Assigning a Business User . 32Manage User Functions . 33eLEARNING . 343
WELCOME TO myCSASECURE ACCOUNT MANAGEMENT PORTALmyCSA by Canon Solutions America, Inc. provides a simple and convenientsolution to managing your devices. The secure account managementportal is a self-service utility available 24 hours a day, 7 days a week thatprovides an efficient way to handle day-to-day functions.Upon enrollment, you can take advantage of the many features of myCSAsuch as submitting meter reads, placing service requests, orderingcontracted supplies, and retrieving account information. This flexibilityand control provides tremendous value.4
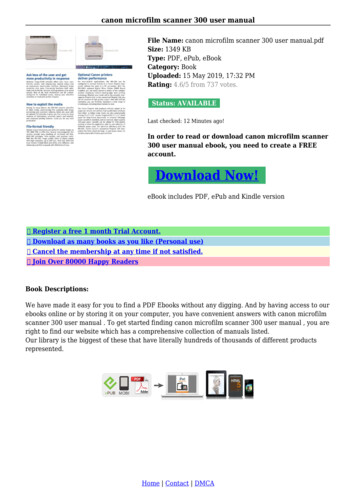
LOGGING INTo login to the myCSA Secure Account Management portal(myCSA), enter your username and password into the formfound on the homepage. If you do not currently have alogin then you will need to create a new user account. ClickCREATE ACCOUNT to register.Forgot PasswordForget your password? Not a problem. Simply click the ‘Forgot Password?’link, fill out the form, and then click RESET PASSWORD.FIRST TIME REGISTRATIONRegistering for a myCSA account is quick and easy. Simply click CREATE ACCOUNT on the login screen to get started. Makesure that you have a valid Serial/Equipment number for a device that you currently manage (You can add more devices after youregister).Access TypemyCSA provides two types of user access: Quick Access (Business User) and Administrator Access (Business Admin). Quick Access gives users features such as device management, submittingmeter reads, ordering supplies and placing service requests. Administrator Access gives users all basic functions as well as full access tomyCSA allowing them to pay invoices, manage users and more.**Please note that this level of access requires additional approval.5
GETTING STARTEDOnce your registration has been approved, you will receive an email notification with your user name and a temporary password.When logging in for the first time, you will be prompted to change your temporary password. Once you have completed the loginprocess, the Home Page will appear.On the left-hand side of the page, you will see Menu options. Simply click on the menu heading to expand the options available.SETTING PREFERENCESUnder Preferences you may update your phone number, change your password and manage notifications that you will receivefrom myCSA.1. Click on the Preferences link in the top right menu.2. Update your preferences as needed and click Save Changes when finished.FEEDBACK FORMThe Feedback form is available on all pages, allowing you to quickly notify myCSA Secure Account Management support of anyinterface-related issues you come across. For all other issues, please use the Account Support page under Account Management.1. Click on the Feedback link in the top right menu to view the form.(The page you are on is automatically selected).2. Fill out the Feedback/Comments field and click Submit when youare finished.6
CONTACT USAt the top of every page you will find a link to the Contact Us form which you can use to submit any general inquiries that youmay have. Contact requests can be submitted to either the myCSA Customer Support team or the Business Administrator thatmanages your account.1. Click the Send To dropdown and choose the recipient of the contact request: Canon Solutions America Customer Support Contact An Administrator Within Your Company2. Use the Serial Number field if your request involves a specific device.3. Enter the topic of your request in the Subject field.4. Enter your message in the Description field.5. Once you’ve completed your message, click Submit to send the request. You will receive a confirmation notice that yourrequest has been submitted. Requests to Customer Support are handled within one business day.7
DASHBOARDThe myCSA Secure Account Management dashboard provides you with an overview of usage associated to the devicesregistered to you. Depending on your user role, it also allows you to quickly access overall customer account-related informationsuch as the device fleet, invoicing, orders and service requests.Usage InformationThe usage information described below is for assigned devices only. Average B&W Copies - Current average number of black & white copies based on previous two meter reads. Average Color Copies - Current average number of color copies based on previous two meter reads. Total Assigned Devices - Total number of devices registered to you. Average Uptime - Average up time for all machines assigned to you that are in working order (not down or serviced).Customer Account Information My Devices - List of devices in your fleet that are assigned to you. Open Invoices - All open invoices that are available to view for your company’s account. Open Orders - All orders currently in process for your company’s account. Open Service Requests - All pending service requests not yet completed for your company’s account.8
MANAGING YOUR DEVICESMy DevicesThe My Devices page lists all devices that are assigned to the user currently logged in. From this page, you may assign additionaldevices, remove devices, update notes, and perform most frequent actions (Order Supplies, Request Service, Enter MeterReads).Assigning Devices1. From the Account Management menu, select My Devices.2. Click Assign Device.All Account Devices not currently assigned to you will be displayed.3. You may reduce the results using one of the search fields and click Search. It is recommended to perform a search byserial number.4. Select the device(s) you would like to manage and click Submit. If the device is not displayed, you may have to request thedevice be added to the account. Refer to the Request Devices instructions.You may also populate the Note 1 and Note 2 fields. These fields are managed by you and may include information suchas location of equipment.5. Once you click Submit, the My Devices page will be displayed.Note 1 & 2The Note 1 & 2 fields are managed by you and may include information such as location of equipment. The information populatedis specific to the device and will be visible to all account users.1. Populate the fields. Information will be saved automatically when you tab out of the field.Action ButtonsYou may perform actions for a device directly from My Devices.1. Order Supplies2. Request Service3. Enter Meter Reads4. Remove Device9
Removing a DeviceIf you no longer wish to manage a device, you may remove the device from your assigned serial numbers. Once a device isremoved from your assigned serial numbers, you will no longer receive notifications for meter readings or be able to place supplyorders for the device.Note: This will not cancel any active maintenance contract and the device will still be available under Account Devices.1. Clickunder Actions for applicable device.Request DevicesIf a machine is not displayed on the Account Devices page or when attempting to Assign Devices, you may request the device beadded.1. From the Account Devices page or Assign Devices page, click Request Devices.2. Enter the serial number for the desired device and click Validate.3. If the serial number is successfully verified, the model and install location will be displayed. Validate this is the correctinformation and click Submit.A request will be sent to the myCSA Web Administrator for review.I f you receive a message stating that the serial number requested can be found in your Account Equipment, please referto steps for Assigning Devices to add the serial number to My Devices.10
METER READINGSSubmit Meter ReadsThe Submit Meter Reads page will display devices assigned to the user account that are within five (5) days of the scheduled duedate for a meter read. You may search for a specific serial number or view all devices that are due.1. From the Meter Readings menu, select Submit Meter Reads.2. Enter the meter read(s) for the applicable device(s) displayed.3. Once all meter reads have been populated, click Submit. If the meter read was submitted successfully, the device will be removed from the view. If you receive a warning, please validate the accuracy of the meter read and click Submitagain. Upon successful submission, the device will be removed from the view. I f you receive an error message, please validate the accuracy of the meter read and clickSubmit again. If you continue to receive an error, you may submit a meter read correctionby clicking on the Edit button. Refer to the Account Support instructions.Download/Upload Meter ReadsDo you have meter reads to submit for multiple devices? Use the Download Meters/Upload Meters function to submit yourmeter reads via spreadsheet. Download the preformatted spreadsheet, fill in your meter reads, and Upload the file. Once theUpload has completed, you will receive a confirmation indicating if the meter reads were successfully captured or if some of themeter reads require your attention.1. From the Submit Meter Reads page, click DownloadMeters. The Canon Pending Meters Report spreadsheetwill download.2. Open the file and enter the meter reads in the white fields.Depending on your version of Excel, you may have tounprotect the spreadsheet. Do not modify the format ofthe spreadsheet.3. Complete and Save the spreadsheet.4. From the Submit Meter Reads page, click Upload Meters.A window will open.5. Click Choose File, select the file and then click Upload.Once the Upload has completed, you will receive a notification.11
Meter Read HistoryOn the Meter Read History page, you may view meter read history for your assigned devices. Additionally, you may submit ameter read correction for the last usage invoice on a device.1. From the Meter Readings menu, select Meter Read History.2. To view the meter history for a specific device, click on theSerial Number. A new window will open displaying the meterread history since the start of the contract.3. To download a device’s meter read history, click on a serialnumber to view the device’s meter read history and clickDownload. The meter read history will download to an Excelspreadsheet.4. To correct the meter reads on the last usage invoice, click theplus sign. The usage invoice details from the last invoicewill be displayed.Note: You may also submit a meter read correction from theAccount Support page.5. Select the check box next to the Invoice Number.6. Fill in the Read Date, Total Read/BW Read and any commentsyou would like to include regarding the correction. Click Submit.7. Upon successful submission, a confirmation number will be displayed.Please use this number for future reference.Download Full Meter Read HistoryDownload meter read history for all devices from the previous two years.12
PRODUCTS & SUPPLIESIn the Products & Supplies section, you may order supplies for devices covered undera supply inclusive maintenance agreement, view open/closed supply orders, submitan inquiry for one of Canon Solutions America product offerings, and view all orders(supply and equipment).Contracted Supplies1. From the Products & Supplies menu, select Order Contract Supplies.2. A list of devices currently assigned to you will be displayed.Note: The device must be assigned to you under My Devices and have an activesupply inclusive contract agreement to order supplies. Refer to theAssigning Devices instructions.3. Locate the device for which supplies are being ordered.4. Click on the Serial Number to begin the order process.Note: If Auto Toner Flag is ENABLED and you still need to order toner, please call our Customer Service Department at1-800-613-2228 for assistance.5. Select quantity from the drop-down menu and click Add To Cart.Note: The quantity listed is based on a one-month supply of toner.13
6. After clicking Add to Cart, the Shopping Cart will be displayed. To remove an item from the cart, click thenext to the item. To revise the quantity, select from the list. To empty the cart, click the Delete Cart button.7. You will be prompted for a meter read if the last meter read on file is within 11 days prior to the current date. Meter Readfields will appear in yellow if required.8. If you need to order supplies for additional devices, click the Add More button. To continue with the order, click the EnterShipping/Billing Information button.14
9. Enter your Billing/Shipping information.10. The install location of the first machine selected will be displayed in the Ship To field. Click the Change Ship To link tochange the ship to location for the entire order.Note: If the supplies need to be shipped to multiple addresses, please create separate orders.11. The Shipping Method will default to standard ground shipping. If you require expedited shipping, contact Customer-Service at 800-613-2228.12. In the Attn Label field enter First Name, Last Name and Phone Number to ensure prompt delivery of your supplies.13. Click Checkout.The Review and Place Order page will appear.14. Review the order for accuracy. If you need to revise the order, click Edit Order. If you are ready to complete the order, click Place Order.15. Upon successful submission of the order a confirmation message will appear and an email with the order number will besent to you, which you should retain for your records.15
Other Canon ProductsPurchase additional products for your business including cameras, lenses, printers, ink, paper and more.Note: Products purchased are billed to your company and invoiced as such.1. From the Product & Supplies menu, click Other Canon Products.2. You can browse available products by using the following options: Shop Best Sellers, Search and Categories.Use the Sort dropdown to change the order of products displayed.16
3. To learn more about a product, click either the More link or the Buy button.4. From the pop-up, you can purchase the product by clicking the Add to Cart button or go directly to your cart and completethe order by clicking the Checkout button.You can also view your cart and/or checkout from the homepage by clicking thelinks in the top right.5. Review your cart before completing your order. To add more products, click the Continue Shopping button. When you’reready to place your order, click the Checkout button.17
6. Choose where you want to ship your order. Click Existing Address to choose from a list of addresses or enter a newaddress by clicking Create New Address.7. If your billing address is the same as your shipping address, leave the checkbox filled. If it’s different, uncheck the box andchoose either Existing Address or Create New Address.8. Click Confirm Request to place your order or click the Back button if you need to make any changes.9. Once your order is placed you’ll see a confirmation screen with a Request Number which you’ll need if you have any issuesregarding your order. This number will also be in the order confirmation email.10. When your order has shipped, we will send you a shipment confirmation email with tracking details.11. For questions regarding your order or if you need to make a return, please have your order request number available andcall 1-855-355-2365 or email us at mycsa@csa.canon.com (include your order request number in the email).For questions regarding product information and support, please visit https://www.usa.canon.com/support.18
Open/Closed Supply OrdersOnce your order has been accepted, the order details will be available on the Open Supply Requests page for orders that havenot closed and Closed Supply Requests for orders that have closed. Tracking Information and Invoice information will be availableonce the order has shipped.1. From the Product & Supplies menu, select Open Supply Requests or Closed Supply Requests.2. Orders that have been created within the last 30 days under the user currently logged in will be displayed.3. Using the search fields, you may search by Related Party Accounts, Request Number, Serial/Equipment Number, Model orfor Orders Placed within 30 days - 18 months.4. To view the Order Details, click the link under Order Information. If the order has been invoiced a link to theinvoice will also be displayed.19
5. Once the order has shipped, a link will be available for the tracking information. This will also be available onthe Order Details page. The link will open the carrier’s website in a new window.Order InquiryOnce your order has been accepted, it may be tracked on the Order Inquiry page.1. From the Product & Supplies menu, select Order Inquiry.2. Using the search fields, you may search by Related Party Accounts, Order/Contract Number, Serial/Equipment Numberor Purchase Order. You may also narrow your search by Order Status.3. The search results will be displayed.4. You can collapse the details for all orders by clicking on theclicking on thenext to the order line.in the column heading or collapse for individual orders by Tracking Information will be displayed if the order has shipped. To view detailed order information, click Order Details.You are able to view your signed documents if there is an electronic signature. If your document is available throughmyCSA, the Reference number will be a hyperlink. All documents are downloaded into a PDF.20
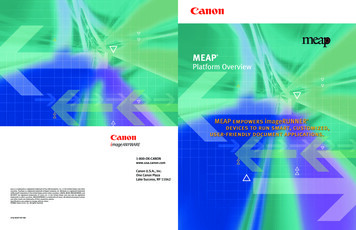
AUTO TONERCertain models of Canon equipment are capable of shipping toner automatically when the machine is low. Two fields have beenadded to the “Order Contract Supplies” screen to indicate if a machine is enrolled in Auto Toner and actively creating new supplyorders.The devices that are enrolled in the Auto Toner program send an alert to us via ImageWARE Remote (IWR) if a toner is low and wewill ship toner automatically.Auto Toner InformationAuto Toner information is visible to all myCSA users. If a user has a machine enrolled in the Auto Toner program and would likeaccess to edit Auto Toner information, please contact us at myCSA@csa.canon.com to request assignment of the Auto Toner role.To access Auto toner information, go to the Order Contracted Supplies page of myCSA. A new column has been added forAuto Toner Flag.Auto Toner LegendAuto Toner Enabled/Active – Machine is enabled for Auto Toner and is activelyreporting low toner alerts through imageWARE Remote. Toner will shipautomatically.Auto Toner Enabled/Inactive – Machine is enabled for Auto Toner and is notactively reporting low toner alerts through imageWARE Remote. Toner will notship automatically. Action needs to be taken to establish communication. Seeinstructions for Communication test.*Auto Toner Enabled/ActiveAuto Toner Enabled/InactiveAuto Toner Not EnabledAuto Toner Not EligibleAuto Toner Not Enabled – Machine is not enabled for Auto Toner and is not actively reporting low toner alerts throughimageWARE Remote. Toner will not ship automatically.Auto Toner Not Eligible – imageWARE Remote is not in an eligible status for Auto Toner. Toner will not ship automatically.21
* In order to perform a Communication Test, please confirm your machine is turned on and connected to your network.Take the following steps to perform a Communication Test and reestablish a communication:1. Press Counter Check or 123 button on machine2. Press Monitoring Services button on screen3. Press Communication Test button on screen4. Press Start Test button on screen If Communication Test was successful, your machine is now communicating and toner will ship when the machineis low on toner If Communication Test was unsuccessful, please contact your IT department and have them confirm the followingimageWARE Remote criteria can be met: Secure Port 443 is open The following URLS are not blocked from outbound internet communication:URLIP AddressSupported Encryption 48.100.72SHA-1 202.248.100.75SHA-2 compliantFailure to reestablish communication could result in running out of toner. If you have any questions, call our CustomerService department at 800-447-0772.Auto Toner Program DetailsAuto Toner program details are available when a user clicks on the Auto Toner Flag next to the serial number. This pop-up windowallows the user to see the details of the device, including the last order that was placed for this device and the ability to view allsupply order history for this serial number.The pop-up also gives the user details about the auto toner flag and status as well as a sample shipping label based on auto tonerinformation populated.22
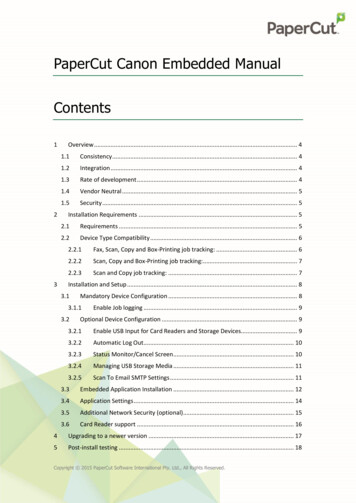
Users With Auto Toner RoleUsers who have been assigned the Auto Toner role can edit contact and shippinginformation via the Edit Details button, as well as add devices to the program.To ensure all of the information you need gets printed onyour Shipping Label, please limit to 20 characters for theAttention Line. We have included a Shipping Label CharacterCounter for your convenience. Please note that the serialnumber will print on the Shipping Label automatically (referto sample shipping label).Add DevicesIf the device is eligible for Auto Toner, but has not been set up, the user has theability to sign up for the Auto Toner program via the “Request to enable this devicewith the Auto Toner program” button1. For a single device – Click on the Auto Toner Flag link next to thecorresponding serial number and complete the form on the pop-up window.Pease allow 24 hours for processing.2. For multiple devices – Download and complete the template on either thepop-up window of a corresponding serial number or the Auto Toner Requestbutton in the top right corner of the page and upload. Please allow 24 hoursfor processing.Please note: Information can be added or changed, but not deleted. If you receive an error when uploading spreadsheet, open file, click on the Errortab to view the error to correct, update original spreadsheet, upload again.To preview the shipping label and additional details about the Auto Toner program, visit the Device Detail page via the My Devicepage. A new tab has been added to the device detail page that allows the users to view the status of the auto toner programalong with a sample of the shipping label. Users also have the ability to edit the Auto Toner details for the serial number.The Device Status section shows the imageWARE remote status and the last communication date. The Device History sectionshows the Supply History for that particular device.This information can also be viewed on Account Devices Export to Excel.23
SERVICERequest ServiceService calls may be placed for devices whether or not they are covered under an active maintenance agreement. If the machineis not covered under an active maintenance agreement, you will be notified of our current service rates.1. From the Service menu, select Request Service.A list of devices currently assigned to you will be displayed.Note: If the device is not assigned to your user account, you can perform a search to locate the device.It is recommended that you use only one search criteria (i.e. Serial Number, Install Location or Related Party Accounts).2. Locate the device for which service is being requested.3. Click on the Serial Number to begin the service request process.The Service Request page will be displayed.4. In the Device Information section, confirm if you would like to select a different Install Location. If Yes is selected, anadditional field will open to select a different install location.5. If the device is not covered under an activemaintenance agreement, the Billing Informationsection will be displayed.24
6. In the Contact Information section, the Contact Name, Contact Phone, and Business Hours will default but may be revised.7. Complete the Room/Floor/Suite field.8. In the Service Request Information section, select the Problem Summary and Problem Description, and include optionalnotes in Additional Instructions.9. Click Continue. The Service Request Review Page will be displayed.10. Click Change to revise the request or Submit to continue.11. Upon successful submission of the service request, a confirmation email will be sent to you with the service-request number for your records.25
Open Service RequestsYou can view open service requests by visiting Open Service Requests under the Service menu. Information such as serialnumber, creation date, and type of request will be displayed. If you need assistance with your service request, please call ourService Department at 1-800-355-1390.1. From the Service menu, select Open Service Requests.Using the search fields, you may search for req
myCSA provides two types of user access: Quick Access (Business User) and Administrator Access (Business Admin). Quick Access gives users features such as device management, submitting meter reads, ordering supplies and placing service requests. Administrator Access gives users all basic functions as well as full access to