Transcription
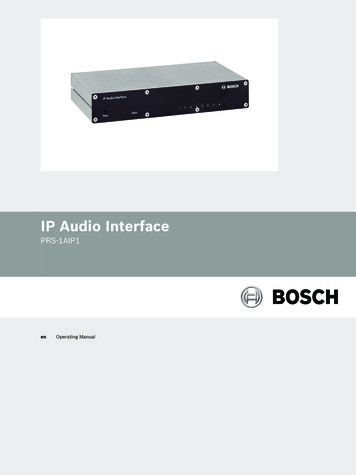
IP Audio InterfacePRS-1AIP1enOperating Manual
IP Audio InterfaceTable of Contents en3Table of contents1Important Safety Instructions52Short information62.1Purpose62.2Digital document62.3Intended audience62.4Related documentation62.5Alerts and notice signs62.6Conversion tables72.7Disclaimers72.7.1Bosch Security Systems B.V.73System overview83.1Application83.2Key product features83.3Package content83.4Product view93.4.1Front view3.4.2Rear view104Installation124.1Mechanical installation124.2Network (step 1)124.3Audio Outputs (step 2)124.4Power supply (step 3)124.5IP address (step 4)124.5.1No DHCP server is found134.6Audio Inputs 1/2134.7Control Inputs134.8Control Outputs135Connection options145.1Unicast (point to point)145.2Multiple st156Configuration166.1Connect to web browser166.2Configuration page176.2.1Network186.2.2Streaming196.2.3Partner Table206.2.4Outgoing Route Table226.2.5Control236.2.6Audio Settings246.2.7Supervision276.2.8Control Input Mapping Table2996.2.9Control Output Mapping Table306.2.10Serial (RS-232/RS-485)316.2.11SNMP32Bosch Security Systems B.V.Operating Manual2013.03 V2.0
4en Table of ContentsIP Audio Interface6.2.12Security336.2.13Default settings346.2.14Configuration view356.2.15Update367Operation397.1Status page397.1.1Control Inputs (1.8)397.1.2Control Outputs (1.8)407.1.3Audio407.1.4Codec407.1.5Power, Fault & Temperature407.1.6Last Caller417.1.7Restart Page418Maintenance429Technical al conditions449.4EMC and Safety452013.03 V2.0 Operating ManualBosch Security Systems B.V.
IP Audio Interface1Important Safety Instructions en5Important Safety InstructionsThe following important safety instructions are applicable to the PRS‑1AIP1 IP Audio Interfaceapparatus.–Read these instructions.–Keep these instructions.–Heed all warnings.–Follow all instructions.–Do not use this apparatus near water.–Only clean the apparatus with a dry cloth.–Do not block any ventilation openings.–Always install the apparatus according to Bosch installation instructions.–Do not install the apparatus near any heat sources, for example: radiators, heat registers,stoves or other apparatus (including amplifiers) that generate heat.–Protect the power supply cord from damage. For example: being walked on, pinched nearthe plug or from stress at the point where the power supply cord exits from theapparatus.–Only use the apparatus with attachments and accessories supplied or recommended byBosch.–This apparatus should only be serviced by qualified service personnel.–If the apparatus has been damaged, servicing will be required. This includes damagecaused by: liquid spillage or objects falling into the apparatus and/or the apparatus beingexposed to rain or moisture. The apparatus must also be serviced if it does not functionnormally, it has been dropped and/or if there is damage to the power supply cord andplug.–To prevent a risk of electrical shock, do not attempt to service the apparatus yourself.Opening or removing the apparatus covers may expose you to dangerous voltages orother hazards.Bosch Security Systems B.V.Operating Manual2013.03 V2.0
6en Short informationIP Audio Interface2Short information2.1PurposeThe purpose of this manual is to provide information required for installing, configuring,operating and maintaining the PRS‑1AIP1 IP Audio Interface.2.2Digital documentThis manual is also available as a digital document in the Adobe Portable Document Format(PDF).2.3Intended audienceThis manual is intended for installers and users of a PRS‑1AIP1 IP Audio Interface.2.4Related documentationPlena Voice Alarm System Operating Manual and Praesideo Public Address and EmergencySound System Installation and User Instruction manual.2.5Alerts and notice signsThe following alerts and notices are used in this manual. The alert type is closely related to theeffect that may be caused if it is not observed.Caution!!The equipment or the property can be damaged, or persons can be lightly injured if the alertis not observed.In this manual a ‘notice’ is used to provide tips, or to give some extra information:Notice!Alert containing additional information. Usually, not observing a ‘notice’ does not result indamage to the equipment or personal injuries.2013.03 V2.0 Operating ManualBosch Security Systems B.V.
IP Audio Interface2.6Short information en7Conversion tablesIn this manual, SI units are used to express lengths, masses, temperatures, etc. These can beconverted to non-metric units using the following information.2.72.7.1Non-metric unitSI unitSI unitNon-metric unit1 in 25.4 mm1 mm 0.03937 in1 in 2.54 cm1 cm 0.3937 in1 ft 0.3048 m1m 3.281 ft1 mi 1.609 km1 km 0.622 miNon-metric unitSI unitSI unitNon-metric unit1 lb 0.4536 kg1 kg 2.2046 lbNon-metric unitSI unitSI unitNon-metric unit1 psi 68.95 hPa1 hPa ( 1 mbar) 0.0145 psiDisclaimersBosch Security Systems B.V.Although every effort has been made to ensure the information and data contained in thesemanual is correct, no rights can be derived from the contents.Bosch Security Systems B.V. disclaim all warranties with regard to the information provided inthese instructions.In no event shall Bosch Security Systems B.V. be liable for any special, indirect orconsequential damages whatsoever resulting from loss of use, data or profits, whether inaction of contract, negligence or other tortuous action, arising out of or in connection with theuse of the information provided in these Installation and User Instructions.Bosch Security Systems B.V.Operating Manual2013.03 V2.0
8en System overviewIP Audio Interface3System overview3.1ApplicationThe PRS‑1AIP1 IP Audio Interface is a universal, Internet Protocol based audio devicesupporting VoIP and Audio over IP applications. It is used for bridging audio and contactclosures over long distance LAN and WAN networks. It extends and interfaces to e.g.Praesideo and non network based traditional public address systems, like Plena, without theneed for a PC during operation.The device has analog audio line inputs and line outputs for easy interfacing, it has optionalpilot tone supervision and generation for emergency sound purposes. One audio input can beswitched to microphone sensitivity with built‑in microphone supervision.Control inputs and outputs can be used to set up an audio connection to start a remote call,but also to pass remote fault events to e.g. a system controller. Also, the control inputs offercable and connection supervision, and can activate (remote) control outputs.3.2Key product featuresSome key product features are:3.3–Digital audio transmission between public address systems on remote locations–Designed to comply to international standards for emergency sound systems–Supervised control inputs and control outputs–A single unit can act as transmitter, receiver or both–Installation and configuration via standard web browser–Support for re‑broadcasting to extend the system size–Built‑in configurable audio delayPackage contentThe package contains:2013.03 V2.0 –PRS‑1AIP1 IP Audio Interface–CD with software and Installation and User Instructions–Power supply for universal input voltage–Screw block terminals (4 x 8 pin, 6 x 3 pin)–Label stickers for screw block terminalsOperating ManualBosch Security Systems B.V.
IP Audio InterfaceSystem overview en3.4Product view3.4.1Front view9Shows the controls and indicators on the front panel.123Figure 3.1: Front view1Reset button–Press this recessed button briefly (1.3 seconds) toreset and start-up the device–If you press it until the red LED (2) flashes (between 5and 10 seconds) the device will be reset to factorydefaults, and configuration settings will be lost. Thenetwork settings will not be lost2Green and red statusThe status LEDs show the device status. The followingLEDsmodes exist:Normal operation (power ON and no Errors)–Green: ON–Red: OFFSearching IP address–Green flashes five times, pauses four times, repeating–Red flashes continuouslyNo application software loaded/Reset status–Green: ON–Red: flashesError detection–Red: ON–Green flashes five times: corrupt application loaded orIP address conflict–Green flashes three times: network hardware couldnot be initialized or a corrupt MAC address3Green LEDs (1.8) forThe status LEDs correspond to the control inputs with thecontrol input statussame number.–All ON: searching for IP address or all inputs activated–All OFF: IP address found and network connectionestablished and all inputs deactivated–One or more ON: one or more inputs activated–One or more slow flashing: open input circuit(s), whilesupervision is enabled–One or more fast flashing: shorted input circuit(s),while supervision is enabledBosch Security Systems B.V.Operating Manual2013.03 V2.0
10en System overview3.4.2IP Audio InterfaceRear viewShows the connections on the rear panel.41868 15877110391121413151 33161117Figure 3.2: Rear view4Control Outputs 1.4Default: open contacts (voltage free relaycontact).5Control Outputs 5.8–1-2: CO1–3-4: CO2–5-6: CO3–7-8: CO4Default: open contacts (voltage free relaycontact).6Control Inputs 1.4–1-2: CO5–3-4: CO6–5-6: CO7–7-8: CO8Default: open contacts (non isolated, 0 isconnected to ground).7Control Inputs 5.8 and Fault Relay out–1-2: CI1–3-4: CI2–5-6: CI3–7-8: CI4Default: open contacts (non isolated,shared 0 is connected to ground, internalpull-up current source).–1-2: CI5–3-4: CI6–5-6: CI7–7-8: CI8Fault Relay outDefault (no fault): open contacts (voltagefree relay contact).–8Audio Output 27-8: Fault contactBalanced, line level with pilot tonegeneration.2013.03 V2.0 Operating Manual–1: -–2: ground–3: Bosch Security Systems B.V.
IP Audio InterfaceSystem overview en910Audio Output 111Balanced, line level.Audio Input 2–1: -–2: ground–3: Balanced, line level with pilot tonedetection.11Audio Input 1–1: -–2: ground–3: Balanced, microphone/line level,microphone supervision.–1: -–2: ground–3: 12RS 232 serial portD-Sub, 9-pole male.13Ethernet 1RJ45 for network connection 10/100Mbps with status indicators.–Green ON: network connectionestablished–Green OFF: no network connection–Yellow ON/flashing: datacommunication–1415Yellow OFF: no data communicationEthernet 2 (back-up connection forRJ45 for network connection 10/100redundancy)Mbps with indicators as for Ethernet 1.RS 485 bus–1: A (TxD-/RxD-)–2: C (reference). Connected via a100 ohm resistor to the ground,which is connected to the negativeinput terminal of the power supply–1617Bosch Security Systems B.V.Back-up power supply inputMains power supply inputOperating Manual3: B (TxD /RxD )With battery under-voltage detection.–1: –2, 3: groundWith mains power failure detection.–Centre: –Ring: ground2013.03 V2.0
12en Installation4IP Audio InterfaceInstallationThe following installation sections guide you through the hardware and network installationprocess. Refer to the connection and indicator details in Product view, page 9. The button,indicator and connector numbers are indicated as (x).4.1Mechanical installationThe IP Audio Interface device can be either built-in a 19”‑frame using a 19”‑mounting frame orshelf (not included) or used stand alone.4.2Network (step 1)Plug a standard (straight) network cable into the network port (13) of the IP Audio Interfaceand the other end into a switch of your network. Use a crossover network cable for a directconnection to your PC.4.3Audio Outputs (step 2)Connect the Audio Output 1 (9) and/or 2 (8) to the amplifier or mixer input(s). Audio Output 2also generates a pilot tone.When powered up for the first time, the device will announce its IP address in English.Connect an amplifier with loudspeaker or headphone to the device in order to hear theannouncement. Keep a pen and paper ready to write down the IP address.4.4Power supply (step 3)Connect the power supply to the power supply input connector (17). Optionally connect theback-up power supply to the power supply input connector (16).The device will start-up andthe eight green Control I/O LEDs (3) go ON and the green and red status LEDs (2) flashalternating.Note that the device will be powered from the voltage source with the highest voltage. Makesure that a battery back-up power supply has a lower voltage than the main power supply toavoid that the battery is drained during normal operation.4.5IP address (step 4)The IP Audio Interface will search for a DHCP (Dynamic Host Configuration Protocol) server toget an IP (Internet Protocol) address. As soon as a valid and free IP address is found, it will beannounced via the Audio Outputs 1 and 2 (9 and 8). Write down the IP address. Example:192.168.0.12 (Voice: one nine two ).The eight green Control I/O LEDs (3) and red status LED (2) go OFF and the green status LED(2) switches ON.The IP Audio Interface is now ready for configuration, but it is recommended to set a static IPaddress, Connect to web browser, page 16.2013.03 V2.0 Operating ManualBosch Security Systems B.V.
IP Audio InterfaceInstallation en13No DHCP server is found4.5.1If no DHCP server is found then the built‑in IPzator function will search the network for a freeIP address. This can take up to 5 minutes.If the IP address is not announced, check:–If the green LED on the network port used (13 or 14) is ON. When OFF, check yournetwork cabling.–The green status LED (2). When OFF, check the power supply cabling.If the device still fails, revert to the factory default settings by pressing the reset button (1)between 5 and 10 seconds while it is powered and repeat the previous steps 1 up to 4.Audio Inputs 1/24.6Connect the Audio Inputs 1 and 2 (11 and 10).Both balanced Audio Input 1 and 2 are independent from each other, but will always be routedtogether. Audio Input 1 is selectable between microphone and line level. If set to microphonesensitivity, it can also do microphone presence supervision.Audio Input 2 is a line level input. It can detect a 20 kHz pilot‑tone which is generated by theconnected audio source to supervise the connection.Control Inputs4.7Connect the Control Inputs 1.8 (6 and 7) that are needed.The Control Inputs 1.8 can be supervised (if configured). Two 10 kohm resistors have to beadded to each Control Input to enable supervision. The resistors should be mounted close tothe switch to make it possible for the device to supervise the cable between the switch andthe input connector. The input detects a 10 kohm resistance if the switch is closed and a20 kohm resistance if the switch is open. This way shorted and open circuits are detected as afault situation. In case supervision is disabled for a Control Input, the resistors can be omittedand the switch can be wired directly to the input connector.10 k10 kFigure 4.1: Supervised Control Input contactsCaution!!4.8Do not connect a voltage or current source to the Control Input contacts.Control OutputsConnect the Control Outputs 1.8 (4 and 5) that are needed as described in Product view, page9.Bosch Security Systems B.V.Operating Manual2013.03 V2.0
14en Connection options5IP Audio InterfaceConnection optionsThis section illustrates how the IP Audio Interface can be used. A data stream can be sent andreceived by the IP Audio Interface. Different connection methods can be used depending onhow the device is configured.5.1Unicast (point to point)Unicast means: a single data stream to a single predefined receiver device (Partner) in a LANor WAN. A typical partner IP address: 192.168.100.501Figure 5.1: Unicast example (1 LAN/WAN)5.2Multiple UnicastMultiple Unicast means multiple data streams to multiple receiver devices (Partners) in a LANor WAN. Typical partner IP addresses: 192.168.100.50, 192.168.100.51, 192.168.100.52, etc.1XFigure 5.2: Multiple Unicast example (1 LAN/WAN)5.3BroadcastBroadcast means: a single data stream to all receiver devices (Partners) in a LAN. A typicalpartner IP address: 192.168.100.255 configured in the transmitter as Partner address. Then allpartners with addresses starting with 192.168.100 receive this stream. Typically, routers in aWAN do not support Broadcast mode.1Figure 5.3: Broadcast example (1 LAN/WAN)2013.03 V2.0 Operating ManualBosch Security Systems B.V.
IP Audio Interface5.4Connection options en15MulticastMulticast means: predefined receiver devices (Partners) each receive a single data stream in aLAN or WAN. Typical partner IP addresses between: 224.0.0.1 to 239.255.255.255.1Figure 5.4: Multicasting example (1 LAN/WAN)5.5Re-broadcastRe-broadcast means: a local device receives a data stream from a remote device and resendsit to other devices (Partners) in a LAN or WAN.3212Figure 5.5: Re-broadcasting (1 Internet, 2 Router, 3 LAN/WAN)Bosch Security Systems B.V.Operating Manual2013.03 V2.0
16en Configuration6IP Audio InterfaceConfigurationThe IP Audio Interface uses dynamic HTML web pages for configuration and status informationmonitoring. Configuration parameters are stored in the IP Audio Interface via the webbrowser.Caution!!6.1Your configuration parameters will be lost if the device is reset to factory default settings, seeFront view, page 9.Connect to web browserOpen a web browser on a PC that is connected to the same network as the IP Audio Interface.IP address.Enter the announced IP address of the IP Audio Interface in the web browser address (URL)box, see IP address (step 4), page 12.The built‑in web server generates the STATUS page in the web browser by default. If not,repeat the installation process. The status screen is updated dynamically. The currentimplementation of this feature does not support all web browsers, for example, GoogleChrome.Figure 6.1: Status screen example2013.03 V2.0 Operating ManualBosch Security Systems B.V.
IP Audio Interface6.2Configuration en17Configuration pageClick CONFIGURATION on top of the page. The Network menu on the left side is opened as adefault. Here you can set the parameters for the:Network (default page)–Streaming–Partner Table–Outgoing Route Table–ControlAudio SettingsSupervisionControl I/O mapping–Control Input Mapping Table–Control Output Mapping TableSerialSNMPSecurityDefault SettingsFigure 6.2: Configuration (Network) screen exampleBosch Security Systems B.V.Operating Manual2013.03 V2.0
18en Configuration6.2.1IP Audio InterfaceNetworkUnit nameDefault: clearEnter a name for the device. This name will be displayed in the title of the web browserapplication page.IP addressDefault: 0.0.0.0You can enter the 4 values of the announced IP address to create a static IP address, or askyour system administrator for a valid IP address and enter it here. Or you can enter e.g.192.168.0.12 for an internal LAN.Subnet maskDefault: 0.0.0.0You can also enter the 4 values of the desired static IP address, or enter 255.255.255.0 for a Cclass network (standard).Default gatewayDefault: 0.0.0.0 (no gateway)You can also enter the 4 values of the desired Gateway IP address, or 192.168.0.1 for aGateway in a LAN.Notice!The Gateway has to be set only when connecting to other devices over a WAN through arouter.Type of Service / DSCPDefault value: 0Differentiated Service Code Point (DSCP) is used for audio streaming. Thissupersedes the IP4 Type of Service (ToS) value and uses the same byte. Valid values are 0 63. Check for DSCP services available in your network to set this value. The recommendedDSCP for voice traffic is the value 46 for Expedited Forwarding (EF).Use SonicIPDefault: YesThe device will announce its IP address over the Audio Outputs 1 and 2. If you select NO, thenthe device will not announce its IP address. This way start up is faster.Submit / Cancel buttonSubmit saves the set values, restarts the device and returns back to the last screen. Cancelrestores the last submitted values.2013.03 V2.0 Operating ManualBosch Security Systems B.V.
IP Audio Interface6.2.2Configuration en19StreamingAudio is transmitted using RTP over UDP. This requires no special configuration other thandefining the UDP ports to be used for the communication.Figure 6.3: Steaming screen (default UDP settings)UDP Receiver PortDefault: 3030You can also select 0 if the port is disabled or enter a different number for receiving anRTP/UDP stream, between 0 (disabled) and 65535.UDP Tx Source PortDefault: 0This setting is only used with a custom software application. The default number 0 causes arandom port to be used. Enter a specific source port number when sending an RTP/UDPstream. Enter a value between 0 and 65535.Back channelDefault: ONThe Backward Signal Data (Back) channel may be turned ON or OFF. Set to ON if audio orcontrol data should be send back to the transmitter device.Back channel periodDefault: 0 x 100 millisecondsThe Back channel period determines the rate at which control data is sent back to the audiotransmitter within the range 100 ms to 4 s. The audio transmitter will then update the controloutput at a rate between 300 ms and 12 s.Bosch Security Systems B.V.Operating Manual2013.03 V2.0
20en ConfigurationIP Audio InterfaceSubmit / Cancel buttonSubmit saves the set values, restarts the device and returns back to the last screen. Cancelrestores the last submitted values.6.2.3Partner TableThe Partner Table is used to set the route parameters of up to 16 remote IP Audio Interfacedevices (Partners).Figure 6.4: Partner Table screen (default)Ptnr (Partner)The first row, Un-known, is to configure the behavior of the receiving device for unknownpartners, i.e. partners that are not identified by their IP address. Then the table continues with16 partner entries. A multicast group must always be known, so multicast addresses arealways compared with entries in the table. Unknown partners cannot have a priority assignedand cannot be activated by a Control Input.Pri (Priority)In this column enter the Priority of the incoming audio streams from partners (0 - 255). Thestream with the highest priority (highest number) is accepted. Existing streams with a lowerpriority are overridden, even if selected by a Control Input. Full duplex connections areconsidered to be permanent one-to-one connections for which Priority settings are ignored.2013.03 V2.0 Operating ManualBosch Security Systems B.V.
Configuration enIP Audio Interface21CI (Control Input)Enter the number of the Control Input (1 - 8) of the receiver that will accept the audio streamfrom this partner. If the transmitting partner is streaming (always) to this receiver, thisselection determines the accepted audio stream unless it is overruled by a higher prioritystream. The default 0 means that a stream from this partner is not selected by a Control Input.Full duplex connections are considered to be permanent one-to-one connections for whichControl Input selections are ignored.Blk Inc (Block Incoming)Default: uncheckedCheck the check box to block the incoming data from the respective partner. Priority andControl Input settings are ignored. The option to block individual partners is only available ifthe unknown partner is already blocked.Spr Ply (Suppress Play)Default: uncheckedCheck the check box to suppress local playback of audio. This mode is used when rebroadcasting the incoming stream to other devices.Re brd (Re-broadcast)Default: UncheckedCheck the check box to allow for re-broadcasting to this IP address.Sup vse (Supervise)Check the checkbox to supervise the connection between the receiver and this partner. Evenin case no audio stream is present the connection will be polled on a regular basis using anICMP message type 1 (ping). The replies will be counted and if 3 consecutive pings are notanswered the partner device will be assumed to be off-line and the fault relay is activated.Pings may also be lost due to network congestion but if the network connection is so bad that3 consecutive replies are lost this condition should also be investigated. If all superviseddevices come back on line then the fault relay will be cleared.IP addressDefault: 0.0.0.0You can enter the IP address of the partner device here.PortDefault: 3030You can enter the port number of the partner device here, between 0 and 65535.Submit / Cancel buttonSubmit saves the set values, restarts the device and returns back to the last screen. Cancelrestores the last submitted values.Bosch Security Systems B.V.Operating Manual2013.03 V2.0
22en Configuration6.2.4IP Audio InterfaceOutgoing Route TableThe Outgoing Route Table is used to set the data stream for up to 16 remote IP Audio Interfacedevices (Partners).Figure 6.5: Outgoing Route Table screen (default)Configure the streaming depending on the following events:Stream AlwaysDefault: uncheckedCheck the check box to automatically stream to the selected partners (1.16) on start-up.Instead of being always on, the stream can be activated on one or more Control Inputs or ondetection of an incoming Pilot Tone. Please note that this activation is edge triggered and notlevel triggered, so streaming starts when one or more Control Inputs become active or when aPilot‑Tone is detected, but the streaming stops as soon as one of them is deactivated.Stream on Control Input 1-8Default: uncheckedCheck the check box to stream to the selected partner (1.16) on activation of a Control Input(1.8).Stream on Pilot ToneDefault: uncheckedCheck the check box to stream to the selected partner (1.16) on detectionof a 20 kHz Pilot Tone on Audio Input 2.Submit / Cancel buttonSubmit saves the set values, restarts the device and returns back to the last screen. Cancelrestores the last submitted values.2013.03 V2.0 Operating ManualBosch Security Systems B.V.
IP Audio Interface6.2.5Configuration en23ControlThe Control menu is used to set the port on which the command data stream is received.Figure 6.6: Control screen (default)UDP command portDefault: 12301This sets the port through which the device will receive commands via UDP. To disable thisport, set to 0.Web server portDefault: 0This sets the port through which the web server of the device can be reached. If set to 0, thedefault port 80 is used.Submit / Cancel buttonSubmit saves the set values, restarts the device and returns back to the last screen. Cancelrestores the last submitted values.Bosch Security Systems B.V.Operating Manual2013.03 V2.0
24en Configuration6.2.6IP Audio InterfaceAudio SettingsThe Audio Settings are used to set all available audio input and output parameters.Figure 6.7: Audio Settings screen exampleAudio inputsDefault: In 2, LineFor dual channel mode (MPEG encoding only), select input In 1 In 2, Line.To use a microphone, select In 1, Microphone. If a microphone input is selected, you can setthe microphone type to Dynamic or Condenser. The phantom power supply for the microphoneis automatically switched on when Condenser is selected.Microphone supervisionDefault: unchecked (disabled)You can check the Supervision check box to enable microphone supervision.Supervision of dynamic microphones is by measuring its impedance, supervision of acondenser microphone is by measuring its current consumption. When a supervisedmicrophone gets disconnected or becomes defect a fault event is generated. This is visible onthe STATUS page, see Status page, page 39.Microphone gainDefault: 0 dBYou can adjust the gain of the microphone input (0.22.5 dB) to adapt it to themicrophone that is used.2013.03 V2.0 Operating ManualBosch Security Systems B.V.
Configuration enIP Audio Interface25Line gainDefault: 0 dBYou can adjust the gain of the line input (0.22.5 dB) to adapt it to the signal level of thesource.Loop Input to OutputDefault: NoYou can select Yes to route the Audio Input signal immediately to the local Audio Output. Thisis typically done for testing. Acoustical feedback (howling) may occur if a microphone and aloudspeaker are connected.Pilot tone super. (Pilot Tone Supervision)Default: NoWhen Pilot tone supervision is enabled, the presence of a 20 kHz pilot tone on audio input 2 issupervised and the result is shown on the status page. That status is also incorporated in theheader of any audio stream transmitted. A receiving device can use this information to controlits own pilot tone output.By regenerating the pilot tone at the output of the receiving device, a pilot tone can be“transferred” from the input of the transmitter to the output of the receiver, even though theaudio channel itself does not have a 20 kHz audio bandwidth.Audio Output–Output levelDefault: 0 dBYou can select the output signal level (0.-70 dB) here. Audio Output 2 may have a fixedlevel 20 kHz pilot‑tone signal.–Output delayDefault: 64 msThe default 64 ms is a practical minimum value. You can change this audio buffer sizesetting to adjust the delay before the received audio stream is played. A too low valuemay cause dropouts in the audio signal depending on the quality of the networkconnection. Higher delay values can be used with the purpose of acoustically aligningloudspeakers connected to different IP Audio Interfaces, e.g. in tunnel applications.The maximum delay that can be selected depends on the chosen audio coding format andwhether the audio stream is full duplex or not. A more efficient coding scheme, lowersample rate and half duplex mode allows for a longer delay. For G.711 (u-Law or A-Law)at 8 kHz sampling rate and half-duplex, the delay can be set up to approximately 8 s.–Output levelDefault: 0 dBYou can select the output signal level (0.-70 dB) here. Audio Output 2 may have a fixedlevel 20 kHz pilot‑tone signal.–Output delayDefault: 64 msThe default 64 ms is a practical minimum value. You can change this audio buffer sizesetting to adjust the delay before the received audio stream is played. A too low valuemay cause dropouts in the audio signal depending on the quality of the networkconnection. Higher delay values can be used with the purpose of acoustically aligningloudspeakers connected to different IP
The PRS‑1AIP1 IP Audio Interface is a universal, Internet Protocol based audio device supporting VoIP and Audio over IP applications. It is used for bridging audio and contact closures over long distance LAN and WAN networks. It extends and interfaces to e.g. Praesideo and non network based traditional public address systems, like Plena .