Transcription
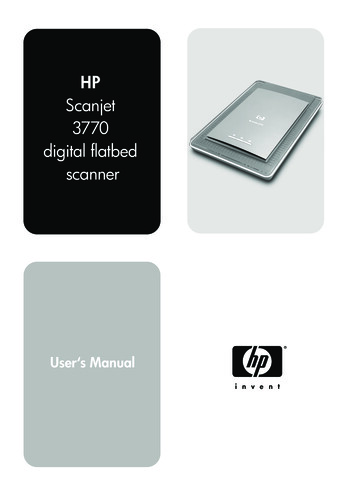
HPScanjet3770digital flatbedscannerUser‘s Manual
HP Scanjet 3770 digital flatbed scannerUser's Manual
Copyright and license 2004 Copyright Hewlett-PackardDevelopment Company, L.P.Reproduction, adaptation, ortranslation without prior writtenpermission is prohibited, except asallowed under the copyright laws.The information contained herein issubject to change without notice. Theonly warranties for HP products andservices are set forth in the expresswarranty statements accompanyingsuch products and services. Nothingherein should be construed asconstituting an additional warranty. HPshall not be liable for technical oreditorial errors or omissions containedherein.Trademark creditsMicrosoft and Windows are registeredtrademarks of Microsoft Corporation.All other product names mentionedherein may be trademarks of theirrespective companies.) is a U.S.Energy Star (registered service mark of the UnitedStates Environmental ProtectionAgency. Microsoft and Windows areregistered trademarks of MicrosoftCorporation. All other product namesmentioned herein may be trademarksof their respective companies.
Contents1234User's ManualHow to use the scanner.2Scanner parts and accessories.2Overview of the HP software.2Scanner buttons and accessories overview.3Scanning overview.3Scan pictures and documents.4Scan multiple pictures with one scan.5Scan slides and negatives.6Print copies.8E-mail scanned pictures.9E-mail scanned documents.10Change settings.10Care and maintenance.10Troubleshooting.12Frequently asked questions.12Scanner installation or setup issues.13Scanner initialization and hardware issues.14Scanner has stopped working properly.15Transparent materials adapter (TMA) issues.16Resolve issues with slides or negatives.17Uninstall the software.18Additional troubleshooting information.18Customer support.19Accessibility website options .19HP website .19Support process .19Phone support in the United States.20Phone support in Europe, Middle East, and Africa.20Other phone support worldwide.22Product specifications.24Scanner specifications.24Transparent materials adapter (TMA) specifications.24Environmental specifications.251
1How to use the scannerThis manual describes the operation of the HP Scanjet 3770 digital flatbedscanner, including how to use the scanner, customer support, and installationtroubleshooting. For installation procedures, see the Setup Poster. For scanningsoftware procedures, see the HP Image Zone on-screen help.This section presents an overview of the scanner and information about how touse and care for the scanner.Note If you have installed HP Windows software from CD 2, the softwarenames in the documentation differ as follows from what was installed:1) Your software is named HP Photo & Imaging instead of HP Image Zone;2) Your picture management software is called HP Photo & Imaging Galleryinstead of HP Image Zone. There may be other terminology differencesbetween the software you installed and the documentation.Scanner parts and accessoriesScanner with built-in transparent materials adapter (TMA)Overview of the HP software 2The HP Director provides easy access to the software applications, defaultsettings, status, and on-screen help for your HP device. By using the HPDirector, you can scan various types of originals (pictures, slides, negatives,and documents), make copies, view and print images, go to the HP Shoppingwebsite, and update your HP software.The HP Image Zone provides tools for managing your still photos, scannedimages, and video clips. You can easily edit and print your images, use themin various projects, and share them with family and friends.Using the HP Scanning software, you can scan items such as pictures,slides, negatives, and documents, and then save them or send them to aHP Scanjet 3770 digital flatbed scanner
How to use the scanner destination of your choice (such as a software application or file). Thesoftware gives you the option of previewing images before the final scantakes place. While previewing, you can adjust the image to achieve the finaleffect that you want. The software also allows you to configure scan settings.The HP Copy software sends scanned images directly to your printer.For more information on the HP software, see the HP Director on–screen help. Toaccess the on–screen help in the HP Director:1Do one of the following:–––2On the Windows desktop, double-click the HP Director icon ( ).In the system tray at the far right of the Windows taskbar, double-click theHP Digital Imaging Monitor icon.On the taskbar, click Start, point to Programs or All Programs, point toHP, and then click Director.If you have installed more than one HP device, click one in the Select Devicelist.The HP Director displays only the buttons that are appropriate for the selecteddevice.3Click the Help button.Scanner buttons and accessories overviewFeatureDescriptionScanScans pictures and documents from thescanner glass, and scans slides and negativesfrom the TMA.CopyScans the item from the scanner glass to aprinter to make copies.HP InstantShareScans the item and allows you to send it in email, create an album on the HP Photowebsite, or order high-quality prints. (Not allservices are available in all locations.)Transparent materials adapter (TMA)You can use the transparent materials adapter (TMA) to scan 35 mm slides ornegatives.For more information about the TMA, see Scan slides and negatives.Scanning overviewNote Macintosh users, see the HP Image Zone software on-screen help forinformation about scanning procedures.User's Manual3
Chapter 1You can start scanning in one of three ways: Scan from the buttons on the scanner lidThe buttons on the scanner lid provide shortcuts to frequently used scanningfunctions. Descriptions for using the scanner-lid buttons are located in thismanual. Scan from the HP DirectorScan from the HP Director software when you want more control of yourscan. The default Preview setting is on for scans initiated from the HPDirector, which gives you more controls to customize the scan.To start the HP Director software, double-click the HP Director icon ( ) onthe desktop. The HP Director window appears. From this window you canscan, view, or print images, use on-screen help, and more.If the HP Director icon is not on the desktop, on the Start menu, point toPrograms or All Programs, point to HP, and then click HP Director. Scan from other applicationsYou can bring an image directly into an open file in one of your applications ifthe application is TWAIN- or WIA-compliant. Generally, the application iscompliant if it has a command such as Acquire, Scan, or Import NewObject. If you are unsure whether the application is compliant or what theoption is, see the documentation for that application.Scan pictures and documentsPress the Scan () button to scan pictures and documents.Note You can also use the Scan ( ) button to scan slides or negatives from theTMA. For more information, see Scan slides and negatives.1234Place the original face down in the upper right hand corner on the glass asshown by the corner reference mark on the scanner.Close the scanner lid.Press the Scan button ( ) on the scanner lid.HP Scanjet 3770 digital flatbed scanner
How to use the scanner4In the dialog box that appears, select:––5Picture if you are scanning a photograph, a graphic, slides, or negatives.The default setting for scanned pictures is to appear in the HP ImageZone.Document if you are scanning text, both text and graphics, or any textthat you want to edit later. Scanned documents appear in the specifieddestination.Follow the instructions on the screen to finish scanning.Note Macintosh users, see the HP Image Zone software on-screen Help forinformation about scanning procedures.To simplify scanning, the software does not prompt you to preview the picturewhen you use the Scan button ( ) on the scanner lid. If you want to preview thescanned picture, select the Show Preview check box on the screen, or begin thescan from the HP Director.The HP Scanning software can automatically correct your pictures or restore fadedcolors in old pictures. The preview setting must be on to use this feature. To turnpicture correction on or off, select Automatically Correct Photos in the Basicmenu of the HP Scanning software, and then select the Restore Faded Colorcheck box.Scan multiple pictures with one scanYou can scan multiple pictures at the same time from the scanner glass.1Place the original pictures in each corner of the scanner glass with at least 1/4inch (6.35 mm) space between the pictures, and then close the scanner lid.Tip After scanning the pictures, you can rotate the scanned pictures in theHP Image Zone software.23Press the Scan button ( ) on the scanner lid.Follow the instructions on the screen to finish scanning.Each scanned picture appears in the HP Image Zone software as a separatepicture.User's Manual5
Chapter 1Tip Use the Scan ( ) button on the scanner lid to scan multiple pictures withone scan. The Preview setting for the Scan button ( ) must be set to off,which is the default setting. To change the preview settings for the Scanbutton ( ) or HP Director, see Change settings. For scans from the HPDirector, the Preview setting is on by default.Scan slides and negativesTips for scanning slides and negatives To scan a transparency that was used for an overhead projector, place thetransparency on the scanner glass, place a white sheet of paper on top of thetransparency, and then scan as usual.When scanning a 35 mm slide or negative, the scanner softwareautomatically enlarges the image to approximately 4 x 6 inches (10 x 15 cm).If you want the final image to be larger or smaller, use the Resize tool in thescanner software to set the scaling to the final size you want; the scanner willscan the item at the proper resolution for the size you choose.To scan 35 mm slides or negatives by using the TMA, press the Scan button( ) on the scanner lid.When cropping images, completely remove the borders to reduce excesslight interference.Scan slidesThe transparent materials adapter (TMA) enables you to scan as many as two 35mm slides or two 35 mm negatives at one time. To scan 35 mm slides, use theslide holder that is part of the built-in TMA.126Open the scanner lid.Remove the negative strip holder, if present, from the slide holder.HP Scanjet 3770 digital flatbed scanner
How to use the scanner34Place as many as two slides into the slide holder. Insert the slides with the topup and with the front of the slides facing you.Close the scanner lid.Note Make sure that the slides are flat and do not overlap. Do not press theScan button ( ) until the slides are loaded and the lid is closed.5Press the Scan button () on the scanner lid.A dialog box appears asking what you are scanning.678910Select Picture.Click Scan.Select Slides from a Transparent Materials Adapter (TMA).Click Scan.The scan is sent to the HP Image Zone.If you want to preview the scanned picture, select the Show Preview checkbox on the screen, or begin the scan from the HP Director software.11 Follow the instructions on the screen to finish scanning.12 When finished, remove the slides. Place the negative strip holder back intothe scanner lid for convenient storage.Scan negativesTo scan 35 mm negatives, use the negative strip holder that is part of the built-inTMA.12User's ManualOpen the scanner lid, and remove the negative strip holder, if present, fromthe slide holder.Slide a negative strip into the negative strip holder so that the shiny side facesyou.7
Chapter 1Note Negatives are easily damaged. Touch them only on their edges.3Insert the negative strip holder back into the slide holder, and then close thescanner lid.Note Do not press the Scan button (the lid is closed.4Press the Scan button () until the negatives are loaded and).A dialog box appears asking what you are scanning.56789Select Picture.Click Scan.Select Negatives from a Transparent Materials Adapter (TMA).Click Scan.The scan is sent to the HP Image Zone.If you want to preview the scanned picture, select the Show Preview checkbox on the screen, or begin the scan from the HP Director software.10 Follow the instructions on the screen to finish scanning.11 When finished, remove the negative strip. Place the negative strip holder backinto the scanner lid for convenient storage.Note You can scan a negative in other ways. For example, in HP Director, clickScan Picture. Or, if you know you'll be sharing an item using HP InstantShare, use the HP Instant Share button ( ) on the scanner lid.Print copiesUse the Copy button (make copies.1238) to scan an original and send it directly to a printer toPlace the original face down on the scanner glass as indicated by thereference marks on the scanner, and close the lid.Press the Copy button ( ) on the scanner lid. A message appears thatshows the copy progress.If you want to increase the number of copies, lighten or darken the copies,reduce or enlarge them, or change printer settings, click Cancel in the Copyin Progress dialog box. You can then make changes to settings in the HPCopying software.HP Scanjet 3770 digital flatbed scanner
How to use the scannerYou can also make copies from the HP Director. For more information, see the HPImage Zone software on-screen help.E-mail scanned picturesYou can scan one or more pictures with your HP scanner and e-mail them in twoways: Use HP Instant ShareE-mail your scanned images as attachmentsE-mail a scanned picture with HP Instant ShareYou can easily 1) send someone an e-mail with thumbnails and links to yourpictures stored on a secure HP website – no more attachments; 2) upload picturesto the HP Photo web site to create online picture albums; or 3) orderprofessional-quality prints from an HP partner web site. (Not all services areavailable in all regions or for all operating systems.)12Place the slides or negatives in the TMA or place the photo face down on thescanner glass, and then close the scanner lid.Press the Scan button ( ) on the scanner lid.The scan is displayed in the HP Image Zone software. If multiple selectionareas were detected, the selections are displayed as separate scannedimages.34Select one or more pictures in HP Image Zone.Click To E-mail, and then follow the on-screen directions.E-mail your scanned images as attachments12Place the slides or negatives in the TMA or place the photo on the scannerglass (look for the icons on the scanner to guide you in proper placement ofthe original), and then close the scanner lid.Press the Scan button ( ) on the scanner lid.The scan is displayed in the HP Image Zone software. If multiple selectionareas were detected, the selections are displayed as separate scannedimages.34Select one or more pictures in the HP Image Zone.Click the Selections Menu below the images.A dialog appears that displays a list of destinations for the images.5Select your e-mail application from the list of destinations, and then click OK.Your e-mail software starts, and a new e-mail message (with the images thatyou selected attached to it) opens.67User's ManualEnter the e-mail destination and subject, and write a note.Send the message as you normally would from the e-mail program.9
Chapter 1E-mail scanned documents12345Place the original face down in the upper right hand corner on the scannerglass, as shown by the corner reference mark on the scanner.Close the scanner lid.Press the Scan button ( ) on the scanner lid.Select E-mail from the scroll-down menu.Follow the instructions on the screen to finish scanning.Change settingsYou can customize some features of your HP Scanjet scanner, including thescanner-lid button settings and other preferences. Change settings from the HP DirectorWhen you use the scanner buttons or the HP Director software, the scanneruses settings optimized for the scanned original type, such as a picture. Youcan change all scan settings from the Settings menu from the HP Director.To change settings, start the HP Director software, and then click Settings. Turn preview image on or offNote Macintosh users, see the HP Image Zone software Help for informationabout turning preview on or off.123456Double-click the HP Director icon ( ) on your desktop. Or, on the taskbar,click Start, point to Programs or All Programs, point to HP, and then clickHP Director.When the HP Director opens, make sure that your HP scanner is selected inthe Select Device list.On the Settings menu, point to Scan Settings & Preferences, and then clickButton Settings. The Button Settings dialog box, which has a tab for eachconfigurable button, opens.Click the tab that corresponds to the button that you want to set.Select or clear the preview button setting for that button.When you are satisfied with the settings, click OK.Care and maintenanceOccasional cleaning of your scanner helps ensure optimal performance. Theamount of care necessary depends upon several factors, including the amount ofuse and the environment. You should perform routine cleaning as necessary.10HP Scanjet 3770 digital flatbed scanner
How to use the scannerWarning Avoid placing items with sharp edges in the scanner. Doing socan damage the scanner. Before placing an item on the scanner glass,make sure the item is free of wet glue, correction fluid, or other substancesthat can be transferred to the glass. Clean the scanner glassDisconnect the USB cable and power cable from the scanner.Clean the glass using a soft, lint-free cloth sprayed with a mild glass cleaner,drying the glass with a dry, soft, lint-free cloth.Caution Use only glass cleaner. Avoid abrasives, acetone, benzene,and carbon tetrachloride, all of which can damage the scanner glass.Avoid isopropyl alcohol because it can leave streaks on the glass.Do not spray the glass cleaner directly on the glass. If too much glass cleaneris applied, the cleaner could run to the edges and damage the scanner.When finished, reconnect the USB cable and power cable to the scanner.Note For instructions on how to clean the underside of the scanner glass,visit www.hp.com/support. Clean the transparent materials adapter (TMA)Clean the TMA with a dry, soft cloth. If necessary, lightly spray the cloth withglass cleaner and wipe the TMA.User's Manual11
2TroubleshootingThis section contains solutions for potential issues with the scanner and thetransparent materials adapter (TMA).Frequently asked questionsThis section contains answers to frequently asked questions.How do I test my scanner hardware?123456Ensure that the TMA cable on the scanner lid is connected to the back of thescanner.Ensure that the scanner is not connected to the computer.Reset the scanner. See Reset the scanner.Disconnect the USB cable and power cable from the scanner.Ensure that the scanner power cable is still connected to the power source.Press and hold the Scan( ) and Copy buttons ( ) on the scanner at thesame time while reconnecting the power cable to the scanner.The TMA should turn on for three seconds and then turn off. After the TMAturns off, the carriage in the scanner should move forward and backward, andthe scanner lamp should turn on. The scanner lamp should flash six timeswhile the carriage is still in motion.7To end the test, disconnect the power cable.How do I turn off the lamp?The scanner lamp should time out and turn off automatically after a period ofinactivity (about 14 minutes). If it does not turn off automatically, do the following:12345From the HP Director, click Settings.Select Scan Settings & Preferences.Select Scan Preferences.Click the Quality vs. Speed tab.Turn off Extended lamp to turn the scanner lamp off after 14 minutes ofinactivity. If this option is on, the scanner lamp turns off after 1 hour ofinactivity.If the scanner lamp issues continue, see Customer support.How do I turn off the scanner?Normally you do not need to turn off the scanner because after a period ofinactivity (about 14 minutes), the scanner reduces to a low-power mode. If youneed to turn off the scanner completely, disconnect it from the power source(electrical outlet or surge protector).12HP Scanjet 3770 digital flatbed scanner
TroubleshootingHow do I scan text for editing?The scanner uses optical character recognition (OCR) to convert text on a page totext that you can edit on your computer. The OCR software is installedautomatically when you install the HP Image Zone software.To select OCR settings, complete the following steps:12Open the HP Director software.Click Settings, click Scan Preferences, and then select Button Settings.Note If you are starting the scan from the scanner lid button, click the Scanbutton tab. If you are starting the scan from the HP Director, click theScan Document button (Director) tab.3Click Modify Scan Document Settings, and then click the Editable TextSettings tab.Two formatting options are available:––Retain page formatting. When you select this option, the text blocks,tables, and graphics are re-created in the same place, and the word andparagraph formatting are maintained. This might make editing moredifficult because the software saves the columns in frames, with no textflow from one column to the next. Select the Use columns whenpossible check box to retain columns that are easier to edit. Most userschoose this option. The text flows from one column to the next, allowingfor easier editing.Do not retain page format. Select this option for flowed text. Thiscreates a file with continuous text. This is recommended for text that youwant to edit and reformat for other purposes.Scanned text might not appear on your computer exactly as it appeared on theoriginal, especially if the original contains faint or smudged text. For example,some characters might be incorrect or missing. As you edit the text, compare thescanned text against the original, and then make corrections as necessary.Scanner installation or setup issuesThis section contains solutions for installation and setup issues.Check your computer Ensure that your computer meets the minimum system requirements that arelisted on the scanner box.If you do not have enough hard-disk space, remove unnecessary files.Use administrative privilegesIf you are installing the scanner on a Microsoft Windows 2000 or XP system,you must be logged on as an Administrator. See your operating system help forhow to log on as an Administrator.User's Manual13
Chapter 2Use a valid folderOn a Microsoft Windows computer, if you receive a message such as “DestinationDirectory Is Invalid” or “Program Folder Is Invalid” during installation, you may nothave read/write permissions to that folder.Check the cablesCable typeActionPower cableThe power cable is connected between the scanner and an ACoutlet. USB cableEnsure that the power cable is securely connectedbetween the scanner and a live electrical outlet or surgeprotector.If the power cable is connected to a surge protector,ensure that the surge protector is plugged into an outletand turned on.Disconnect the power cable from the scanner and turn offthe computer. After 60 seconds, reconnect the powercable to the scanner, and then turn on the computer, inthat order.The USB cable is connected between the scanner and thecomputer. Use the cable that was included with the scanner.Another USB cable might not be compatible with thescanner.Ensure that the USB cable is securely connected betweenthe scanner and the computer.For additional USB troubleshooting information, see www.hp.com/support, select your country/region, and then use thesearch tool to find USB troubleshooting topics.Note On a Macintosh computer, use the Apple System Profiler to ensure that thescanner is connected to the computer correctly.Scanner initialization and hardware issuesThis section contains solutions for initialization and hardware issues.Reset the scannerIf you receive an error message similar to “Scanner initialization failed” or“Scanner not found” when trying to use the scanner:1234514Close the HP Scanning software if it is open.Disconnect the USB cable that connects the scanner to the computer.Turn the scanner off by disconnecting the power cable.Turn the computer off, wait 60 seconds, and then turn it on again.Turn the scanner back on by reconnecting the power cable.HP Scanjet 3770 digital flatbed scanner
Troubleshooting6Reconnect the USB cable that connects the computer and the scanner.––Make sure that the USB cable is properly connected to the back of thescanner. The USB symbol on the end of the cable (the connector) shouldbe facing up. When connected correctly, the USB connector feels slightlyloose. When connected incorrectly, the USB plug feels overly tight.Try connecting the USB cable to a different USB port on your computer.If the scanner still fails to initialize, run the Repair utility (Windows computers only)as described in the Scanner has stopped working properly section.Test scanner hardwareIf you think the scanner has a hardware issue, verify that the cables are firmlyconnected to the scanner, the computer, and the power source. If the cables arecorrectly connected, test the scanner using this procedure.123456Ensure that the TMA cable on the scanner lid is connected to the back of thescanner.Ensure that the scanner is not connected to the computer.Reset the scanner. See Reset the scanner.Disconnect the USB cable and power cable from the scanner.Ensure that the scanner power cable is still connected to the power source.Press and hold the Scan( ) and Copy buttons ( ) on the scanner at thesame time while reconnecting the power cable to the scanner.The TMA should turn on for three seconds and then turn off. After the TMAturns off, the carriage in the scanner should move forward and backward, andthe scanner lamp should turn on. The scanner lamp should flash six timeswhile the carriage is still in motion.7To end the test, disconnect the power cable.Scanner has stopped working properlyIf the scanner stops scanning, complete the following steps in order. After eachstep, start a scan to see if the scanner is working. If not, proceed with the nextstep. A cable might be loose. Ensure that both the USB cable and power cable aresecurely connectedUnplug the power cable from the power source, wait 60 seconds, and thenplug it back in.Restart your computer.A software conflict might exist on your computer. You might need to reinstallthe HP Image Zone software. To do this, run the Repair utility (Windowscomputers only).––User's ManualClick Start, point to Settings, and then click Control Panel (in WindowsXP, click Start, and click Control Panel).Click Add/Remove Programs, and then select the HP Image Zonesoftware.15
Chapter 2–– Click Add/Remove (or Change, depending on your version ofWindows).Follow the instructions on the computer screen, and then click Repair.Install the scanner on another computer. This helps determine if the issue isrelated to the computer or to the scanner.Transparent materials adapter (TMA) issuesUse this section to help resolve issues that might occur when scanning 35 mmslides and negatives from the transparent materials adapter (TMA).Transparent materials adapter does not work at allThe TMA adapter cable might not be connected correctly. Ensure that the adaptercable is connected securely from the TMA to the TMA port on the back of thescanner.Cannot select slides or negatives in the What are you scanning? dialog boxAfter each step, start a scan to see if the scanner is working. If not, proceed withthe next step. The TMA adapter cable might not be connected correctly. Ensure that theadapter cable is connected securely to the TMA port on the scanner.If the TMA was connected while th
Note You can also use the Scan ( ) button to scan slides or negatives from the TMA. For more information, see Scan slides and negatives. 1 Place the original face down in the upper right hand corner on the glass as shown by the corner reference mark on the scanner. 2 Close the scanner lid. 3 Press the Scan button ( ) on the scanner lid. Chapter 1
