Transcription
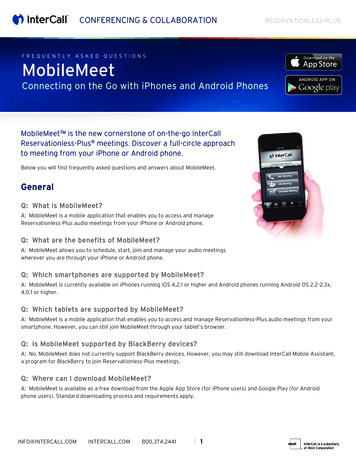
Microsoft Office Live MeetingAdd-In Pack User’s GuideInterCall, a subsidiary of West Corporation, in partnership with Microsoft, providesConference PlaceSM web conferencing services. Because Conference Place is poweredby Microsoft Office Live Meeting, this guide makes several references to the servicename, platform and features.For more information:800.374.2441www.intercall.comUSING THE ADD-IN TO MEET NOWMeet Now is a Conference Place / Live Meeting feature that can be accessed from Word,Excel , PowerPoint , Project and Visio when you install the Microsoft Office LiveMeeting Add-in Pack. Meet Now is a quick and easy way to have an unscheduledmeeting. Using the Meet Now meeting is ideal when you are working with a documentand want to meet immediately and without configuring additional meeting options.To use the Meet Now feature:1On the Live Meeting toolbar, click Meet Now. The meeting console opens inapplication sharing mode. Any documents you had open in the program areshared.2An Outlook meeting invitation opens so that you can invite your co-presenters orattendees.Click Send.3Microsoft and the Microsoft Office Logo are either trademarks or registered trademarks of Microsoft Corporation inthe United States and/or other countries.Last modified on: 5/10/2007
USING MEET NOW TO SHARE A DOCUMENTThe Live Meeting Add-in for Office Collaboration enables you to share documents inWord, Excel, PowerPoint, Project or Visio with minimal setup. While working on adocument, take advantage of the Meet Now option in one of these Office applications toget immediate input from others.To share a document for editing:12Click Live Meeting on the menu bar.Select Meet Now, and then click Share Document to Edit. The ConferencePlace/Live Meeting console opens. An Outlook meeting invitation also opens sothat you can invite your co-presenters or attendees.3Once you’ve sent the Outlook invitation, focus returns to the document inapplication sharing mode. When your invitees join you in the meeting, they willsee the document you have shared and will be allowed to request editingprivileges.To share a document for viewing:12Click Live Meeting on the menu bar.Select Meet Now, and then click Share Document to View. The ConferencePlace/Live Meeting console opens. An Outlook meeting invitation also opens sothat you can invite your co-presenters or attendees.3Once you’ve sent the Outlook invitation, focus returns to the document inapplication sharing mode. When your invitees join you in the meeting, they willsee the document you have shared and will be allowed to request editingprivileges.Note: You cannot use Meet Now in Project to share a document for viewing.
USING MEET NOW WITHOUT SHARING A DOCUMENTThe Add-in Pack adds the Meet Now feature to your Office applications so you can sharedocuments with others in unscheduled meetings. Open documents in Word, Excel,PowerPoint, Project or Visio can be shared for viewing or editing. However, you can alsotake advantage of the easy access to your Meet Now meeting without sharing thedocument you are working on.To Meet Now without sharing a document:123Click Live Meeting on the menu bar.Select Meet Now, and then click Meet Now without This Document. TheConference Place/Live Meeting console opens. An Outlook meeting invitationalso opens so that you can invite your co-presenters or attendees.Once you’ve sent the Outlook invitation, focus returns to the ConferencePlace/Live Meeting console and you are ready to begin your meeting.SETTING MEET NOW OPTIONS FOR OUTLOOKYou can customize the Live Meeting experience by setting options for individual meetings.For example, you can control how meeting participants will enter a meeting, or you canenable or disable features such as chatting or recording. Note In most Live Meetingenvironments, the Live Meeting administrator configures most or all of the meetingoptions. Do not override these settings unless you have a clear understanding of howeach option should be configured in your environment. For example, if the administratorhas configured your audio settings to work with your organization's audio conferencingservice, changing those settings could cause an error when you try to connect to audio foryour Live Meeting sessions.Note: In most Live Meeting environments, the Live Meeting administrator configures most or allof the meeting options. Do not override these settings unless you have a clear understandingof how each option should be configured in your environment. For example, if the administratorhas configured your audio settings to work with your organization's audio conferencing service,changing those settings could cause an error when you try to connect to audio for your LiveMeeting sessions.To set Meet Now options:1On the Live Meeting menu, point to Tools, and then click Meet Now Options.
2In the Meet Now Options dialog box, click the category of options that you wantto set, as described in the following table. The rest of this topic explains how toset individual options within these categories.Option CategoryDescriptionMeet Now DetailsDefault settings for language to be used, the billing code of yourdepartment, meeting size, and meeting duration.Entry ControlMethod for controlling participant access to your Meet Now space,limits on when participants can join the meeting, and whetherparticipants must supply an e-mail address and company name.Meeting LobbyA waiting area for people without an invitation who want to joinyour Meet Now meeting.AdditionalFeaturesVarious permissions you can grant to meeting participants andsettings to improve the participants’ experience.ContentExpirationA time limit for making meeting content available to participantsafter the meeting is over.AudioSettings that control how meeting audio is made available toparticipants.RecordingAccess restrictions on any recordings that might be made duringthe meeting.3When your Meet Now options are the way you want them, click OK.Set Meet Now Details:1In the left pane of the Meet Now Options dialog box, click Details.2In the Language box, select the language that will be used in the Live Meetingconsole, in meeting invitations, and in descriptive data for Live Meetingrecordings.In the Bill to Code box, enter the billing code associated with your use of the LiveMeeting service within your organization.In the Meeting Size box, enter the maximum number of people that you expect toattend a meeting.In the Meeting Duration list, select the maximum length of a meeting.345Set Entry Control options:
1In the left pane of the Meet Now Options dialog box, click Entry Control.2Under Presenters, do one of the following:- To restrict entry as a presenter to individuals who have a membership in yourLive meeting account, click Access Control List.- To allow entry as a presenter to individuals who have the meeting ID andmeeting key (password) for this meeting, click Meeting Key. If you want the LiveMeeting Manager to automatically generate a meeting key for your meeting,select the Generate a new Meeting Key for every Meet Now meeting check box.To create your own meeting key, type the key in the Use this Meeting Key box.3Under Attendees, do one of the following:- To restrict entry as an attendee to individuals who have a membership in yourLive meeting account, click Access Control List.- To allow entry as an attendee to individuals who have the meeting ID andmeeting key (password), click Meeting Key. If you want the Live MeetingManager to automatically generate a meeting key for your meeting, select theGenerate a new Meeting Key for every Meet Now meeting check box. To createyour own meeting key, type the key in the Use this Meeting Key box.- To allow entry as an attendee to individuals who have the meeting ID withoutrequiring a meeting key, click Free Entry.4Under Meeting Entry Time, to allow only presenters to enter your Meet Nowmeeting until 30 minutes before it starts, click Attendees - 30 min. early.Presenters - Anytime. To allow anyone to enter at any time, click Anyone Anytime.
5To require that meeting participants supply an e-mail address and companyname before being admitted, under Extended Registration click Request e-mailaddress and company name. Otherwise, click Do not request e-mail address andcompany name.Set Meeting Lobby options:1In the left pane of the Meet Now Options dialog box, click Meeting Lobby.2To enable the meeting lobby so individuals without an invitation can wait to beadmitted, select the Enable Meeting Lobby for this meeting check box. The LiveMeeting manager will automatically generate a URL for the meeting lobby, whichyou can share with people who do not have invitations but may want to join yourmeeting.In the Lobby greeting box, you can type a message that will appear whensomebody visits the meeting lobby.If you want the Live Meeting Manager to send you an e-mail notification whensomebody enters the meeting lobby, select the Enable e-mail notifications fromlobby attendee’s check box. After the first visitor to the lobby, a new e-mailmessage is sent every 30 minutes if somebody new has entered the lobby.34Set Additional Features:1In the left pane of the Meet Now Options dialog box, click Additional Features.
23456789To allow attendees of an auditorium-style meeting to ask questions of thepresenters, select the Question and Answer Control Panel check box.To allow presenters to use the Live Meeting console to end the meeting andclose the console on the computer of each participant, select the Show EndSession Option in Console check box.To allow participants to use the Live Meeting console to send e-mail messages toeach other during the meeting, select the Send e-mail to each other check box.To enable chat during the meeting, select the Chat check box.To allow presenters to share programs with other participants, select theApplication Sharing check box. If you allow application sharing, click theappropriate option to specify when presenters can share control of theapplication with participants. If you want participants to be able to request control,select the appropriate check box. To set the color quality of shared applications,which can affect the performance of application sharing over a network or overthe Internet, select the appropriate option in the How many colors to use forsharing? box.To allow either presenters only or all participants to store meeting content as anAdobe Acrobat file (.pdf), select the Printing to PDF check box, and then checkthe appropriate option to indicate who is authorized to save the meeting content.To display the seating chart to all participants, select the View the Seating Chartcheck box. To change the title of the seating chart legend and to change themeanings associated with each color in the seating chart, type the appropriatetext in the boxes provided. To change the default color, click the appropriatecolor.To display a pane in the Live Meeting console of each participant that can displayany content that can be passed through an HTTP or secure HTTP (HTTPS) Webpage, including interactive surveys, video, and audio, select the Streaming MediaCustom Frame check box. In the Attendee URL box, enter the URL of the Webpage whose content you want to display in the pane on attendee consoles. In thePresenter URL box, enter the URL of the Web page whose content you want todisplay in the pane on presenter consoles.Set Content Expiration options:1In the left pane of the Meet Now Options dialog box, click Content Expiration.2To set a time limit after which any stored content from your meeting will bedeleted, select the appropriate check box, and then enter the time interval youwant. If you clear the check box, content is not automatically deleted.Set Audio options:1In the left pane of the Meet Now Options dialog box, click Audio.
2In the This meeting uses box, indicate whether or not the meeting uses LiveMeeting with Audio Conferencing.3 In the Conferencing Provider box, select your provider of audio conferencingservices.4 If you are using audio conferencing and you did not select "Other" asconferencing provider, select the Allow meeting participants to use JoinConference check box if you want participants to be able to request that theaudio conferencing service call them instead of vice versa.5 To enable Internet Audio Broadcasting for one-way communication over theInternet from presenters to attendees, select the Enable Internet AudioBroadcasting check box.6 To display in the Live Meeting console a toll-free number that participants cancall to join the meeting audio conference, select the Display the toll-free phonenumber to meeting check box.7 To display in the Live Meeting console a toll number that participants can call tojoin the meeting audio conference, select the Display the toll phone number tomeeting check box.8 Under Toll-free meeting phone number, select the country/region, and then typethe city code or area code and the local phone number of the toll-free meetingphone.9 Under Toll meeting phone number, select the country/region, and then type thecity code or area code and the local phone number of the toll meeting phone.10 Under Participant and Leader codes, in the boxes provided, type a participantcode and a leader code that meeting participants must use to identify themselvesas a participant or a leader when they join the audio conference. The leader codeis never revealed to meeting participants.11 If you will record your meeting or you will use Internet Audio Broadcasting orboth, and if phone access to meeting audio will require additional dialing keys,under Additional dialing keys, type those keys into the boxes provided. Insertcommas as necessary for a pause, for example, when the dialing must pausewhile the audio conferencing service responds.
Set Recording options:1In the left pane of the Meet Now Options dialog box, click Recording.2To enable recording for meeting presenters, under Enable Recording clickPresenters can record the meeting. To disable recording for all but the meetingorganizer, click Disabled in the meeting.3To specify who can view recordings, under Recording Access click theappropriate option.SCHEDULING A MEETING IN OUTLOOKWith the Live Meeting Add-in for Outlook, you can schedule a meeting that uses LiveMeeting in the same way that you schedule a meeting where the participants gather in aconference room.You can convert a previously scheduled Outlook appointment to be held in Live Meetinginstead. When you do so, you can also add meeting participants; define participants asattendees or presenters, and set meeting options, just as if you had created a LiveMeeting invitation in the first place.For the most part, creating a meeting request for Live Meeting is exactly the same ascreating other meeting requests in Outlook. The main differences are that you designatemeeting participants as either attendees or presenters, and you can set meeting optionsthat are specific to Live Meeting.To schedule a meeting using Outlook:1On the Live Meeting menu, click Schedule Live Meeting, or click the ScheduleLive Meeting button on the Live Meeting toolbar.
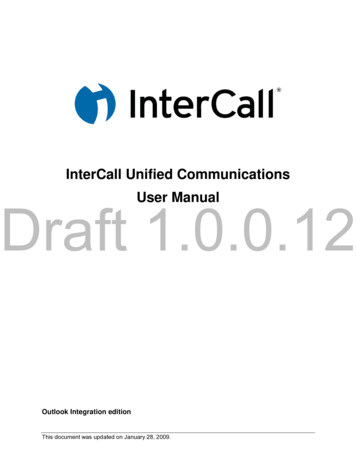
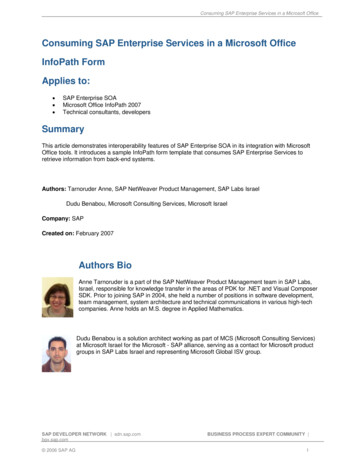
23On the Appointment tab, on the Subject line, type a description of your meeting.To add people to the invitation, do one of the following:- On the Appointment tab, in the To box, type the full e-mail addresses of thepeople you want to invite.- On the Appointment tab, click To, and then select the invitees from your addressbook.4To designate which invitees are to be presenters, click Attendees and Presenterson the Live Meeting toolbar in the meeting request. In the Attendees list, click theappropriate names and e-mail addresses. Click Add to move the selected namesto the Presenters list, and then click OK.
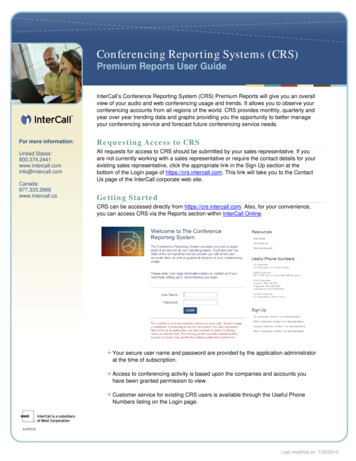
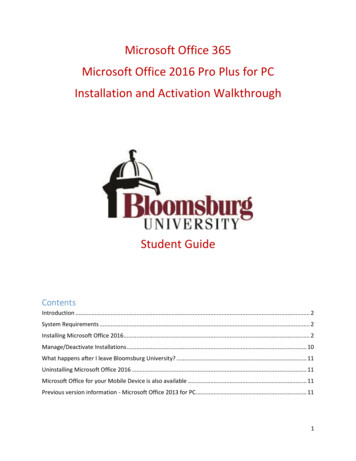
5To check the availability of meeting participants if you have not done so already,on the Scheduling tab find a time when all participants are available, and thenclick that time. Drag the bars that indicate the start and end time for the meetinguntil they are as you want them.6If you like, you can type a message that all recipients will receive. On theAppointment tab, type your message above the dotted line in the box provided.You do not need to provide the meeting URL, meeting ID, or meeting key; thatinformation is supplied automatically.Note: Do not type anything below the dotted line. The text that appears will be replaced withinformation that participants will need to join your meeting.
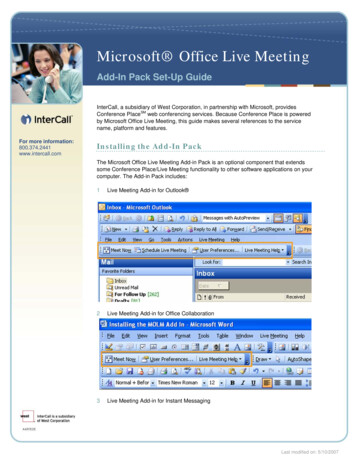
7On the Live Meeting toolbar of the meeting request window, click MeetingOptions and specify the options that you would like to use for this meeting.8When the meeting invitation is as you want it, on the Standard toolbar, clickSend.
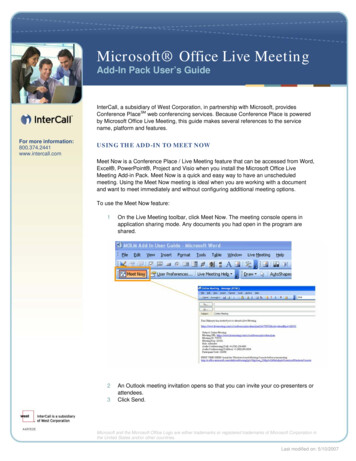
To convert a standard Outlook meeting request to a Conference Place/Live Meetinginvitation:12In the Outlook Calendar, double-click the meeting to open the request form.On the Live Meeting toolbar, click Make this a Live Meeting.3To designate which invitees are to be presenters, click Attendees and Presenterson the Live Meeting toolbar in the meeting request. In the Attendees list, click theappropriate names and e-mail addresses. Click Add to move the selected namesto the Presenters list, and then click OK.4If you like, you can type a message that all recipients will receive. On theAppointment tab, type your message above the dotted line in the box provided.You do not need to provide the meeting URL, meeting ID, or meeting key; thatinformation is supplied automatically.Note: Do not type anything below the dotted line. The text that appears will be replacedwith information that participants will need to join your meeting.5On the Live Meeting toolbar of the meeting request window, click MeetingOptions. For details about setting meeting options, see6When the meeting invitation is as you want it, on the Standard toolbar, clickSend.
SETTING SCHEDULED MEETING OPTIONS FOR OUTLOOKBefore you start scheduling Conference Place/Live Meeting sessions from within Outlook,you should configure settings that will ensure that the meeting features will suit yourneeds. You can configure the options for your scheduled meetings by using MeetingOptions.To set meeting options for Scheduled Meetings:1On the Live Meeting toolbar, click Meeting Options.2In the Meeting Options dialog, click the category of options that you want to set,as described in the following table. The rest of this topic explains how to setindividual options within these categories.Option CategoryDescriptionDetailsThe meeting ID, the type of meeting, the language to beused, the billing code of your department, and the meetingsize.Entry ControlMethod for controlling participant access to your meetinglimits on when participants can join the meeting, and whetherparticipants must supply an e-mail address and companyname.Meeting LobbyA waiting area for people without an invitation who want tojoin your meeting.Additional FeaturesVarious permissions you can grant to meeting participantsand settings to improve the participants' experience.
Content ExpirationA time limit for making meeting content available toparticipants after the meeting is over.AudioSettings that control how meeting audio is made available toparticipants.RecordingAccess restrictions on any recording that might be madeduring the meeting.3When the meeting options are set the way you want them, if you want to reusethese settings for future meetings by default, click Set As Default. To save thesettings for this meeting, click OK.Set Scheduled Meeting details1In the left pane of the Meeting Options dialog box, click Details.2In the Meeting ID box, enter an ID that users will need to join your meeting. If youwant Conference Place / Live Meeting to automatically generate a meeting ID,select the Generate for me check box.Under Type, click the appropriate option. For a large meeting that consists mainlyof presentations, click Auditorium Place. For a small meeting that consists mainlyof interaction among participants, click Meeting Place.In the Language box, select the language that will be used in the ConferencePlace / Live Meeting console, in meeting invitations, and in descriptive data forConference Place / Live Meeting recordings.In the Bill to Code box, enter the billing code associated with your use of theConference Place / Live Meeting service within your organization.In the Meeting Size box, enter the maximum number of people that you expect toattend the meeting.3456Set Entry Control options:1In the left pane of the Meeting Options dialog box, click Entry Control.
2Under Presenters, do one of the following:- To restrict entry as a presenter to individuals who have a membership in yourConference Place / Live Meeting account, click Access Control List.- To allow entry as a presenter to individuals who have the meeting ID andmeeting key (password) for this meeting, click Meeting Key. If you want theConference Place / Live Meeting Manager to automatically generate a meetingkey for your meeting, select the Use a system generated Meeting Key check box.To create your own meeting key, type the key in the Use this Meeting Key box.3Under Attendees, do one of the following:- To restrict entry as an attendee to individuals who have a membership in yourConference Place / Live Meeting account, click Access Control List.- To allow entry as an attendee to individuals who have the meeting ID andmeeting key (password), click Meeting Key. If you want the Conference Place /Live Meeting Manager to automatically generate a meeting key for your meeting,select the Use a system generated Meeting Key check box. To create your ownmeeting key, type the key in the Use this Meeting Key box.- To allow entry as an attendee to individuals who have the meeting ID withoutrequiring a meeting key, click Free Entry.45Under Meeting Entry Time, to allow only presenters to enter your meeting until 30minutes before it starts, click Attendees - 30 min. early. Presenters - Anytime. Toallow anyone to enter at any time, click Anyone - Anytime.To require that meeting participants supply an e-mail address and companyname before being admitted, under Extended Registration click Request e-mailaddress and company name. Otherwise, click Do not request e-mail address andcompany name.
Set Meeting Lobby options1In the left pane of the Meeting Options dialog box, click Meeting Lobby.2To enable the meeting lobby so individuals without an invitation can wait to beadmitted, select the Enable Meeting Lobby for this meeting check box. TheConference Place / Live Meeting manager will automatically generate a URL forthe meeting lobby, which you can share with people who do not have invitationsbut may want to join your meeting.In the Lobby greeting box, you can type a message that will appear whensomebody visits the meeting lobby.If you want the Conference Place / Live Meeting Manager to send you an e-mailnotification when somebody enters the meeting lobby, select the Enable e-mailnotifications from lobby attendee’s check box. After the first visitor to the lobby, anew e-mail message is sent every 30 minutes if somebody new has entered thelobby.34Set Additional Features:1In the left pane of the Meeting Options dialog box, click Additional Features.
23456789To allow attendees of an auditorium-style meeting to ask questions of thepresenters, select the Question and Answer Control Panel check box.To allow presenters to use the Conference Place / Live Meeting console to endthe meeting and close the console on the computer of each participant, select theShow End Session Option in Console check box.To allow participants to use the Conference Place / Live Meeting console to sende-mail messages to each other during the meeting, select the Send e-mail toeach other check box.To enable chat during the meeting, select the Chat check box.To allow presenters to share programs with other participants, select theApplication Sharing check box. If you allow application sharing, click theappropriate option to specify when presenters can share control of theapplication with participants. If you want participants to be able to request control,select the appropriate check box. To set the color quality of shared applications,which can affect the performance of application sharing over a network or overthe Internet, select the appropriate option in the How many colors to use forsharing? box.To allow either presenters only or all participants to store meeting content as anAdobe Acrobat file (.pdf), select the Printing to PDF check box, and then checkthe appropriate option to indicate who is authorized to save the meeting content.To display the seating chart to all participants, select the View the Seating Chartcheck box. To change the title of the seating chart legend and to change themeanings associated with each color in the seating chart, type the appropriatetext in the boxes provided. To change the default color, click the appropriatecolor.To display a pane in the Conference Place / Live Meeting console of eachparticipant that can display any content that can be passed through an HTTP orsecure HTTP (HTTPS) Web page, including interactive surveys, video, andaudio, select the Streaming Media Custom Frame check box. In the AttendeeURL box, enter the URL of the Web page whose content you want to display inthe pane on attendee consoles. In the Presenter URL box, enter the URL of theWeb page whose content you want to display in the pane on presenter consoles.Set Content Expiration options:1In the left pane of the Meeting Options dialog box, click Content Expiration.2To set a time limit after which any stored content from your meeting will bedeleted, select the appropriate check box, and then enter the time interval youwant. If you clear the check box, content is not automatically deleted.
Set Audio options:12In the left pane of the Meeting Options dialog box, click Audio.In the This meeting uses box, indicate whether or not the meeting usesConference Place/Live Meeting with Audio Conferencing.3 In the Conferencing Provider box, select your provider of audio conferencingservices.4 If you are using audio conferencing and you did not select "Other" asconferencing provider, select the Allow meeting participants to use JoinConference check box if you want participants to be able to request that theaudio conferencing service call them instead of vice versa.5 To enable Internet Audio Broadcasting for one-way communication over theInternet from presenters to attendees, select the Enable Internet AudioBroadcasting check box.6 To display in the Conference Place / Live Meeting console a toll-free number thatparticipants can call to join the meeting audio conference, select the Display thetoll-free phone number to meeting check box.7 To display in the Conference Place / Live Meeting console a toll number thatparticipants can call to join the meeting audio conference, select the Display thetoll phone number to meeting check box.8 Under Toll-free meeting phone number, select the country/region, and then typethe city code or area code and the local phone number of the toll-free meetingphone.9 Under Toll meeting phone number, select the country/region, and then type thecity code or area code and the local phone number of the toll meeting phone.10 Under Participant and Leader codes, in the boxes provided, type a participantcode and a leader code that meeting participants must use to identify themselvesas a participant or a leader when they join the conference. The leader code isnever revealed to meeting participants.11 If you will record your meeting or you will use Internet Audio Broadcasting orboth, and if phone access to audio will require additional dialing keys, underAdditional dialing keys, type those keys into the boxes provided. Insert commas
as necessary for a pause, for example, when the dialing must pause while theaudio conferencing service responds.Recording options:1In the left pane of the Meeting Options dialog box, click Recording.2To enable recording for meeting presenters, under Enable Recording clickdisable recording for all but the meeting organizer, click Disabled in the meeting.To specify who can view recordings, under Recording Access click theappropriate option.3
by Microsoft Office Live Meeting, this guide makes several references to the service name, platform and features. USING THE ADD-IN TO MEET NOW . Meet Now is a Conference Place / Live Meeting feature that can be accessed from Word, Excel , PowerPoint , Project and Visio when you install the Microsoft Office Live Meeting Add-in Pack.