Transcription
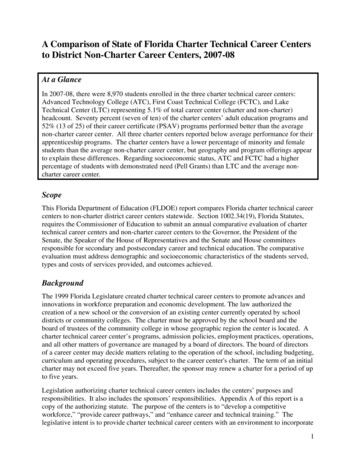
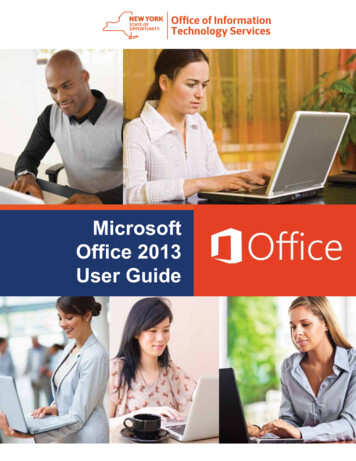
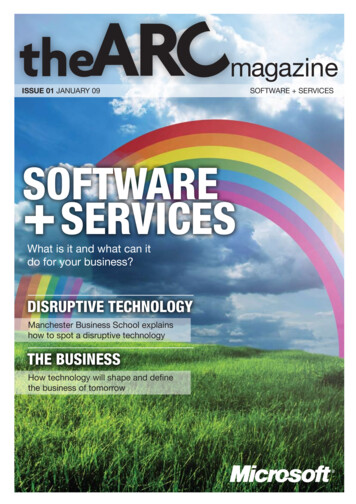
Microsoft Office Live MeetingAdd-In Pack Set-Up GuideInterCall, a subsidiary of West Corporation, in partnership with Microsoft, providesConference PlaceSM web conferencing services. Because Conference Place is poweredby Microsoft Office Live Meeting, this guide makes several references to the servicename, platform and features.For more g the Add-In PackThe Microsoft Office Live Meeting Add-in Pack is an optional component that extendssome Conference Place/Live Meeting functionality to other software applications on yourcomputer. The Add-in Pack includes:1Live Meeting Add-in for Outlook 2Live Meeting Add-in for Office Collaboration3Live Meeting Add-in for Instant MessagingLast modified on: 5/10/2007
To install the Microsoft Office Live Meeting Add-in Pack, you must be logged onto thelocal computer as an Administrator. A Power User cannot install the Add-in Pack becausethe add-in for Outlook uses several settings that must be installed for the entire machine(as opposed to for a single user).If you have a previous version of the add-in, the installer for the Add-in Pack willautomatically uninstall the older version before installing the newer one. You may alsoremove the Add-in Pack manually at any time by using the Add or Remove ProgramsControl Panel.Make sure that no Microsoft Office applications, MSN Messenger or Windows Messengerare running when you install or remove the add-in. Also, be sure that your computermeets the following system requirements:Operating System:Windows 2000 with Service Pack 4 or laterWindows XP with Service Pack 1a or laterWindows Server 2003Microsoft Office:Word 2000 or laterExcel 2000 or laterPowerPoint 2000 or laterProject 2000 or later
Visio 2002 or laterNote: If you do not have at least one of these Office applications installed on your machine, theinstaller will proceed without installing the Add-in for Office Collaboration.Messenger:Windows Messenger 4.7 or laterMSN Messenger 6.0 or laterNote: If the installer finds MSN Messenger, but not Windows Messenger, the add-in will beinstalled. However, you will need to install Windows Messenger before you can actually usethe Add-in for Instant Messaging.To install the Add-in Pack:123456Download the Live Meeting Add-In Pack from the downloads page located athttp://www.conferenceplace.com/downloads.htmIn the File Download dialog box, click Open or Run to initiate the setup program.In the Install-Shield dialog box, click Yes to continue installation.In the Microsoft Office Live Meeting Add-in Pack dialog box, click Next to begininstallation.When the installation completes, select the Set up my User Preferences nowcheckbox.Then, click Close.
Note: You must configure your user preferences before using the add-ins. If you do not want toconfigure your preferences at this time, de-select Set up my User Preferences now, and thenclick Close. When you are ready to configure your user preferences, click Start All Programs Microsoft Office Live Meeting, and then click User Preferences.Once you have completed installation for the Add-in Pack, you will be able to quickly andeasily access Conference Place/Live Meeting from within Word, Excel, PowerPoint,Project or Visio and share any open document instantly. You will also be able to escalatean IM session to a web conference or schedule a web conference with a single click usingthe Outlook Calendar.Setting Up User Preferences for the Add-In PackUser Preferences should be configured at the time you install the Live Meeting Add-inPack. Once the Add-in for Office Collaboration is installed, you may view or change yourUser Preferences for Conference Place/Live Meeting while using Word, Excel,PowerPoint, Project or Visio. User Preferences include Live Meeting Add-in setup,personal information, connection speed and recording access.LIVE MEETING ADD-IN SETUPTo set up your User Login and Password:1In any Office application, click Live Meeting on the menu bar then click UserPreferences. The User Preferences dialog box appears. Alternatively, you canclick the User Preferences button in the Live Meeting toolbar.
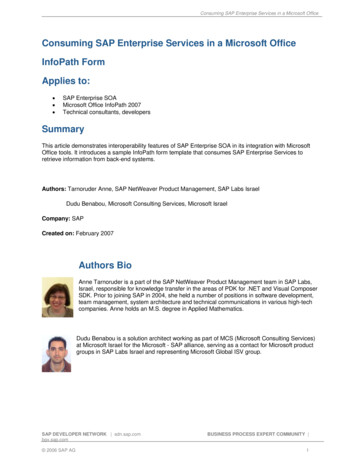
23In the User Preferences dialog box, the Live Meeting Add-in Setup option isselected by default in the left navigation pane.Select the I use a user login and password used to access Live Meeting radiobutton if you use a username and password to access your meetings.Note: If your company uses a Live Meeting Intranet Portal to access Conference Place/LiveMeeting, select the ‘I use a Live Meeting’ Intranet Portal to access Live Meeting radio buttonthen contact your site administrator to obtain the Portal URL.4In the Live Meeting URL field, type your conference center URL. This is the sameURL you would use to log into your Conference Place/Live Meeting account.Note: If using the Conference Place shared per-minute site at www.conferenceplace.com,follow the Determining your Conference Center URL instructions below to obtain the URL to beplaced in this field.5678In the User Login field, enter your Conference Place/Live Meeting user name.In the Password field, enter your Conference Place/Live Meeting password.Click Test Connection to validate your login information with the Live Meetingserver.Click OK.To determine your Conference Center URL when using the Conference Place shared perminute site:123Go to www.conferenceplace.com and click Manage Your Account in the left-handnavigation.Enter your User Login and Password then click Submit.Click on My Home and note the URL that appears in your browser.
4Copy this URL and paste it into the field indicated in Step 4 of the instruction setabove. After doing so, delete the three-digit number found after “www”.Note: In the example shown in the screenshot above, you would delete the “109”. The finalURL contained in the Live Meeting URL field would read NG YOUR PERSONAL INFORMATIONYou may set up your personal information for others to view during meetings. This contactinformation is displayed in the Attendee list for all meetings you attend.To enter your personal information:1Click Live Meeting on the menu bar then click User Preferences. Alternatively,you can click the User Preferences button in the Live Meeting toolbar.2In the User Preferences dialog box, click Personal Information in the leftnavigation pane.
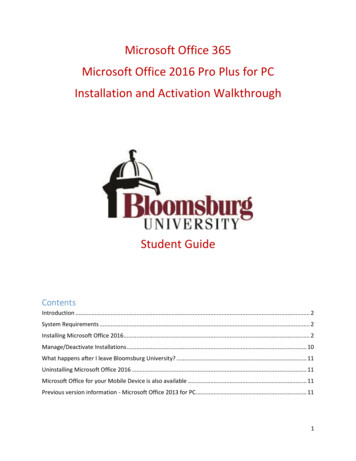
3456789All checkboxes are selected by default. You can de-select the checkbox next toany personal information you do not want displayed.In the Company field, type the name of your company or organization.In the Title field, enter your job title.In the Email field, enter the email address other attendees should use to emailyou (when the email feature is enabled).In the Phone field, enter your phone number.In the Photo field, enter the location and file name of the image you want to use.You can also search for an image to use by clicking Browse, then clicking Openwhen you have selected your photo.Click OK.SETTING YOUR CONNECTION SPEEDThe connection speed that you use helps to define your experience while accessingmeeting content. You can either define your connection type or allow Conference Place/Live Meeting to automatically detect your connection speed.To set your connection speed:1Click Live Meeting on the menu bar, and then click User Preferences.Alternatively, you can click the User Preferences button in the Live Meetingtoolbar.2In the User Preferences dialog box, click Connection Speed in the left navigationpane.3If you do not know your connection speed or you want it to be automaticallydetected, select Automatically detect my connection speed. Otherwise, select theoption that better represents your connection speed: I have a broadbandconnection (corporate LAN, DSL, cable modem) or I have a dial-up connection(56K modem).SELECTING RECORDING ACCESSUse this meeting option to determine who can access and download meeting recordings.The settings in this dialog box are similar to the recording settings available in the meetingconsole and in Live Meeting Manager.
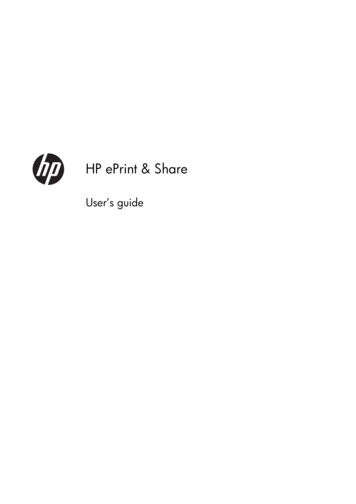
To select recording access:1234Click Live Meeting on the menu bar, and then click User Preferences.Alternatively, you can click the User Preferences button in the Live Meetingtoolbar.In the User Preferences dialog box, click Recording Access on the left navigationpane.To use extended registration for recording access, select the Require extendedregistration by asking for e-mail and company name checkbox.Select your Download recording access preference:- To prevent attendees from downloading recordings, click Only meetingorganizers can download recordings.- To allow all attendees to download meeting recordings, click Anyone who canview the recording can download the recording.5Click OK.Note: Any changes made to your user preferences will be reflected in future meetings.Setting Meet Now OptionsMeet Now Options allows you to configure features for your meetings, including but notlimited to: meeting duration, entry control, audio and recording. You can configure MeetNow Options from within Office applications when you have installed the Live MeetingAdd-in for Office Collaboration. Configuring these options requires you to be online andable to connect to the Conference Place / Live Meeting service.To set Meet Now Options:1Click Live Meeting on the menu bar, select Tools and then Meet Now Options.The Meet Now Options dialog box displays.23In the Meet Now Options dialog box, you can configure meeting details asdescribed in the sections below.When you are done with configuration, click OK.
Note: These options will be applied to future Meet Now meetings.MEET NOW OPTIONSMeeting DetailsUse the Details option on the left navigation pane to set the details of your meeting. Thisincludes details such as the primary language you will use in the meeting, the billing code,the expected size of the meeting and the planned meeting duration.OptionDescriptionLanguageSelect the language that should be used in the meeting invitations.Bill to CodeUse this field to enter the billing code of the department that meetingcosts should be attributed to.Meeting SizeThis setting defines the number of people you expect to attend themeeting.MeetingDurationThis field allows you to select the duration of your meeting. You canchoose a meeting duration as short as 30 minutes to as long as 4hours.Entry ControlUse the Entry Control option on the left navigation pane to specify presenter and attendeeaccess, meeting entry time and extended registration.OptionPresentersDescriptionTo allow only those people who have been invited and have anaccount with the conference center to be presenters, select theAccess Control List option. To allow anyone using the Meeting IDand the Meeting Key to be a presenter, select the Meeting Keyoption. If you select the Meeting Key option, you will also need todefine whether the system will generate a new key for every MeetNow meeting or if the same meeting key will always allow access toyour Meet Now meeting.Select the Generate a new Meeting Key for every Meet Now meetingcheckbox to ensure that attendees of previous Meet Now meetingscannot join this meeting with presenter privileges. The key in the Usethis meeting Key field can be used to present in all your Meet Nowmeetings.
AttendeesMeeting EntryTimeExtendedRegistrationTo allow only those people who have expressly been invited as wellas have an account with the conference center to be attendees,select the Access Control List option. To allow anyone with theMeeting ID and the Meeting Key to be an attendee, select theMeeting Key option. If you select the Meeting Key option, you willalso need to define whether you want the attendees to use a systemgenerated Meeting Key or if the same key will always allow access toyour Meet Now meeting.Select the Generate a new Meeting Key for every Meet Now meetingcheck box to ensure that attendees of previous Meet Now meetingscannot join this meeting. The key in the Use this Meeting key fieldcan be used to attend all your Meet Now meetings.Select the Free Entry option to allow anyone with the Meeting ID toattend your Meet Now meetings.You can define when attendees and presenters can join a meeting.Presenters may join a meeting at any time, but you may want time toupload slides or do other preparation work for the meeting beforeallowing attendees to join. In a case like this, you might wantattendees to join the meeting only up to a half an hour before itstarts. To do this, select the Attendees – 30 minutes early,Presenters – Anytime option. If you prefer, you can allow all meetingparticipants to join the meeting at any time. To set this, select theAnyone – Anytime option.Use this option to obtain extended registration information frommeeting attendees. You can choose to prompt the attendee for emailand company name by selecting Request e-mail address andcompany name. The attendee will be asked to provide thisinformation before entering the meeting. This information becomespart of the meeting report. If you don’t need this information, selectDo not Request e-mail address and company name.Meeting LobbyUse the Meeting Lobby option on the left navigation pane to enable details such as lobbyaddress and lobby greeting message.OptionsEnable Meeting Lobbyfor this meetingLobby AddressEnable e-mailnotifications from lobbyDescriptionSelect this option if you would like to use a meeting lobbywhere attendees can wait for the meeting to begin.If you enable a meeting lobby, the system will generate aURL that you can get here and share with people who donot have invitations but want to join your meeting.Select this option to have email sent to you when the firstmeeting attendee arrives in the meeting lobby. A new
attendeesemail is sent every thirty minutes thereafter when additionalattendees enter the lobby.Additional FeaturesUse the Additional Features option on the left navigation pane to configure features foryour meeting. You can tailor your meeting with features such as chat, application sharing,printing and seating charts.OptionsQuestion andAnswer ControlPanelShow EndSession Option inConsoleSend e-mail toeach otherChatApplicationSharingHow many colorsDescriptionYou can enable the Question and Answer control panel to monitorand respond to questions from attendees.This lets presenters end the meeting and close all attendeeconsoles with one click.You can facilitate communication between all meeting participantsby setting this option. Once set, all meeting participants can sendemail to each other.To enable chat in the meeting, select the Chat check box.Use this option to share applications during a meeting. Once youselect this checkbox, you can select from the options within todefine the extent of application sharing you want to allow. Theshared application can be the desktop, a single frame or a singleapplication. You can also allow attendees to request control of theshared application while application sharing is in progress. Thisallows them to demonstrate tasks or add to the discussion while inthe shared application. To do so, select the Allow meetingparticipants to request control checkbox.You may change the color quality used during application sharing.
to use forsharing?Printing to PDFView the seatingchartStreaming MediaCustom FrameNote: This option isnot available on allsites. Pleasecontact yourInterCall salesrepresentative formore information.Click the drop-down arrow and choose between 256 colors, Highcolor (16 bit), True color (24 bit), Gray scale (16 shades) and Grayscale (256 shades).Use this option to enable PDF printing of meeting content forpresenters only or for all meeting participants.The seating chart allows meeting participants to provide feedbackduring presentations. When you enable the seating chart, you canuse the default chart title and meanings assigned to each colorchoice. You can also edit each field to customize the chart and themeaning of the five color choices.Indicates that you would like to add a pane to meeting consolewhere an interactive web page is displayed to meeting participants.Attendee URL – Shows the content of the specified web address inthe Streaming Media Custom Frame on Atendees’ consoles.Presenter URL – Shows the content of the specified web addressin the Streaming Media Custom Frame on Presenters’ consoles.Frame Height – Indicates the height, in pixels, that the customframe should be when it appears on meeting participants’consoles.Content ExpirationYou can configure your meeting so that content is automatically deleted at a specific tiemafter the meeting ends.OptionDescriptonMeeting content will be deletedafter the meeting ends basedon the duration specified belowUse the text field and time values in the drop-downmenu to specify when the meeting content should bedeleted. The time can be specified in minutes,hours, days or months.
AudioYou should define the level of audio support you will have in your Meet Now meeting.Audio options that you can configure include conference call controls, Internet audiobroadcasting, toll and toll-free meeting phone numbers and meeting participant andleader codes. If you do not already have it, you can obtain the following information fromInterCall and/or your Conference Place/Live Meeting account administrator.OptionThis meeting usesConferencingproviderAllow meetingparticpants to useJoin Conference tohave Live Meetingcall their phoneinstead of dialing inEnable InternetAudio Broadcasting(invitations sent toattendees will notcontain phoneinformation)Display the toll-freephone number toDescriptionYou can connect to your InterCall Reservationless-Plus accountto enable conference call controls such as the entry and exitmessages from within the meeting console. Choose LiveMeeting with audio conferencing to allow your attendees to usethe conference call controls.If you do not need audio support for your meeting or you do notneed to enable conference call conference call controls fromwithin the meeting console, choose Live Meeting without audioconferencing.When you want to enable conference call controls, selectInterCall from the drop-down menu.You can have Conference Place/Live Meeting call attendees ontheir telephones (instead of having attendees dial in themselves).Enable this by checking the box to Allow meeting participants touse Join Conference to have Live Meeting call their phoneinstead of dialing in. To join the audio portion of the meeting,participants will be prompted to input the number at which theycan be reached. After supplying his phone number, a participantcan click the Join Conference button to have theReservationless-Plus service dial out.If you want your meeting attendees to receive audio through theircomputer speakers instead of their telephones, enable InternetAudio Broadcasting. With this feature, audio is one-way only.Meeting attendees will receive audio, but cannot transmit theirown.If you want your meeting attendees to be able to use a toll-freenumber, check this box.
meeting participantsin the Live MeetingConsoleDisplay the tollphone number tomeeting participantsin the Live MeetingConsoleToll-free meetingphone numberToll meeting phonenumberParticipant andLeader codesAdditional dialingkeysIf you want your meeting attendees to be able to use a toll phonenumber, check this box.When you have chosen to display a toll-free meeting phonenumber to your attendees, use these fields to input theinformation that will be displayed. Select the Country/region ofthe phone number, then enter the phone number in the City/areacode and Local number fields.When you have chosen to display a toll meeting phone numberto your attendees, use these fields to input the information thatwill be displayed. Select the Country/region of the phonenumber, then enter the phone number in the City/area code andLocal number fields.In order to join the audio portion of the meeting, attendees willhave to enter a code that your conferencing provider associateswith your calls. Enter those codes here for your meetingattendees to use.There may be additional keys used by the Meeting Recordingand Internet Audio Broadcasting features of ConferencePlace/Live Meeting.- Sample dialing keys: This line shows an example ofwhat the additional dialing keys might look like.- Actual dialing keys: In these fields, enter the additionaldialing keys required before and after the participantcode.- Valid characters: 0123456789*#, Each comma is a onesecond pause – for example: “,,,,,” would indicate a fivesecond pause.RecordingYour meetings may be recorded and viewed later. If your Conference Place/Live Meetingaccount administrator has enabled it, you can use this option to apply recordingcapabilities to your meeting and configure who can access the recordings.
OptionDescriptionEnable RecordingIf you want to disable recording for everyone except yourself, clickDisabled in the meeting, but he organizer can still record whenlogged into Live Meeting. If you want to allow all presenters torecord the meeting, click Presenters can record the meeting.Recording AccessChoose who can view the recordings by clicking Only theadministrator and organizer can view recordings or All meetingparticipants can view recordings using their meeting entryinformation.
The Microsoft Office Live Meeting Add-in Pack is an optional component that extends some Conference Place/Live Meeting functionality to other software applications on your computer. The Add-in Pack includes: 1. Live Meeting Add-in for Outlook 2 Live Meeting Add-in for Office Collaboration . 3 Live Meeting Add-in for Instant Messaging