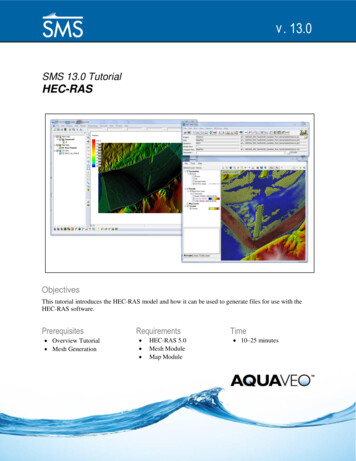
Transcription
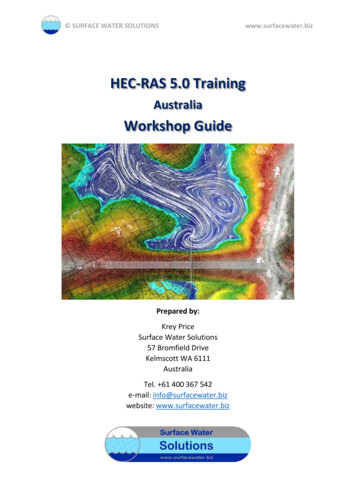
SURFACE WATER SOLUTIONSwww.surfacewater.bizHEC-RASRAS 5.0 TrainingAustraliaustraliaWorkshop GuidePrepared by:Krey PriceSurface Water Solutions57 Bromfield DriveKelmscott WA 6111AustraliaTel. 61 400 367 542e-mail: info@surfacewater.bizwebsite: www.surfacewater.biz
SURFACE WATER SOLUTIONSwww.surfacewater.bizContentsWorkshops:1: Getting started2: RAS Mapper input3: 1D model development4: 2D mesh development5: Boundary conditions6: Computational options7: Land use8. Internal structures9. RAS Mapper output10. Computational options11. Coupled 1D/2D models12. Direct rainfall13. Break and fix your model14. Create a model from scratchIn conjunction with the lecture notes,these workshops are designed to prepare youto build, run, and animate 1D and 2D flood modelsusing the new features available in HEC-RAS 5.0.5Additional resources: -clickDouble-click2Select LinkDraw
SURFACE WATER SOLUTIONSwww.surfacewater.bizIntroductionThis guidance document describes a basic model setup process for: HEC-RAS one-dimensional (1D) flood modelHEC-RAS two-dimensional (2D) flood modelThis guide includes new features available in HEC-RAS Version 5.0.5 and assumes that users havedownloaded and installed the latest version.The schematic image below shows an example of the file setup for the files that will be developedfor these exercises along with the relevant icons for creating, running, and viewing basic HEC-RASmodels.Reading from left to right, the HEC-RAS icons that will be covered in these exercises correspond tothe following files: HEC-RAS project file (*.prj)Geometry file (*.g01)Unsteady flow file (*.u01)Plan file (*.p01)RAS Mapper file (*.rasmapper)The first four icons shown in the inset image below require user input with a defined title that isassociated with each file name. The RAS Mapper file (*.rasmapper) is automatically created anddoes not require the selection of a title.Before beginning, an appropriate folder structure should be set up under a HEC-RAS directorycreated within the overall project folder. Here is an example of the folders to be created: Aerial photosHydrologyLand useProjectionResultsTerrainShape filesThis folder structure may be adjusted to suit organisational IT requirements and geospatial datastandards. Available shape files, terrain files, hydrographs, and other relevant files should be placedin the appropriate folders before proceeding. It would be beneficial to create new layers outside ofHEC-RAS for some features first, such as: Catchment delineationsFlow pathsCross section and long section profile alignmentsRoadway or levee centreline alignmentsBuilding footprintsThese features should be defined as shape files using CAD or GIS software (Arc, QGIS, AutoCAD,etc.). The shape file should include a name field, and individual features should be assigned namesthat will allow clarity and consistency in the HEC-RAS model once the shape file is imported.3
SURFACE WATER SOLUTIONSwww.surfacewater.bizHEC-RAS File Management:4
SURFACE WATER SOLUTIONSwww.surfacewater.bizIntroduction: Getting startedDownload elevation data (Skip this step if terrain and projection are already available) Google “Australia elevation data” and select Geosciences Australia websiteHint: Internet Explorer may not work; Chrome or Firefox are generally preferred. Select Elevation Foundation Spatial Data, accept conditions, and click download link Zoom/pan to area of interest and choose “Select an area”Select data set and click on “Download”Introduction: Getting StartedPage 5
SURFACE WATER SOLUTIONS www.surfacewater.bizOutput format (suggest geotiff) and coordinate system (suggest GDA 94)Enter e-mail address and start extractIntroduction: Getting StartedPage 6
SURFACE WATER SOLUTIONS www.surfacewater.bizGoogle “Australia Zone XX projection file”, click on spatialreference.org websiteSelect prj file and download (suggest creating “GIS” folder and assigning descriptive name)Introduction: Getting StartedPage 7
SURFACE WATER SOLUTIONSwww.surfacewater.bizWorkshop 1: Set Up Project File and RAS Mapper Download the latest version of HEC-RAS (Version 5.0.5)o Google “Download HEC-RAS”o Download link: nloads.aspxo Recommend installing with Example Projects Open HEC-RAS (Select HEC-RAS 5.0.5 from Start Menu)Workshop 1: Set up project file and RAS MapperPage 8
SURFACE WATER SOLUTIONS www.surfacewater.bizSet unit systems to default to SI units (Options Unit System)Start a new project in SI units (File New Project)If folder structure has not yet been set up, return to introduction for instructions or create anew folder (recommend setting up folder in root directory, not in windows shortcuts)Workshop 1: Set up project file and RAS MapperPage 9
SURFACE WATER SOLUTIONS www.surfacewater.bizAssign descriptive project title and relevant file name[Note: the file name will be replicated in many other files with varying file extensions – sometimes tohundreds or even thousands of files. The files are not easily renamed, so choose the file namecarefully!] Project DescriptionEnter description, including:o Purpose of modelo End cliento Data sources for hydrologyo Data sources for terrain datao Name and contact details for modellerSave files using File SaveWorkshop 1: Set up project file and RAS MapperPage 10
SURFACE WATER SOLUTIONSwww.surfacewater.biz Open RAS Mapper (click on RAS Mapper icon or Menu: GIS Tools RAS Mapper) Set projection (Menu: Tools Set Projection for Project) Change Default XS River Stations to Metres and browse to downloaded projection fileWorkshop 1: Set up project file and RAS MapperPage 11
SURFACE WATER SOLUTIONSwww.surfacewater.biz Confirm details Create a new terrain (right-click on Terrain Create a new terrain) and select “plus” button Browse to downloaded or provided terrain file (Be sure to drag down to additional file types)Users with high spec computers, use “Brookfield 1m.tif”; all others use “Brookfield 5m.tif”Workshop 1: Set up project file and RAS MapperPage 12
SURFACE WATER SOLUTIONSwww.surfacewater.biz Change file name to relevant description of terrain and click “Create” Click “Close” when completeWorkshop 1: Set up project file and RAS MapperPage 13
SURFACE WATER SOLUTIONS www.surfacewater.bizToggle on Terrains Layer Group, right-click on Terrain and click “Zoom to Layer”Workshop 1: Set up project file and RAS MapperPage 14
SURFACE WATER SOLUTIONSwww.surfacewater.biz Right-click on “Map Layers”, select “Add Web Imagery Layer”, and click on “Google Satellite” Double-click on “Google Satellite” and adjust transparencyWorkshop 1: Set up project file and RAS MapperPage 15
SURFACE WATER SOLUTIONS www.surfacewater.bizSelect the measure tool, choose a profile location, and select “Plot Terrain Profiles(s)”Workshop 1: Set up project file and RAS MapperPage 16
SURFACE WATER SOLUTIONSwww.surfacewater.biz Click on the “Table” tab to view the profile plot ordinates. Select the blank cell in the upperleft to highlight all text. These values can be copied and pasted into Excel or similar program. Repeat the process by selecting the measuring tool, but this time click on “Save as ProfileLine” and enter a name for the profile line.Workshop 1: Set up project file and RAS MapperPage 17
SURFACE WATER SOLUTIONS www.surfacewater.bizLeft-click on Profile Lines tab at the lower left of the window, then right-click on the newlynamed profile.Select Plot Terrain to view the long sectionWorkshop 1: Set up project file and RAS MapperPage 18
SURFACE WATER SOLUTIONSwww.surfacewater.biz Right-click on the name of the terrain file, then select “Layer Properties” Press the Edit button and adjust all desired parameters, including colour ramp, min/maxvalues, number of displayed values, transparency, and number of values.Click on “Create” and “Apply” when finished Workshop 1: Set up project file and RAS MapperPage 19
SURFACE WATER SOLUTIONS www.surfacewater.bizSelect “Plot Contours” and adjust contour line colours and intervalSelect “Plot Hillshade” and adjust Z factor to observe effect on map appearanceWorkshop 1: Set up project file and RAS MapperPage 20
SURFACE WATER SOLUTIONSwww.surfacewater.bizBonus GIS and RAS Mapper tasks: Create your own shape file by creating a profile line, then right-click on the assigned nameand select “Export Profile to Shapefile”Add the newly created shape file to the Map Layers in RAS Mapper and adjust displayproperties as desiredCreate polygon, polyline, and point shapefiles by right-clicking on Features and selecting“create new layer” Add features, then right-click and export to shape file, then add as existing map layers Zoom to selected zoom levels and save views using view tab (www.surfacewater.biz/views/)Right-click on web imagery and save the view extents as a static image (with a world file)Add any additional GIS files or available static aerial images (with world files)Adjust symbols, colour palettes, ranges, intervals, and transparency for all layers to optimisethe view for later use in the Geometry EditorWorkshop 1: Set up project file and RAS MapperPage 21
HEC-RAS 5.0 Training Australia RAS 5.0 Training ustralia Workshop Guide Prepared by: Krey Price Surface Water Solutions 57 Bromfield Drive Kelmscott WA 6111 Australia Tel. 61 400 367 542 e-mail: info@surfacewater.biz website: www.surfacewater.biz