Transcription
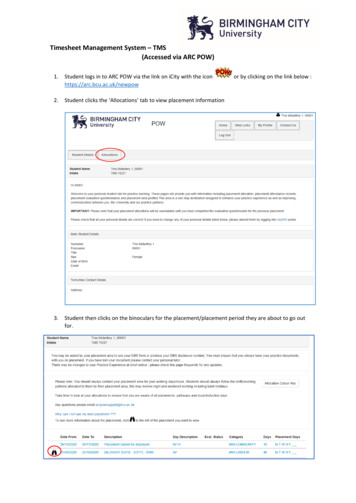
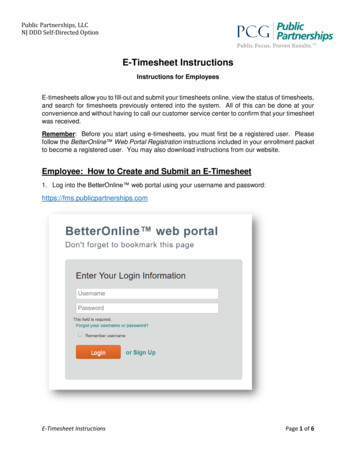
Public Partnerships, LLCNJ DDD Self-Directed OptionE-Timesheet InstructionsInstructions for EmployeesE-timesheets allow you to fill-out and submit your timesheets online, view the status of timesheets,and search for timesheets previously entered into the system. All of this can be done at yourconvenience and without having to call our customer service center to confirm that your timesheetwas received.Remember: Before you start using e-timesheets, you must first be a registered user. Pleasefollow the BetterOnline Web Portal Registration instructions included in your enrollment packetto become a registered user. You may also download instructions from our website.Employee: How to Create and Submit an E-Timesheet1. Log into the BetterOnline web portal using your username and heet InstructionsPage 1 of 6
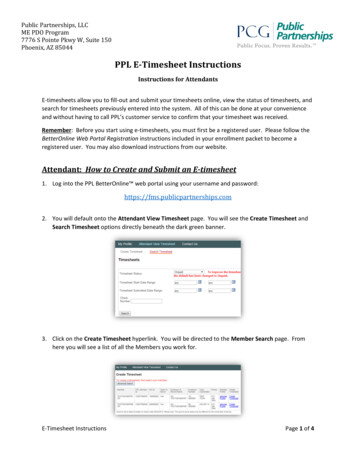
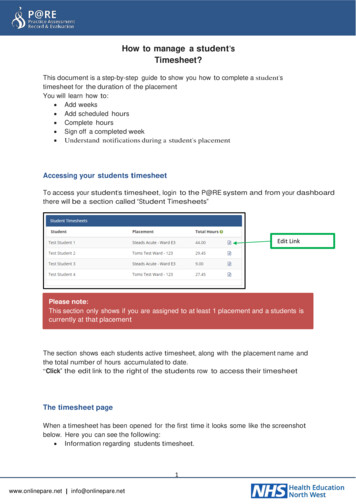
2. Once logged in, click on the Self-Directed Employee View Timesheet link in the ribbon.3. You will be redirected and see the Create Timesheet and Search Timesheet options directlybeneath the dark green banner.4. Click on the Create Timesheet hyperlink. You will be directed to the Individual Search page.From here you will see a list of all the Individuals you provide services to.5. Click on Create Timesheet for the individual you wish to submit time for.6. You will be prompted to enter a Time Period. The easiest way to do this is to click on thecalendar icon next to the empty box and choose the date from the calendar that correspondsto the first date worked that you would like to submit.E-Timesheet InstructionsPage 2 of 6
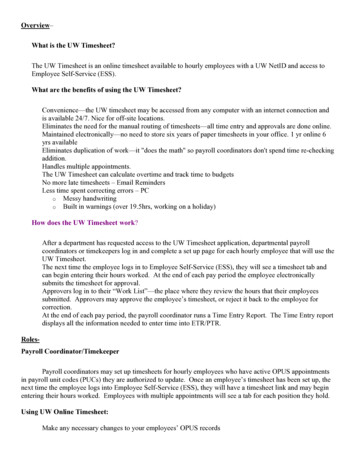
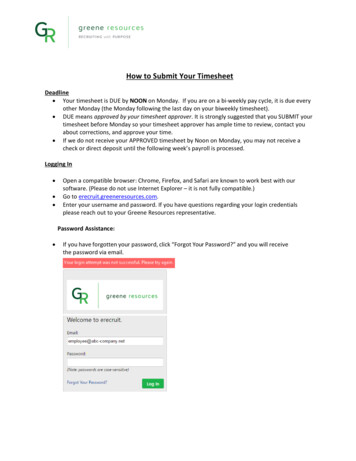
7. After selecting your pay period, you will be taken to the Submit Timesheet screen. Fromhere, you will enter the time you worked during the selected pay period.8. Choose a day of the week that you worked, and enter a service for that day by clicking on theService drop down menu. You must pick a service for each day you worked; if you forget,the system will notify you when you try to submit your timesheet.a. The procedure code for the Service you select will display differently from the procedurecode located in the individual’s service plan. While you will only be able to select procedurecodes you’re authorized to provide, it’s important to select the correct code when filling outyour timesheet. On the next page, you will find the Conversion Matrix for procedure codes.E-Timesheet InstructionsPage 3 of 6
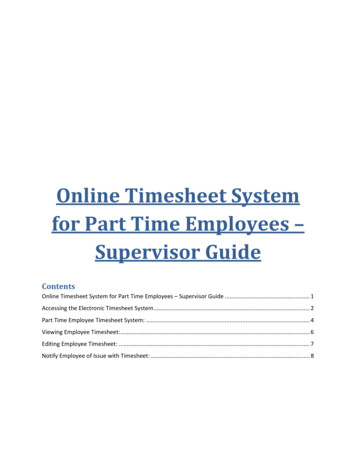
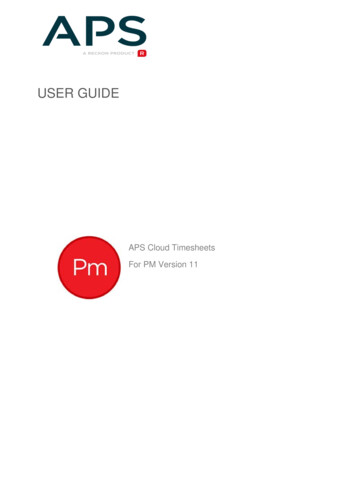
Procedure Code Conversion MatrixIndividual Service Plan Procedure 005HIU8T2041HIU7T100522T2015SA0090HI52Converts to BetterOnline Procedure 1T1005-Z1T2041-Z1T100522-Z3T2015S-Z3A0090-Z19. Next, enter the Plan ID, Outcome No, and Service No that correspond to the associatedservice found in the individual’s service plan.10. Next, enter the Hours and Minutes you worked on that date. Enter the time of day you started, by clicking on the Time In dropdown. Enter the time of day you ended, by clicking on the Time Out dropdown.11. If you worked multiple shifts in one day, select the There are more hours button and a newline will appear on that date worked.E-Timesheet InstructionsPage 4 of 6
12. When you have finished entering all of the days you worked in the pay period, scroll to thebottom of the page and click on the Next button.13. You will be directed to the Confirm Timesheet page. On this page, you should review thetimesheet you entered for completeness and accuracy.14. If the timesheet has an error, you may scroll to the bottom of the page and click on the Editbutton to make the necessary changes.15. After verifying that the timesheet is accurate, click on the Submit button located near thebottom of the page.16. After clicking Submit, you will be directed to a confirmation page letting you know that yourtimesheet has been submitted for approval.17. If there is a problem with your timesheet that would cause it not to be paid, then theBetterOnline web portal will prevent the timesheet from being submitted for approval untilthe problem is fixed. You may contact our customer service center if you have a questionabout a specific pend message.E-Timesheet InstructionsPage 5 of 6
18. Once you have successfully submitted your timesheet for approval, it will be up to youremployer to approve the timesheet. You may monitor the approval status by searchingyour timesheets and reviewing the “Status.” When approved, the status will update from “Submitted” to “Approved.”Do not assume that if you submitted your timesheet it will be paid. Monitor thestatus of your timesheet and/or remind your Participant/Employer to approve yourtimesheets in a timely manner.Once in an Approved status, it will be sent to Public Partnerships for payment inthe next scheduled pay cycle.E-Timesheet InstructionsPage 6 of 6
E-Timesheet Instructions Page 2 of 6 2. Once logged in, click on the Self-Directed Employee View Timesheet link in the ribbon. 3. You will be redirected and see the Create Timesheet and Search Timesheet options directly beneath the dark green banner. 4. Click on the Create Timesheet hyperlink. You will be directed to the Individual Search page. From here you will see a list of all the .