Transcription
USER GUIDEAPS Cloud TimesheetsFor PM Version 11
User Guide Reckon APS Cloud Timesheets for PMV 11AuthorCreated and Published by Reckon LimitedLevel 2, 100 Pacific HighwayNorth Sydney NSW 2060AustraliaACN 003 348 730All Rights ReservedCopyright 2019 Reckon LimitedCopyright & TrademarksNo part of these materials may be reproduced or transmitted in any form or by any means,including photocopying, without written permission of Reckon Limited.Every effort has been made to ensure the accuracy and completeness of this manual. However,neither Reckon Limited, its subsidiaries, employees and agents, are liable for any errors oromissions. This document should not be relied on as a detailed specification of the system. Inaddition, Reckon Limited reserves the right to issue revisions, enhancements andimprovements to APS software or any other Reckon software at any time without notice. Everyeffort will be made to ensure that the manual is updated concurrently and that the user is notinconvenienced as a result of any change.Reckon, Reckon logos, R logos, Reckon APS, Advance and Accountable Technology aretrademarks of Reckon Limited.Reckon Limited PAGE 2 OF 28
User Guide Reckon APS Cloud Timesheets for PMV 11ContentsOverview . 4Functional differences between cloud and desktop . 4Setting up Users for APS Cloud products . 5Enabling APS Cloud Timesheets for specific users. 6User Registration process . 7Forgot your password ?. 9Web Timesheets . 11Calendar Views . 12Header Navigation . 12Actions Menu . 12Adding an Entry. 13Add Entry form . 13Week Summary. 15Completing your Week . 15Open others Timesheet . 15Glide Time Entry . 17Mobile Timesheets . 19Installing the Mobile Timesheet Application . 19Logging in to Mobile Timesheets and signing in. 19Using APS Mobile Timesheets . 22Completing your Week . 28Reckon Limited PAGE 3 OF 28
User Guide Reckon APS Cloud Timesheets for PMV 11OverviewThis document assumes the Cloud Timesheet configuration has been completed as per the‘APS PM V.11 Cloud Application Installation Notes’ and the relevant services are running.Cloud Timesheets has two methods for recording time. These are the web application and amobile application. Functionally, both applications are the same.Cloud Timesheets uses a synchronisation engine to synchronise data between your APSdatabase and the APS Cloud stores.Cloud timesheets use a different header style to Diary/Standard style timesheets. Differenttimesheet entry methods can not be used in the same period (header), this means that Cloudtimesheets can not be edited or updated using the Desktop timesheet application.There are several steps to enabling your account and downloading the application to yourdevice. Setting up Users for APS Cloud productsUser registration processInstall APS Mobile Timesheet application from the Application store for Google or iOSUsing APS Web and/or Mobile TimesheetsNote: Timesheets run on a Synchronisation model which can lead to some timing issues.Things like updating of a header can take a couple of minutes to show in TimesheetAdministration after the header has been completed on the Mobile Device or via the WebBrowser. If a header is completed and then the user re-activates the header and in themeantime the header has been posted in your APS Database, entries can be edited in the cloudwhich will error when they post to your APS Database as the header is now posted.Another example of an error would be where your firm is using the Fee Earner Filter function ata matter level. This is not implemented in Cloud Timesheets so entries will show as errors afterthey have been entered and synchronised to your APS Database.Functional differences between cloud and desktopThere are some functional differences between the Cloud and desktop timesheet applications,these are summarised below: Cloud application allows for entries to be entered side by side, there is no requirementfor the entries to be consecutive. Cloud application currently supports Diary view only.Expenses are supported through the desktop application only. Users can use either ofthe Cloud Timesheet connection methods for their time entry, then expenses areentered via the desktop application.Overtime is only supported on the desktop application.Fee Earner charge rates are available for rates 1 to 5, however cost rate (Rate 6) is notcurrently available in the mobile.Reckon Limited PAGE 4 OF 28
User Guide Reckon APS Cloud Timesheets for PMV 11Setting up Users for APS Cloud productsYour Practice Management Administrator would complete the following administrativeprocesses.Enable the fee earner for Cloud access in the Fee Earner console.Each user must have a valid email address, then they require the “Cloud Enabled” flag to beset, this will trigger the user registration process.Reckon Limited PAGE 5 OF 28
User Guide Reckon APS Cloud Timesheets for PMV 11Enabling APS Cloud Timesheets for specific usersYour Practice Management Administrator would complete the following administrativeprocesses.Setting the Fee Earner to default to Cloud style, future Timesheet headers created will becreated as Cloud style for use through the Cloud Timesheets applications.In Timesheet Admin you can edit existing headers that are Idle and set these to Cloud style.These week’s timesheets can then be entered through one of the cloud applications.Open Timesheet Admin, select the weekRight click on the Fee Earner and select “Edit” (header must be IDLE)Reckon Limited PAGE 6 OF 28
User Guide Reckon APS Cloud Timesheets for PMV 11In the Style combo, select CloudThese headers will then become available in the Cloud applications.User Registration processEach Fee Earner will receive an email after the Cloud Enabled flag has been set in Fee EarnerConsole. This will have a signup link. Please click the signup button.The email is addressed to the user as their User Name is recorded in the Fee Earner console inAPS Practice Management.Reckon Limited PAGE 7 OF 28
User Guide Reckon APS Cloud Timesheets for PMV 11The Fee Earner then enters the temporary password from the email invitation. Enter your email address (from the signup invitation)Enter the password provided in the signup emailNew Password and Confirmation plus Name need to be entered to complete the registrationprocess.This completes the registration process.Reckon Limited PAGE 8 OF 28
User Guide Reckon APS Cloud Timesheets for PMV 11Forgot your password ?Click on ‘Forgot your password’Enter your email address, then click on the Reset my password button.A password reset code will be sent to your email address.Reckon Limited PAGE 9 OF 28
User Guide Reckon APS Cloud Timesheets for PMV 11Use this code and enter your new password as per below, click change password.Reckon Limited PAGE 10 OF 28
User Guide Reckon APS Cloud Timesheets for PMV 11Web TimesheetsWeb timesheets can be accessed via the URL: http://timesheets.aps.reckon.comYou will automatically be requested to login. Please use the username and password fromabove.Web Timesheets looks similar to the desktop diary style timesheet.Each row in the grid represents 1 unit of time for the logged in User.Reckon Limited PAGE 11 OF 28
User Guide Reckon APS Cloud Timesheets for PMV 11Calendar ViewsThe 1, 5 and 7 icons represent the number of days displayed in the calendar1 – Single day view5 – Work Week View7 – 7 Day week viewHeader NavigationThe header navigation bar displays the current active header and allows you to navigatethrough the week.Single Day view - When in single day view the navigation arrows left and right will navigate youthrough the days, when you navigate past the beginning or end of a header then the activeheader will be updated5 or 7 day view – When in 5 or 7 day view the navigation arrows left and right will navigate youthrough the headersActions MenuThe Actions menu is context sensitive and provides the following functionsReckon Limited PAGE 12 OF 28
User Guide Reckon APS Cloud Timesheets for PMV 11Edit – opens an existing entry for editingAdd – adds a new entry at the selected time, if more than 1 unit is selected in the Calendar thenthe number of units will be set accordingly in the new entry.Copy – (Ctrl C) – Copies the selected entry to the clipboardCut – (Ctrl X) – Places the current entry in the clipboard, then deletes the timesheet entryPaste – (Ctrl V) – Pastes the Copied/Cut entry to the newly selected time. If more than oneunit is selected when pasting, then the duration will be set to the number of units selected in thecalendarDelete – (Delete key) – deletes the selected EntryAdding an EntryThere are multiple ways to add a timesheet entry.Double Click a unit opens the add screenSelect a range of cells (units) holding the shift key, will open the Add screen setting the durationto the number of units selected in the calendarSelect a unit (or units) then use the Add button from the Edit menuAdd Entry formWhen adding the Add Time Entry screen is displayedReckon Limited PAGE 13 OF 28
User Guide Reckon APS Cloud Timesheets for PMV 11Recent Clients – Displays a list of your recently used clientsInternal Time – Click on the Internal Time icon displays a list of Internal Matters,alternatively you can type the word ‘Internal’ to display the internal matters.Changes the search behaviour to search for client name starting with text or includingtext.Save Draft – incomplete (or placeholder) entries can be created, a minimum of 1 piece ofinformation must be entered to allow an entry to be saved as a Draft entry. eg, Client ornarration.Client Name SearchNames commencing with (tick box ticked):Searching for APS where the name begins with APS will return clients whose namescommence with APS as per the example below:Names containing (tick box un-ticked):Searching for APS where the name contains APS will return clients whose names contain thetext APS as per the example below:Reckon Limited PAGE 14 OF 28
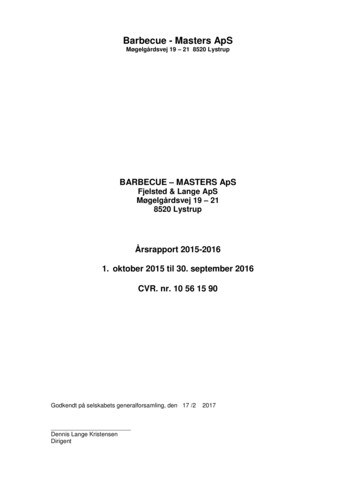
User Guide Reckon APS Cloud Timesheets for PMV 11Week SummaryCompleting your WeekTo complete the timesheet week, open the headers view and select the Tick, this will completethe week (a pencil will indicate the week is complete). To Activate a Completed week, select theEdit pencil to re-activate the week.Recalculate week totalsThe refresh clock icon (required.) provides a function to recalculate the week totals should this beOpen others TimesheetThis allows users to edit others timesheet. To enable Switch user functionality ‘LaunchingTimesheets Allowed’ in JOE Admin for individual Timesheet user who are eligible to enterothers timesheet must be ticked.Switch Users:Login to Web timesheet and hover on hamburger icon at the top right and click “Switch User’Reckon Limited PAGE 15 OF 28
User Guide Reckon APS Cloud Timesheets for PMV 11User is prompted with a pop-up window to search for a user that you like to switch too.Select User Name and click ‘Switch’ navigates user to different user’s timesheet and a messagewill be displayed at top ‘You are currently editing the timesheet of: User namexxx(Switch Useror Go to your own)’There is ability for the user to go back to their own timesheet or can switch to a different user byclicking ‘Switch User’ or ‘Go to your own’ link displayed at top.Reckon Limited PAGE 16 OF 28
User Guide Reckon APS Cloud Timesheets for PMV 11Glide Time EntryWhen a Practice is set up to keep track of extra time worked outside of normal hours, this allowsusers to record and calculate extra hours worked or time taken from the Glide Time repository.The user can use their timesheet as a self-balancing control of their personal time worked.Enable ‘Allow Glide Time’ for the user must be set to yes in the Fee Earner console.When the total hours worked for the week have been entered the week header form is used tocalculate the Glide Time accrued or used for that week.Login to Web Timesheets and select a header where glide time is relevant.Reckon Limited PAGE 17 OF 28
User Guide Reckon APS Cloud Timesheets for PMV 11Glide Time is the variance between actual and standard hours for the week. It can be calculatedfor the week in 2 ways, either Automatically or Manually. Once calculated the glide time hourswill show as Internal hrs in the Glide Time row. Extra/accrued hours worked are displayed in red and in brackets.Used/deficit hours worked displayed in black.Note: in Glide Time – Extra time worked is shown as negative units. Used time is shown aspositive units.AutomaticallyDouble-Clicking on the Internal hrs of the Glide Time row.This will automatically calculate Glide Time and update Internal hours for the row Glide Time.ManuallyUsers can manually enter hours by (single) clicking on the Internal hrs of the Glide Time row.This will display a Glide Time pop-up were changes can be made - click save after changes.Reckon Limited PAGE 18 OF 28
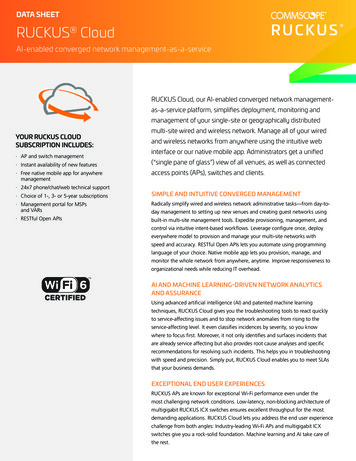
User Guide Reckon APS Cloud Timesheets for PMV 11Mobile TimesheetsInstalling the Mobile Timesheet ApplicationUsing Google Play store or App Store for Apple, search for APS Timesheets and you shouldfind the app. Download and install the application. There is no charge for installing theapplication.Logging in to Mobile Timesheets and signing inLaunch the appLogin by tapping the Login buttonYou will be re-directed to the APS Authentication pageEnter your email address (username) and password:Reckon Limited PAGE 19 OF 28
User Guide Reckon APS Cloud Timesheets for PMV 11Once successfully authenticated you will then need to enter a 4 digit PIN number. This is all thatwill be required for future access to the application.Your pin will be displayed, select “done” to confirm the pin.This completes the Sign In process and Timesheets will be opened.Reckon Limited PAGE 20 OF 28
User Guide Reckon APS Cloud Timesheets for PMV 11After signing in the first time you may receive this message, at this stage Location services arenot being used by APS Mobile Timesheets, this plugin is part of our current development andincluded in the build but not activated. If you receive this message please select ‘DENY’.Once logged into timesheets the default view is the entry view for “today”.Reckon Limited PAGE 21 OF 28
User Guide Reckon APS Cloud Timesheets for PMV 11Using APS Mobile TimesheetsThe default view is the entry view for “today”.Reckon Limited PAGE 22 OF 28
User Guide Reckon APS Cloud Timesheets for PMV 11To create an entryAdd Entry screen:Reckon Limited PAGE 23 OF 28
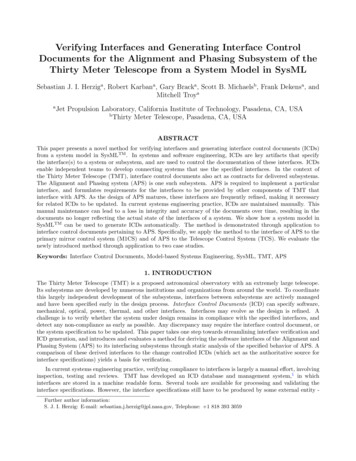
User Guide Reckon APS Cloud Timesheets for PMV 11Select ‘client’ to enter the clientSelect the clientYou are taken to the entry screenContinue entering the following data-MatterMilestoneEnter number of unitsChange the rate where appropriateReckon Limited PAGE 24 OF 28
User Guide Reckon APS Cloud Timesheets for PMV 11Enter narration (or dictate using your mobile phone dictation)Save the narration using the “tick” in the top right cornerSave the entryReckon Limited PAGE 25 OF 28
User Guide Reckon APS Cloud Timesheets for PMV 11The entry is then displayed in the day viewDraft entries can be created, a minimum of 1 piece of information must be entered to allow anentry to be saved as a Draft entry. eg, Client or narration.Overlapping Entries may also be created.Reckon Limited PAGE 26 OF 28
User Guide Reckon APS Cloud Timesheets for PMV 11Cut / Copy / Paste functionalityOnce the entry is added, it can be Cut or Copied. Selecting an existing entry will now display apop up, select the action you wish to perform.Open – Opens the existing entry for the user to editCopy – Copies the entry to the clipboardCut – Places the entry in the clipboard for pasting and deletes the existing entryCancel – returns the user to the diary viewPasteOnce an entry has been placed in the clipboard, selecting a time will display the followingCreate – creates a new entryPaste – Pastes the entry from the clipboardCancel – returns the user to the diary viewReckon Limited PAGE 27 OF 28
User Guide Reckon APS Cloud Timesheets for PMV 11Completing your WeekTo complete the timesheet week, open the headers view and select the Tick, this will completethe week (a pencil will indicate the week is complete). To Activate a Completed week, select theEdit pencil to reactivate the week.Errors and Draft entries:Errors and Draft entries are displayed on the diary view and in the header view as follows:Diary View of error:Header View of errorReckon Limited PAGE 28 OF 28
Open others Timesheet This allows users to edit others timesheet. To enable Switch user functionality 'Launching Timesheets Allowed' in JOE Admin for individual Timesheet user who are eligible to enter others timesheet must be ticked. Switch Users: Login to Web timesheet and hover on hamburger icon at the top right and click "Switch User'