Transcription
Effortlessly Moving Images Out of your Camera and Into your Life7” & 9” Digital Photo FrameUser GuideEnglish – Français – Español
Register your Product / Enregistrement De Produit / Registro Del Producto1Qualify to win a FREEdigital photo frame!*(valid in USA only)Register your FREE 1-year warranty!**Enregistrez votre garantie GRATUITE d’un an!**Registre su garantía por 1 año GRATIS**Register now at http://www.pandigital.netInscrivez-vous maintenant sur http://www.pandigital.netRegístrese ahora en http://www.pandigital.net*For details, go to our website: www.pandigital.net**The online signup is for the purpose of user andproduct registration. Failure to register does not in anyway diminish any of your standard warranty rights, asdescribed in the documentation included with yourproduct.NOTE: If you must mail your 1-year registration, pleasesend your name, address, phone number, model &serial number, and when & where purchased to:Pandigital, P.O. Box 2969,Dublin, CA 94568-2969 USA**L’inscription en ligne a pour objectif l’enregistrementde l’utilisateur et du produit. Omettre de s’inscriren’entraîne en aucun cas une diminution des droits degarantie, tels qu’ils sont décrits dans la documentationincluse avec ce produit.À NOTER: Dans le cas où vous devez poster votreinscription d’un an, envoyez votre nom, adresse,numéro de téléphone, modèle & numéro de série, dateet lieu d’achat à:Pandigital, P.O. Box 2969,Dublin, CA 94568-2969 USA**La suscripción en línea permite el registro de usuarios yproductos. No registrarse no afecta de ningún modo susderechos estándar a la garantía, de acuerdo con lodescrito en la documentación que se incluye con elproducto.NOTA: Para enviar su registro de garantía de 1 año porcorreo, escriba a la siguiente dirección (por favor,incluya su nombre completo, dirección, teléfono,modelo y número de serie, y cuándo y dónde adquirióel producto):Pandigital, P.O. Box 2969,Dublin, CA 94568-2969 USANote: Your frame style and features may differ from those documented in this User Guide.UG-E-FRC-SP PAN7000DW FR NZ PAN9000DW FR NZ V1.1 09-092
T ab le of Con ten tsEnglishIntroduction . 5Compatible Memory Cards .5What’s in the Box .5Overview of the DPF . 5Remote Control . 5Control Buttons on DPF . 6Getting Started . 6The HOME Screen . 6Setup Menu Overview . 6About Selecting Options . 7Select Media Source . 7Personalized Digital Greeting Card . 7The Virtual Keyboard .7Enter Greeting .8Assign Personal Background Image .8PHOTOS . 8Photo Thumbnails.8View Individual Photo during a Slideshow .8Adjust Screen Colors .9Optimal Image Display .9Photo Import Method .9Display Current Time with Photos .9Display Photo File Date/Time Stamp with Photos .9Import Photos into Internal Memory .9Delete Photos from Internal Memory .9PHOTO SLIDESHOWS . 10Slideshow of Photos in Internal Memory .10Slideshow of Photos on your Media Source .10Pause a Slideshow .10Slideshow Folders .10Slideshow Background Music .11Set Slideshow Music Mode .11Set Slideshow Interval .11Set Slideshow Transition .11Set Slideshow Shuffle.11MUSIC. 11Select Media Source for Music.11Playing Music Only .12Music Repeat Mode.12Import Music Files into Internal Memory .12Delete Music Files from the Internal Memory .12VIDEOS. 12Select Media Source for Videos .12Watch a Video .12Video Repeat Mode .12Import Video Files into Internal Memory .13Delete Videos from the Internal Memory.133
CALENDAR/CLOCK . 13Select Media Source for Calendar Slideshow .13Set Schedule .13Disable Schedule.13Run the Schedule .13Run Schedule from Slideshow .14Run Schedule from CALENDAR/CLOCK Screen .14Set Date and Time.14Set Alarm .14Wi-Fi . 14Set up DPF to connect to Photo Sharing Websites .14The Virtual Keyboard .14Set up Wireless Network .15Windows Live FrameIt .16Photo Sharing Websites .17DPF to PC – Wireless Connection . 17DPF to PC – USB Connection . 18USB Flash Drive to DPF Connection . 18Bluetooth Connection . 18Set Sleep Mode. 19Set Language. 19Reset to Factory Defaults . 19Frequently Asked Questions . 19Important Safety Precautions . 20Technical Specifications . 20Limited Warranty . 21FCC Statement . 21FrançaisEspañol4
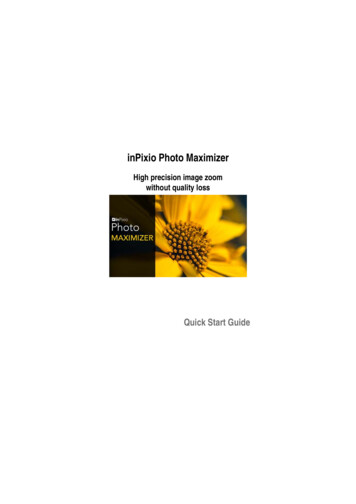
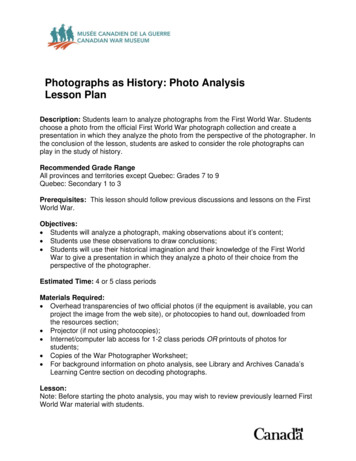
IntroductionWelcome to the Pandigital Multimedia Digital Photo Frame (DPF). Now you can display your digital photos directly from your memory card, no computer isnecessary.DPF Key Features Simple Plug & PlayDisplays digital Photo files (JPEG up to 16 mega pixels)Plays digital Music files (MP3)Plays digital Video files (AVI)Displays Calendar/Clock with photo slideshow and Alarm functionWireless connection to photo sharing websites and DPF-to-PC direct file transferDoes not require a computerInfrared Remote Control and control buttons on the frame1GB Internal Memory2 USB2.0 ports (Device & Host)Compatible Memory CardsCompatible memory cards include: Secure Digital (SD), Compact Flash (select models), MultiMedia Card (MMC), xD Card,Memory Stick (MS), MemoryStick Pro , and Memory Stick Pro Duo * (The Memory Stick Pro Duo requires an additionaladaptor to fit properly into the DPF. You can purchase the adaptor at retail outlet stores that sell memory cards.)What’s in the Box Digital Photo Frame (DPF)AC Power Cord and AdapterInfrared Remote ControlWhite and Charcoal Decorative Paper MatsUSB CableQuick Start Guide, User GuideOverview of the DPFStore Remote ControlYou can avoid misplacing the remote control by safelystoring it on the back of the DPF when not in use.The top back of the remote control has a built-in magnetand the back of the DPF has a ‘magnetic area’ so you cansimply attach the remote control to the back of the DPF forsafe keeping.(The memory card slots, ports, and jacks inyour DPF may be different than those pictured here.)Remote ControlYou can access all of the DPF’s features, and perform all of the functions by using the remote control. You will be able to perform several functions with the remotecontrol that are not possible with the top-back panel control buttons.Note: Before first time use, pull the plastic tab sticking out of the remote control. It protects the battery and the remote control will not work unless it is removed.Replace the Remote Control Battery1. Hold the remote control with the buttons facingdown.2. Push and hold the small release tab while pulling thebattery tray out.3. Replace the “CR2025” Lithium battery on the traywith the positive ( ) side facing up.4. Push the tray back in until it clicks into place.Release tab5
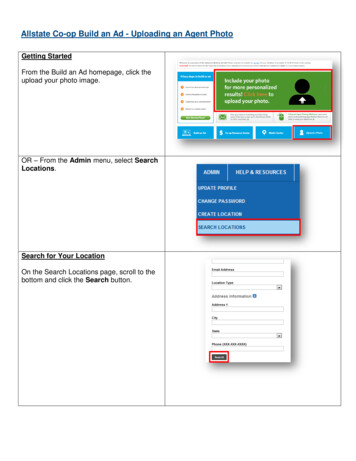
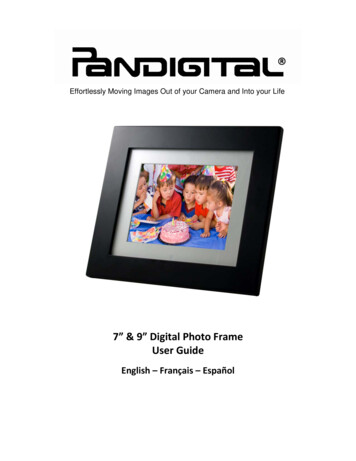
Control Buttons on DPFYou can perform many (but not all) of the DPF functions by using the control buttons located on the top-back panel of the DPF. Their basic functions are the sameno matter when you use them.TIP: The instructions throughout this User Guide only reference the use of the remote control. However, you can use the frame control buttons when theENTER, EXIT, and MENU buttons are referenced when desired.ButtonActionScroll leftENTERSelect the highlighted option, start a Slideshow, Play and PauseScroll rightEXITMENUExit the current display, or go back a screenDisplays function setup screensGetting Started1.Plug the AC Power Adapter into the DPF’s DC power jack and an electrical wall outlet.2.Slide the power button on the left side of the DPF up to the ON position.3.If prompted, select the desired language for the user interface display (varies by model).4.After the initial start up screen is displayed, a slideshow will automatically begin displaying the photos that are stored in the internal memory.5.To view your own photos, insert a memory card containing your photos into the slot on the DPF. Press ENTER on Start Slideshow.CAUTION: The memory cards will only fit in one direction; do not force them as this will damage the card reader.The HOME ScreenThe six main DPF features, PHOTOS, MUSIC, VIDEO, CLOCK, RECIPES, and Wi-Fi are accessed from the HOME screen.To access the HOME screen while a slideshow is playing, press MENU.PHOTOSDisplay your photo files (.JPG or .JPEG) individually or as slideshows. PHOTOS-Manage: set viewing preferences, assign photos tocategory folders, import and delete photo files (page 8)MUSICPlay your MP3 music files. MUSIC-Manage: set listening preferences, import and delete music files (page 11)VIDEOPlay your AVI video files. VIDEO-Manage: set viewing preferences, import and delete video files (page 12)ClockView clock and calendar with photo slideshow, and manage the calendar, clock, and alarm settings (page 13)Wi-FiWith the Pandigital Wi-Fi USB adapter (sold separately) you can connect wirelessly for access to on-line photo sites (page 14) and to your PCfor file transfer (page 17)EditQuick access to single photo manage mode for Zooming, Rotating, or Deleting currently displayed photo.Setup Menu OverviewUse the Setup Menu for DPF functions to optimize your viewing/listening preferences.On the HOME screen press MENU to display the Setup Menu screen.6,
Select Media SourceSelect the media source for current viewing or listening (page 7)Wi-Fi Network SetupSet up wireless network to which you want to connect (page 15)Slideshow SetupSet multiple slideshow functions to optimize your viewing preferences (page 10)Adjust Screen ColorsAdjust LCD screen settings as desired (page 9)Optimal Image DisplaySet photos to display as actual photo size, or optimized to best fit the screen (page 9)Photo Import MethodSet photos to be imported compressed or original resolution and file size (page 9)Set Sleep ModePower saving function (page 19)Reset to Factory DefaultsReturns all function settings to the factory defaults (page 19)Set LanguageSelect desired DPF display language (page 19)Greeting CardCreate a personalized greeting which will be displayed when the unit is powered on (page 7)About Selecting OptionsThroughout this User Guide, when you are instructed to ‘select’ a function option or button, unless otherwise instructed, useto highlight [the referencedoption], and then press ENTER to select.Select Media SourceIf you have inserted one or more external media sources (i.e., memory card, USB flash drive), you can use the Select Media Source function to switch between theinternal memory and your external media source for viewing your photos, videos, or listening to music.You will also use this function to view the contents of the Slideshow Folders after you assign photos to these folders (page 10).1.On the HOME screen, press MENU to display the Setup Menu.2.Select Select Media Source, and then select the desired media source(sources not present will not be available).Internal Memory Built-in flash memoryTMTMSD/MMC Secure Digital / Multi Media cardTMMS Memory Stick (Standard, Pro, and Duo)xD Standard flash memory cardCF Compact FlashUSB Standard USB flash driveSlideshow Folders View photos after assigning to folders (page 10)3.The Photo Thumbnails or Slideshow Folders selection screen will be displayed.Personalized Digital Greeting CardYou can set a personalized greeting which displays when the DPF is powered on. This feature is especially useful when presenting this DPF as a gift.The Virtual KeyboardYou will use a virtual keyboard for entering your personalized greeting.Navigate the keyboard as follows: to highlight the keys, and then pressTo select the desired characters, useENTER multiple times as needed. STYLE 1 2 3 4 Select the background image appropriate for your greeting (can also be your personal photo)DEL Clears the entry field View your greeting with selected background image TITLE MSG Toggle between the Title and Message entries ABC/abc/SYM Toggles between upper and lower case letters, and the following symbols:! :; ( )[] \ & /% ! - {} Scroll through your entry to edit as neededBackspace Erases last selected character Done Completes entry Cancel Return to the previous screen without an entryNote: You can also use the remote control buttons as follows:‘ ’ Scroll forward through entry to edit as needed‘-‘ Scroll back through entry to edit as neededROTATE Backspace, erases last selected characterZOOM Toggles between ABC / abc / SYM screens7
Enter Greeting1.On the HOME screen, press MENU to display the Setup Menu screen.2.Select Greeting Card.3.Select Yes to create a new greeting or delete existing greeting, or select No to edit existing greeting.4.Use the virtual keyboard to enter a title (i.e., Happy Birthday, Merry Christmas).5.Select TITLE MSG to enter your personalized message. Use (on 1 key) to enter multiple lines of text.TIP: If entering multiple lines, to avoid losing your progress should you leave the unit or have a power interruption, it is recommended that you selectDone periodically to save your message.6.Select STYLE 1 2 3 4 to choose a background appropriate for your greeting.Style 1 Default – Blue with scroll (or your personal photo – see Assign Personal Background Image on page 8)Style 2 – BalloonsStyle 3 – Gift with gold ribbonStyle 4 – Roses7.Select VIEW to view your greeting, and then press EXIT to return to the keyboard screen.8.When satisfied with your greeting, select Done to save.Assign Personal Background ImageYou can enhance your personal greeting even more by assigning one of your own photos as the greeting background.1.Choose the photo you want as your background, and then name it exactly showme.jpg.IMPORTANT: showme.jpg must be a standard JPG and not in a progressive format.2.Copy your showme.jpg file into the root folder of the DPF’s internal memory.Use the DPF to PC – USB Connection instructions on page 18 to copy the file to the root folder (do not copy into Photos folder).3.Follow steps 1-6 under Enter Greeting (above), and select the Default style.4.Your greeting will now have your personal photo as the background.5.Select VIEW to view your greeting, and then press EXIT to return to the keyboard screen.6.When satisfied with your greeting, select Done to save.PHOTOSThe PHOTOS feature includes many functions for optimizing and customizing your viewing preferences. You can view your photos individually or as slideshowswith or without background music. Other optional functions allow you to display the current time with your images, adjust the screen colors, choose slideshowtransitions, and even schedule slideshows according to your weekly schedule.Photo Thumbnails1.On the HOME screen, select the PHOTOS-Manage button.2.Use3.To view an individual photo full screen, press ENTER on the highlighted photo.4.While the photo is displayed, you can useto scroll through individual photos, or use the Page Up/Page Down arrows to scroll full pages.to view the next/previous photos.View Individual Photo during a Slideshow1.With the desired photo displayed, press EXIT to pause the slideshow.2.The photo will be displayed approximately 15 seconds and then the slideshow will automatically resume, or you can press ENTER or SLIDESHOW toresume the slideshow.Zoom or Rotate PhotosYou can temporarily magnify or rotate photos while viewing them in single photo view. The rotation of a photo will be saved only for photos in the internalmemory.Zoom or Rotate a photo during a slideshow1.With the photo displayed that needs rotating, press ZOOM or ROTATE, multiple times if necessary, to achieve the desired view.2.Press SLIDESHOW to resume the slideshow.Zoom or Rotate a photo from the Photo Thumbnails screen1.On the HOME screen, select the PHOTOS-Manage button.2.On the Photo Thumbnails screen, press ENTER to select the desired photo to be magnified or rotated, and then press ZOOM orROTATE multiple times if necessary to achieve the desired view.3.Press EXIT to return to the Photo Thumbnails screen.TIP: When a photo is zoomed, you can pan around the photo by using8to view portions of the photo that are not currently visible.
Adjust Screen ColorsYou can adjust the four LCD color levels for optimal image viewing.1.On the HOME screen, press MENU to display the Setup Menu.2.Select Adjust Screen Colors.3.Useto scroll through the LCD options, and use4.Useto select Done.to adjust the setting until the desired view is achieved.Optimal Image DisplayYou can choose the desired display mode for displaying your photos on the DPF as follows:1.On the HOME screen, press MENU to display the Setup Menu.2.Select Optimal Image Display, and then select the desired setting.Original Displays photos in actual photo size.Optimal (default) Optimizes the size and resolution to best fit the screen, which may result in part of a photo not being visible on the screen.Photo Import MethodWhen importing files into the internal memory from an external media source, the file can be optimized or left as the original file size and resolution.1.On the HOME screen, press MENU to display the Setup Menu.2.Select Photo Import Method, and then select the desired setting.Optimized (default) The photo file is downscaled in size and compressed into a smaller sized JPEG, allowing more photos to be stored in the internalmemory.Original The photo file is stored keeping its original size and resolutionDisplay Current Time with PhotosYou can have the current time displayed with your photos if desired.1.On the HOME screen, press MENU to display the Setup Menu.2.Select Slideshow Setup, and then use3.Select Done.to select Yes or No under Display Current Time.TIP: If the time is incorrect, refer to Set Date and Time on page 14 to set the clock.Display Photo File Date/Time Stamp with PhotosMost digital cameras typically include a Date/Time stamp when saving photo files. If your photo files contain this Date/Time information, you can have itdisplayed with your photos if desired.1.On the HOME screen, press MENU to display the Setup Menu.2.Select Slideshow Setup, and then use3.Select Done.to select Yes or No under Display Photo Date/Time.Import Photos into Internal MemoryYou can import your photo files from external media sources (i.e., memory card, USB flash drive) into the DPF’s internal memory. The number of photo filesyou can import de
6 Control Buttons on DPF You can perform many (but not all) of the DPF functions by using the control buttons located on the top-back panel of the DPF. Their basic functions are the same no matter when you use them. TIP: The instructions throughout this User Guide only reference the use of the remote control.However, you can use the frame control buttons when the ,