Transcription
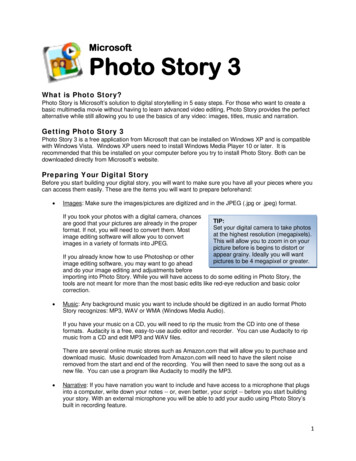
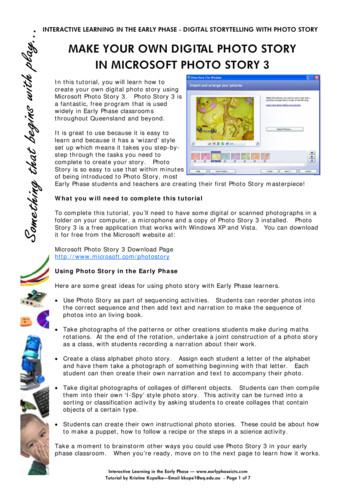
INTERACTIVE LEARNING IN THE EARLY PHASE - DIGITAL STORYTELLING WITH PHOTO STORYMAKE YOUR OWN DIGITAL PHOTO STORYIN MICROSOFT PHOTO STORY 3In this tutorial, you will learn how tocreate your own digital photo story usingMicrosoft Photo Story 3. Photo Story 3 isa fantastic, free program that is usedwidely in Early Phase classroomsthroughout Queensland and beyond.It is great to use because it is easy tolearn and because it has a ‘wizard’ styleset up which means it takes you step-bystep through the tasks you need tocomplete to create your story. PhotoStory is so easy to use that within minutesof being introduced to Photo Story, mostEarly Phase students and teachers are creating their first Photo Story masterpiece!What you will need to complete this tutorialTo complete this tutorial, you’ll need to have some digital or scanned photographs in afolder on your computer, a microphone and a copy of Photo Story 3 installed. PhotoStory 3 is a free application that works with Windows XP and Vista. You can downloadit for free from the Microsoft website at:Microsoft Photo Story 3 Download Pagehttp://www.microsoft.com/photostoryUsing Photo Story in the Early PhaseHere are some great ideas for using photo story with Early Phase learners. Use Photo Story as part of sequencing activities. Students can reorder photos intothe correct sequence and then add text and narration to make the sequence ofphotos into an living book. Take photographs of the patterns or other creations students make during mathsrotations. At the end of the rotation, undertake a joint construction of a photo storyas a class, with students recording a narration about their work. Create a class alphabet photo story. Assign each student a letter of the alphabetand have them take a photograph of something beginning with that letter. Eachstudent can then create their own narration and text to accompany their photo. Take digital photographs of collages of different objects. Students can then compilethem into their own ‘I-Spy’ style photo story. This activity can be turned into asorting or classification activity by asking students to create collages that containobjects of a certain type. Students can create their own instructional photo stories. These could be about howto make a puppet, how to follow a recipe or the steps in a science activity.Take a moment to brainstorm other ways you could use Photo Story 3 in your earlyphase classroom. When you’re ready, move on to the next page to learn how it works.Interactive Learning in the Early Phase — www.earlyphaseicts.comTutorial by Kristine Kopelke—Email kkope1@eq.edu.au - Page 1 of 7
INTERACTIVE LEARNING IN THE EARLY PHASE - DIGITAL STORYTELLING WITH PHOTO STORYBeginning your adventure with Photo Story 3Step 1 - Getting StartedWhen you open Photo Story,you will see the screen shownhere. At this point, you are asked toselect an option.Select Begin a New Story.Click the Next button to move onto the next step.Step 2 - Importing and arrangingyour pictures.In this step, click on the ImportPictures button and locate the imageson your computer that you wish to useas part of your Photo Story. Note that youcan import more than one photo at a time.To do this, hold down the Ctrl key on yourkeyboard and click on the images you wishto import. Press OK.Your photos will appear in the timeline below (shown here).photos on your timeline, you can:By interacting with the reorder your images by clicking and dragging them into different places or byselecting an image and using the arrows to move them forward or backwards. delete your images by clicking on the image and pressing the X button.As part of this step in the Photo Storywizard, you can enhance or edit yourphotographs.Correct Colour Levels byselecting this button.Remove Red Eye by selectingthis button.Rotate the photo byclicking on these buttons.Edit the photo by cropping it, fixing the colour or adding effectswhen you select this button and enter the Editing Window.Interactive Learning in the Early Phase — www.earlyphaseicts.comTutorial by Kristine Kopelke—Email kkope1@eq.edu.au - Page 2 of 7
INTERACTIVE LEARNING IN THE EARLY PHASE - DIGITAL STORYTELLING WITH PHOTO STORYEditing PhotosWhen you select the Edit button, you are takeninto the Edit Pictures window of Photo Story.You will at first see that you are now in a partof Photo Story where you can rotate and cropyour photos. Note that this window has threetabs at the top. They are Rotate and Crop, Auto Fix and Add Effect.Select each of the tabs at the top and explore the features in each section. How to crop an image1. Ensure the Rotate and Croptab is selected at the top.2. Select the Crop option3. Resize the box that appearsusing the small squares(handles) that appear on theedge of the box. You can use this to make the region to be shown bigger orsmaller. You can also drag the box around to select the part you want to show inthe photo story.4. Ensure you select save to ensure the crop issaved for use in your story. How to add an effect1. Ensure that the Add Effect tab at the top isselected.2. Select the effect you want.3. Ensure you select save to ensure the effectis saved with your photo.Once you have imported, arranged and edited all of your photos, select next to moveon to the next step. Note that you can select back at anytime in Microsoft Photo Storyto import or remove photos.Step 3 - Adding textAdding text is simple in Microsoft Photo Story.Follow these steps.1. Select the photo you wish to add text to.2. Enter the text in the text box provided to the right of the photo (shown here).3. Use the A button to choose the font, type and colour for your text.align text buttons until you have the text in the spot you want.Click on the4. Select save and repeat this process for each photo you wish to add text to.5. Select the next button to move onto the next step.Interactive Learning in the Early Phase — www.earlyphaseicts.comTutorial by Kristine Kopelke—Email kkope1@eq.edu.au - Page 3 of 7
INTERACTIVE LEARNING IN THE EARLY PHASE - DIGITAL STORYTELLING WITH PHOTO STORYStep 4. Narrate your pictures and customize motionOne of the best things aboutPhoto Story 3 is just how easy itis to add sound to your photo stories.Photo story even includes a text boxwhere you can write down the words youwant to say so that you can just readthem when you record your narration.To record your narration:1. Plug in your microphone.2. Select the red circle button to begin recording and the black square button tostop recording. If you make a mistake, selectthe undo button (back arrow) and thenbeing your narration again.3. Press the preview button to see what yourstory looks like with the narration. If youare happy with it, simply move on to addingnarration to the rest of your photos. If not,select the undo key and record it again.Customising MotionPhoto Story 3 also allows you to add interest to yourphoto story through the use of motion andtransitions.You can select an area of your photothat you want to use as a start positionwhen the photo appears. You can thenselect an area that will be shown as theend position. For example, for thepurple photo in the photo story shownthe right, only the top right corner ofthe photo will be displayed when thephoto appears. It will then zoom outshow the whole photo.Transitions also addinterest to your photostory. Photo Story has alarge collection oftransitions you can use toincrease interest as youmove from one photo tothe next. Thescreenshot to the rightshows the preview of theCircle Outwards transitionbeing applied to the pinkand yellow photos.Interactive Learning in the Early Phase — www.earlyphaseicts.comTutorial by Kristine Kopelke—Email kkope1@eq.edu.au - Page 4 of 7atto
INTERACTIVE LEARNING IN THE EARLY PHASE - DIGITAL STORYTELLING WITH PHOTO STORYTo customise motion:1. Select the customise motion button that is locatedunder the main photo in the Narrate your pictures andcustomise motion step in Photo Story.2. Select the Motion and Duration tab to add motion toyour photo story.3. Select the specify start and end position of motionoption.4. Use the handles at the edge of the photos shown in the start and end position toset up the areas that will be shown when the photo starts and ends.5. Click on the Set duration automatically option if you want Photo Story to determinethe time that the photo should be displayed. This will be based on the lengthof your narration and also the motion / transitions you have used.Alternatively, select the number of seconds to display the pictureoption to control how long your image is displayed.6. Select preview to see what your motion looks like.the motion.Press save if you are happy withAdding TransitionsTo add transitions to your photo story, select theTransition tab from the top of the Customise Motionwindow.Interactive Learning in the Early Phase — www.earlyphaseicts.comTutorial by Kristine Kopelke—Email kkope1@eq.edu.au - Page 5 of 7
INTERACTIVE LEARNING IN THE EARLY PHASE - DIGITAL STORYTELLING WITH PHOTO STORYTo add a transition:1. Select the checkbox next to the start current picture using a transition.2. Use the scroll bar next to the transitions to scroll through the collection oftransitions you can choose from. Click on any transition to preview it in themiddle of the three images displayed. Alternatively, select the preview buttonto see how it works within the photo story itself.3. Once you have selected your transition, select whether the duration of thetransition will be automatic or whether you want to set it yourself.4. Select Save and Close once you are happy with the transition.Repeat this process for any of the photos you wish to add motion or transitions to.Once you are happy, select the next button to move on to the next step.Step 5. Add Background MusicAnother great feature of Photo Story 3 is the ability to add background music to yourstory. To do this:1.Select the photo where you want the music to start playing.2.If you have an existing music file that you would like to use (in wav, mp3 or wmaformat), click the Select Music and locate it on your computer. Click ok once youhave found it. Alternatively, click the Create Music option to make your own originalmusic in Photo Story.Interactive Learning in the Early Phase — www.earlyphaseicts.comTutorial by Kristine Kopelke—Email kkope1@eq.edu.au - Page 6 of 7
INTERACTIVE LEARNING IN THE EARLY PHASE - DIGITAL STORYTELLING WITH PHOTO STORY3. If you have selected Create Music, thewindow at the right will appear. Workthrough the different options until you havecreated some music that suits your story.4. Select OK and then Preview to view yourphoto story with the music you have selected.If you are happy with your photo story, selectnext to move on to the final step.Alternatively, select the back button to movethrough the previous steps and to make anychanges you need to make.Step 6. Save and Publish your Photo StoryYou have probably clicked save prior to this point,however it is now time to save your final photostory. When we save our photo story, we saveit as two different files. The first is the PhotoStory Project file that you can open in Photo Storywhen you want to make changes. The second file is the one that we can share withothers. This is usually a WMV (Windows Media Video) format.Save a project fileTo create a project file, select Save Project from thebottom of the Save your story window. Give your projecta name and save it in the folder of your choice.Save your story to share with othersYou have numerous options when it comes to how you can share your photo story withothers. You will most likely want to save your story for playback on your computer.To do this select the Save your story for playback on your computer option and thenselect the Browse button to locate the place on your computer where you want to savethe file. Give your file aname and select save.Another great option is tosave your photo story tosend in an email message.When you select this option,Photo Story automaticallymakes your file size smallto enable it to be attachedto an email.YOU DID IT!If you’ve reached thispoint, you should havea great photo story toshare with your students orcolleagues. For more greatideas for digital storytelling and Microsoft Photo Story, visit the Interactive Learning inthe Early Phase website at www.earlyphaseicts.com.Interactive Learning in the Early Phase — www.earlyphaseicts.comTutorial by Kristine Kopelke—Email kkope1@eq.edu.au - Page 7 of 7
INTERACTIVE LEARNING IN THE EARLY PHASE - DIGITAL STORYTELLING WITH PHOTO STORY MAKE YOUR OWN DIGITAL PHOTO STORY IN MICROSOFT PHOTO STORY 3 In this tutorial, you will learn how to create your own digital photo story using Microsoft Photo Story 3. Photo Story 3 is a fantastic, free program that is used widely in Early Phase classrooms


