Transcription
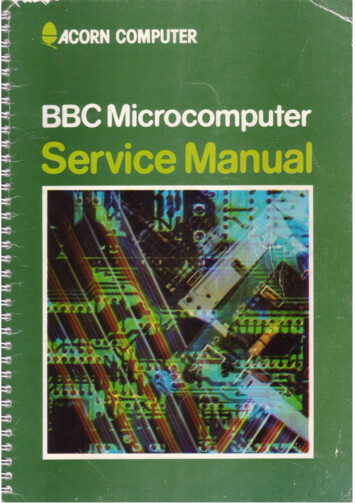
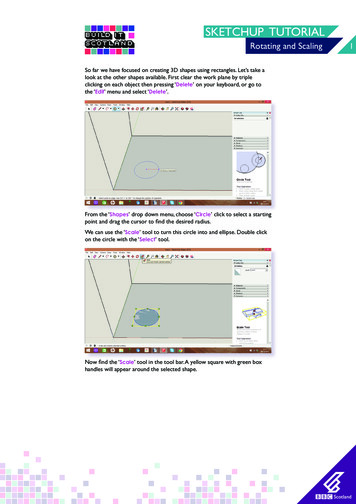
SKETCHUP TUTORIALRotating and ScalingSo far we have focused on creating 3D shapes using rectangles. Let’s take alook at the other shapes available. First clear the work plane by tripleclicking on each object then pressing ‘Delete’ on your keyboard, or go tothe ‘Edit’ menu and select ‘Delete’.From the ‘Shapes’ drop down menu, choose ‘Circle’ click to select a startingpoint and drag the cursor to find the desired radius.We can use the ‘Scale’ tool to turn this circle into and ellipse. Double clickon the circle with the ‘Select’ tool.Now find the ‘Scale’ tool in the tool bar. A yellow square with green boxhandles will appear around the selected shape.1
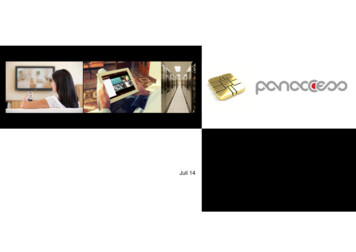
SKETCHUP TUTORIALRotating and ScalingClick and drag on any corner to resize your shape whilst keepingits proportions.Click and drag one of the side handles to change the length or width. Makethe shape narrower to turn it into an ellipse.2
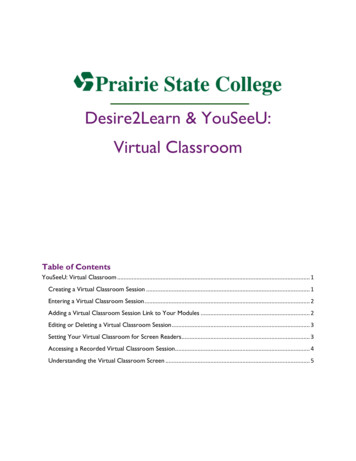
SKETCHUP TUTORIALRotating and ScalingNow lets look at the final shape in the drop down menu, find the ‘Polygon’shape and select it.As with the circle, click and drag to create a polygon. The default polygonhas 5 sides.To change the number of sides, click once to start your shape, hold down‘Ctrl’ and use ‘ ’ or ‘-’ to increase or decrease the number of sides. Clickagain to finish.3
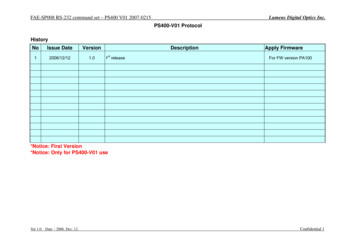
SKETCHUP TUTORIALRotating and ScalingUse the ‘Push/Pull’ tool to extrude the shapes.Triple click on the triangular prism to select the whole object. Then from thetoolbar select the ‘Rotate’ tool and click on one of the vertical edges aligningthe protractor icon so it is flat against the side face.Move the cursor and the protractor will spin. Select an angle to rotatearound. I have lined the angle up with the edge of the shape, vertically. Clickto select the angle.4
SKETCHUP TUTORIALRotating and ScalingNow, as you move the cursor around the object will rotate. Rotate so thatthe edge that was vertical is now horizontal. Click to complete.Orbit around your shape to see the triangular face. Rotate the object againbut this time clicking on one of the edges of the triangle, with the protractorflat against this face. Then move the cursor to align the protractor with thisedge (edge will become highlighted pink).5
SKETCHUP TUTORIALRotating and ScalingRotate the shape so this edge is now horizontal.Use the move tool to move this shape back into the build area and downonto the plane.6
SKETCHUP TUTORIALRotating and ScalingWith the prism still selected (all lines and faces), select the ‘Scale’ tool again.This time a 3D yellow cube surrounds the whole object. Click on a cornerand drag to resize the whole shape to scale.You can also resize just one of the faces. With the ‘Select’ tool, deselect thewhole shape by clicking off it and the work area, then double click on the topface of the 3D ellipse. Select the ‘Scale’ tool and the shape will now have ayellow box around it again, not 3D.7
SKETCHUP TUTORIALRotating and ScalingAs the shape is connected to the rest of the object, when you resize theshape it will distort the object.8
SKETCHUP TUTORIAL Rotating and Scaling To change the number of sides, click once to start your shape, hold down 'Ctrl' and use ' ' or '-' to increase or decrease the number of sides. Click again to fi nish. As with the circle, click and drag to create a polygon. The default polygon has 5 sides.