Transcription
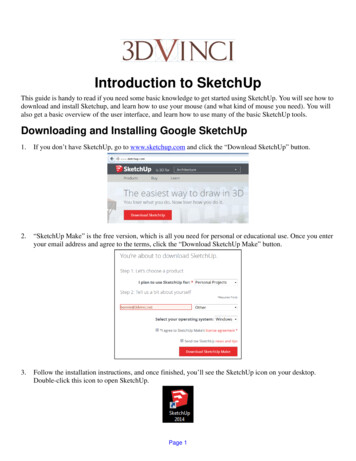
Introduction to SketchUpThis guide is handy to read if you need some basic knowledge to get started using SketchUp. You will see how todownload and install Sketchup, and learn how to use your mouse (and what kind of mouse you need). You willalso get a basic overview of the user interface, and learn how to use many of the basic SketchUp tools.Downloading and Installing Google SketchUp1.If you don’t have SketchUp, go to www.sketchup.com and click the “Download SketchUp” button.2.“SketchUp Make” is the free version, which is all you need for personal or educational use. Once you enteryour email address and agree to the terms, click the “Download SketchUp Make” button.3.Follow the installation instructions, and once finished, you’ll see the SketchUp icon on your desktop.Double-click this icon to open SketchUp.Page 1
4.In the Welcome to SketchUp window, click Choose Template, and choose one of the templates from the list.Then click Start Using SketchUp.The MouseYou might already have a perfect mouse, but if not, you should get one! What you should have is a three-button,scroll wheel mouse. Here are some examples:If you are using SketchUp on a laptop or notebook computer, you might not have a separate mouse. Instead, youmay have a track pad with two mouse buttons, like these examples:It is quite difficult to use SketchUp properly on a laptop, with buttons and pads like these. So you really shouldattach a “real” mouse to the laptop.Page 2
Using a three-button wheel mouse has two huge advantages:1.The scroll wheel can be used to zoom in and out (making the objects appear larger or smaller).2.The middle mouse button can be used for orbiting (spinning the model around). If you have a scroll-wheel inthe middle, the scroll wheel IS the middle mouse button - you can both scroll it and click it.The right mouse makes it easy to move around in your model - it’s a good deal harder to maneuver around with a“lesser” mouse!If you install a new mouse, it comes with setup software, which you can use to set what each mouse button does.If you already have a mouse, and the buttons aren’t doing what you expect them to, open your computer’s mousesettings. Most mouse drivers have options to set what each mouse button does. Make sure you set: Left button click Right button Right-click Wheel button Scroll (yours might say “AutoScroll”)If there’s a separate option for Middle Button, set it to “Middle-click.”Some mice have extra buttons, such as small ones on either side. You can set one of these to double-click, whichwill save your clicking finger from some extra work! (SketchUp uses a lot of double-clicking.)Toolbars, Menus, IconsThis is the menu and the main toolbar you’ll see when first opening SketchUp. Here you can access most, if notall, the drawing and editing tools you’ll be using.There are many more toolbars available, which you can find by choosing View / Toolbars (Mac: View / CustomizeToolbars). From the menu that appears, click any toolbars you want to see. (What you see on your list may lookdifferent; installing plugins adds more toolbars to the list.) Once displayed, you can move toolbars to differentlocations, by clicking and dragging their title bars around the screen.Page 3
Mac users: drag the toolbar you want to see onto the main toolbar.If you don’t feel like clicking icons or going the main menu each time you want to use a tool, you should get toknow the keyboard shortcuts. If you look at the menus, you can see the shortcuts listed next to each tool (forexample, “L” for Line, “M” for Move, or “E” for Eraser).To use a shortcut, just press the letter or key on the keyboard. So if you want to use Move, just press the M key.This is very useful for tools you use very often, such as Select (whose shortcut key is the Spacebar).If you want to change a shortcut to a different key, or set a shortcut for a tool that doesn’t have a shortcut, chooseWindow / Preferences (Mac: SketchUp / Preferences) and open the Shortcuts page.Zooming, Panning, and OrbitingIt’s crucial in SketchUp that you understand how to navigate and explore in your model. There are icons forzooming, panning, and orbiting tools. But to make it very easy to move around, you really, really need athree-button scroll wheel mouse. With the right mouse, you never have to click any of these tools - you just useyour mouse buttons and (sometimes) keys on your keyboard.OrbitOrbiting is like holding an object and turning it around. When you use this tool, click and hold the mouse buttonand move the mouse around. Where your cursor is on the screen will be the center of rotation. It takes some gettingused to, so try using Orbit with your cursor in different places.Here’s a much easier way to orbit: If you have a three-button mouse, just press and hold the middle mouse buttonwhile moving the mouse. If your middle mouse button is a scroll wheel, just click the wheel and hold it down.Page 4
You can mouse-orbit even if you’re in the middle of using another tool - when you release the middle mousebutton, you’re back in the tool you were already using.PanPanning means sliding your view up or down, left or right. It’s similar to moving a piece of paper across a desk.To pan the view, activate Pan and hold and drag the mouse.If you have a three-button mouse, you can pan by pressing Shift while orbiting. This means holding the middlemouse button, pressing Shift, and dragging the mouse around.ZoomClick and drag the mouse up to zoom in, down to zoom out. With a wheel mouse, you can scroll the mouse wheelup or down to zoom. If you are using your scroll wheel, place your mouse where you want the zoom to be centered.It sounds confusing, but try zooming with your cursor in different places, to see what this means.If you zoom so far in or out that you can’t see your model anymore, click Zoom Extents. That will fit everythingback on your screen.Overview of SketchUp’s Basic ToolsAll of SketchUp’s drawing and editing tools are available from the main menu, and on the main toolbar across thetop of the screen. Most of these can be activated by a shortcut key, too.SelectMenu: Tools / Select, shortcut: SpacebarYou need to select objects (edges and/or faces) before the objects can be moved, copied, scaled, etc. You can alsouse Select to erase objects: Select them, then press the Delete key.Page 5
When you activate Select and click on an object, it will be highlighted. You can select more than one object bypressing Shift or Ctrl (Mac: Option) while clicking. (Shift toggles what’s selected - if something is alreadyselected, Shift and Select will unselect it. Ctrl / Option will only add to what’s selected.)When you want to select multiple objects, it’s often easiest to use a selection window. This means holding themouse and dragging a rectangle around what you want to select. The way you drag the window makes a difference:if the window goes from left to right, you’ll select only what’s completely inside. If the window goes from rightto left, you’ll select everything completely inside AND everything that touches the window.If you double-click on a face, you’ll select both the face and its edges. This comes in handy! And triple-clickingmeans everything connected to the selected object will also be selected.LineMenu: Draw / Lines / Line, shortcut: LThis tool draws (surprise!) lines, also known in SketchUp as edges. Click the first endpoint, then click the secondendpoint. If you’re finished making lines but the tool has started a new line, press the Esc (Escape) key. (You canalso activate a new tool if you ever want to cancel the current tool.) If you draw lines that form a closed shape,like a triangle or rectangle, SketchUp will automatically create a face inside the lines.RectangleMenu: Draw / Shapes / Rectangle, shortcut: RTo draw a rectangle, click one corner, and then click the opposite corner. If you want to draw a square, wait to seethe “Square” popup before clicking that second corner point.CircleMenu: Draw / Shapes / Circle, shortcut: CTo draw a circle, first click the center point, then click an outside point.Page 6
A circle is actually a set of short line segments; the default number of sides is 24 which is fine for almost allmodels. If you need a more “realistic” circle, you can use a higher number of sides. To set the number of sides,activate Circle and then immediately type the number of sides you want, and press Enter. To change the numberof sides of a circle you just made, type “100s” to change the number to 100 sides (for example). Warning: a highnumber of sides can slow down your model!Arc ToolsMenu: Draw / ArcsThere are three ways to draw an arc. The simplest is 2 Point Arc (shortcut: A), which creates in arc in three clicks.The first click sets the start point, then the end point, then a point in the middle (the “bulge” point). Like withcircles, an arc is actually made of short line segments, and you can change the number of sides like you would fora circle.The second arc tool (Arc) first sets the center point, then the two points at either end. Pie is similar, but fills in apie-shaped face.PolygonMenu: Draw / Shapes PolygonWhen you first activate Polygon, before clicking any points, you’ll see the number of sides listed in the Sides box,located by default below the SketchUp window. If you want a different number of sides, type the number and pressEnter. (For example, if you enter “3,” you’ll create a triangle, if you enter “6,” you’ll create a hexagon.)Then create the polygon like a circle - first the center point, then an outside point. After a polygon is created, youcan still change its number of sides. Enter “8s” to change the polygon to an octagon, for example.EraserMenu: Tools / Eraser, shortcut: EPage 7
This tool erases edges (lines). If you erase an edge of a face, the face will also disappear. (Re-drawing that linewill replace the face.) To erase more than one edge, you can click on each edge separately, or you can keep theleft mouse button pressed while you drag the mouse over the edges you want to erase.This tool doesn’t work on faces! To erase a face, you can right-click on it (click the face using your right mousebutton) and choose Erase. Or you can Select a face and press the Delete key.MoveMenu: Tools / Move, shortcut: MThis tool is used for both moving and copying. First, Select what you want to move. Then click a start point andend point for the move. The Length box below the SketchUp window will show you the move distance - you canchange this by entering a new number.If you want to make a copy, press the Ctrl (Mac: Option) key while moving. (Just press Ctrl / Option once, youdon’t have to hold it down.) After the copy is created, you can enter “2x” to make two 2 copies, “8x” to make eightcopies, etc. You can also enter a distance from the first to last copy, like “120.” If you want to create four copiesspaced evenly within this distance, enter “4/” (note the slash symbol).RotateMenu: Tools / Rotate, shortcut: QThis tool is used for both rotating and copying. First, Select what you want to rotate. Then the protractor appears- place this at the center of rotation. Then click a start point and end point for the rotation. The angle is shown inthe Angle box below the SketchUp window; you can change this by entering a new number.If you want to make a copy, press the Ctrl / Option key while rotating. After the copy is created, you can enter“2x” to make two copies, etc. You can also enter an angle from the first to last copy, like “360.” If you want tocreate 12 copies spaced evenly within this distance, enter “12/” (again, note the slash symbol).Page 8
Paint BucketMenu: Tools / Paint Bucket, shortcut: BThis is the tool you use to paint faces. When you click it, the Materials window opens (Mac: the Colors windowopens). There are several collections of solid colors and materials available.To paint a face, click the color square you want to use, then click the face. If you want to paint more than one faceat once, first Select the faces you want to paint. Then click the color, and click any of the selected faces. They willall be painted.SketchUp has MANY more tools, but these are the basic ones you’ll use most often. You can always checkSketchUp’s online help (menu: Help / Knowledge Center) for a quick description of a tool or feature. And ofcourse, all of the advanced tools are described in the ModelMetricks and GeomeTricks books!Page 9
2. "SketchUp Make" is the free version, which is all you need for personal or educational use. Once you enter your email address and agree to the terms, click the "Download SketchUp Make" button. 3. Follow the installation instructions, and once finished, you'll see the SketchUp icon on your desktop. Double-click this icon to open .
