Transcription
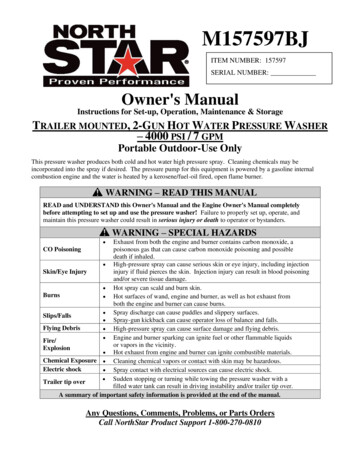
M157597BJITEM NUMBER: 157597SERIAL NUMBER:Owner's ManualInstructions for Set-up, Operation, Maintenance & StorageTRAILER MOUNTED, 2-GUN HOT WATER PRESSURE WASHER– 4000 PSI / 7 GPMPortable Outdoor-Use OnlyThis pressure washer produces both cold and hot water high pressure spray. Cleaning chemicals may beincorporated into the spray if desired. The pressure pump for this equipment is powered by a gasoline internalcombustion engine and the water is heated by a kerosene/fuel-oil fired, open flame burner.WARNING – READ THIS MANUALREAD and UNDERSTAND this Owner's Manual and the Engine Owner's Manual completelybefore attempting to set up and use the pressure washer! Failure to properly set up, operate, andmaintain this pressure washer could result in serious injury or death to operator or bystanders.WARNING – SPECIAL HAZARDS Exhaust from both the engine and burner contains carbon monoxide, apoisonous gas that can cause carbon monoxide poisoning and possibledeath if inhaled. High-pressure spray can cause serious skin or eye injury, including injectionSkin/Eye Injuryinjury if fluid pierces the skin. Injection injury can result in blood poisoningand/or severe tissue damage. Hot spray can scald and burn skin.Burns Hot surfaces of wand, engine and burner, as well as hot exhaust fromboth the engine and burner can cause burns. Spray discharge can cause puddles and slippery surfaces.Slips/Falls Spray-gun kickback can cause operator loss of balance and falls.Flying Debris High-pressure spray can cause surface damage and flying debris. Engine and burner sparking can ignite fuel or other flammable liquidsFire/or vapors in the vicinity.Explosion Hot exhaust from engine and burner can ignite combustible materials.Chemical Exposure Cleaning chemical vapors or contact with skin may be hazardous.Electric shock Spray contact with electrical sources can cause electric shock. Sudden stopping or turning while towing the pressure washer with aTrailer tip overfilled water tank can result in driving instability and/or trailer tip over.A summary of important safety information is provided at the end of the manual.CO PoisoningAny Questions, Comments, Problems, or Parts OrdersCall NorthStar Product Support 1-800-270-0810
Hazard Signal Word DefinitionsHazard Signal Word DefinitionsThis is the safety alert symbol. It is used to alert you to potential personalinjury hazards. Obey all safety messages that follow this symbol to avoidpossible injury or death.DANGERDANGER (red) indicates a hazardous situation, which if not avoided, willresult in death or serious injury.WARNINGWARNING (orange) indicates a hazardous situation, which if not avoided,could result in death or serious injury.CAUTIONCAUTION (yellow), used with the safety alert symbol, indicates a hazardoussituation, which if not avoided, could result in minor or moderate injury.CAUTIONCAUTION (yellow), without the safety alert symbol, is used to addresspractices not related to personal injury.NOTICENOTICE is used to address practices not related to personal injury.Equipment Protection Quick FactsSTOP! Closely inspect to make sure no components are missing or damaged. See theInspect Upon"Assembly and Initial Set-Up" section for instructions on whom to contact to report missing orDeliverydamaged parts.Fill with STOP! Engine is shipped without oil. DO NOT start pressure washer without adding oil toEngine Oil engine. Please refer to Engine Manual shipped with unit for acceptable grade motor oils.Check PumpPump is shipped with oil. Check pump oil level before starting.OilBattery A battery is not included. The engine will not run and burner will not fire unless a battery isRequired installed. Purchase a standard, top post mount 12VDC, 18 Ah automotive battery (Group 75/86).An electric brake controller is required. Brake controllers are available from Northern Tool &Electric BrakesEquipment. Call Product Support 1-800-270-0810.Water supply is tank fed. Make sure the supply water flow rate is always 20% higher than theWater Flowpressure washer's flow rate (see "Specifications" and "Assembly/Initial Set-Up" sections forRequirementsdetail), and that your water is clean and particle free.Storage Do not allow water to freeze in the pump, hose, coil, or spray gun(s).Chemical Use only NorthStar brand or equivalent washer chemicals designed for high-pressure use. UseSpraying soap adjustment knob to regulate cleaning power.Maintenance Engine: See Engine Owner's manual.Schedule Change oil after first 40 hours, then every 3 months or 500 hours.Pump: Check mounting bolts regularly for proper torque.Burner fuel Drain water as needed.filter /water Change filter after every 500 hours of useseparator: Descale coil annually or more frequently as conditions/performanceCoil:require.Electrodes: Inspect electrodes annually and clean/adjust as needed Check belt tension after first 24 hours of use, then routinely withBelts:each oil change. Tighten or change belts as needed. Check belt tension after first 24 hours of use, then routinely with eachBrakes:oil change. Tighten or change belts as needed.2
Table of ContentsAbout Your Pressure Washer . 4Specifications . 5Component Identification. 6Safety Labeling . 8Special Equipment Safety Features . 9Assembly and Initial Set-Up . 10Step 1. Unpacking & Delivery Inspection. 10Step 2. Gun and Nozzle Storage Set-Up . 12Step 3. Initial Pump, Engine & High Pressure Hose Preparation . 12Step 4. Battery Installation . 13Moving and Towing . 14Before Each Use . 17Step 1. Check Equipment . 17Step 2. Add Fuel(s). 18Step 3. Select a Suitable Worksite. 20Operation . 22Step 1. Connect Hose(s), Water Supply, and Spray Nozzle(s) . 22Step 2. Set Up for Chemical Spray (if desired) . 25Step 3. Spraying . 27Step 4. Stopping . 33Storage. 34Burner Adjustment . 37Maintenance and Repair . 39Troubleshooting. 51Parts Explosion . 52Pump Explosion . 57Wiring Diagram . 59Summary of Important Safety Information . 60Limited Warranty . 65California Proposition 65 Information. 663
About Your Pressure WasherThank you for purchasing a NorthStar hot water pressure washer! Your machine is designed for long life,dependability, and the top performance you demand. This pressure washer is designed to:1) Produce a high-pressure spray of heated or unheated water (up to 7 gallons per minute at 4000 psi). Thepressure washer may be operated in either dual- or single-gun mode.2) Incorporate cleaning chemicals into a low-pressure water spray.The pump requires a clean, tank-fed water supply at a flow rate of at least 8.4 gallons per minute. (Tank isincluded.) Any cleaning chemicals that are used must be specifically approved for use in pressure washers.The pressure washer is trailer mounted and towable. The trailer is equipped with electric brakes -- an electricbrake controller is required and must be supplied by the customer. Brake controllers are available from NorthernTool & Equipment. Call NorthStar Product Support 1-800-270-0810.The pump is powered by a gasoline-fueled engine. The spray water is heated (when desired) by a kerosene/fueloil fired, spark-ignited, open flame burner. Normal operation of this equipment will require you to supply: Gasoline fuel and lubrication oil for the enginePump oilFuel for the burner (kerosene, diesel, or fuel oil)A 12-volt top post mount automotive batterySee the "Specifications" section of this manual for more detail.Gasoline powered pressure washers are for OUTDOOR USE ONLY. Be sure to read about site selectionfor running this pressure washer in the "Installation & Initial Set-up" section of this manual.The user should plan to acquire and wear safety apparel during operation of this pressure washer. Safety apparelincludes waterproof insulated gloves, safety glasses with side and top protection, and non-slip protectivefootwear. Some cleaning chemicals may require the use of a respirator mask (as instructed on chemical label).Before using this washer, the user shall determine the suitability of this product for its intended useand assumes liability therein.Read this ManualWARNINGCarefully read and follow all instructions and safety information for using this pressure washer.Improper use or maintenance of the pressure washer can result in serious injury or death to theoperator or bystanders from: Carbon monoxide poisoning Fire/explosion Chemical exposure Burns Slips/falls Skin/eye injury from high Electric shock Flying objects/debrispressure sprayKeep this manual for reference and review. A summary of important safety information can be found at the endof the manual.Proper preparation, operation, and maintenance of this pressure washer will result in optimal performance and along life for this equipment. For detailed Engine operation and maintenance information, always refer to theEngine Owner's Manual furnished with the pressure washer.ATTENTION:Rental Companies and Private Owners who loan this equipment to others!All persons to whom you rent/loan this pressure washer must have access to and read this manual. Keep thisowner's manual with the pressure washer at all times and advise all persons who will operate the machine toread it. You must also provide personal instruction on how to safely set-up and operate the pressure washerand remain available to answer any questions a renter/borrower might have.4
SpecificationsMODELModel #157597FLOW OUTPUTPressure Rating4000 psiFlow Rate7 gpmMaximum Temperature200 FDIMENSIONS / COMPONENTSLength201.5"Width78"Height75"Weight2000 lbs. – dry6550 lbs. – water tank fullPump TypeNorthStar TWS 7040Engine Horsepower23.5 hpHigh Pressure Discharge HoseTwo - 3/8" x 150'Chemical InjectorMaximum dilution ratio 15-to-1Trailer GVWR7000 lbs.Hitch Ball Size2"SUPPLIES REQUIRED (not included)Engine FuelRegular, Unleaded GasolineEngine OilSee Engine Owner's ManualBurner FuelPump Oil(shipped with oil, but refills required)BatteryInput Water Supply#1 or #2 Diesel, B5 or lower Biodiesel,Kerosene, or Fuel Oil(Capacity: 15 Gal.)Universal Tractor Transmission Oil or SAENon-detergent 30wt. oil12 Volt, minimum 18 Amp/Hr.Standard top post mount automotive(Group 75/86)Water feed tank (included):Flow rate must be maintained at 8.4 gpm5
Component IdentificationHEATSW.THERMOSTATINDICATOR LIGHTSPOWERFLOWONOFFTHERM.Ref #1245678910DescriptionRef #Indicator light (Power)Indicator light (Flow)Indicator light (Thermostat)ThermostatHeat SwitchControl PanelGasoline TankWater/Fuel SeparatorBattery box1112131415161718196DescriptionFlow SwitchUnloaderWater OutletEngine (see engine manual)Engine Key SwitchPumpWater InletFuel oil/Kerosene/Diesel TankHeat Exchanger
Component IdentificationREFERENCE GUIDE1. Indicator Light (Power)2. Indicator Light (flow)4. Indicator Light (Thermostat)5.6.7.8.9.ThermostatHeat SwitchControl PanelGasoline TankWater/Fuel Separator10. Battery Box11. Flow Switch12. Unloader13. Water Outlet14. Engine15. Engine Key Switch16. Pump17. Water Inlet18. Fuel Oil/Kerosene/Diesel Tank19. Heat ExchangerInstrument used to monitor unit operation. Shouldilluminate when the power switch is in the ON position.Instrument used to monitor unit operation. Illuminates ifwater is flowing through the spray gun.Instrument used to monitor unit operation. Should beilluminated when the gun is in use and the burner is firing.Adjust the water temperature.On/off device for power to burner components.Flat surface for mounting switches.Fuel storage container.Used to remove contaminant water from gasoline or dieselfuel to prevent water in the fuel from reaching the engine.Storage place to house the battery.A device that monitors flow.Valve that regulates pressure and directs flow into bypasswhen trigger is closed.Connect high pressure hose here.The air-cooled engine powers the pump.Start engine by turning clockwise.A device that moves fluid through a combination of suctionand displacement.Used to connect water from the feed tank to the inletplumbing.Fuel storage container.Device that heats the water by forcing a flame across steelpipe.7
Special Equipment Safety Features15WARNING - BATTERY HAZARDSBATTERIES:1) contain caustic acid, 2) emit explosive gases,3) can cause electric shockALWAYS use eye protection. Caustic acid and explosivegases can cause blindness or severe burns.NO smoking, sparks, or flames.NEVER touch both battery terminals at the same time with yourhand or any non-insulated tools.FLUSH immediately with water if battery acid contacts eyes,skin, or clothing.CONNECT cables in correct sequence: FIRST RED to POSITIVEterminal, then BLACK to NEGATIVE terminal. When disconnecting,DISCONNECT BLACK cable first, then RED.NEVER charge a visibly damaged or frozen battery. ALWAYSread and follow charger instructions.378239726MOVING/TOWING INSTRUCTIONSTowing trailer:-Latch coupler securely to class 4 or higher hitch with 2" ball.-Make sure hitched trailer sits level.-Crank jack to UP position.-Attach safety cables to the tow vehicle.-Connect breakaway switch cable.-Plug in 7-way connector into tow vehicle.-Check local, state and federal requirements before towingon public roads.874DANGERFOR OUTDOOR USE ONLY ! Using this pressure washer indoors CAN KILL YOU IN MINUTES.Engine exhaust and burner exhaust contain carbon monoxide. This is a poison you cannotsee or smell.NEVER use inside any building, structure orgarage, EVEN IF doors and windows are open.9Ref#12345678Only use OUTSIDE and far away fromwindows, doors, and vents.WARNINGHigh Pressure Fluid Forces / Burn HazardsHigh pressure spray can cause injection injury, eye injury, andloss of balance. Hot discharge fluid and hot surfaces can burn.NEVER direct discharge stream at or near any person. Do notallow any part of the body to come in contact with the fluid stream.Gun kicks back - hold with two hands. Keep good footing andbalance at all times.Surfaces of engine, burner, and wand can become very hot. Useonly designated gripping area of wand. Avoid contact with hotengine and burner.9Fire / Explosion HazardSpraying flammables can cause explosion. Fuel is flammableand explosive. Exhaust can ignite combustible materials.NEVER spray flammable liquids. Operate only where open flameor torch is permitted.NEVER fuel a running or hot engine or oil burner.Ensure there are no fuel leaks before starting. Keep sources ofsparks and flames away.Use approved container only for transferring fuel. Clean up fuelspills immediately.Keep engine and burner exhaust at least 7 feet from allcombustible objects. Situate on heat-resistant flooring whenusing burner.On-Product Warning LabelsPart #Description786632Rotating Equipment Warning786739Operating Instructions/Warning786635Burn Hazard Decal782325Danger and Warning Decal782397Battery Warning Decal779695Moving Big Units786633Tow Warning792538Breakaway Switch Warning798057Rupture Disk Warning32821LanyardChemical Exposure HazardUnderstand all safety hazards and first aid measures for chemicalsbeing used.Follow chemical manufacturer's directions when handling andcleaning with chemicals. Wear safety gear as directed.Electric Shock HazardKeep spray away from electrical wiring, or electric shock /electrocution could occur.Always make sure safety labels are in place and in good condition.If a safety label is missing or not legible, order new labels or unsafeoperation could result. To order replacement safety labels, callNorthstar Product Support at 1-800-270-0810.CAUTION: To Reduce Risk of Injury, Read Operating Instructions Carefully Before Using.7823258
Special Equipment Safety FeaturesHigh PressureSafety Device(Rupture Disc)WARNING-If the high-pressure safety device ever discharges water,turn the engine off and do not use the machine. The device will no longerfunction properly. See a dealer or call Product Support at 1-800-2700810.This unit is equipped with a highpressure safety device, which acts asa backup safety feature. If theunloader malfunctions, the highpressure safety device will open andrelieve excess system pressure.High pressuresafety deviceHighTemperatureLimitThis unit is equipped with a hightemperature limit that measuresdischarge spray temperature andautomatically turns the burner offwhen the temperature setting isreached. When the dischargespray temperature drops, theburner automatically reignites.Spray Gun SafetyLatchThe spray gun is equipped with a built-in trigger safety latch to guard againstaccidental trigger actuation.High temperaturelimitSafety Latch004179
Assembly and Initial Set-UpSteps for Assembly / Initial Set-UpStep 1. Unpacking & Delivery InspectionStep 2. Gun and Nozzle Storage Set-UpStep 3. Initial Pump & Engine PreparationStep 4. Battery InstallationEach of these steps is discussed below:Step 1. Unpacking & Delivery InspectionFind and separate the components identified in Figure 2 – Overview of Pressure WasherComponents and Figure 3 – Hardware Bag. Inspect the power washer immediately after youreceive delivery for missing parts and damage. If you have missing or damaged components, please contact NorthStar Product Support at1-800-270-0810.Manual bag(2) Spray guns & lances(2) High pressurehosesPressure washer, tank, and trailerFigure 2 – Overview of Pressure Washer Components10
Assembly and Initial Set-UpQty (2) Engine KeysQty (2) #3.5 Nozzle 5 PacksPart # 38532#7.0 Nozzle 5 PackPart # 779544Qty (16) GrommetsPart # 777111Qty (2) Pin CatchesPart # 778498Figure 3 – Hardware Bag contents11
Assembly and Initial Set-UpStep 2. Gun and Nozzle Storage Set-Up1. Guns. Store guns vertically on back of trailer using supplied pins. Rest guns with handle downon the back of the trailer and pins will hold guns in place.2. Nozzles. Insert grommets and nozzles (provided) into the hose reel guides.GrommetsNozzlesInsert holesFigure 4Step 3. Initial Pump, Engine & High Pressure Hose PreparationPrepareWater PumpVerify pump oil level.Note: The pump is shipped with oil.1. Verify that oil level is halfway up the sight glass (or atthe indicator line on the dipstick).2. If oil level is low, fill usingUniversal TractorTransmission Oil or SAENon-detergent 30wt. oil.3. Replace oil fill cap.Oil fill capSight glassPrepareEngineFigure 5Fill the engine with oil.Note: The engine is shipped without oil.Refer to the Engine Manual to locate oil-fill port and for instructions on filling.Use the oil grade and quantity specified in the Engine Manual.12
Assembly and Initial Set-UpPrepareCompletely unwrap / unwind the high pressure hose from the hose reel.High PsiNote: New hose will “grow” when charged for the first time and should always beHose on Hose charged one time before being wrapped on the reel.ReelStep 4. Battery InstallationInstall a 12-volt standard, top-post mount, automotive battery (Group 75/86) with a minimum18 amp-hour rating. The engine will not run and the burner will not fire unless a battery is installed.The battery is to be supplied by the customer and should be installed in the protective batterycompartment located near the engine. The inside dimensions of the battery compartment are 111/8"L x 7-3/4"W x 10-1/8"H.Follow the steps below for connecting and disconnecting the battery.WARNING: Battery HazardsBatteries are hazardous because they contain caustic acid, can emit explosive gases, and cancause electric shock. Caution must be exercised when making connections to a battery toavoid shock and contact with the acid, and to prevent any sparking that could lead to anexplosion. ALWAYS follow the general battery safety rules and instructions listed below.GeneralBatterySafety Rules Connectingthe batteryALWAYS use eye protection and protective clothing when handlingbatteries.NEVER smoke or work near sparks or other sources of ignition.NEVER touch both battery terminals at the same time with your hand or anynon-insulated tools.If battery acid contacts skin or clothing, flush immediately with water andneutralize with baking soda.Always connect the cables in the following sequence to avoid possible shock:1. Find the battery cables located inside the battery compartment.2. Connect the red cable to the positive ( ) terminal of the battery.3. Then connect the black cable to the negative (-) terminal of the battery.Disconnecting Always disconnect cables in the following sequence to avoid possible shock.the battery1. First, disconnect the black cable from the negative (-) terminal of thebattery.2. Next, disconnect the red cable from the positive ( ) terminal of the battery.3. Remove the battery from the battery compartment.13
Moving and TowingWARNINGThe filled pressure washer is heavy. It can crush and cause serious injury if it rolls outof control or tips over. ALWAYS keep the jack cranked down to help balance the trailer when it is notconnected to a vehicle hitch. FOLLOW all the instructions below for safely connecting and towing the pressurewasher.Connecting Trailer and TowingInspect trailerAlways inspect the trailer before hitching it to your vehicle.1. Make sure tires are fully inflated and in good repair. See tire sidewallfor recommended pressure.2. Check to make sure that trailer is in safe working condition. Makesure all nuts, bolts, and connections are tight. If a part needsreplacement, only use parts that meet the manufacturer'sspecifications.3. Make sure you have performed regular maintenance on trailer brakesto ensure they are in good working order.WARNING: Do not over-inflate tires. Serious injury can occur if tireexplodes. Damaged or missing components, or replacement parts thatdo not meet specifications, may result in a safety hazard orpoor operation of the trailer. Inadequately maintained brakes could result in brake failureand loss of control of towing vehicle.Move pressurewasher to vehicleWhen moving the pressure washer by hand, always keep the jack crankeddown to provide support if needed.Attach trailer tohitchAttach trailer to vehicle hitch.When filled, the pressure washer trailer has a tongue weight of 400 lbs.Ensure the towing vehicle is properly equipped to handle the load.1.2.Attach trailer coupler to vehicle's class 4 or higher hitch with 2" ball(only).Ensure trailer is level, with A-frame tow bar parallel to the ground.You may need to adjust your coupler height or purchase the properhitch to achieve the correct tongue height so trailer is level.WARNING: Vehicle handling may be adversely affectedwhile towing if the trailer is not level.3.Adjust coupler to ball by raising locking lever and turning lock nut14
Moving and Towing4.5.with fingers. Proper adjustment is obtained when coupler is as tight aspossible on ball and locking lever can still be opened and closed.Lock lever closed to secure the attachment.Insert safety pin.Attach safetycablesTwo safety cables must be used while towing.Cross safety cables under the coupler, allowing only enough slack for vehicleturns.Route breakawayswitch cableRoute breakaway switch cable.The breakaway switch is a device that will activate the trailer brakes shouldthe trailer become disconnected from the tow vehicle. A cable is connectedto a pin inserted into the breakaway switch. You must route this cable so thatit will pull the pin out of the breakaway switch if the trailer begins to separatefrom the tow vehicle, which in turn will activate the trailer brakes.PinBreakawayswitchSafety cablelatch pointLanyardFigure 61. Pull the pin with its attached cable out of the breakaway switch. Notethe other end of the cable is a terminal loop.2. Route the pin and its attached cable through the safety cable latchpoint on the tow vehicle, and then back through its own terminal loop.3. Reinsert the pin into the breakaway switch.IMPORTANT: Always keep the pin inserted in the breakaway switch, evenwhen not towing. Failure to have the pin inserted will drain yourpressure washer's battery. Never use the breakaway switch as aparking brake.*Note: An extra pin is attached to the lanyard.15
Moving and TowingPlug inlights/brakePlug 7-way electrical pin connector into vehicle.Raise the jackAlways crank the jack into the UP position before towing.TowTow the pressure washer to your desired work location.When towing, always adhere to the following safety rules. If leavingunattendedRead vehicle instructions. Review towing safety instructions in yourtowing vehicle manual.Driving skills. Special attention and driving skills are necessary fortowing any type of trailer.Vehicle handling. Be aware that vehicle handling will be affected whentowing the filled pressure washer. Exercise caution to avoid loss ofcontrol or pressure washer overturning:o Keep speed to a minimum so you can maintain control at all times.Reduce speed prior to turns.o Allow for wider turns and for more distance to stop.o Avoid any sudden steering maneuvers, starts, or stops that couldcreate sway.Rough or sloped terrain. Slow down and exercise extra caution onrough or sloped terrain in order to reduce risk of rollover. Pick the mostlevel route possible when transporting across fields. Drive up and downslopes that cannot be avoided, rather than across. Use a vehicle equippedwith a Roll Over Protection System (ROPS) if you will be operating onnon-level terrain.Added length. Be aware of the added length of the pressure washer.Reduced visibility. Be aware that visibility may be reduced withpressure washer attached. Be extra cautious when backing up or turning.Ride / transport. Never ride or transport cargo on the pressure washer.On public roads. If towing on a public road, make sure to comply withall local, state, and federal towing requirements. It is the soleresponsibility of the purchaser to obtain licensing, trailer lights, safetychains or signage as needed to comply.Under the influence. Never tow or operate this pressure washer whileunder the influence of alcohol, drugs, or medicationTurn off the vehicle and block the trailer wheels if leaving the pressurewasher unattended.16
Before Each UseFollow the steps below prior to each use of the pressure washer.Steps to Follow Before Each UseStep 1. Check EquipmentStep 2. Add Fuel(s)Step 3. Select Suitable WorksiteStep 1. Check EquipmentCheck/addpump oilCheck/add pump oil.Caution: Never run the pump without sufficient lubrication!1. Check oil level. Verify that oil level is half way up the sight glass (or at theindicator line on the dip stick).2. If oil level is low, fill using Universal Tractor Transmission Oil or SAENon-detergent 30wt. oil.3. Replace oil fill cap.Check/addengine oilCheck the engi
M157597BJ Owner's Manual Instructions for Set-up, Operation, Maintenance & Storage TRAILER MOUNTED, 2-GUN HOT WATER PRESSURE WASHER - 4000 PSI / 7 GPM Portable Outdoor-Use Only This pressure washer produces both cold and hot water high pressure spray.