Transcription
Pulsar 320 TCP/IP Setup InstructionsContents:1.0 Configure network settings for the PC- Connect through a network or router- Direct connect with a single PC connection2.0 Connection to the Pulsar 320- Pulsar 320 TCP/IP setupPulsar 320 TCP/IP Setup Guide
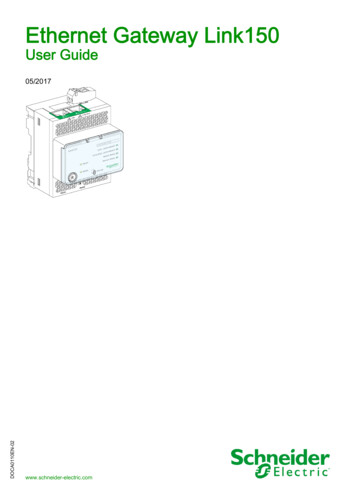
TCP/IP Connection through network to Pulsar 320:PC SetupFind your current IP address and determine whether it is static or dynamic:1.2.3.4.5.Open Windows Start menuSelect RunType: cmd and click OKAt the blinking cursor, type: ipconfig/all and press EnterLook for these entries near the end of the list:- Dhcp enabled. “No” means your IP address is static. “Yes” meansit is dynamic.- IP Address. This is your current IP address- Subnet Mask. This is the local subnet range- Default Gateway. Gateway address of any routers or hubs.Windows IP ConfigurationIf the current IP address is:Static, then this IP will need to be changed to Dynamic by enablingDCHP.Dynamic, then take note of: IP Address, Subnet Mask, DefaultGateway, then continue to Pulsar Setup.2Pulsar 320 TCP/IP Setup Guide
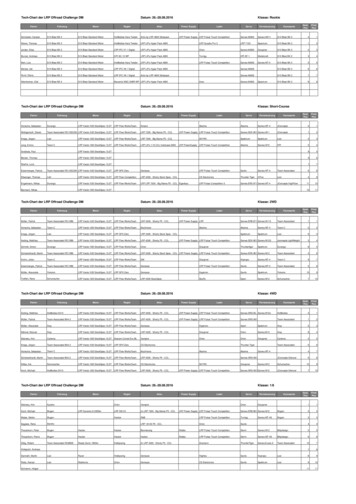
Enable DHCP (Windows XP)1. Open Windows Start Menu2. Open Control Panel3. Classic view: Open Network ConnectionsCategory view: Select Network and Internet Connections,andthen Network Connections4. Double-click on your active LAN or Internet connection5. Click PropertiesThis opens the Local Area Connections Properties window.Internet Protocol PropertiesLocal Area Properties6. Enable Obtain IP address automatically. Enable ObtainDNS automatically unless advised otherwise by your networkadministrator.Pulsar 320 TCP/IP Setup Guide3
Direct TCP/IP connection from single PC to Pulsar320PC SetupYou will need to assign a static IP to the host PCFind your current IP address and whether it is static or dynamic:1.2.3.4.5.Open Windows Start menuSelect RunType: cmd and click OKAt the blinking cursor, type: ipconfig/all and press EnterLook for these entries near the end of the list:- Dhcp Enabled. “No” means your IP address is static. “Yes”means it is dynamic.- IP Address: This is your current IP address.- Subnet Mask. This is the local subnet range.- Default Gateway. Gateway address of any routers or hubs.Windows IP Configuration4Pulsar 320 TCP/IP Setup Guide
If the current IP address is:- Static, then make note of the IP address, subnet mask, anddefault gateway. You will need to assign the Pulsar 320 networksettings so they work in the same range.- Dynamic, then assign a static IP address instead (covered in thefollowing pages).If your IP is already Static, then you can skip to Pulsar Setup. You onlyneed to do these steps if you want to adjust any of the TCP settings (IP,Gateway, Subnet).Choose an IP AddressChoose an IP address, and collect other information needed in order toassign a static IP address to your computer.This only needs to be done if you have a router with multiple PCs and/or other devices connected with different IP addresses.In your router administration program, find an IP address that canbe assigned as a static IP. The address:- Must not be one that might be assigned to someone as a dynamicaddress.- Must not be one that has been assigned to another device- Must be lower than the range of dynamic addresses.This may be handled by an administrative group or networkengineers. Have this group assign an IP that you can use for both thehost PC and target Pulsar 320 unit. This will prevent any IP conflictsfrom occurring.Assign the IP Address to the PC (Windows XP)To set a static IP address:1. Open Windows Start menu2. Open Control PanelPulsar 320 TCP/IP Setup Guide5
3. Classic view: Open Network ConnectionsCategory view: Select Network and Internet Connections,and then Network Connections4. Double-click on your active LAN or Internet Connection5. Click PropertiesThis opens the Local Area Connections Properties window6. In the General tab, highlight the Internet Protocol (TCP/IP)item, and click Properties.This opens the Internet Protocol (TCP/IP) Properties window.7. In the General tab, click Use the following IP address, andthen enter:- IP address. The static IP address you want to assign to thiscomputer.- Subnet Mask. Subnet Mask used used by your router.- Default Gateway. IP address of your router’s default gateway.8. In Use the following DNS server addresses, enter all the IPaddresses for the DNS servers your router uses if applicable.If DNS server addresses do not pertain to you, use Obtain DNSserver address automatically.9. Click OKThen:10. Click OK to close each window11. Restart your computer12. Recheck your IP address again, to make sure the changes wereapplied.Run: cmd Type: ipconfig/allContinue to Pulsar Setup6Pulsar 320 TCP/IP Setup Guide
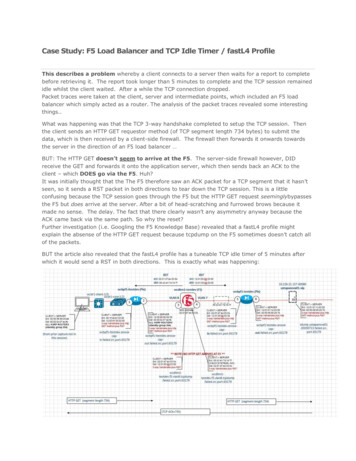
Pulsar SetupOnce we know what the system and network settings are, we can configure thePulsar 320 controller to communicate across the network via TCP/IP.USB Port ConfigurationConnect to the Pulsar 320The Pulsar must first be configured via USB.1.2.3.4.Connect the target Pulsar 320 unit via USB cable to host PCConnect 24VDC power source and toggle the controller ONLaunch “PulsarV00 02.exe”In the parent window, select the USB icon to establish a USBconnectionThis will open the USB port select dialog.5. Select the USB port to connect to -- usually port 0 for a single Pulsar6. Once connection is established, select Query7. In the information box you can view current IP, Subnet, Gateway,and other pertinent information regarding current settings onthe controller.8. To edit network settings press Edit Network9 Before assigning a new IP address you must choose and IPaddress that won’t conflict with any other devices on thenetwork (PCs, printers, routers, other machines, etc.).For most small networks with 255 devices, the first 3 sets of digits shouldmatch, with only the last digits being unique.Example:PC IP Address:Pulsar IP Address:192.168.24.50192.168.24.240Pulsar 320 TCP/IP Setup Guide7
10. Subnet Mask is a division of networks into separate pieces.Essentially you will want both host PC and Pulsar 320 to be onthe same subnet so they can find each other.Enter the value found from your PC settings.Example:PC Subnet:255.255.255.0Pulsar 320 Subnet: 255.255.255.0Pulsar TCP/IP Connection and IP Dialog WindowThe subnet also determines how many unique places are used in IPaddress. Contact your network administrator if you needmore assistance.11. Enter the same value obtained from the PC for default gatewayinto the Pulsar 320PC Default GatewayPulsar 320 s OKClose the Query Dialog and close the USB connectionPower down the Pulsar 320 and disconnect the USB cableConnect the Ethernet cable and power the Pulsar ON againSelect the TCP/IP icon to open the ECP/IP connection dialogPulsar 320 TCP/IP Setup Guide
17. Press ADD to add a new device to the list.18. Name the device for easy recognition and enter all the proper IPsettings that were loaded onto the controller. Once finished,press OK19. Select the newly added device and press Connect to establishthe TCP/IP connection to that device.Pulsar 320 TCP/IP Setup Guide9
Pulsar 320 TCP/IP Setup Guide
Pulsar 320 TCP/IP Setup Guide Pulsar 320 TCP/IP Setup Guide If the current IP address is: - Static, then make note of the IP address, subnet mask, and default gateway. You will need to assign the Pulsar 320 network settings so they work in the same range. - Dynamic, then assign a static IP