Transcription
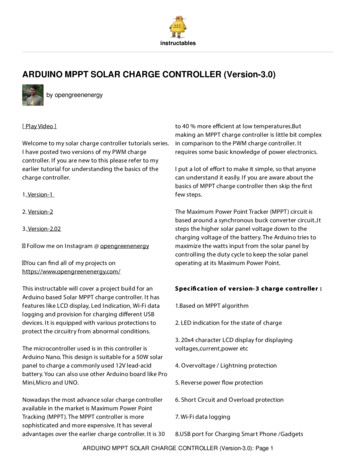
instructablesARDUINO MPPT SOLAR CHARGE CONTROLLER (Version-3.0)by opengreenenergy[ Play Video ]to 40 % more e cient at low temperatures.Butmaking an MPPT charge controller is little bit complexWelcome to my solar charge controller tutorials series. in comparison to the PWM charge controller. ItI have posted two versions of my PWM chargerequires some basic knowledge of power electronics.controller. If you are new to this please refer to myearlier tutorial for understanding the basics of theI put a lot of e ort to make it simple, so that anyonecharge controller.can understand it easily. If you are aware about thebasics of MPPT charge controller then skip the rst1. Version-1few steps.2. Version-23. Version-2.02Follow me on Instagram @ opengreenenergyYou can nd all of my projects onhttps://www.opengreenenergy.com/This instructable will cover a project build for anArduino based Solar MPPT charge controller. It hasfeatures like LCD display, Led Indication, Wi-Fi datalogging and provision for charging di erent USBdevices. It is equipped with various protections toprotect the circuitry from abnormal conditions.The microcontroller used is in this controller isArduino Nano. This design is suitable for a 50W solarpanel to charge a commonly used 12V lead-acidbattery. You can also use other Arduino board like ProMini,Micro and UNO.Nowadays the most advance solar charge controlleravailable in the market is Maximum Power PointTracking (MPPT). The MPPT controller is moresophisticated and more expensive. It has severaladvantages over the earlier charge controller. It is 30The Maximum Power Point Tracker (MPPT) circuit isbased around a synchronous buck converter circuit.Itsteps the higher solar panel voltage down to thecharging voltage of the battery. The Arduino tries tomaximize the watts input from the solar panel bycontrolling the duty cycle to keep the solar paneloperating at its Maximum Power Point.Spe ci ca t io n o f v e rs io n- 3 cha rg e co nt ro lle r :1.Based on MPPT algorithm2. LED indication for the state of charge3. 20x4 character LCD display for displayingvoltages,current,power etc4. Overvoltage / Lightning protection5. Reverse power ow protection6. Short Circuit and Overload protection7. Wi-Fi data logging8.USB port for Charging Smart Phone /GadgetsARDUINO MPPT SOLAR CHARGE CONTROLLER (Version-3.0): Page 1
Ele ct rica l s pe ci ca t io ns :I a m n o mo re wo rk in g o n t h is pro je c t d ue t oso me issue s. Th is c o n t ro lle r is n o t wo rk in g.1.Rated Voltage 12V2.Maximum current 5AS o d o n' t t ry t o b uild , if yo u d o n' t h a vee n o ugh k n o wle d ge in t h is e ld .3.Maximum load current 10AYo u ma y t a ke id e a s fro m t h is pro je c t .4. Input Voltage Solar panel with Open circuitvoltage from 12 to 25V5.Solar panel power 50WUpd a t e : 0 5. 0 1. 20 19This project is consists of 40 steps. So for simplicity Idivided the entire project in to small sections. Click onthe link which you want to see.I accidentally found this link today. The author claimsthat by doing a little modi cation, it works for him.1. Basics on MPPT charge controller2. Buck circuit working and design calculationYou can have a look to his work. The link is 016/12/16/m.3. Testing the Buck Circuit4. Voltage and Current Measurements5.LCD display and LED indication6.Making the Charging Board7.Making the Enclosure8. Making the USB Charging Circuit9. Wi Fi Data Logging10. MPPT algorithm and ow chartT he pro ble m in V- 3 :During my prototyping, I have faced a critical issue.The issue was that when I connect the battery to thecontroller, the connection between the battery andthe switching ( buck converter ) becomes very hot andthen MOSFET Q3 burns out. It was due to the shortingof MOSFET-Q3. So Current ows from Battery MOSFET Q3- GND which is unexpected.Upda t e : 29 . 0 7. 20 16ARDUINO MPPT SOLAR CHARGE CONTROLLER (Version-3.0): Page 2
ARDUINO MPPT SOLAR CHARGE CONTROLLER (Version-3.0): Page 3
11. On my nexus-5ARDUINO MPPT SOLAR CHARGE CONTROLLER (Version-3.0): Page 4
http://youtu.be/PQDqZSj1TtoStep 1: PARTS AND TOOLS REQUIRED:ARDUINO MPPT SOLAR CHARGE CONTROLLER (Version-3.0): Page 5
1. Arduino Nano (Amazon / eBay )rel "nofollow" Right angle )2.Current Sensor ( ACS712-5A / Amazon )19. DIP Socket ( 8 pin )3.Buck Converter ( LM2596 / Amazon )19.Screw Terminals ( 3 x2 pin ,1 x 6pin / Amazon )4.Wi Module ( ESP8266 / Amazon )20.Fuses ( 2 x 5A)5. LCD display ( 20x4 I2C / Amazon )21. Fuse Holders (Amazon / 2 nos)6 .MOSFETs ( 4x IRFZ44N / Amazon )22. Push Switch (Amazon / 2 nos)7. MOSFET driver ( IR2104 / Amazon )23.Rocker /Toggle Switch ( 1 no)8. 3.3V Linear regulator ( AMS 1117 / Amazon )24.Female USB port ( 1no)9. Transistor ( 2N2222 )25. JST connector ( 2pin male -female )10.Diodes ( 2x IN4148 , 1 x UF4007 )26.Heat Sinks ( Amazon )11.TVS diode ( 2x P6KE36CA / Amazon )27.Enclosure12.Resistors ( Amazon / 3 x 200R ,3 x330R,1 x 1K, 2 x10K, 2 x 20K, 2x 100k, 1x 470K )28.Plastic Base29. Spacers ( Amazon )13.Capacitors ( Amazon / 4 x 0.1 uF, 3 x 10uF ,1 x100 uF,1x 220uF)29. Screws/Nuts/Bolts14.Inductor ( 1x 33uH -5A / Amazon )T O O LS REQ UIRED :15. LEDs ( Amazon / 1 x Red ,1 x Yellow ,1 x Green )1.Soldering Iron ( Amazon )16.Prototype Board ( Amazon )2. Glue Gun ( Amazon )17.Wires and Jumper wires ( Female -Female )3. Dremel ( Amazon )18.Header Pins (Amazon / Male Straight ,female ,4. Cordless Drill ( Amazon )5.Hobby Knife ( Amazon )8.Screw Driver ( Amazon )6.Wire Cutter ( Amazon )9. Ruller and pencil7.Wire Stripper ( Amazon )ARDUINO MPPT SOLAR CHARGE CONTROLLER (Version-3.0): Page 6
ARDUINO MPPT SOLAR CHARGE CONTROLLER (Version-3.0): Page 7
ARDUINO MPPT SOLAR CHARGE CONTROLLER (Version-3.0): Page 8
ARDUINO MPPT SOLAR CHARGE CONTROLLER (Version-3.0): Page 9
Step 2: Basics on MPPT Charge ControllerARDUINO MPPT SOLAR CHARGE CONTROLLER (Version-3.0): Page 10
A solar panel will generate di erent voltagesdepending on the di erent parameters like :really somewhere in between 12V and 21V paneldepending on what load is connected to it and howbright the sunlight is. The panel has an internal1.The amount of sunlight 2.The connected load 3.The resistance which changes dynamically with di eringtemperature of the solar panel.irradiance levels. Solar panels will only deliver theirrated power at one speci c voltage and load, and thisThroughout the day, as the weather changes, thevoltage and load move around as the sunlightvoltage produced by the solar panel will be constantly intensity changes.varying. Now, for any given voltage, the solar panelwill also produce a current (Amps). The amount ofFor example take a solar panel rated at 100 watts, 18VAmps that are produced for any given voltage isat 5.55 amps.determined by a graph called an IV curv e , which canbe found on any solar panel's speci cation sheet andThe 18 V at 5.5 amps means that the Solar panel wantstypically looks like the gure-1 shown above.to see a load of 18/5.5 3.24 ohms.In the above gure-2, the blue line shows a solarpanel voltage of 30V corresponding to a current ofabout 6.2A. The green line shows a Voltage of 35Vcorresponds to a current of 5A.We know that Power V x IIn the picture shown above as you move along thered curve above you will nd one point where theVoltage multiplied by its corresponding Current ishigher than anywhere else on the curve. This is calledthe solar panel's Maximum Power Point ( M PP).Ref : I have downloaded the images from the web (www.solarquotes.com.au ) to explain the MPP.W ha t Is M PPT ?With any other load, the panel will deliver less than100 watts. So if a static load is connected directly to apanel and its resistance is higher or lower than thepanels internal resistance at MPP, then the powerdrawn from the panel will be less than the maximumavailable.Taking a simple example say we connected the above100W panel directly to a 12V lead-acid battery, thepanel voltage would be dragged down near to theload voltage of the battery as the batteries resistanceis lower than the panels, but the current stays thesame at 5.55 amps. This happens because Solar Panelsbehave like current sources, so the current isdetermined by the available sunlight.Now the power (P) V x I 12x5.55 66.6W. So the Solarpanel is now behaving like a 66-watt panel.MPPT stands for Maximum Power Point Tracking.MPPT charge controllers used for extractingmaximum available power from the PV module undercertain conditions. Look at the image shown above.We have seen that the maximum power point (MPP)of a solar panel lies at the knee of the current andvoltage curve.This equates to a loss of 100W-66.6W 34W ( 33.4%).This is the reason for using an MPPT charge controllerinstead of a standard charge controller like PWM. TheMPPT controller is consists of a DC-DC converterwhere the duty cycle is varied to track the MaximumPower Point.A 12V solar panel is not really a 12V panel at all. It isARDUINO MPPT SOLAR CHARGE CONTROLLER (Version-3.0): Page 11
Step 3: BUCK CONVERTER WORKINGARDUINO MPPT SOLAR CHARGE CONTROLLER (Version-3.0): Page 12
A buck converter is a DC-DC converter in which theoutput voltage is always lower or the same as theinput voltage. The schematic of a buck converter isshown in the above picture.energy in the capacitor is supplied to load to maintainthe current.W o rking Principle :In the above topology, the diode used to have aconsiderable amount of voltage drop which reducedthe e ciency of the Converter. To improve thee ciency a Power electronics switch is used in itsplace. Thus a synchronous buck converter is amodi ed version of the basic buck converter circuittopology in which the diode, D, is replaced by anelectronics switch like MOSFET( Q2). It is shown in g4.W he n t he M O S FE T is O NWhen the MOSFET is ON, current ows through theinductor (L), load (R) and the output capacitor (C ) asshown in g-2. In this condition, the diode is reversebiased. So no current ows through it. During the ONstate magnetic energy is stored in the inductor andelectrical energy is stored in the output capacitor.W he n t he M O S FE T is O FFW ha t is Sy nchro no us Buck Co nv e rt e r?I would like to give special credit to co de r- t ro nicsfrom which I have taken this explanation part of thebuck converter.When the MOSFET is o , stored Energy in the Inductoris collapsed and current complete its path throughYou can see his work at http://coderthe diode ( forward-biased) as shown in g-3. Whentronics.com/c2000-solar-mppt-tutorial.stored energy in the inductor vanishes, the storedStep 4: BUCK CONVERTER DESIGNARDUINO MPPT SOLAR CHARGE CONTROLLER (Version-3.0): Page 13
In our case, the input source is a 50W solar panel andload is a 12V lead-acid battery. From the earlierdiscussion, we have concluded that a buck converterconsists of1.Inductor2.Capacitor3.MOSFETSfrequency is inversely proportional to the size of theinductor and capacitor and directly proportional tothe switching losses in MOSFETs. So higher thefrequency, lower the size of the inductor andcapacitor but higher switching losses. So a mutualtrade-o between the cost of the components ande ciency is needed to select the appropriateswitching frequency.Keeping these constraints into consideration theselected frequency is 50KHz.S e le ct ing t he f re que ncy : The switchingStep 5: INDUCTOR CALCULATIONCalculating the inductor value is most critical inL ( Vin-Vout ) x D x 1/Fsw x 1/ dIdesigning a buck converter. First, assume theconverter is in continuous current mode( CCM). CCMWhere dI is Ripple currentimplies that the inductor does not fully dischargeduring the switch-o time. The following equationsFor a good design typical value of ripple current is inassume an ideal switch (zero on-resistance, in nite o - between 30 to 40 % of load current.resistance and zero switching time) and an idealdiode.Let dI 35% of rated currentAs s um edI 35% of 4.2 0.35 x 4.2 1.47AWe are designing for a 50W solar panel and 12VbatterySo L (15.0-12.0) x 0.8 x (1/50k) x (1/1.47) 32.65uH 33uH (approx)Input voltage (Vin) 15VInductor peak current Iout dI/2 4.2 (1.47/2) 4.935A 5A (approx)Output Voltage (Vout) 12VOutput current (Iout) 50W/12V 4.16A 4.2A(approx)So we have to buy or make a toroid inductor of 33uHand 5A.You can also use a buck converter design calculatorSwitching Frequency (Fsw) 50 KHzSo 33uH is enough for our design.Duty Cycle (D) Vout/Vin 12/15 0.8 or 80%Ca lcula t io nARDUINO MPPT SOLAR CHARGE CONTROLLER (Version-3.0): Page 14
Step 6: HOW TO WIND a TOROIDAL INDUCTORARDUINO MPPT SOLAR CHARGE CONTROLLER (Version-3.0): Page 15
I have collected a bunch of toroidal cores from an oldcomputer power supply. So I thought to make theinductor at my home. Though it took a lot of time tomake, I learned a lot and enjoyed it during themaking. These are a few tricks that I learned duringthe making so that you can make it easier.Ho w t o W ind t he w ire :Winding by hand is very painful for the skin as well asyou can't make the winding so tight. So I made asimple tool from popsicle stick for winding thetoroidal core. This simple tool is very handy and youcan make perfect and tight winding. Before makingthe inductor you have to know the core speci cationand the number of turns.The important parameters of the toroidal core are1. Outer diameter(OD)2.Inner diameter(ID)I searched for the Phy s ica l dim e ns io n table fromthe chart. From the table, it was found that the core isT94Finding t he m ix num be r :The color of the core is an indication for mix number.As my core is is yellow/white in color, it is con rmedthat the mix number is 26So the unknown core is T94-26Finding Al v a lue :From the Al value table for a T94-26 core it is 590 inuH/100 turns.After selecting the core now time to nd out thenumber of turns required to obtain the desiredinductance.Num be r o f t urn ( N) 10 0 x s qrt ( de s ire dinduct a nce in uH / Al in uH pe r 10 0 t urns )3.Height (H) N 100 sqrt(33/590) 23.65 approximately 24turns4.Al valueAs I did not know the part number, I used an indirectmethod to identify it. First I measure the OD and ID ofthe unknown core by using my vernier caliper, it wasaroundYou can also use this online calculator for nding thenumber of turns. Only you have to know the partnumber and mix number.Then I wind a 20 AWG copper wire (24 turns) aroundOD 23.9mm (.94'") , ID 14.2mm(.56") ,H 7.9mm( .31") the toroid core. At the both end of the winding leaveand yellow-white in color.some extra wire for connection lead. After this removethe enamel insulation from the lead. I used myI used a toroid core chart (page-8) to identify theleatherman le for removing the insulation. See theunknown core. I have attached this toroid size chart in above picture for a better understanding.the bellow. It contains a lot of information for theinductor design. The PDF version is attached below.No t e : Making a good inductor is not so simple. I amstill in the learning stage. If you are not so con dent IFinding t he pa rt num be r :will recommend buying a ready-made inductor.ARDUINO MPPT SOLAR CHARGE CONTROLLER (Version-3.0): Page 16
ARDUINO MPPT SOLAR CHARGE CONTROLLER (Version-3.0): Page 17
9/I5MD0NSE/FWJ3N19I5MD0NSE.pdfStep 7: CAPACITOR CALCULATIONOutput capacitance is required to minimize thevoltage overshoot and ripple present at the output ofa buck converter. Large overshoots are caused byinsu cient output capacitance, and large voltageripple is caused by insu cient capacitance as well as ahigh equivalent-series resistance (ESR) in the outputcapacitor. Thus, to meet the ripple speci cation for abuck converter circuit, you must include an outputcapacitor with ample capacitance and low ESR.Where dV is ripple voltageLet voltage ripple( dV ) 20mVCout 1.47/ (8 x 50000 x 0.02 ) 183.75 uFBy taking some margin, I select 220uF electrolyticcapacitor.The equations used for calculation of inductor andcapacitor is taken from an article LC Selection Guidefor theDC-DC Synchronous Buck ConverterCa lcula t io n :The out put capacitor ( Cout) dI / (8 x Fsw x dV)ARDUINO MPPT SOLAR CHARGE CONTROLLER (Version-3.0): Page 18
W/I64XDOB2/FW9IRRWI64XDOB2.pdfStep 8: MOSFET SELECTIONARDUINO MPPT SOLAR CHARGE CONTROLLER (Version-3.0): Page 19
The vital component of a buck converter is MOSFET.Choosing the right MOSFET from the variety of itavailable in the market is quite a challenging task.These are a few basic parameters for selecting theright MOSFET.1. V o lt a g e Ra t ing : Vds of MOSFET should begreater than 20% or more than the rated voltage.2. Curre nt Ra t ing : Ids of MOSFET should begreater than 20% or more than the rated current.3. O N Re s is t a nce ( Rds o n): Select a MOSFET withlow ON Resistance (Ron)4.Co nduct io n Lo s s : It depends on Rds(ON) andduty cycle. Keep the conduction loss minimum.voltage, current, etc. Try to keep it a minimum.These are a few links where you can get moreinformation on selecting the right MOSFET.1.MOSFET selection for Buck Converter2.A simple guide to selecting power MOSFETsIn our design, the maximum voltage is solar panelopen-circuit voltage(Voc) which is nearly 21 to 25V andthe maximum load current is 5A.I have chosen the IRFZ44N MOSFET. The Vds and Idsvalue has enough margin as well as it has low Rds(On)value.You can check the other parameters of IRFZ44N fromthe data sheet5.Sw it ching Lo s s : Switching loss occurs during thetransition phase. It depends on switching frequency,ARDUINO MPPT SOLAR CHARGE CONTROLLER (Version-3.0): Page 20
B/I64XDOJP/FRZFM2BI64XDOJP.pdfStep 9: MOSFET DRIVERARDUINO MPPT SOLAR CHARGE CONTROLLER (Version-3.0): Page 21
W hy w e ne e d a g a t e driv e r?A Mosfet driver allows a low current digital outputsignal from a Microcontroller to drive the gate of aMosfet. A 5-volt digital signal can switch a highvoltage MOSFET using the driver. A MOSFET has agate capacitance that you need to charge so that theMOSFET can turn on and discharge it to switch o , themore current you can provide to the gate the fasteryou switching on/o the MOSFET, that is why you usea driver.For more details, you can read about MOSFET BasicsFor this design, I am using an IR2104 Half-Bridgedriver. The IC takes the incoming PWM signal from themicrocontroller and then drives two outputs for aHigh and a Low Side MOSFET.Ho w t o us e it ?From the datasheet, I have taken the image shownabove.First, we have to provide power to the gate driver.It isgiven on Vcc (pin-1) and its value is between 10-20V asper the datasheet.The high-frequency PWM signal from Arduino goes toIN (pin-2). The shut down control signal from theArduino is connected to SD ( pin 3).O ut put :The 2 output PWM signals are generated from the HIand LO pin. This gives the user the opportunity tone-tune the dead-band switching of the MOSFETs.Cha rg e Pum p Circuit :The capacitor connected between VB and VS alongwith the diode form the charge pump.This circuitdoubles the input voltage so the high switch can bedriven on. However, this bootstrap circuit only workswhen the MOSFETs are switching.The datasheet of IR2104 is attached hereInput 0T/I64XDP67/FA85W0TI64XDP67.pdfStep 10: SCHEMATIC AND WORKINGARDUINO MPPT SOLAR CHARGE CONTROLLER (Version-3.0): Page 22
The input power connector to the solar panels is thescrew terminal JP1 and JP2 is the output screwterminal connector to the battery. The third connectorJP3 is the connection for the load.the bootstrap circuit that generates the high side gatedrive voltage for Q1 and Q2. The software keeps trackof the PWM duty cycle and never allows 100% oralways on. It caps the PWM duty cycle at 99.9% tokeep the charge pump working.F1 and F2 are the 5A safety fuses.The buck converter is made up of the synchronousMOSFET switches Q2 and Q3 and the energy storagedevices inductor L1 and capacitors C1 and C2 Theinductor smooths the switching current and alongwith C2 it smooths the output voltage. Capacitor C8and R6 are a snubber network, used to cut down onthe ringing of the inductor voltage generated by theswitching current in the inductor.The third MOSFET Q1 is added to allow the system toblock the battery power from owing back into thesolar panels at night. In my earlier charge controller,this is done by a diode in the power path. As all diodeshave a voltage drop a MOSFET is much moree cient.Q1 turns on when Q2 is on from voltagethrough D1. R1 drains the voltage of the gate of Q1 soit turns o when Q2 turns o .The diode D3 (UF4007) is an ultra-fast diode that willstart conducting current before Q3 turns on. It issupposed to make the converter more e cient.There are two voltage divider circuits( R1, R2, and R3,R4) to measure the solar panel and battery voltages.The output from the dividers is feeding the voltagesignal to Analog pin-0 and Analog pin-2. The ceramiccapacitors C3 and C4 are used to remove highfrequency spikes.The MOSFET Q4 is used to control the load. The driverfor this MOSFET is consists of a transistor and resistorsR9, R10.The diode D4 and D5 are TVS diodes used forovervoltage protection from the solar panel and loadside.The current sensor ACS712 senses the current fromthe solar panel and feeds to the Arduino analog pin-1.The 3 LEDs are connected to the digital pins of themicrocontroller and serve as an output interface todisplay the charging state.The reset switch is helpful if the code gets stuck.The IC IR2104 is a half-bridge MOSFET gate driver. Itdrives the high and low side MOSFETs using the PWMsignal from the Arduino (Pin -D9). The IR2104 can alsobe shut down with the control signal (low on the pin D8) from the Arduino on pin 3. D2 and C7 are part ofThe backlight switch is to control the backlight of theLCD ET35OKIASCUPDL.pdfARDUINO MPPT SOLAR CHARGE CONTROLLER (Version-3.0): Page 23
13/FKGHU5OIAY1ES13.pdfDownloadStep 11: Test the Gate Driver and MOSFETs SwitchingHey, I think I have talked a lot about the theory. Solet's do some practical.you get resistance bellow 1K then recheck the circuitconnection.As I have told earlier the heart of the MPPT chargecontroller is Buck Converter. As per me if your buckconverter circuit works perfectly. You can do the restthing easily. So rst let's test the Mosfets switchingand the driver.Upload the test sketch to the Arduino. The code in theform of the text le is attached below.Before soldering, I request to do it on a breadboard. Ihave blown a lot of MOSFETs during my testing. So becareful during the connection.The result should be a PWM with frequency 50KHz.Connect everything as per the schematic given above.Now you can omit the TVS diode, current sensor, andvoltage divider.Then connect the scope in between the source of Q1and GND.The waveform obtained during my testing is shownabove.If everything goes right then proceed to complete thebulk converter circuit. ( i.e adding inductor andcapacitor)After connecting everything tests the resistancebetween the input rail. It should be several KOhm. IfARDUINO MPPT SOLAR CHARGE CONTROLLER (Version-3.0): Page 24
W/I64XDY70/F6EIAJWI64XDY70.txtStep 12: Test the Buck ConverterARDUINO MPPT SOLAR CHARGE CONTROLLER (Version-3.0): Page 25
In the previous steps, we have calculated the inductorand capacitor rating. Now it is time to using andtesting it.Vout Duty Cycle x VinFor example, if I give a 50% duty cycle to a 12 inputsupply, the output should be 6V in the scope.Add the 33uH inductor and 100uf input and 220uFoutput electrolytic capacitor as per the schematic. Youcan also use 0.1uF ceramic capacitors parallel withinput and output capacitors. It will give a betterresult.But it is not mandatory.After con rmed that everything working ne, now wecan add the blocking MOSFET Q1. It is used to blockreverse power from battery to the solar panel duringthe night.Then make the snubber circuit by using a 0.1uFceramic capacitor and 200ohm resistor.Add the third MOSFET Q3 as per schematic. Thenplace the 470k resistance and diode IN4148.Again check the resistance in between the input rail. Itshould be the order of K ohm.Again check the output it should be the same.Now give power to the input rail and Arduino.At last, place the scope in between the gate of Q1 andGod.Connect the probe of your scope in between theoutput capacitor.Do you know? you have done the most critical part ofthis project.The result is shown above. The output should be asteady DC.ARDUINO MPPT SOLAR CHARGE CONTROLLER (Version-3.0): Page 26
111. Battery Voltage1. 25 % Duty Cycle111. 50% Duty Cycle1. 75% Duty Cycle1211. Out Voltage Ripple1. Gate Signal2. Output VoltageStep 13: VOLTAGE MEASUREMENTARDUINO MPPT SOLAR CHARGE CONTROLLER (Version-3.0): Page 27
Vo lt a g e M e a s ure m e nt :As you may well know, Arduino’s analog inputs can beused to measure DC voltage between 0 and 5V (whenusing the standard 5V analog reference voltage) andthis range can be increased by using two resistors tocreate a voltage divider. The voltage divider decreasesthe voltage being measured within the range of theArduino analog inputs. We can use this to measurethe solar panel and battery voltages.The above code gives an ADC value in between 0 to1023Ca libra t io n :We’re going to read output value with one of theanalog inputs of Arduino and its analogRead()function. That function outputs a value between 0 (0Vin input) and 1023 (5V in input)that is 0,0049V for each increment (As 5/1024 0.0049V)For a voltage divider circuitVin Vout*(R1 R2)/R2 ; R1 100k and R2 20kVout R2/(R1 R2) x VinVin (R1 R2)/R2 x VoutVin ADC count*0 . 0 0 4 9 * (120 /20 ) Volt //Highlighted part is Scale factorThe analogRead() function reads the voltage andconverts it to a number between 0 and 1023No t e : This leads us to believe that a reading of 1023corresponds to an input voltage of exactly 5.000 volts.Exa m ple co de :// read the input on analog pin 0 ( You can use any pinfrom A0 to A5)int Value analogRead(A0);Serial.println(value);In practical you may not get 5V always from thearduino pin 5V .So during calibration rst measurethe voltage between the 5v and GND pins ofarduino by using a multimeter,and use1ADC measured voltage/1024 instead of 5/1024Check your voltage sensor by a test code attachedbellowARDUINO MPPT SOLAR CHARGE CONTROLLER (Version-3.0): Page 28
I/I7CVM65C/F10XZ5II7CVM65C.inoStep 14: CURRENT MEASUREMENTARDUINO MPPT SOLAR CHARGE CONTROLLER (Version-3.0): Page 29
For current measurement, I used a Hall E ect currentsensor ACS 712 (5A).Ca libra t io n:Value (5/1024)*analog read valueThe ACS712 sensor reads the current value andconvert it into a relevant voltage value, The value thatlinks the two measurements is sensitivity. You can ndit on the datasheet.As pe r da t a s he e t f o r a n ACS 712 (5A) m o de l:1. Sensitivity is 185mV/A.2. The sensor can measure positive and negativecurrents (range -5A 5A),// If you are not getting 5V from Arduino 5V pin then,value ( Vmeasured/1024 ) * analog read value// Vmeasured is the voltage in between Arduino pin 5Vand GND. You can measure it by a multimeter.But as per data sheets o set is 2.5V (When currentzero you will get 2.5V from the sensor's output)Current in amp (value-2.5)/0.185Test it by a sample code for ACS712 attached bellow.3. The power supply is 5V4. The middle sensing voltage is 2.5V when no /FKK/8EXW/I7CVM6XW/FKK8EXWI7CVM6XW.inoStep 15: LCD Display and LED IndicationARDUINO MPPT SOLAR CHARGE CONTROLLER (Version-3.0): Page 30
LCD dis pla y :column-3: PWM duty cycle and load statusA 20X4 char LCD is used for monitoring solar panel,battery and load parameters. For simplicity, an I2CLCD display is chosen. It needs only 4 wires tointerface with the Arduino.In my earlier design theLCD was consuming a lot of power. The main causewas LCD backlight. So I add a push switch to controlthe backlight. By default the backlight will be in ocondition. If the user presses the switch then it will onfor 15 secs and again goes o .For testing the LCD download the test code attachedbellow.Vcc-- 5V , GND-- GND, SDA-- A4 and SCL-- A5Low Voltage -- Red ledColumn-1: Solar panel voltage, Current and PowerNormal Voltage -- Green LedColumn-2: Battery Voltage, Charger state, and SOCFully Charged -- Yellow LedYou download the library from LiquidCrystal I2C .LED indica t io n :Red, Green and Yellow LEDs are used to indicate thebattery voltage level.ARDUINO MPPT SOLAR CHARGE CONTROLLER (Version-3.0): Page 31
KA/FCW5VONI66CZAKA.inoDownloadStep 16: HARDWARE AND SOLDERINGBefore soldering you should clear about the Powerand Control Signal. Do not mix up between them.Otherwise, you will fry everything.2. Signals from the Arduino to the Mosfet drivers, LEDand LCD3. The signal between the Arduino and ESP8266Po w e r Sig na l :1.Solar panel - Fuse - Current sensor - MosfetsQ1,Q2 ,Q3 - Inductor - Battery.I used red and black thick wires ( 0.5 to 0.75 sq mm)for power and ground connections respectively.All the colored thin wires are for control signals.2.Battery - Fuse - Load - Mosfet Q4T ips : Print the PDF format Schematics beforesoldering. Keep it in front of you during soldering forreference.Co nt ro l Sig na ls :1.The signal from the di erent Sensors to ArduinoStep 17: Drill Holes for MountingFirst, hold the prototype board by a vice.Then drill 4 holes (3mm) at the 4 corners of the prototype board.ARDUINO MPPT SOLAR CHAR
Jul 29, 2016 · Arduino Nano. This design is suitable for a 50W solar panel to charge a commonly used 12V lead-acid battery. You can also use other Arduino board like Pro Mini,Micro and UNO. Nowadays the most advance solar charge controller available in the market is Maximum Power Point Tracking (MPPT). The