Transcription
Web Development GuideInformation SystemsGabriel MalveauxMay 2013
Web Development GuideGetting StartedIn order to get started with your web development, you will need some basic software. In this guide we willdownload and install an easy to use software package called XAMPP in order to simplify the process of running theApache webserver and MySQL database. We will then download Aptana, an open source Web IDE that comes withcode assist/code completion abilities. It will prove invaluable when developing your own web based informationsystems. Finally we will run through some basic examples of web pages and code. The appendix will contain moreadvanced and complex samples and ideas.For this tutorial we are assuming you are running Windows 7 and have not installed any of this softwarepreviously. You are encouraged to follow along with the screenshots to limit errors.Step 1: XAMPP Download and InstallationNavigate to http://sourceforge.net/projects/xampp/ to pick up the latest copy of the XAMPP software installer.Save the installer to your desktop. When the download is complete, run the installer.Leave all the defaults as they are, except for the following: Uncheck the box to learn more about BitNamiUncheck the box to Start Control Panel NowFollow along with the screenshots to avoid confusion.
Step 2: Running XAMPP, Starting Apache and MySQL, First Run Configuration,Shutdown ProcedureAt this point you should have XAMPP installed. We will now show how to start the XAMPP Control Panel, startthe Apache webserver, start the MySQL databse, and run through first run configuration. We will then go through howto shutdown Apache and MySQL and close XAMPP.Opening XAMPP Control Panel and Starting Apache/MySQLOpen the XAMPP Control Panel by opening the Windows Start Menu and finding XAMPP Control Panel in theAll Programs List. The Control Panel can take a few moments to initiate.
After you have opened the XAMPP Control Panel, you should see the following. Notice that the panel is also availablefrom the system tray.
Start the Apache web server and MySQL database by clicking on Start under Actions. The Apache and MySQL modulesshould turn green in the Control Panel and indicate that they are running.(NOTE: If you use Skype, it is common for MySQL to start but not Apache. The reason is that Skype will occasionally usethe same ports as Apache. To fix this, close Skype completely and try to run Apache again.)
First Run ConfigurationYou will need to make the following configuration changes only the first time you run Apache and MySQL.In the XAMPP Control Panel, once the Apache Server and MySQL Database have been started, click on theAdmin button under Actions for Apache. Your web browser should open to a XAMPP splash page.
Click on English to continue. Next click on STATUS, in the left side navigation area. Confirm that at least MySQLDatabase and PHP are Activated.Next click on the SECURITY link under STATUS in the left side navigation. It will take you to a security page. Near thebottom there is a link that will fix security issues. Click on the link to continue.
On the next page, you have to option of setting a password for the MySQL root user, as well as setting directoryprotection for the XAMPP folder. You should do so now for the MySQL root user. (For example, give root the passwordinfosys2013). Hit Password Changing, to change the password.
Restart the MySQL Server by going back to the XAMPP Control Panel and hitting stop, waiting for it to stop and thenhitting start to start it up again. Click on SECURITY in the left side navigation to confirm that the MySQL root user has apassword (SECURE) and that PhpMyAdmin password login is enabled (SECURE).
Next, navigate to http://localhost/phpmyadminFor the login, enter the user as root and the password as infosys2013 (or whatever you set it to be).You should be taken to the following screen after you log in. You will be using PhpMyAdmin often, so it isrecommended you bookmark this page now.
If you have gotten to this point, your Apache and MySQL installation is sound. If not, you should attempt to fix (orredo) your installation as you will most likely have trouble for the remainder of its use.Shutting Down Apache, MySQL and XAMPP Control PanelTo shut down Apache and MySQL return to the XAMPP Control Panel and press the Stop button for eachmodule respectively. When both modules have been stopped, you may Quit the XAMPP Control Panel.
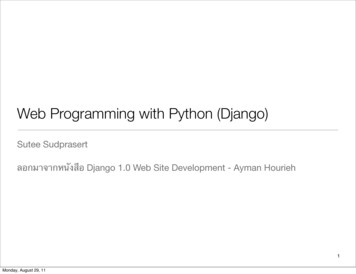
Step 3: Download and Install Aptana, Basic PHP ExampleIn this next step we will download and install Aptana, an Open Source web IDE (integrated developmentenvironment). We will then run through a very basic example of creating a webpage with some PHP. More advancedexamples are available in the Appendix of this guide.Downloading and Installing AptanaNavigate to http://www.aptana.com/products/studio3/download and download the Stand-Alone version. Youdo not need to sign up to download the program. Save the installer to your desktop. When the download is complete,run the installer.When the installer gets to the Install Location screen, do not install to the default directory. Instead, install to thefollowing directory:C:\Program Files (x86)\Aptana\
When you must choose which File Associations to make, make sure all boxes are checked.
When the installer is finished, proceed to the next section.Running Aptana For The First TimeGo to the Windows Start Menu, find and run Aptana. It may ask you to Select a Workspace. If so, instead of the defaultworkspace, use this directory instead:C:\xampp\htdocsCheck the Use this as the default and do not ask again box and then click OKYou should be presented with the following interface.
You are now ready to use Aptana to create a basic website.Using Aptana: A Basic ExampleAt this point you should have all the software necessary to create a basic website from scratch. We will now explore abasic example that will combine all the software we have acquired.A Basic WebpageOpen the XAMPP Control Panel and start Apache and MySQL. Open Aptana as well. Create a new project in Aptana bygoing to File New PHP Project. We will name the project testone. Make sure it is in the default location that wehave set up (C:\xampp\htdocs). PHP Compatibility should be at least 5.3x.
Next we will add an HTML file to the project. Right-Click in the testone project workspace in the App Explorer on theleft side of the IDE window. Select New From Template HTML XHTML – Transitional (*.html). Name the fileindex.php
Your view should change to the following:
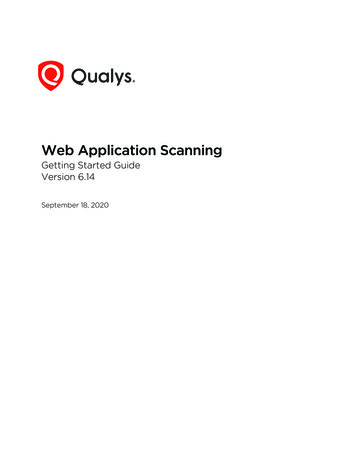
There are many resources available online on how to write HTML and PHP code. http://w3schools.com is a highlyrecommended resource on familiarizing yourself with the languages. Make your file look like the following, then savethe file. !DOCTYPE html PUBLIC "-//W3C//DTD XHTML 1.0 xhtml1-transitional.dtd" html xmlns "http://www.w3.org/1999/xhtml" xml:lang "en" lang "en" head meta http-equiv "Content-Type" content "text/html; charset utf-8"/ title This is the Title Text /title /head body h1 This is the most important heading on the page! /h1 h2 This is a less important heading /h2 !-- This is an HTML Comment -- p This is just a small paragraph. the code <hr /> /code tag implements a horizontal rule, useful for seperating contenton a page as shown below. /p hr / h3 Below is table tr td This tr td This tr td This /table /body /html a 3x3 table /h3 is a cell, inside a table row. (1,1) /td td This is a cell,inside a table row (1,2) /td /tr is a cell, inside a table row. (2,1) /td td This is a cell,inside a table row (2,2) /td /tr is a cell, inside a table row. (3,1) /td td This is a cell,inside a table row (3,3) /td /tr
You have created a webpage, now let’s view it! Open up your browser and navigate to http://localhost/testoneIf you have done everything correctly, your page should look like the following:At this point we have successfully created a plain HTML page. This is a very basic example, but for the purposes of thisguide it will be enough.Lets Add PHPFor the next part, we will write some simple PHP code to improve our webpage.Let us replace the largest heading on the page with the current date. We will do so however, without knowing anythingabout PHP. The PHP Manual will prove to be very useful when searching for answers to questions such as these. Aquick search for “php date” returns the following page: http://php.net/manual/en/function.date.phpFrom the manual we can see that the date() function is just what we need. We will now replace the h1 /h1 tagwith the following code: ?php current date date('l, F jS');echo ' h1 '. current date.' /h1 ';?
You should get the following result:
This example shows us how to use PHP functions and variables, as well as how to output HTML. Next we will integrateMySQL into our example.Adding a Database to the MixIn this part of our example, we will go through the basics of how to create databases and table in MySQL, create HTMLforms, submit form data to the database, and then display it on a page. This will be a basic walkthrough – for moreadvanced material please see the appendix.Let us recount where we left off in the previous section. We have an HTML page and some PHP code that prints outthe current date for us. We will use this page to show the data that our database contains (we have yet to create it).We will also need to create a form to add data to the database. First however, let us create the database!Navigate to http://localhost/phpmyadmin
After logging into PhpMyAdmin, click on the Databases tab at the top of the page. In the create database form type intestone and press create.The database will be created and added to the list of databases. Click on the one you just created so that we may addtables to it.For this simple example, let us create a table with only two columns. We will call the table test scoresThere should be two fields: student and grade both of type VARCHAR and length 100Creating this table and clicking BROWSE on it will bring up the following screen:
We have now created a database called testone, and added a table to it called test scores. The test scores table hastwo fields, student and grade both of type varchar and of length 100. We can now interface with this table using PHP.Add another new page to your Aptana testone project. Right-click in the project App Explorer and Select New FromTemplate HTML XHTML – Transitional (*.html). Name the file add student.php
On this new page we need to add an HTML form that will allow us to submit a student name and a grade to the Apacheserver, to be then processed by PHP and added into the MySQL database.The HTML for the form is as follows: body form method "post" action "insert.php" input type "text" name "name" placeholder "Student Name"/ input type "text" name "grade" placeholder "Student Grade"/ input type "submit" value "Submit" / /form a href "index.php" View List /a /body This form will take the data that was input and pass it onto insert.php. We now need to write insert.php, which willtake that form data and insert it into the test scores table. Let us create that file now.Once again, in the testone App Explorer Right-Click and add a new file from template. This time however select PHP PHP Template. Name the file insert.php
Clear any code between the ?php ? tags.For this example, we are going to assume that the data will always be sound. That is, there will always be a student anda grade input at the same time. In a more serious setting, a validation step must take place that ensures the data is fitto be processed into the database.Therefore, the first thing this script must do is connect to the database. It does so with the following code:/** Code to Connect to the Database**/ server 'localhost'; username 'root'; password 'infosys2013'; database 'testone';mysql connect( server, username, password) or die(mysql error());mysql select db( database) or die(mysql error());The next thing the script needs to do is insert the submitted values from the form into the test scores table. To do sowe add the following:/** Get data out of POST array* and do a query to insert it into test scores table**/ name POST['name']; grade POST['grade']; sql "INSERT INTO test scores ( student , grade ) VALUES ('". name."', '". grade."')"; result mysql query( sql) or die(mysql error());After the data has been added to the table, we should send the user to the homepage, which will show all of theentries we have in the test scores table. To do so, we add the following line just before the end of the insert.phpscript:// After processing data into table, redirect back to homepageheader('Location: http://localhost/testone/');We should now be able to fill out the form at http://localhost/testone/add student.php and have it inserted into thedatabase. Let us test this now by doing so. We can check to see that it was actually added by going into phpmyadminand browsing the table.
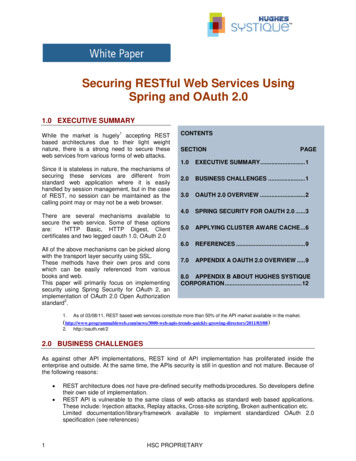
There is now one final part remaining for us. We will alter index.php so that it links to add student.php and we willmake it display the contents of the table test scores table.First let us add a link to add student.php. Add the following anchor element to index.php: a href "add student.php" Add a Student /a
Next let us add some PHP code that will fill the table we have made with HTML. First we need to connect to thedatabase. This is the same as in insert.php, so we can just copy the code for the connection. We then create a SELECTquery and execute it. The results are displayed as rows within a table.Either replace the old table or add to the index.php page with the following code: table tr td STUDENT /td td GRADE /td /tr ?php/** Code to Connect to the Database**/ server 'localhost'; username 'root'; password 'infosys2013'; database 'testone';mysql connect( server, username, password) or die(mysql error());mysql select db( database) or die(mysql error());/** Select query**/ sql "SELECT * FROM test scores"; result mysql query( sql);/** Output results**/while( row mysql fetch array( result)){echo " tr ";echo " td " . row['student'] . " /td ";echo " td " . row['grade'] . " /td ";echo " /tr ";}? /table Your output should look similar to the following:
This concludes this basic example. You can now create HTML pages, databases and tables, as well as use PHP tointegrate database data with web pages. For more advanced topics please see the appendix.
APPENDIX
Web Development GuideConnecting Databases via ODBCManage ODBC Data SourcesIn order to manage ODBC Data Sources, open up the Windows Start Menu and search for Run (also located under AllPrograms Accessories Run)In the prompt type the following C:\Windows\SysWOW64\odbcad32.exe and click OK to open up the ODBC DataSource Administrator
Adding a DatabaseIn order to add a database, open the System DSN tab. These sources will be available to applications systemwide (necessary for our Apache installation). Click the Add button on the right side.
In this example we are adding the Ecom database for Studio 2, which we have placed in the htdocs/musicweb/ folder(you may have it in any folder you wish, but make sure you are connecting the same database that you edit). Nowwhen the system calls for a connection to Ecom, it will be able to connect via ODBC.
Web Development GuideAlternatives to Microsoft Access: LibreOffice Base connected via ODBCOccasionally you may need to edit a database that you do not have software for. This tutorial focuses on thecase of a user who needs to edit a .mdb database file, but does not have Microsoft Access. The solution is to use theopen source program, LibreOffice Base and an ODBC connection to communicate with the database.In this tutorial we will first cover how to add an ODBC Data Source. Then we will download LibreOffice and useBase to connect to the database (musicweb.mdb) via ODBC.Manage ODBC Data SourcesIn order to manage ODBC Data Sources, open up the Windows Start Menu and search for Run (also located under AllPrograms Accessories Run)In the prompt type the following C:\Windows\SysWOW64\odbcad32.exe and click OK to open up the ODBC DataSource Administrator
Adding a DatabaseIn order to add a database, open the System DSN tab. These sources will be available to applications systemwide (necessary for our Apache installation). Click the Add button on the right side.
In this example we are adding the Ecom database for Studio 2, which we have placed in the htdocs/musicweb/ folder(you may have it in any folder you wish, but make sure you are connecting the same database that you edit). Nowwhen the system calls for a connection to Ecom, it will be able to connect via ODBC.
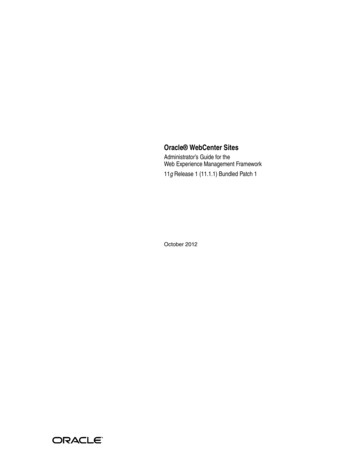
Download and Install LibreOfficeBase is part of the LibreOffice suite, so we will have to download the suite first. Get the installer rror/ and download it to your desktop.Let the installer run through with all of the defaults. When the install is complete, find and run LibreOfficeBase. It is very similar to Microsoft Access. When it first opens it will run a database wizard. Select the option toConnect to an Existing Database via ODBC.
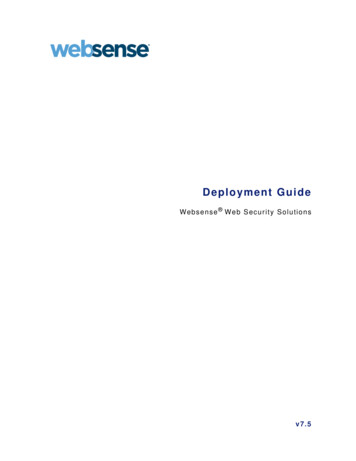
Hit Next, and then select the ODBC Data Source that you wish to connect to (in our case ecom). If you set up ausername and password hit next to enter the login information, otherwise press the Finish button. Save the databaseas .odb when it asks you in order to proceed to the database view.In order to open up a table view, double click on a table. To design tables, right-click on a table and select Editin order to bring up table schema.
Web Development GuideStudio 2.4: MusicWebThis guide is intended as a supplement to Studio 2 Part 4 located at http://viu.eng.rpi.edu/lab/2/s2 4.html.This guide will attempt to walk through the studio keeping in mind the deliverables. We shall walk through how to getthe MusicWeb website, including database set up in the XAMPP installation discussed in the Getting Started tutorial.We will then attempt to implement Customer Checkout.We assume that you are using the XAMPP based Apache and MySQL installation and have set up the EcomODBC connection as per the ODBC Tutorial associated with this guide.If you have not yet set up the Ecom database, download a populated file fromhttp://viu.eng.rpi.edu/lab/2/musicweb.mdb and use it as the ecom ODBC Data Connection, as mentioned in the nextsection.Uploading MusicWeb to the XAMPP/Apache InstallationIn order to get MusicWeb installed on our server, we must download the ZIP archive athttp://viu.eng.rpi.edu/lab/2/musicweb.zip as well as the populated database (if you do not already have it set up) fromhttp://viu.eng.rpi.edu/lab/2/musicweb.mdbSave the archive to your desktop. When it is downloaded, right click on it and Extract All to a folder calledmusicweb inside the htdocs folder of your XAMPP/Apache installation (you may need to create the musicweb folder).(C:\xampp\htdocs\musicweb)
Next, download the file at http://homepages.rpi.edu/ malveg/func and overwrite the current func.php in themusicweb directory. This is a critical step as the default installation will not work with modern PHP versions (4 ).Now we will check to make sure the installation was successful. Start your web server. (If you have been following thisguide you must open the XAMPP Control Panel and then start the Apache web server). When the server is started,open your browser and navigate to http://localhost/musicwebIf your installation was successful, your screen should look like the following:
If you have errors or warnings on your page regarding ODBC connections, you may have not set up ODBC correctly forthe Ecom database. Please make sure you follow the ODBC tutorial associated with this guide and have a populateddatabase (such as is available at http://viu.eng.rpi.edu/lab/2/musicweb.mdb)
Implementing the Checkout ProcessNow that the MusicWeb front-end (customer facing side) is up and running, we would like to implement thecheckout process.From a more general view of the process, we will need to get customer specifics such as name, credit card,shipping and billing information. We will also need to submit the customer’s cart to production. Carrying out thisprocess will require us to create a form and then a function that will communicate with the database, as we have seenpreviously through the loading of categories and songs.The first thing we are going to do is build the checkout form. When a customer clicks the checkout button, theywill be directed to this form. On the form they will input their information and then have the option to Submit theirOrder.Download the checkout form folder at http://homepages.rpi.edu/ malveg/checkout form.zip and upload itinto your htdocs/musicweb directory. The form was built using the form builder at http://www.phpform.org/, andthen had some elements of the viewcart.php file combined into it.We must now edit the func.php file to take the user to the form, receive the inputs and then process them intothe database. First we will add the following lines just before the end of the file (just before the closing ? tag):
if(isset( POST["checkout"])){header("Location: checkout form/checkout form.php");}These lines will move the user to the checkout form when they click the Checkout button. If everything is correctlyset up, when the customer clicks on the Checkout Button when in the shopping cart, they will be taken to thefollowing form:Next we need to create a function to handle the inputs received from the form and insert them into thedatabase. The following function will take the form inputs and insert them into the Customer and CreditCard tables. Itwill also add a CD to the CD table and then create an entry in the Order table from the combination of Customer,CreditCard, and CD information. As a final step, it will empty the shopping cart and send the user back to thehomepage.Add the following code just before the closing php (? ) tag in func.php:if(isset( POST["doCheckout"])){session start();
post POST; cart SESSION['cart'];doCheckout( post, cart);}function doCheckout( post, cart){//--- Get Customer SHIPPING Info name post['element 1 1'].' '. post['element 1 2']; email post['element 3']; shipping street address post['element 2 1'].' '. post['element 2 2']; shipping city post['element 2 3']; shipping state post['element 2 4']; shipping zip post['element 2 5']; shipping country post['element 2 6'];// Country not used in DB//--- Get Customer CREDIT CARD cc number post['element 4']; cc type post['element 5']; cc exp post['element 6 1'].'/'. post['element 6 2'].'/'. post['element 6 3'].' 12:00 AM';//--- Get Customer BILLING Info billing street address post['element 7 1'].' '. post['element 7 2']; billing city post['element 7 3']; billing state post['element 7 4']; billing zip post['element 7 5']; billing country post['element 7 6'];// Country not used in DB phone post['element 8 1']. post['element 8 2']. post['element 8 3'];// Connect to database conn odbc connect('ecom','','');if (! conn) {echo odbc error();}// INSERT INTO Customer Table sql "INSERT INTO Customer ( CustomerName , CustomerAddress , CustomerCity , CustomerState , CustomerZip , CustomerTelephone , CustomerEmail )"." VALUES ('". name."', '". shipping street address."', '". shipping city."', '". shipping state."', '". shipping zip."','". phone."', '". email."')"; result odbc exec( conn, sql);// Get CustomerID sql "SELECT * from Customer WHERE CustomerName '". name."' AND CustomerEmail '". email."' AND CustomerTelephone '". phone."'ORDER BY 'CustomerID' DESC"; result odbc exec( conn, sql); cust ID odbc result( result,"CustomerID");// INSERT INTO CreditCard Table sql "INSERT INTO CreditCard ( CC# , CCType , Exp Date , CustomerID , BillingAddr , BillingCity , BillingState , BillingZip , BillingTel )"." VALUES ('". cc number."', '". cc type."', '". cc exp."', '". cust ID."', '". billing street address."','". billing city."', '". billing state."', '". billing zip."', '". phone."')"; result odbc exec( conn, sql);// --- Create a CDPlaylist and CD cd rand();// give the CD a random number// add to CD table sql "INSERT INTO CD ( CD# , CDTitle , CDDescription ) VALUES ('". cd."','Various Artists -". cd."','Description ". cd."')"; result odbc exec( conn, sql);// add to CDPlaylist tableforeach( cart as s){ sql "INSERT INTO CDPlaylist ( CD# , SongFileName ) VALUES ('". cd."','".trim( s['ProductID'],'SongTitle ')."')"; result odbc exec( conn, sql);}// generate order for Order table sql "INSERT INTO Order ( CustomerID , CD# , CC# , CD Title , CD Description , DateTime ) VALUES('". cust ID."','". cd."','". cc number."','Various Artists -". cd."','Description ". cd."','".date('m/d/y H:m A')."')"; result odbc exec( conn, sql);//--- Finish up: Close out cart, redirect to homepage
unset( SESSION['cart']);echo " p Your Order has been submitted - THANK YOU! /p ";echo " p You will be redirected in 5 seconds. /p ";sleep(5);header("Location: index.php");}We have now successfully set up the MusicWeb website in our own XAMPP development environment, andhave gone a step further and implemented the customer checkout procedure.
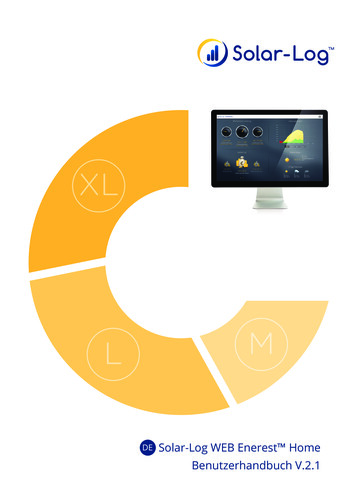
Database Normalization (Customers, Credit Cards and Orders)It is worthwhile to review the concept of a normalized database and see how it is applicable to this example.Recall that the point of database normalization is to minimize redundancy and dependency. The procedure aims to putdata into simple tables and then define relationships between them.
The MusicWeb database is a good example of normalization. Let us look at the process of generating an order.An order is defined by a customer, their CD purchase, and their credit card information. Looking at the Order table onewould see that it does not store the actual customer name or telephone or address information. Instead it keeps justthe CustomerID. The CustomerID is unique to a customer in the Customer table, and all personal information is storedthere. This is an example of keeping redundancy to a minimum, as there is no need for both the Order table and theCustomer table to keep personal information about the customer. The CreditCard table is the same way. While eachcard is unique, there can be multiple cards for a given customer.
For those still unconvinced about the benefits of normalization, imagine that the customer info, credit card andorder tables were combined into one large table. Every time a returning customer pays with a different credit card, anew row would have to be made containing mostly similar information except for credit card information. Thisscenario could easily develop Insertion or Update Problems. For example if a customer wanted to change their creditcard information on record, they would be forced to submit a new order. Furthermore, querying the table couldbecome very costly due to the excess amount of data that would have to be parsed for a simple change.Database design needs to consider the future. In particular, it needs to consider all queries, not just expectedqueries. A normalized database can be effectively used no matter what the query is. For example, in this case wecould ask which credit card type is the most popular. Although this is not exactly a query that the database designermay have anticipated when designing table structure, because the database is normalized we can simply query theCreditCard table and derive the answer.When developing a database for an information system, one should try to make it as normalized as possible.The mission for the information system can change over time, but if the information in the database is in a normalizedform then the database can stay the same. A little bit of effective planning can limit costly future changes.
Step 3: Download and Install Aptana, Basic PHP Example In this next step we will download and install Aptana, an Open Source web IDE (integrated development environment). We will then run through a very basic example of creating a webpage with some PHP. More advan