Transcription
Plug-In How-To GuideMicrosoft Word 2013, 2016, 2019 & Office 365Copyright 2022 Topaz Systems Inc. All rights reserved.For Topaz Systems, Inc. trademarks and patents, visit www.topazsystems.com/legal.
MS Word Plug-Ins (2013, 2016, 2019 & Office 365)Table of ContentsOverview. 3Signing in MS Word . 3Creating a Trusted Location . 5Adding Topaz as a Trusted Publisher. 5Signature Placement . 7Naming Signatures . 8Changing the Size of a Signature Field . 9Pre-Placing Blank Signature Fields . 9Validating Signatures . 11Auto-Validation and Voided Signatures . 12Location of the TOPAZSIG3.DOT File . 13Troubleshooting Tips . 142www.topazsystems.comBack to Top
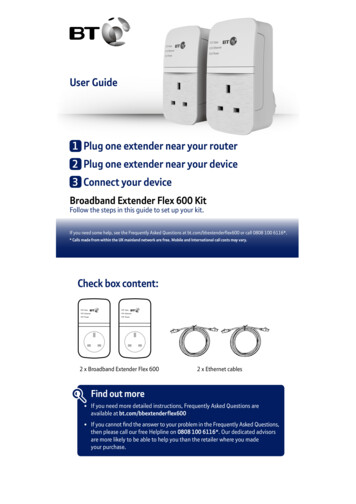
MS Word Plug-Ins (2013, 2016, 2019 & Office 365)OverviewThe Topaz MS Office Plug-In software allows users to electronically capture a handwrittensignature in a Microsoft Word document using a Topaz signature pad and pen. Eachsignature is embedded and bound to the text of the document. A change made to any partof the text of the document after signing, even something as minimal as hitting thespacebar or enter key, renders the signature invalid.However, if the text is returned to the state it was in when the document was signed, thesignature will be restored. Please note that form fields (such as dropdown menus, radiobuttons, etc.) are excluded from the binding process.Note: This Topaz Office plugin is designed for installed versions of MS Office only.Please make sure you first install the current version of l. When using a 64-bit version of Office,please install the 64-bit version of SigPlus.Then, install the plug-in at: www.topazsystems.com/plugins.html.Signing in MS WordBefore you can sign, you must make sure that you are in “Print Layout”. To accomplish this,go to the “View” tab on the toolbar and choose “Print Layout”. Once your document isready to be signed, click the “Add-Ins” toolbar and the pencil icon, “Topaz: Sign Doc”.3www.topazsystems.comBack to Top
MS Word Plug-Ins (2013, 2016, 2019 & Office 365)Note: If you don't see the “Add-Ins” tab, click on the “File” tab “Options” “Add-Ins”. At thebottom of the window, change the dropdown to “Word Add-ins” and click “Go". In the windowthat appears, you should see “TopazSig3.dot” listed. Make sure it is checked.The signing window will open once the “Sign Doc” icon under the “Add-Ins” tab is clicked.4www.topazsystems.comBack to Top
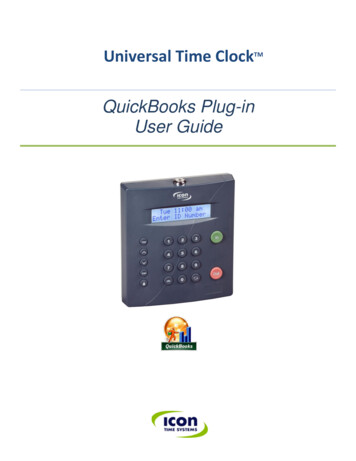
MS Word Plug-Ins (2013, 2016, 2019 & Office 365)Once the signing window is open, there are several options a user can choose: The “Cancel” button will cancel the signature event.The “Clear” button will clear any signature in the signature window.The “Done” button will bind the signature to the document text (embed into document).The user can name the signature by using the specified field, “Type the namefor the signature box here (optional)”, located below the buttons.A time and date stamp can be included by checking the “Stamp” box in the lower righthand corner.If the document requires initials instead of a signature, check the “Initials” box. This willplace a smaller signature field in the document.Creating a Trusted LocationIf an error message regarding Macro security arises when attempting to sign, a trustedlocation needs to be created in Word. To create a trusted location in Word 2013, 2016,and 2019, click on the “File” Tab “Options” “Trust Center” “Trust Center Settings” “Trusted Locations” “Add New Location” “Browse”. Navigate to “C” “ProgramFiles” “Microsoft Office” “Office15” “STARTUP”. Click “OK”.Now the plug-in location is trusted and “Macro Security” needs to be changed. Click on the“File” tab “Options” “Trust Center” “Trust Center Settings” “Macro Settings”.Select “Disable all macros except digitally signed macros”, click “OK”, and close Word.Adding Topaz as a Trusted PublisherTo overcome the requirement to click-through “Enable Content” when Word is opened, setup Topaz Systems, Inc. as a trusted publisher in Word. Follow the steps below to do so:1. Open a new Word document and click “Macros have been disabled” in the “SecurityWarning” bar at the top.5www.topazsystems.comBack to Top
MS Word Plug-Ins (2013, 2016, 2019 & Office 365)2. The “Info” window will appear. Click “Enable Contact” “Advanced Options”.3. In the window that appears, select “Trust all documents from this publisher”.6www.topazsystems.comBack to Top
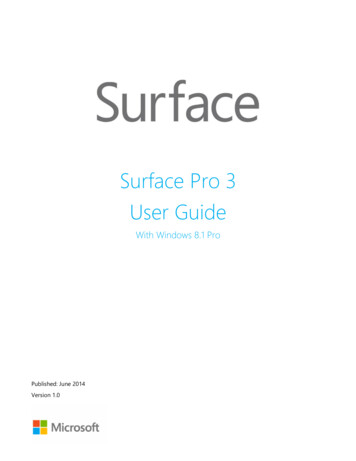
MS Word Plug-Ins (2013, 2016, 2019 & Office 365)4. To ensure that Topaz Systems, Inc. has been added as a trusted publisher, checkyour list of Trusted Publishers. Click “File” “Options” “Trust Center” “TrustCenter Settings ” “Trusted Publishers”.Signature PlacementWhen signing in MS Word, the signature’s bottom-left edge will be placed at the cursorlocation. The signature’s height is automatically sized based on the amount of space abovethe cursor before any text is reached. The plug-in sizes a signature using its baseline as areference, rather than its top edge. If the cursor is immediately beneath a line of text, theplug-in will adjust its size to fit from the cursor up to the text above - only one line - ratherthan using any available space below the cursor. To ensure that your signatures aredisplayed at the proper size, make sure that you leave enough space between the cursorand any page items appearing above it before signing.Signatures can be a maximum size of 0.7 of an inch height and 3.5 inches in width.Before signing, the cursor is placed sufficiently below the last line of text, leaving room to createa signature field.CursorEach signature can be positioned by moving the cursor to the desired place in thedocument and going through the signing procedure above.7www.topazsystems.comBack to Top
MS Word Plug-Ins (2013, 2016, 2019 & Office 365)Be sure to plan for the placement of your signature and create enough space to facilitateall necessary signatures before the signing process is initiated.Note: pressing the “Space Bar” or the “Enter Key” after signing will result in the invalidationof any previously signed signature fields.Naming SignaturesThe “Signature Select” box will list all the signatures already embedded in your document.The names listed in this box will correspond to the name of a particular signature. If noname was entered during signing, a default listing of SigPlus1, SigPlus2, etc. will bedisplayed. Each signature’s name can also be found in the top right corner of eachsignature field.When you highlight a particular signature’s name in the “Signature Select” box, you maydelete the signature by clicking the “Delete” button or make a new signature by signingagain and clicking “Done”. Highlighting “New” in the “Signature Select” box will create anew signature. If a user is unsure whether they are creating a new signature field orsigning a currently existing one, there is a message below the signature window thatindicates the function being performed.8www.topazsystems.comBack to Top
MS Word Plug-Ins (2013, 2016, 2019 & Office 365)Changing the Size of a Signature Field“Design Mode”, found under the “Developer” tab, is a useful tool that can alter the size andlocation of a signature field, blank or otherwise, to better fit the user’s needs. To access“Design Mode”, click on the “Developer” tab at the top of the screen. If the “Developer” tabcannot be found along the Ribbon, click on the “File” tab “Options” “Customize Ribbon”.Select “Main Tabs” from the drop-down menu on the left side of the window under “Customizethe Ribbon”. You should see “Developer” listed. Make sure that it is checked and click “OK”.After you have completely exited the options window, “Developer” should appear as a tab atthe top of the screen. In the “Developer” tab, click the “Design Mode” icon to activate“Design Mode”.In “Design Mode”, you can now click on the signature field to position and size it. Holding the“Alt” key while performing this will allow for fine-tuning. When finished, make sure todeactivate “Design Mode” by clicking on the “Design Mode” icon.Pre-Placing Blank Signature FieldsA user can also pre-place a blank signature field into a Word document by following thesesteps:Place the cursor in the general location of the desired signature position.Click the “Sign Doc” button, to open the “Sign Document” window. If desired, the user can namethe signature and enable/disable the time stamp at this time as well. Click the “Done” buttonwithout signing and a blank signature field will be embedded in the document.9www.topazsystems.comBack to Top
MS Word Plug-Ins (2013, 2016, 2019 & Office 365)To sign a blank signature field, click the “Sign Doc” icon. On the right-hand side of the “SignDocument” window, you will find the “Signature Select” box. Choose the blank signaturefield that you want to sign. Once chosen, sign and click “Done”.The signature will be placed in the corresponding blank signature field.10www.topazsystems.comBack to Top
MS Word Plug-Ins (2013, 2016, 2019 & Office 365)The benefits of pre-placed blank signature fields include:1. Consistent placement and size of signatures.2. Ease of use as signature placement is independent of cursor position.3. Dramatic reduction in time needed for signing process.Validating SignaturesThe “Validate Sig” button, located next to the “Sign Doc” button and denoted by a checkmarkicon, will check the validity of each signature in the document.If changes have been made to the textual contents of a document after signing has takenplace, the signature(s) will be rendered invalid and appear to be blank. NOTE: Notice thechange in text has resulted in an invalid (blank) signature. Neither the signature, northe signature field is visible in the document.If a signature is invalid, it should be possible to by returning the document to the state it wasin when signed and click “Validate Sig” again.11www.topazsystems.comBack to Top
MS Word Plug-Ins (2013, 2016, 2019 & Office 365)NOTE: The text has been restored to its original state. The signature has returnedand is once again considered valid.Any change to the document can render a signature invalid, even a change as small asadding a space after a sentence. The “Validate Sig” button can be clicked at any timewhile the document is open and should be clicked any time the user wants to know thestatus of the signature(s).Any of the following events will trigger signature validation:1.2.3.4.5.Pressing the “Validate Sig” buttonClosing a documentSaving a documentOpening a documentPrinting a documentAuto-Validation and Voided SignaturesAuto-validation is a process performed by the plug-in when a document is opened. Ifmultiple instances of Word are open, auto-validation does not occur, leaving any signatureswithin the document invalid. Also, if you open a Word document through a third-partydocument management system, you will need to press the “Validate Sig” button to run thevalidation. To manually validate the signatures, go to the “Add-ins” tab and click the“Validate Sig” icon. A message will appear in Word, stating that the signature is either validor invalid. If the signature is valid, it will be restored to the document.If the signature is invalid, a change was made to the document. The signature will not bevalid until the document has been restored to its original state.12www.topazsystems.comBack to Top
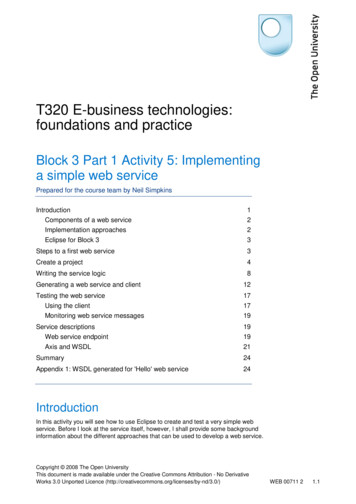
MS Word Plug-Ins (2013, 2016, 2019 & Office 365)An invalid signature will also lose the name it was assigned. If the Sign Doc icon is clicked,the list of names under “Signature Select” will be replaced with Void1, Void2, etc. Thedocument can be re-signed without it being restored to its original state, but the signaturename will default to SigPlus1, SigPlus2, etc., unless the name is re-entered in the “Type thename for this signature box here” field.List of valid signature namesList of invalid signature namesPre-placed blank signature fields that have never been signed will be named Void1, Void2,etc. before validation. However, their names will return after validation.Location of the TOPAZSIG3.DOT FileThe TopazSig3.dot file for MS Word is automatically installed into the location specifiedby MS Office within the WIN registry. Most often this is in one of the following locations,depending on the current Operating System and version of Office: WIN\Application Data\Microsoft\Word\Startup Program Files\MicrosoftOffice\Office\StartUp Office 36564 bit C:\Program Files\Microsoft Office\root\Office16\STARTUP 32 Bit C:\Program Files (x86)\Microsoft Office\root\Office16\STARTUP When installed at the above startup folder TopazSig3.dot is treated as a global template,rather than a document template, and as such is available to all Word documents. As aglobal template, eSignature technology is available to any document you might haveopened, saved, or new, and at any time. This is the suggested method of electronicsignatures using the Topaz plug-ins.13www.topazsystems.comBack to Top
MS Word Plug-Ins (2013, 2016, 2019 & Office 365)Troubleshooting Tips1. Do not use date fields when creating documents. Date fields can auto-updatewhen the document is opened. This will cause any signatures within thedocument to become invalid. To avoid inadvertently invalidating signatures, itis best to manually enter dates into a document.Q.After signing and clicking the “Done” button in the “Sign Doc” window, thesignature is not visible in the document, or the signature is so small that it isillegible.A.Q.After signing and clicking the “Done” button in the “Sign Doc” window,the signature is higher than the location where the cursor was placed.A.Q.Most likely, not enough space was left between the cursor and the above textto place a signature field. Click the “Validate Sig” icon. A message statingthat the document contains a valid signature should appear. That confirmsthat the signature is somewhere in the document, even though it is notvisible. Search through the document for the signature field. Often, it hasshrunk and is in the top left corner, or it is on the first page of the document.If you are having trouble finding the signature, go to the “Developer” tab, andclick on the “Design Mode” icon. This will put 4 dots around the edge of thesignature field, making it more visible. Once the signature is found, makesure you are in “Design Mode” and then drag/resize the signature. If thesignature cannot be found, you can go back to the “Add-ins” tab, click the“Sign Doc” icon, select the missing signature, and click “Delete”. In thedocument, place the cursor leaving enough room to create a signature field,and re-sign the document.This indicates that the white space, normally seen between two pages in adocument, is hidden. Click on the “File” tab “Options” “Display”, andcheck “Show white space between pages in Print Layout view”. Exit out ofthe “Options” window and open the “Sign Doc” window from the “Add-ins” tab.Select the affected signature, delete it, and re-sign the document. When youclick “Done”, the signature will appear in the location.Placing a signature inside a table:A.14The best way to place a signature inside a table is to first place the cursorsomewhere in the document, outside of the table, with plenty of whitespace. Go to the “Add-ins” tab and click on the “Sign Doc” icon. Sign,name the signature if desired, and click “Done”. Then, go the “Developer”tab, and click on the “ Design Mode” icon. You can now resize thesignature field and drag it into an existing table in the document.www.topazsystems.comBack to Top
MS Word Plug-Ins (2013, 2016, 2019 & Office 365)Q. Printing a signed document to a PDF:A.When printing a signed document to PDF, there is no guarantee that thesignatures within the document will be visible in the PDF. Additionally, oncethe document is converted to a PDF, any visible signatures within that PDFare no longer eSign compliant. This is because the distillation process fromWord document to Acrobat PDF has no means to process Topaz’s SigPlusobject and will attempt to create an image based on the rendered signature.To create eSign compliant signatures in a PDF, download the Topaz AdobeAcrobat Plug-in and sign documents directly in Adobe Acrobat.Q. Sending a signed Word document to someone else:A.If you want to send your signed Word document to someone else, that personmust install SigPlus as well as the MS Office Plug-in. Without that software,they may not be able to see the signature(s), and even if they can see them,they will have no way of determining the validity of the signature(s).Q. The “Signature Select” box in the “Sign Doc” window does not say “New”.A.15This could mean that you’re not in “Print Layout”. Close the “Sign Doc”window and go to “View” “Print Layout”. Then try clicking “Sign Doc” again.If the “Signature Select” box still doesn’t list “New” at the top, one of thesignature fields in the document is currently highlighted. Close the “Sign Doc”window and place your cursor somewhere else in the document. When yousee your blinking cursor, click the “Sign Doc” button, and the “SignatureSelect” box will default to “New”.www.topazsystems.comBack to Top
MS Word Plug-Ins (2013, 2016, & 2019) Overview The Topaz MS Office Plug-In software allows users to electronically capture a handwritten signature in a Microsoft Word document using a Topaz signature pad and pen. Each signature is embedded and b