Transcription
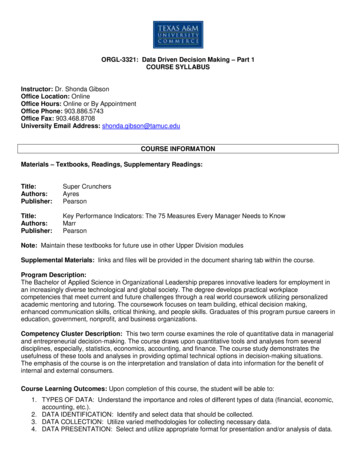
Lesson 10: PowerPoint Presentations Beyond the Basics10POWERPOINT BEYOND THE BASICSMaking interactive, non-linear slide showsand enhancing formattingLEARNING OUTCOMESIn the first PowerPoint tutorial you learned how to create and save a new presentation (theScreenbeans slide show). You saw a sample slide show (The Tudor Monarchs). You learned howto prepare an outline, you typed text for each slide, added clip art, and set timings. You added aneffect to enhance the slide transition, you selected a color scheme, and may have even created anew background effect. You changed the printer settings so that you can print out handoutsrather than just individual slides of your shows.For many classrooms and for most K-12 students, what you learned in chapter 8 is just fine.But, if you're ready to take the next step and learn some more advanced skills with PowerPoint,or if you teach computer-savvy students who want more challenging skills to master, thischapter's for you.Most PowerPoint presentations you see in school or at work are what are called linearpresentations. That is, each slide is designed to proceed one slide right after another. The firstslide transitions to the second, which transitions to the third, and so forth. For many educationaltasks, this is fine.But, what if.What if you want your students to create an interactive story, where, for example, youngerkids could read about a dragon on Slide One, then choose, on Slide Two, any one of threepossible places that the dragon could go? By clicking on the word "desert," the show wouldmove to a slide describing what happens to the dragon in the desert. If the student clicks theword "forest," another slide appears with another ending. The learner thus participates, not bysimply clicking on slide after slide in one, linear direction, but by making choices that affectwhat slide comes next, thus making the presentation interactive and non-linear.309
ESSENTIAL MICROSOFT OFFICE 2010: Tutorials for TeachersCopyright Bernard John Poole, Lorrie Jackson, 2010. All rights reservedA more common application of non-linear PowerPoint presentations is when reviewingknowledge—for what you might call interactive Drill & Practice. This lesson will teach you howto do that. Teachers (and even older students) can create quizzes using PowerPoint. In these slideshows, students are asked questions and then click on what they think is the answer. If theanswer is correct, the show moves to the next question. If the student answers incorrectly, theshow moves the student back to re-answer the question or, if the question is of the True/Falsevariety, explains why the answer was incorrect before moving them on to the next step in theshow.The movement from one slide to another is not one-way, not linear, but rather non-linear, thepathway through the show determined by the student's interaction with it.In this tutorial you will be introduced to the basics of non-linear interactive PowerPoint slideshows, along with some more advanced formatting and impact-enhancing tools. Amongst theskills you will learn are: Using hidden slides, Action Buttons, and hyperlinks Formatting and enhancing graphics Inserting sounds, clip art, movies, and hyperlinks (including E-mail links)A caveat before you begin:If you have not completed the tutorial in Chapter 9 but feel fairly comfortable with the basics ofPowerPoint, feel free to tackle this chapter. If you are not sure you know the basics ofPowerPoint, however, skim Chapter 9 to make sure you're ready to begin. Good luck!10.1 ADDING ACTION BUTTONS AND HIDDEN SLIDES TO ANEXISTING PRESENTATIONAction buttonsFor the sake of uniformity, you are going to work with a version of the Screenbeans presentationcreated specially for this tutorial.In the PowerPoint File menu click on OpenNavigate on your disk to the Work Files for Office 2010 folder PowerPointFiles folder, then double click on the file Problems and Solutions to open itAction Buttons allow you to control the sequencing of the slides in a slide show. They also allowyou to go to slides that would otherwise be hidden from the user’s view and passed over whenthe slide show is running. You will learn about such Hidden Slides in the next section of thistutorial.Action Buttons also can be used to direct the user back to a previous slide, or forward to thenext slide, or to go directly to the first or last slide, or anywhere in between. Later in this tutorialyou will learn about other PowerPoint tools that can be used to call up a movie clip or someother kind of multimedia document.You're going to put Action Buttons on each of the slides in the Problems and Solutionspresentation. These action buttons will make it easy for the user to go back to the previous slideor forward to the next slide, and so forth. The first slide will have just one Action Button—to goto the next slide. The last slide will have two Actions Buttons, one to go to the previous slide and310
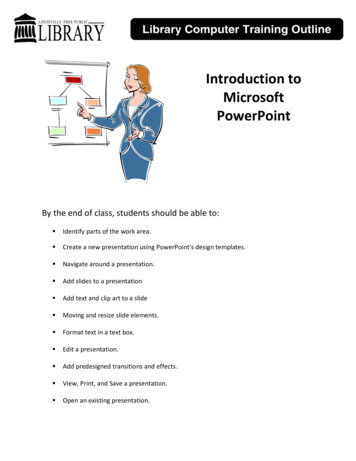
Lesson 10: PowerPoint Presentations Beyond the Basicsanother to go back to the beginning of the slide show (Home). Every other slide will have anAction Button to go to the previous slide, an Action Button to go to the next slide, and an ActionButton to go to the first (Home) slide in the presentation.Fig. 10.1 shows you how the Title slide will look after you've added the Action Button.Fig. 10.1 The Action Button on the Title slideOK, here goes. To use Action Buttons you must be in the Normal view so you can work onindividual slides.In the Slide View toolbar (lower right of your PowerPoint window—Fig.10.2) click on Normal viewFig. 10.2 The Slide View toolbar311
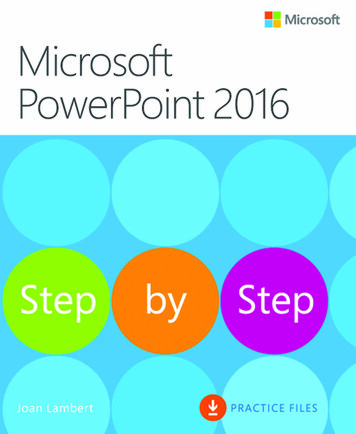
ESSENTIAL MICROSOFT OFFICE 2010: Tutorials for TeachersCopyright Bernard John Poole, Lorrie Jackson, 2010. All rights reservedThen, in the left hand frame of the PowerPoint window, click on Slide #1 (theTitle slide)In the Insert Ribbon Illustrations Group, then click on the Shapes icon toshow the selection of Shapes you can use in Office 2010 (Fig. 10.3)Action button forthe Forward orNext SlideFig. 10.3 The Office 2010 Shapes menu showing the Actions buttonsFrom the Shapes Action Buttons panel (Fig. 10.3 above), click on theAction Button for the Forward or Next slideNow, without clicking, roll the mouse cursor down over the large version ofthe slide on the right of the PowerPoint window and notice that the arrowpointer changes from a pointer to a cross hair ( )Position the cross hair in the lower right corner of the slide (where you seethe Action button in Fig. 10.1 on the previous page), and hold down the leftmouse button and drag to create a box about a half inch square (lookagain at the Action button in Fig. 10.1), then let go of the mouse buttonYou can adjust the size of an action button any time you want by clicking on it and dragging onthe handles around it.If the button you have created looks too large or too small to you, go aheadnow and click on it, grab one of the handles and adjust the size to yoursatisfaction312
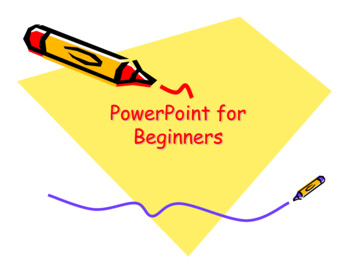
Lesson 10: PowerPoint Presentations Beyond the BasicsPowerPoint displays the Action Settings dialog box (Fig. 10.4).Click on this down arrow tosee the menu of soundsClick in this box toPlay a sound when theuser clicks on theAction ButtonFig. 10.4 The Action Settings dialog box(If you don’t see the Action Settings dialog box, right click on the ActionButton and, from the pop up context menu, select Edit Hyperlink )You want the Action Button to go from the Title slide to the Next Slide, which is the defaultsetting in the Hyperlink to: box, but before you click on OK, let’s opt to play a sound which theusers will hear when they click on the Action button (Fig. 10.4 above)Click to put a check mark (tick) in the box next to Play sound: then click onthe down arrow at the end of the Play Sound box and, from the menu ofsounds, select ArrowNow click on OKYou should now see a professional-looking Action Button. We’ll test it shortly. If you ran theslide show right away and clicked on the button, it would advance you to the next slide with thewhoosh sound of an arrow for good measure. You’re going to put this same button on the nextseven slides, so you need to copy it so you can paste it onto the next slide (Slide #2)Make sure you still have the handles around the Action button (just click onthe button to get the handles), then press ctrl-C to copy the Action button tothe clipboardYou're going to put three action buttons on each of the next seven slides—one to go back to theprevious slide, another to go forward to the next slide, and a third to go back to the beginning ofthe slide show.313
ESSENTIAL MICROSOFT OFFICE 2010: Tutorials for TeachersCopyright Bernard John Poole, Lorrie Jackson, 2010. All rights reservedClick (in the left hand pane) on Slide #2, and immediately press ctrl-V topaste the copy of the Action button from the first slide onto Slide #2Next, in the Insert Ribbon Illustrations Group click on the Shapes iconFrom the Action Buttons panel (Fig. 10.3 on page 315), select the ActionButton for Back or Previous slideSlide the cursor down to the lower left corner of the slide and drag to drawan Action Button in the lower left corner (Fig. 10.5)Fig. 10.5 Position the Back or Previous Action button in the lower left corner of the slideYou want this second Action Button to go from the second slide to the Previous Slide, which isthe default hyperlink, but before you click on OK, let’s opt to play a different sound for the usersto hear when they click on the Previous Slide Action button.Click to put a check mark (tick) in the box next to Play sound: then click onthe down arrow at the end of the Play Sound box and, from the menu ofsounds, select BreezeNow click on OKYou should now see another professional-looking Action Button. If you ran the slide show rightaway and clicked on the button, it would take you back to the previous slide with the sighingsound of a breeze.Finally on Slide #2, in the Insert Ribbon Illustrations Group, select theShapes menu and locate the Action Buttons panel314
Lesson 10: PowerPoint Presentations Beyond the BasicsIn the Action Buttons panel click the Action Button for the Home slide (itlooks like a little house), and once again, on the slide itself, drag to draw anAction Button in the lower center of the slide (Fig. 10.6)Fig. 10.6 The Home Action buttonYou want the Action Button to go to the Home Slide (the First slide in the show), which is thedefault hyperlink in the Action Settings dialog box, but before you click on OK you need to havePowerPoint play yet another different sound.Click to put a check mark (tick) in the box next to Play sound: then click onthe down arrow at the end of the Play Sound box and, from the menu ofsounds, select ChimeNow click on OKSlide #2 should now look something like Fig. 10.6 above.Copying the Action buttons to the other slidesOnce you have created a set of buttons for a slide, if you need to do the same on other slides inthe presentation, all you have to do is copy and paste them. This is a lot quicker than recreatingthem on each succeeding slide and it is very simple to do.Hold down the Shift key on the keyboard, then click on each of the newbuttons on the Confusion slide so that all three buttons are selectedPress ctrl-c on the keyboard to copy them to the clipboardClick in the left hand frame on the thumbnail for slide #3 and press ctrl-v topaste the buttons onto the third slideNotice that the buttons are pasted into the exact same place on the next slide.Now go to each of the remaining six (6) slides in the presentation and dothe same315
ESSENTIAL MICROSOFT OFFICE 2010: Tutorials for TeachersCopyright Bernard John Poole, Lorrie Jackson, 2010. All rights reservedBetter save your work to this pointThe Problems and Solutions presentation is missing one final slide—the Acknowledgementsslide, which should accompany any presentation where you use information or audio-visualmaterial that is not your own. Adding a new slide to a presentation is easy.First, you want the Acknowledgements slide to be that last slide in the show,so, in the left hand frame, use the mouse to click immediately after thethumbnail for Slide #9 (you’ll see a dark grey bar flashing on and off toindicate that this is where the new slide will go)Now, on the keyboard, hold down the Ctrl key and, at the same time, pressthe letter ‘m’ (Ctrl-m), or, in the Slides Group of the Home Ribbon, click onthe New Slide buttonThe layout for the new slide will be the same as the other slides in the show, namely a TwoContent layout. For the Acknowledgements slide it will be best if it is a Title and Content slidelayout.In the Home Ribbon Slides Group, click on the Layout option to bringdown the Layout menuIn the Layout menu, select the layout Title and ContentThe buttons are slightly different on this last slide. You still want the Action Button to go back tothe previous slide, and you need the one that returns you to the beginning—the Home ActionButton. But you don’t need a button to go to the next slide.You’ve just pasted the three Action buttons onto each of the previous 7 slides, so the buttonsare still available on the clipboard for you to paste onto the new last slideOn Slide #10, the last slide in the show, hit ctrl-V to paste the three Actionbuttons here, tooNow, click anywhere on the slide to deselect the three action buttons, thenclick on the Action button in the lower right corner (the Next Action Button)to select it alone, and hit the Del(ete) key to remove it from the slideNext, click where you see “Click to add title,” and in the Title box typeAcknowledgementsFinally, click in the large box below the Title box to add text and, by way ofAcknowledgements, type the following (centered) on the last slide:Screenbeans courtesy of Microsoft CorporationText courtesy of Bernie PooleYou don’t want the bullets with the text, so, in the Home Ribbon Paragraph Group, click on the Bulleted List tool to toggle the bullets off (orselect None from the Bullets menu)Hit Ctrl-S to save this (almost) final version of the Problems and SolutionspresentationYour show is almost ready, but first you have to learn about hidden slides.316
Lesson 10: PowerPoint Presentations Beyond the BasicsHidden SlidesHidden Slides are slides that will be bypassed unseen, as the user clicks through a presentation,except when the user clicks on an Action Button that specifically sends them to the Hidden Slide.Here are the steps to create an Action Button on one slide which will take the user to aspecific Hidden Slide in the Screenbeans slide show.Make sure you still have the Slides tab selected at the top of the left handframe, so that you can see all the thumbnails of your slides, then scroll back,if necessary, and click on Slide #2 (the Confusion slide) to make it the activeslideClick to position the cursor right at the end of the text that you typed in theslide’s left-side text placeholder (after the words tougher than it really is)Hit Enter to go to a new line, then type Click if you’d like to read a quoteabout problem-solving.In the Home Ribbon Slides Group, select New Slide (or press ctrl-M) toinsert a new slide right after Slide #2—the Confusion slideImmediately, PowerPoint inserts a new slide right after the second slide in the show.Next, in the Home Ribbon Slides Group again, click on the Layout button,locate the Title slide layout in the selection of slide layout options, and clickon it to select it as the layout for the new slideYou want this new slide to be a Hidden Slide.In the Slide Show Ribbon Set Up Group, select Hide SlideNotice that there is now, in front of the thumbnail for the new slide #3, a box around the number3 with a diagonal slash through it, which indicates that this is a Hidden Slide (Fig. 10.7).The Hidden Slide has a boxwith a slash thru the slidenumberFig. 10.7 How to recognize a Hidden Slide in the thumbnail Slides menu317
ESSENTIAL MICROSOFT OFFICE 2010: Tutorials for TeachersCopyright Bernard John Poole, Lorrie Jackson, 2010. All rights reservedClick in the title placeholder on the new slide (where it says Click to addtitle), and type the following quotation (including the quotes): “Quality is inthe details.”Click in the subtitle placeholder on the new slide (immediately above thetitle placeholder) and type the following: Bernie Poole, Esq.The Hidden Slide with the quote is now complete, but it’s hidden, so you have to givePowerPoint (and the user) a way to find it by creating an Action button that links to it.In the left hand thumbnail view of the slides, click on the thumbnail forSlide #2 (the Confused Screenbean)In the Slide Show Insert Group, select the Shapes button ActionButtons and from the Action Buttons panel click the Action button forForward or Next slideWithout clicking the mouse button, roll the mouse cursor down over the slideand notice that the arrow pointer changes to a cross hair ( )Position the cross hair near the end of the text that you typed in the slide’stext placeholder, at the end of "Click if you’d like to read a quote aboutproblem-solving" (Fig. 10.8), then hold down the left mouse button anddrag to create a small Action button that you are going to use to link to thehidden slide (slide #3)Position the actionbutton hereFig. 10.8 Placement of action button linking to the hidden slideLet go of the mouse button when you're done—you can still adjust the size ofthe button if you want by clicking on the button to select it and then draggingon the handles around the button318
Lesson 10: PowerPoint Presentations Beyond the BasicsPowerPoint displays the Action Settings dialog box (Fig. 10.9).The default Hyperlink is to the Next Slide and this is not what you want, soclick on the arrow to the right of the Hyperlink to: box (Fig. 10.9) to show thedrop down menu of Hyperlink to: optionsFirst, click on this downarrow to see the Actionbutton Hyperlink optionsNext, click onSlide to go to aparticular slide inthe presentationFig. 10.9 The Action Settings dialog boxChoose Slide. from this drop-down menu (Fig. 10.9 above)Now you will see a list of the slides in the presentation, including the hidden slide (Fig. 10.10).Fig. 10.10 The Hyperlink to Slide dialog box319
ESSENTIAL MICROSOFT OFFICE 2010: Tutorials for TeachersCopyright Bernard John Poole, Lorrie Jackson, 2010. All rights reservedNotice that Slide #3 has parentheses like this, (3), around the number for the slide (Fig. 10.9above). This is to indicate that it is a hidden slide.Click to select slide #3 (“Quality is in the details.”) from the list of slides, clickon OK, then click on OK again to exit the Action Settings dialog boxThis new Action Button now provides a link from slide #2 in the show to the hidden slide #3.When you run the show shortly and get to slide #2, if you do not click on this Action Button,slide #3 will be bypassed.You have to do one more thing to complete the content on the hidden slide (slide #3). Youneed to put an action button on there to go to the next slide. Can you remember how to do ityourself? If so, go ahead; but if you need help, here are the steps to follow:Click in the left hand frame on the thumbnail for slide #2 (the Confusionslide)Now click once on the action button in the lower right corner of the slide(the button to go the next slide), then press ctrl-c on the keyboard to copythe action button to the clipboardNext click in the left hand frame on the thumbnail for slide #3 (the hiddenslide slide), and press ctrl-v on the keyboard to paste the action button ontothe hidden slideSimple.Better Save all the good work you’ve done so farAnimation SchemesPowerPoint Animation is a way of bringing objects, such as text and pictures, to life on thescreen, controlling and sequencing how text and other slide objects emerge onto the screenduring a presentation—sliding in from the right or left, or fading in, and so forth. Let's try someof the PowerPoint Animations now.In the left hand thumbnail view of the slides, click on the thumbnail forSlide #2 (the Confused Screenbean)In the Animations Ribbon Animations Group, click on the small arrow tobring down the menu of More Animation styles (Fig. 10.11)Click on this arrowto see MoreAnimation stylesFig. 10.11 More Animation styles320
Lesson 10: PowerPoint Presentations Beyond the BasicsThis will bring down the Animation styles menu (Fig. 10.12).Fig. 10.12 Animation Effects menuIn the Entrance section of the menu, select the Fade option, and watch asPowerPoint gives you a demo of the effectTry out a few other animations to get a feel for what is available; then whenyou are done experimenting, Save the Problems and Solutions presentationagainNotice that PowerPoint indicates the sequencing of the animations (Fig. 10.13).Fig. 10.13 Animations sequenceNotice, also, that you can remove an animation scheme by clicking on None at the top of theAnimation Effects menu (Fig. 10.12 above).321
ESSENTIAL MICROSOFT OFFICE 2010: Tutorials for TeachersCopyright Bernard John Poole, Lorrie Jackson, 2010. All rights reservedSo you can experiment with different schemes, try them out, remove them if you don’t like them,and start over—all part of the design process.You can change any sequence, and you can also sequence the items to come onto the screenall at once, and so forth. There will be occasions when you will want to alter the sequencebecause, for example, you may decide that you want to talk about one topic ahead of another.Also, you may want the presentation to be presented as a running display in a conference roomor in the lobby of a building. You can also determine the time you want each item to stay on thescreen before the next animation is to come up. To do this, you would use the other tools in theAnimations Ribbon. It is beyond the scope of this tutorial to dwell further on this topic, but youshould find the time to play around with the tools available to you so that you can become anexpert in the use of this beautiful teaching tool.Bear in mind that it’s not a good idea to apply Animation Schemes on all the slides.Animations are best used sparingly, to highlight specific ideas, or to spice things up in apresentation. But too much spice can overwhelm a presentation and take away from itsenjoyment or effectiveness.Later in this lesson you’ll learn how to customize animation schemes, but first let’s create abasic interactive PowerPoint presentation.In the File menu select Close10.2 INTERACTIVE POWERPOINT AT WORKLet’s start by looking at an example of an interactive PowerPoint presentation.You should still have the Work Files for Office 2010 folder available in thedisk driveIn the File menu select OpenPowerPoint presents the Open dialog box for you to navigate to the Work Files for Office 2010 .Locate and open the Work Files for Office 2010 folder, open thePowerPoint Files folder, then double click to open the Mammal testpresentationYou’ll recall that the left hand frame of the PowerPoint window allows you to select either oftwo tabs: Outline or Slides. You'll use both of these shortly to create and order your owninteractive slide show. But first you’re going to examine the Mammal test interactivepresentation which has been prepared for you and which will demonstrate the various features ofwhat makes a presentation interactive and non-linear.In the Slide Show Ribbon Start Slide Show, click on From Beginning toview the presentationUse the mouse (or space bar or right arrow key) to move through theslides—be sure to click on the Action Buttons or answers when indicatedAnswer at least one question incorrectly so you can see how thepresentation takes you back to re-answer a question should you get it wrongNotice also the sound, clip art, and animation clip that are added to thisshow322
Lesson 10: PowerPoint Presentations Beyond the BasicsFeatures to look out for in the demonstration presentationGeneral Layout of an Interactive PowerPoint Used for Assessing KnowledgeThink of a test in your classroom. You start with a title on your test, so the students know whatthe test is on and who wrote it. Then you have an introduction, which might define the subjectmatter for the test. Alternatively, if used as a review, the introduction might summarize theconcept being tested. A good interactive slide show thus begins with a title and an introductionslide (Fig. 10.14).Fig. 10.14 Title and Introduction SlidesYou then move to the set of directions which tell the user how to complete the test. The testquestions follow right on after the directions.An effective interactive slide show should have a directions slide because a good teachernever assumes that all the students know how to take a particular test. After the directions comethe question slides, which contain the questions themselves and the options for answers (See Fig.10.15).Fig. 10.15 Directions and Question One SlideAn interactive PowerPoint presentation has the same elements as any PowerPoint presentation,with one significant addition: question slides and feedback slides. In your class, you grade papersand return them, giving the students feedback on their answers. So, in the Mammal test slide323
ESSENTIAL MICROSOFT OFFICE 2010: Tutorials for TeachersCopyright Bernard John Poole, Lorrie Jackson, 2010. All rights reservedshow, we have feedback slides that tell the user "You're Right" or "Sorry. Try Again" (Fig.10.16).Fig. 10.16 Question and Feedback SlidesLastly, in any interactive PowerPoint it's appropriate to have a concluding slide which tells thestudents they’re done, followed by an acknowledgements slide (Fig. 10.17).Fig. 10.17 Ending and Acknowledgment SlidesIn this way, you set good precedent for citing sources, and you also clue your audience to the factthat it's over! We'll talk more about the layout of an interactive PowerPoint as you begin creatingyour own.Action Buttons and HyperlinksIn order to move outside the linear box of traditional PowerPoints, we've used Action Buttonsand Hyperlinks. Action Buttons are the square boxes with arrows in them that let you eithermove on to the next question or re-answer the previous one. These were discussed briefly in theprevious chapter, but we'll pay special attention to them in the subsequent activities.324
Lesson 10: PowerPoint Presentations Beyond the BasicsA PowerPoint Hyperlink takes you directly from one place to another: if you are on the Web, thehyperlinks take you from one Web site to another, or from a website to your email program; ifyou are in a PowerPoint, the hyperlink might take you from a slide to your E-mail program, orfrom one slide in your presentation to another, or from a slide in your PowerPoint presentationto, say, a page on the Web.Notice the absence of transitions and animations in this Mammal Test presentation. Thepresentation has a simple, clean style. In the previous lesson, you learned how to use differenteffects for Slide Transitions and earlier in this lesson you were introduced to animations.These are certainly valuable tools that engage your viewers and can keep their interest. Buteverything has a time and a place, and in a testing situation, the bells and whistles aren't needed.They may, indeed, be an unwanted distraction.So much for an overview of using an interactive PowerPoint show. It's time to create yourown interactive quiz.One final word before you begin: if you are a practicing teacher using this tutorial, and youconsider yourself an experienced user of the computer, why don’t you create, or use an existingquiz of your own, a quiz based on your grade level or subject matter using the upcoming steps asyour guide? Experienced computer-using teachers should have little trouble doing this. But ifyou're even the least bit fuzzy on how an interactive show works, stick with the mock test belowfor your first try. Then practice it later with your own curriculum!Hit ESC to exit the slide show, then close (File Close) the Mammal Testpresentation when you are ready to continue with the tutorial10.3 BUILDING THE PRESENTATIONYou are going to use PowerPoint to prepare a simple test about the U.S. states and capitals,which will give you the experience to prepare more detailed interactive tests on your own.PowerPoint should still be open on your screen, so go to File New and clickon the Blank Presentation icon (or simply hit Ctrl-n) to start a new slideshowYou’ll remember that it’s always a good idea to immediately save a new documentGo to File Save, navigate to your Work Files for Office 2010 Data Filesfolder PowerPoint Presentations folder, give the new presentation thename States and Capitals Quiz, and click on the Save buttonIt is usually a good idea to create the text outline for your slides before you select a template foryour design theme, slide transitions, animations and so forth. This is because different templateshave different slide layouts (bigger title boxes, less room for bulleted lists, and so on). So youwill want to get a feel for the text on each slide before you proceed with design considerations.This brings to mind a good rule of thumb when creating anything that is designed to provideinformation for the purpose of effective communication: Substance Before Style! Or, to put itanother way, Content Counts! Keep this in mind when developing any PowerPoint presentation.Let's get to work. Figure 10.18 illustrates the content you will be typing in for the first threeslides of the U.S. States and Capitals quiz. Follow the directions on the next page to completethis first part of the task.325
ESSENTIAL MICROSOFT OFFICE 2010: Tutorials for TeachersCopyright Bernard John Poole, Lorrie Jackson, 2010. All rights reservedFig. 10.18 Content for the first three slidesIn Lesson 9 you learned how to use the Outline tab in the left hand frame of the PowerPointwindow to enter the text onto each slide. You can go ahead and use the Outline tab again if youwant, as illustrated in Fig. 10.18 above. For this pres
Lesson 10: PowerPoint Presentations Beyond the Basics 313 PowerPoint displays the Action Settings dialog box (Fig. 10.4). Fig. 10.4 The Action Settings dialog box (If you don’t see the Action Settings dialog box, right click on the Action Button and, from the pop up context menu, select Edit Hyperlink You want the Acti