Transcription
TECH TUTORMicrosoftPowerPoint 2013kcls.org/techtutorMicrosoft PowerPoint 2013 ManualRev 6/2014instruction@kcls.org
Microsoft PowerPoint 2013The KCLS Tech Tutor Program offers free One-on-One Computer Help and Computer Classes. Go tokcls.org/techtutor for upcoming Tech Tutor sessions, learning online and class manuals. This manualis for Microsoft PowerPoint 2013 class held on library computers running Windows his%class,%you%will Learning%from%KCLS!.!7!Signing In to Library ComputersFor personal use of library computers, sign in with your library card number and Personal ID number.For a computer class, sign in with these codes:6278371212Note: Be careful not to type the letter “O” for a zero (0) or the letter “l” for a one (1).
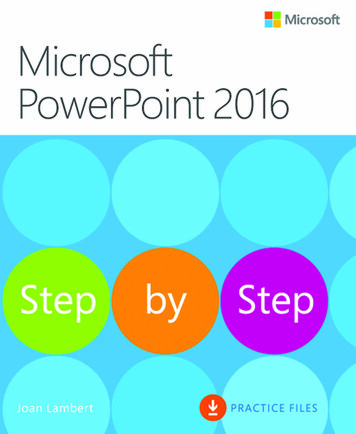
In this class, you will Learn about Microsoft PowerPoint 2013, including:! What PowerPoint is used for! How tools and menus are organized (user interface)! How to use basic tools in PowerPointWhat is PowerPoint used for?PowerPoint is used to “design and deliver beautiful presentations with ease and confidence.”You can create presentations for:!!!School – book reports, science fairs, speech classWork – project proposals, reportsPhoto Albums – for friends, family or a workplace social gatheringPowerPoint has excellent tools and templates. Tools like color-matching Eyedropper, alignment andsmart guides, and improved Presenter Views are very helpful. PowerPoint templates on the WelcomePage offer pre-designed themes that you can easily change to suit your style.PowerPoint 2013 Welcome PageOpen PowerPoint 2013 from the computer desktop. On the Welcome page, notethe various popular templates available. Click a template you’d like to use to see afull description. Click “Create” to open a document in this particular style.PowerPoint 2013 desktop iconPowerPoint 2013 Welcome Page2% %M i c r o s o f t ! P o w e r P o i n t ! 2 0 1 3 !
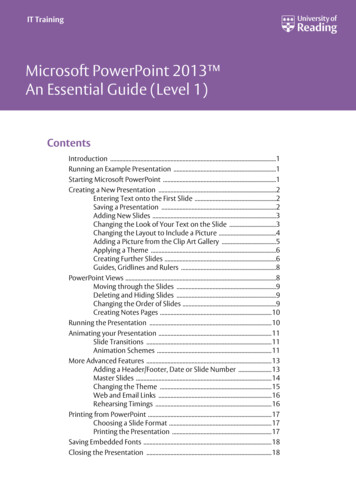
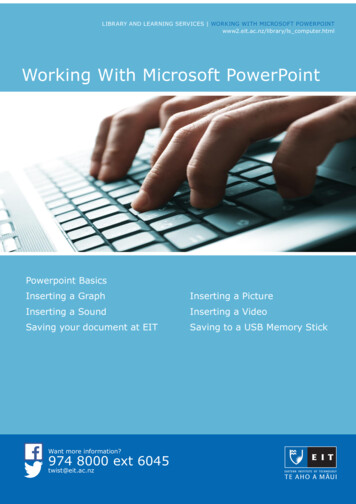
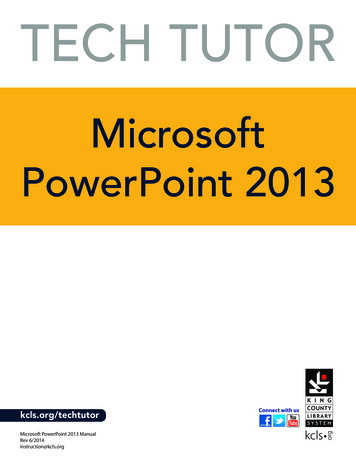
PowerPoint 2013 Organization – User InterfaceThe way the tools and menus are organized in PowerPoint 2013 is known as the user interface.You will learn about The Ribbon, Quick Access Toolbar, File Menu and other key parts ofPowerPoint.The RibbonThe Ribbon runs along the top, has all the PowerPoint tools, and is organized into three parts:!!!Tabs – represent a general activity areaGroups – show related tools (commands) togetherCommands – a button, expandable menu, or a box for entering related informationClick the various Tabs: observe how the Groups and Commands change based on the selected Tab.Tabs%Groups%Commands%Diagram of The Ribbon and its partsQuick Access ToolbarThe Quick Access Toolbar is above the Tabs and has commands used most often, including “Save”.Place the mouse arrow over each icon (do not click) to see the name and use for each icon.You may customize the commands in the toolbar if you click the black arrow at the end of the toolbar.The Undo command “takes back” any changes made to the document. For example, type “Undo” inthe blank document you have open, then click Undo in the Quick Access Toolbar. Undo keeps track ofactions by sequence; if you accidentally erase (change) data in your file, click Undo right away to get itback. On that note, it is important to “save early and save often.” (See “Saving Your Work” on page 5.)Save%Undo%Quick%Access%Toolbar%%Quick Access Toolbar & “Undo” button3% %M i c r o s o f t ! P o w e r P o i n t ! 2 0 1 3 !
File MenuThe File Menu contains actions at the file level. Click the blue “File” tab to the far left of the tabs.What you’ll see is the “backstage” area. From here, you can create a New document, Open an existingone, Save changes to the current document, Save As a different file with a different name, Print thecurrent document, and other options. Click the “back arrow” at the top to exit the backstage area.Title Bar, Help Menu, Ribbon Display OptionsThe Title Bar shows the name of the program and the name (title) of your document. (Top-mostbar in program window.) A new document has a temporary title, Presentation1, until you “Save As”with a different name. To the far right on the Title Bar is the Help Menu and Ribbon Display options.The Help Menu has articles on using the software. Not sure how to perform a certain action or whereto find a command? Click the question mark icon to browse Help articles, or search for specific topics.Ribbon Display Options allow you to see more or less of the Ribbon and the work area, as a result.Take a moment to locate and explore these features in the Word program %%%%Title Bar, Help Menu & Ribbon Display Options4% %M i c r o s o f t ! P o w e r P o i n t ! 2 0 1 3 !
Create a PowerPoint PresentationStart learning about creating a presentation by viewing a couple and then creating one of your own.View Presentation ExamplesThe Homemade Ice Cream presentation is a good example of a basic presentation. Note the use of atheme gives the presentation a polished appearance.You will learn to use tools in PowerPoint by creating a presentation of your own. Consider thefollowing.Choose a goal for your presentation. Are you trying to: Inform your audiencePersuade your audience to belief or actionAmuse or entertain your audienceAnalyze your audience What do you know about your audience?What will interest, motivate, or entertain your audience?Is the level of information appropriate, not too advanced, and not too simple?Proper Role of PowerPointHave a clear reason for using PowerPoint or other presentation program. Too often, PowerPoint isused simply as a gimmick. Ask yourself, what can PowerPoint provide that adds to the purpose of thepresentation?Create Slides and Add TextYou will start by creating a few slides with text. After the slides you will add graphics. Once you pick atopic, make a quick outline on paper or in your head and think of a title.Earlier, you selected and opened a template. You will work with that template. Here’s what you see:1. The first slide provides a title and subtitle. Click in the Placeholder to type a title. Click in thesubtitle placeholder to create a subtitle.2. From the Home tab, click New Slide button and type a title. Type at least three bulleted items.3. Choose New Slide. This time, click the arrow under new slide to choose a different design. Add atitle, a small bulleted list or a sentence. From the Insert tab, click “Online Pictures” button and do asearch for a picture that fits your topic in Office.com Clip Art.Example of a blank slide with placeholders5% %M i c r o s o f t ! P o w e r P o i n t ! 2 0 1 3 !
Add pictures to SlidesYou can easily insert pictures from the web and other places to enhance a presentation.Here’s how to insert pictures from the web:1.2.3.4.5.Click Insert Tab.Click “Online Pictures” in Illustrations Group.Search for “New York City” in the Office.com Clip Art box.Select a picture you like.Click Insert.How to move a picture:1. Place mouse pointer over picture.2. Look for cross-like move arrow tool.3. Click and drag your shape to a new spot.How to re-size a picture:1. Click into the picture.2. Look for squares around the frame.3. Click and drag a frame square.a. Drag a corner out to enlarge proportionally.b. Drag a corner in to shrink proportionally.%Get royalty-free photos from Office.comAdd a couple more pictures, and try re-sizing them.Share your presentationUse Slide Show view to present the slide show to your classmates. Useful shortcuts include: F5 starts the show quickly. Shift F5 starts with the current slide as first slide to show. Right click during a slide show for useful options, such as jumping ahead or back to aparticular slide. Press the Esc key to end the slide show immediately. On the keyboard, use to advance to the next slide or to go back a slide. There are manyother ways to advance or back up as well.Animations TabTransition to this SlideThis group allows you to pace your presentation by choosing transitions speed, adding sounds, andapplying various animations between slides—you can use Fades and Dissolves, Wipes, Push andCover, Stripes and Bars, and/or Random.Transition SoundThis allows you to choose a sound to play during the transition from one slide to the next. Try addingapplause to the last slide.Advance SlideFrom here you set the slide show to automatic. Click Apply to All and check the Automatically Afterbox (be sure to set the number of seconds between transitions).6% %M i c r o s o f t ! P o w e r P o i n t ! 2 0 1 3 !
Slideshow TabSet-upThis group allows you to prepare for your presentation. For example, you can choose to hide certainslides. This comes in handy if you are giving the presentation on a tight schedule and have to make itshorter. Try hiding one of the slides in the Homemade Ice Cream presentation.First, click on the slide you want to hide and then click on hide slide. Notice the small slash throughthe slide number on slide view.Save Your WorkTo make sure you don’t lose your work on a document, you should “save early and save often.” Let’sstart by saving the document you have open in Word 2013:4. Click the blue File Button near the Tabs. Learn more about “File Menu” on page 4.5. Click Save As. This option is for saving, or naming, a file for the first time. You may create differentversions of a file by “saving as” a new name. Learn more in “Quick Access Toolbar” on page 3.6. Click “Computer”. See TIP below and “Saving With OneDrive” (page 11) for “cloud” storage info.7. Click “My Documents” folder. On KCLS computers, files saved to “My Documents” folder areerased at the end of your session. Consider a USB drive, or OneDrive for long-term storage.8. Name file “My Practice Document”. Generally, choose a name that is easy to remember.9. Click Save.TIP: Have a Microsoft account with Outlook.com, Hotmail.com or Live.com? Microsoft Office 2013Programs offer “cloud” file storage through OneDrive. Click OneDrive instead of “Computer” tolog in, save the file and access anyplace through the Internet. Learn more at bit.ly/office2013cloud.More Computer Learning from KCLSThe KCLS Tech Tutor Program offers free One-on-One Computer Help and Computer Classes. Go tokcls.org/techtutor for upcoming Tech Tutor sessions, computer learning online courses throughpremium databases and class manuals. This manual has been for Microsoft PowerPoint 2013 class heldon library computers running Windows 7.Please visit kcls.org/usingthelibrary/computers/ to learn more about using KCLS library computers.—END—7% %M i c r o s o f t ! P o w e r P o i n t ! 2 0 1 3 !
PowerPoint 2013 Welcome Page Open PowerPoint 2013 from the computer desktop. On the Welcome page, note the various popular templates available. Click a template you’d like to use to see a full description. Click “Create” to open a document in this particular style. PowerPoint 2013 d