Transcription
IT TrainingMicrosoft PowerPoint 2013 An Essential Guide (Level 1)ContentsIntroduction .1Running an Example Presentation .1Starting Microsoft PowerPoint .1Creating a New Presentation .2Entering Text onto the First Slide .2Saving a Presentation .2Adding New Slides .3Changing the Look of Your Text on the Slide .3Changing the Layout to Include a Picture .4Adding a Picture from the Clip Art Gallery .5Applying a Theme .6Creating Further Slides .6Guides, Gridlines and Rulers .8PowerPoint Views .8Moving through the Slides .9Deleting and Hiding Slides .9Changing the Order of Slides .9Creating Notes Pages . 10Running the Presentation . 10Animating your Presentation . 11Slide Transitions . 11Animation Schemes . 11More Advanced Features . 13Adding a Header/Footer, Date or Slide Number . 13Master Slides . 14Changing the Theme . 15Web and Email Links . 16Rehearsing Timings . 16Printing from PowerPoint . 17Choosing a Slide Format . 17Printing the Presentation . 17Saving Embedded Fonts . 18Closing the Presentation . 18
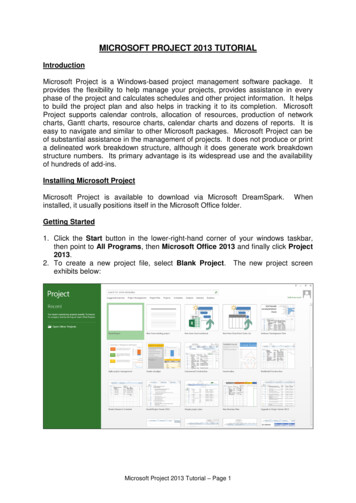
IntroductionMicrosoft PowerPoint is widely used for making professional quality presentations in a varietyof formats, including on-screen computer slide shows, black-and-white or colour overheads,and 35mm slides. You can also use it for speaker's notes and audience hand-outs.In addition, PowerPoint can be used as a drawing package for preparing pictures, forms,posters and leaflets (for example, we use it to produce our IT Quick Guides). If you are notfamiliar with the drawing tools, have a look at Microsoft Office 2013 The Drawing Tools.Running an Example PresentationStart by opening an example file to see how a presentation looks and what PowerPoint can do. If you are notusing an IT Services computer, then the presentation can be run by clicking on the link at Step 3, below.1. Click on the Start button in the bottom left corner of the screen and choose My Computer2. Double click on the Data (D:) icon then repeat this on the Training folder icon3. Finally, double click on the example.ppsx icon then follow the on-screen instructions4. [Close] Windows Explorer after the presentation has finishedNote that the example presentation ran immediately on opening the file. This is because it was saved in aspecial PowerPoint Show format. Presentations saved in this format will even run on a computer which doesn'thave PowerPoint installed. You’ll learn more about this later.Starting Microsoft PowerPointTo load Microsoft PowerPoint:1. Click on the Start button again but this time choose All Programs2. From the sub-menu choose Microsoft Office 2013 then PowerPoint 2013 – choose BlankPresentationYou are presented with the screen below, ready to enter information onto your first (title) slide:3. If necessary, [Maximize] the window to fill the screen1
The main part of the screen is divided into two sections. The main section shows the current slide, while onthe left, slide miniatures appear, allowing you to see the current slide in its context.In the top left corner of the screen is the Quick Access Toolbar which contains icons to common commands,eg save and undo. Below this is the Ribbon, with tabs along the top. Each tab has a set of icons which are usedto give instructions to PowerPoint. Currently the HOME tab is displayed.At the very bottom of the window, is the Status Bar. This shows various information, eg which slide you arecurrently looking at (here you are on slide 1) and the language you’re working in. On the right-hand side ofthe Status Bar are icons to change the view of the slides and to zoom in or out.Creating a New PresentationYou are going to create a presentation, consisting initially of 6 slides, about the courses offered by IT Training.It's best to follow the notes exactly, step by step, though you can use your own information, if you prefer.It's important whenever you create a presentation that you give full consideration to your audience. Inparticular, don't try to crowd too much information on each slide and make sure that the text is big enoughto be clearly readable (especially for those with poor eyesight or similar disabilities). Throughout these notes,mention will be made of good practice so far as accessibility is concerned.Entering Text onto the First SlideThe first slide has the layout for a Title Slide (usually you start a presentation with a title slide, though youdon't have to). The layout has two boxes with a dotted frame. These boxes are called placeholders. Thoseprovided here can contain text. You will be meeting other types of placeholder later. Instructions on usingeach type of placeholder appear within its frame.1. Click on Click to add title to activate the top main title placeholder and type IT TrainingNote that the default font is Calibri (Headings), the size is large (44 pt), and the title is centre-aligned in theplaceholder. Calibri is a sans-serif font; these are recommended for good accessibility2. Click on the lower placeholder, Click to add subtitle, and type your own nameIf you find the text on the screen a bit small to read then increase the magnification using the zoom facility inthe bottom right-hand corner of the Status Bar. Use the slider or click on the [Zoom level] (%) button.Saving a PresentationIt's a good idea to save your work at regular intervals whilst you are working on it rather than wait until youhave finished the last slide. For example, you could save every 15 minutes or after completing each slide.1. Click on the [Save] button on the Quick Access Toolbar (or move to the FILE tab and choose Save) –better still, use Ctrl s from the keyboard2. Save the file in My Documents (click on it)The File name: has already been set for you (PowerPoint uses the main title you entered on the first slide - ITTraining) - you can change this here if you want. PowerPoint automatically adds a .pptx extension.3. Press Enter for [Save]If you wish to save your presentation in the older 2003 format, change Save as type to PowerPoint 97-2003Presentation (*.ppt). This would make it easier for anyone who has an older version of PowerPoint to openand edit the presentation. Note, however, that if a document is saved as an earlier version then any newfeatures available in PowerPoint 2010 or 2013 will not be saved (you are warned what these are).It’s also worth noting some of the other Save as type options such as .pps or .ppsx for PowerPoint slideshows;.pdf for a non-editable copy in PDF format; .png, .gif or .jpg for graphics format; and .xml for web pages.2
Adding New SlidesYou are now going to add the next slide:1. Click on the [New Slide] button on the left of the HOME tab in the Slides group (click on the icon noton the words New Slide) or simply press Ctrl m A new slide appears in a different slide layout from the first called Title and Content. There are several differentslide layouts available (which you can get to if you click on the words New Slide rather than the icon).2. Click in the Title placeholder (where it says Click to add title) and type Introduction3. Click in the Content placeholder (where it says Click to add text) to activate itTip: You can jump between placeholders by pressing Ctrl Enter on the keyboard; if on the last placeholderit creates a new slide.4. Type in the following details, pressing Enter after each bulleted item: Different Ways of Learning Training Materials Training Sessions Training TopicsChanging the Look of Your Text on the SlideBulletsFontFont ColourChange CaseLine SpacingThere are a number of ways that you could change the look of your text on this slide. You could, for example: change the bullet point character use a different font change the font colour change the case (upper, lower) of the text increase or decrease the line spacing between the bullet points3
IMPORTANT: if you wanted to apply all or some of the above changes to every slide in a presentation, youwould need to make the changes on the Master Slide. It’s best to do this before you start typing your wordsonto the slides. You will look at Master Slides later.To make changes to all your text you need to have the placeholder selected:1. Press Esc (in the top left corner of the keyboard) – the placeholder handles are displayed2. On the HOME tab in the Paragraph group, click on the down arrow next to the [Bullets] button3. Choose the bullet character required (eg the tick marks or checkmark bullets)You can also get to further choices after doing step 2 above by choosing Bullets and Numbering at thebottom of the list. Here there are [Customize.] and [Picture.] buttons that allow you to choose nonstandard characters and pictures as bullets. Take care when choosing non-standard characters as they mayresult in poor accessibility - it's best to stick to those offered here, unless you know what you are doing. Notealso that the size of the bullet point can be changed relative to the text, as can its colour.To use a different font:4. Click on the down arrow next to [Font] button on the HOME tab, and choose the font you wantRemember that sans-serif fonts (eg Arial) are best. Next, to change the font colour:5. Click on the down arrow next to [Font Colour] button in the Font group6. Click on the square of the colour that you want (or click on More Colors and select a colour fromthere then press Enter for [OK])To change the case of the text, eg turn all the letters to UPPERCASE or to lowercase:7. Click on the [Change Case] button in the Font group and choose the case requiredFinally, to change the line spacing of the bulleted points:8. Click on the [Line Spacing] button in the Paragraph group on the HOME tab9. Choose the line spacing required, eg 1.5 for one and a half line spacingNote: the last item in the list, Line Spacing Options , gives you access to further settings, eg to change thespacing before or after a paragraph.To change the bullet point symbol, font, font colour or case on a particular bullet point, simply select that line(drag through it or click three times on the mouse button) then carry out the instructions as above. Notethat you can also use the [Format Painter] (the paint brush icon in the Clipboard group on the left of theHome tab) to copy the format of one list entry to another (or to the whole list).You don’t have to have bulleted points at all, if you don’t want them for a particular line. To turn them off:10. Click on the line you don’t want bulleted (here, click on the first line in the list)11. Next, click on the [Bullets] button (click on the icon itself, not the list arrow)Your bullet point should now have disappeared.12. End by redisplaying the bullet – press Ctrl z for [Undo]Changing the Layout to Include a PictureWhat if you decide that you would like to add a picture to illustrate this slide? The easiest way to do this,keeping what you've done already, is to choose a slide layout which includes a picture placeholder.1. Click on the [Layout] button in the Slides group on the left of the HOME tab4
You have various options as shown below:2. In the second row, click on [Two Content] – a new placeholder appears on the rightTip: The advantage of a content layout is that it will automatically resize a picture to fit within it if the image istoo large, saving you the bother of manually resizing large images.Adding a Picture from the Clip Art GalleryThis new placeholder has content icons (in the centre) as well as the usual bullet points at the top. These letyou add a Table, Chart, SmartArt, Picture, Online Picture or Video respectively. To insert some Clip Art:1. Click on [Online Picture] (the second icon in the bottom row) then select Office.com Clip Art2. Type computer into
features available in PowerPoint 2010 or 2013 will not be saved (you are warned what these are). It’s also worth noting some of the other Save as type options such as .pps or .ppsx for PowerPoint slideshows; .pdf for a non-editable copy in PDF format; .png, .gif or .jpg for graphics format; and .xml for web pages. 3 Adding New Slides You are now going to add the next slide: 1. Click on the .
