Transcription
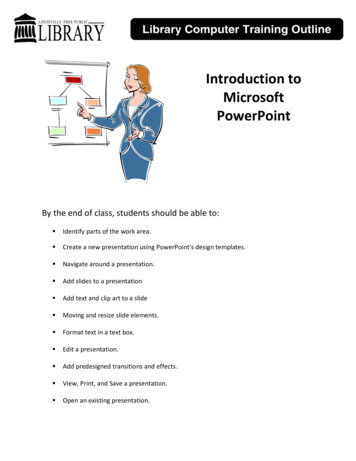
Introduction toMicrosoftPowerPointBy the end of class, students should be able to: Identify parts of the work area. Create a new presentation using PowerPoint’s design templates. Navigate around a presentation. Add slides to a presentation Add text and clip art to a slide Moving and resize slide elements. Format text in a text box. Edit a presentation. Add predesigned transitions and effects. View, Print, and Save a presentation. Open an existing presentation.
What is Microsoft Power Point?PowerPoint is a powerful yet fun way to create professional presentations using a computer.We will be covering these three key points:1. How to create a basic PowerPoint presentation2. Different ways to view and edit a PowerPoint presentation3. How to add transitions, effects, animations and sounds to your slidesOpening Microsoft PowerPointTo open Microsoft PowerPoint: Double click on the Microsoft PowerPoint shortcut on the desktop‐OR Click on the Start menu, click on Programs, and click on Microsoft PowerPoint.Touring the Work AreaLet’s begin by getting oriented to Microsoft PowerPoint’s interface.Microsoft OfficeRibbonOutlinePaneSlidePaneNotesPane The slide pane is in the center. This is where you click to add and edit content in each slide. The outline pane allows you to move easily between slides in your slideshow by clicking onthe slide that you want to view or edit.Louisville Free Public Library Computer Learning Center2
The notes pane is below the slide pane. You can type presentation notes associated withthe slide in this area. Later you can print the notes pages to assist during a presentation.The notes pane is not visible to slide show viewers. The Microsoft Office Ribbon is above the main work area. The content and choices shownon the ribbon change depending on which tab is active and what tasks you are performing.Creating a New Presentation From Design Template1. Click on the Microsoft Office Buttonand click new.2. A new window will appear with several categories of templates to choose from. Click onthe template style that you wish to use and click the Create button. This will allow us toeasily a consistent background and style to our presentation.3. Slides will be added automatically to your slide presentation. Instructions will beincluded on each slide explaining how to add content to your slideshow.Navigating Around a PresentationWhen you first create a presentation, PowerPoint starts you out on the title slide of thepresentation.Viewing a specific slideTo view or edit a specific slide in your presentation, simply click on the slide in the Outline Pane.The slide will then appear in your work area and will be ready to edit.Louisville Free Public Library Computer Learning Center3
Adding Text and Clip Art to a SlideText areasClip Art areaText boxes and clip are the basic slide elements necessary for creating a professional lookingpresentation. Your template has provided you with these basic design elements for each slide,but you will need to change them or add more of them to create your presentation.Adding and editing text1. Click on the text area of the slide.2. Start typing.3. When typing in a bulleted list area, press the Enter key on your keyboard to createanother bulleted line.Adding or changing clip art1. Click in the clip art area. The clip art gallery will appear.2. Type a keyword into the clipart gallery search box and click on Go.3. Click on the desired clip art that appears in the gallery to insert it into your slide.Inserting additional text boxes1. On the Insert tab, in the Text group click on Text Box.2. The cursor will turn into what looks like an upside down “t”. Click on the slide and dragthe mouse diagonally on the slide to create a new text box of whatever size and shapeyou need and release the mouse button.3. Click on the new text box to begin typing text into it.Louisville Free Public Library Computer Learning Center4
Inserting additional clip art1. On the Insert tab, in the Illustrations group click on Clip Art.2. The clip art gallery will open in the task pane. Type in a keyword and click on Go.3. Click on the art that you would like to include in your slide. The art will appear in yourslide and you can drag it with the mouse to wherever you would like it to appear on theslide.Be aware that you can limit your search to a particular collection or a particular mediafile type.Moving and Resizing Text Boxes and Clip ArtResizing Clip ArtResizing Text Boxes1. Click on the clip art.1. Click on the text box.2. Notice circles appear around the outside2. Click and drag on one of the circle handlesof the clip art. They are called handles.to resize the object.Click and drag inward or outward at adiagonal on the corner handle to resize theobject.Moving Clip Art Click in the middle of the clip art and dragit to the desired location.Moving Text Boxes1. Click on the text box.2. When the border appears around the textbox, click and drag on it to move the box.Formatting textTo format text, first you have to select it and then you make your modifications.Selecting text to format Click and drag over the text with your cursor.‐OR to format a whole text box at once, click on a text box, then click on the border that appearsaround the text box.You can hover your mouse over most formatting options to see a preview of how thatoption will look in the slide before actually applying it.Louisville Free Public Library Computer Learning Center5
Using PowerPoint’s Formatting OptionsAfter selecting the text to be changed, select the desired options on the Home tab.TypefaceEmphasis Buttons –Bold, Italic, UnderlinedFont SizeFont ColorHorizontal TextAlignment ButtonsUndoing Accidental ChangesRemember, you can always undo accidental changes using the Undo button.Running Spell CheckIt is always advisable to run spell check before presenting. Misspellings can be veryembarrassing for the presenter and distracting for the viewers.To spell check your presentation: Click on the spell checkbutton on the Review tab in the Proofing group.‐OR Press the F7 key on the keyboard.Editing a PresentationAdding SlidesIf you want to add additional slides to the ones already included in the template: Click on New Slide on the Slides group of the Home tab. A new slide will be createdafter your currently selected slide.By default, the new slide has a heading area with a bulleted list area below it. This is the mostcommonly used slide layout. To select a different slide layout, simply click on the arrow belowNew Slide and choose from the list of slide styles.Rearranging Slides In the Outline Pane, click and drag the slide to the desired location. A vertical gray linewill appear between the slides. This will help you know where you are dropping theslide.Louisville Free Public Library Computer Learning Center6
Deleting Slides1. Right‐click on the slide in the Outline Pane that you wish to delete.2. From the list of options that appears, click on Delete.Adding Transitions and EffectsChanging TransitionsA transition refers to how the previous slide changes to the next slide. The new slide can zoomin from the side, come down from the top, unfold like horizontal blinds or appear in anynumber of other ways.To change the default transition style for your slide presentation:1. Click on the Animations tab.2. In the Transition to This Slide group you will notice several predesigned optionsavailable. It also allows you to change other transitional effects individually. Hoveringyour mouse over an option to show a preview of that option on your slide.3. Click an option to apply it to the current slide.4. Click Apply to All to apply the transition to all of the slides in your presentation. It isrecommended that you use the same transition throughout your presentation, as thiswill give your presentation a uniform appearance.Viewing a PresentationTo view your presentation:1. Click on the Slide Show tab.2. In the Start Slide Show group, choose From Beginning to view the show from thebeginning.‐ORClick From the Currently Selected Slide to view the presentation from the current slideonward.You can also start viewing your slideshow by pressing the F5 key on your keyboard.Louisville Free Public Library Computer Learning Center7
You can navigate through the slides by doing any of the following: Clicking your mouse Pressing the space bar Using the arrow keysTo end the slide show, press the escape (ESC) key.Printing a Presentation Click the Microsoft Office Button Click on Print and a dialog box will appear. Click on the Print What drop down menu.and hover over Print.PowerPoint gives you four print options:1. Slides – One slide per page2. Handout – Two to nine slides per page.Choose with the Slides per page drop downmenu3. Notes Pages – One slide with presentationnotes per page4. Outline View – Textual outline of yourpresentationPrint What:Slides per pageSaving a PresentationTo save a slide presentation:1. Click on the Microsoft Office Buttonand click Save As.2. In the File name: field, type the name of the presentation.3. Click on the Save in: drop down menu and choose where you would like thepresentation saved.4. Click on the Save button.Louisville Free Public Library Computer Learning Center8
Opening an Existing PresentationTo open an existing slide presentation 1. Open PowerPoint.2. Click on the Microsoft Office Buttonand click Open.3. Locate the saved file and click on it.4. Click on the Open button.Practice Your New SkillsPractice is the best way to retain your new skills. Follow the steps below to practice usingwhat you have learned about PowerPoint today.1. Create a PowerPoint presentation about yourself.2. Create bulleted lists about your hobbies, likes, dislikes, education, family, work, etc.3. Include clip art symbolizing your hobbies, likes, dislikes, etc.4. Add transitions and effects to your slides.The Help MenuAccessing Microsoft PowerPoint’s Help FeatureIf you have a question about PowerPoint that you need answered right away, you might wantto consult Microsoft PowerPoint 2007’s built in help feature. You can access this feature inPowerPoint by pressing the F1 key on your computer keyboard. From there you can click on ahelp topic or search for one using PowerPoint’s help search box located near the top of thePowerPoint Help window.HelpSearchBoxLouisville Free Public Library Computer Learning CenterHelpTopics9
For Further Reading and LearningNow that you have completed Introduction to Microsoft PowerPoint 2007, the nextrecommended class is Intermediate Microsoft PowerPoint 2007. In Intermediate MicrosoftPowerPoint, you will learn how to create your own custom animations, and insert tables,videos, and hyperlinks into your presentations. You may also want to explore theintroductory classes that we offer for Microsoft’s other productivity applications like Exceland Publisher.To find a book on Microsoft PowerPoint, search the library’s online catalog using “MicrosoftPowerPoint” as a subject.Learn more about upcoming classes on the library's event’s calendar athttp://www.lfpl.org/events.htm or in our monthly Computer Learning Center brochure.Louisville Free Public Library Computer Learning Center10
Opening Microsoft PowerPoint . To open Microsoft PowerPoint: Double click on the Microsoft PowerPoint shortcut on the desktop ‐OR Click on the Start menu, click on Programs, and click on Microsoft PowerPoint. Touring the Work Area . Let’s begin by getting oriented to