Transcription
AHAND BOOK ON SPSSFORRESEARCH WORKDr. Anil Kumar MishraAssociate Professor,Institute of Management & Information Science,Bhubaneswar.ISO 9001:2015 CERTIFIED
AUTHORNo part of this publication may be reproduced, stored in a retrieval system, or transmitted in any formor by any means, electronic, mechanical, photocopying, recording and/or otherwise without the priorwritten permission of the author and the publisher.First Edition : 2011Reprint : 2015, 2016, 2017Second Revised Edition : 2019Published by:Branch Offices:Mrs. Meena Pandey for Himalaya Publishing House Pvt. Ltd.,Ramdoot, Dr. Bhalerao Marg, Girgaon, Mumbai - 400 004Phone: 022-23860170/23863863; Fax: 022-23877178E-mail: himpub@vsnl.com; Website: www.himpub.comNew Delhi:Pooja Apartments, 4-B, Murari Lal Street, Ansari Road, Darya Ganj,New Delhi - 110 002. Phone: 011-23270392, 23278631; Fax: Kundanlal Chandak Industrial Estate, Ghat Road, Nagpur - 440 018.Phone: 0712-2738731, 3296733; Telefax: 0712-2721216Plot No. 91-33, 2nd Main Road, Seshadripuram, Behind Nataraja Theatre,Bengaluru - 560 020. Phone: 080-41138821;Mobile: 09379847017, 09379847005No. 3-4-184, Lingampally, Besides Raghavendra Swamy Matham, Kachiguda,Hyderabad - 500 027. Phone: 040-27560041, 27550139New No. 48/2, Old No. 28/2, Ground Floor, Sarangapani Street, T. Nagar,Chennai-600 012. Mobile: 09380460419First Floor, Laksha Apartment, No. 527, Mehunpura, Shaniwarpeth(Near Prabhat Theatre), Pune - 411 030. Phone: 020-24496323, 24496333;Mobile: 09370579333House No. 731, Shekhupura Colony, Near B.D. Convent School, Aliganj,Lucknow - 226 022. Phone: 0522-4012353; Mobile: 09307501549114, SHAIL, 1st Floor, Opp. Madhu Sudan House, C.G. Road, Navrang Pura,Ahmedabad - 380 009. Phone: 079-26560126; Mobile: 0937708884739/176 (New No. 60/251), 1st Floor, Karikkamuri Road, Ernakulam,Kochi - 682011. Phone: 0484-2378012, 2378016; Mobile: 09387122121Plot No. 214/1342, Budheswari Colony, Behind Durga Mandap,Bhubaneswar - 751 006. Phone: 0674-2575129; Mobile: 09338746007108/4, Beliaghata Main Road, Near ID Hospital, Opp. SBI Bank, Kolkata - 700 010,Phone: 033-32449649; Mobile: 07439040301Sneha GaonkarM/s. Seven Hills Printers, Hyderabad. On behalf of HPH.DTP byPrinted at::
Dedicated toMy ParentsMy Wife SasmitaandMy Son Ronit
PrefaceI take great pleasure in presenting the 2nd edition of book ‘A Hand Book on SPSS for ResearchWork’ to the research students. This book has been written in conformity with the revisedsyllabus of different universities and autonomous institutions. The book is designed to be selfcontained and comprises of sixteen chapters and includes two new chapters Reliability Analysisand Factor Analysis. Besides the additional (new) topics covered in this book, all the chaptershave been completely rewritten and simplified in many ways with additional examples andcase studies. The book covers the theoretical, practical and applied aspects of SPSS as far aspossible in a clear and exhaustive manner. Every chapter in this book explains the principlesthrough appropriate examples in a graded manner. The book is very helpful to the studentswho take their research work and the professional courses like analytics for different researchorganisations. At the end of this textbook, few alive projects are attached for the convenience ofthe research students. I welcome suggestions from research students, teachers and academiciansso that this book may further be improved upon. I thank everyone who has lent a helping handin the preparation of this book.Dr. Anil Kumar Mishraanilmishra5555@gmail.comMob: 91-9861131250
ContentsChapter 1 SPSS Windows and Files1–51.1 Overview1.2 Launching SPSS1.3 The SPSS Data Editor1.4 The SPSS Viewer1.5 Syntax Editor WindowChapter 2 Entering and Working with Data6 – 192.1 Overview2.2 Creating a Data File2.3 Key Point: One Row per Participant, One Column per Variable2.4 Example Data2.5 Specifying the Data Structure2.6 Entering the Data2.7 Computing a New Variable2.8 Selecting Cases2.9 Sorting Cases2.10 Splitting a FileChapter 3 Descriptive Statistics and Graphs3.1 Overview3.2 Exploring Means for Different Groups3.3 Frequency Distributions and Histograms3.4 Exploratory Data Analysis20 – 28
Chapter 4 Independent Samples t-Test29 –374.1 Overview4.2 Creating Your Data File: Key Point4.3 Performing the t-test for the Parental Involvement Experiment4.4 Output from the t-test Procedure4.5 Interpreting the Output4.6 More Example on One sample t-test4.7 More Example on Independent t-testChapter 5 Paired-samples t-Test38 – 435.1 Overview5.2 Entering Data for a Within-subjects Design: Key Point5.3 Performing the Paired-samples t-test Step-by-step5.4 Interpreting the Paired-samples t-test Output5.5 More ExampleChapter 6 One-way ANOVA44 – 516.1 Overview6.2 Entering the Data in SPSS6.3 Conducting the One-way ANOVA6.4Post Hoc Tests6.5Some More ExampleChapter 7 Repeated-measures ANOVA7.1 Overview7.2 Coding Considerations7.3 Performing the Repeated-measures ANOVA52 – 58
Chapter 8 Two-way ANOVA59 – 678.1 Overview8.2 Performing the Two-way ANOVA8.3 Some More ExampleChapter 9 ANOVA for Mixed Factorial Designs68 – 759.1 Overview9.2 Building the SPSS Data File9.3 Performing the Mixed Factorial ANOVAChapter 10 Correlation and Scatterplots76 – 8210.1 Overview10.2 Entering the Data in SPSS10.3 Calculating and Testing Correlation Coefficients10.4 Constructing a ScatterplotChapter 11 Simple Linear Regression83 – 9111.1 Overview11.2 Entering the Data in SPSS11.3 Linear Regression11.4 Running the Regression Procedure11.5 Examining ResidualsChapter 12 Multiple Correlation and Regression12.1 Overview12.2 Preparing for the Regression Analysis12.3 Conducting the Regression Analysis12.4 Interpreting the Regression Output92 – 99
Chapter 13 Chi-Square Tests100 – 11313.1 Overview13.2 Conducting a Goodness-of-Fit Test13.3 Conducting a Chi-Square Test of Independence13.4 Going Further13.5 Some More ExampleChapter 14 Analysis of Covariance114 – 12114.1 Overview14.2 Before the ANCOVA14.3 Performing the ANCOVA in GLM14.4 Performing an ANCOVA using Hierarchical RegressionChapter 15 Reliability Analysis122 – 13015.1 Overview15.2 Conduct a Reliability Analysis15.3 Item-total Statistics15.4 Cronbach’s Alpha15.5 Result of the Analysis of the above given DataChapter 16 Factor Analysis131 – 14816.1 Overview16.2 Steps of Principal Axis Factoring (PAF)16.3 Assumptions16.4 Steps for Principal Axis Factor16.5 Case Study16.6 Concluding NoteCase Questionnaire – 1149 – 154Case Questionnaire – 2155 – 160
ChapterSPSS Windows and Files11SPSS Windows and FilesObjectives Launch SPSS for Windows. Examine SPSS windows and file types.1.1 OverviewIn a typical SPSS session, you are likely to work with two or more SPSS windowsand to save the contents of one or more windows to separate files. The window containingyour data is the SPSS Data Editor. If you plan to use the data file again, you may click onFile, Save from within the Data Editor and give the file a descriptive name. SPSS willsupply the .sav extension, indicating that the saved information is in the form of a datafile. An SPSS data file includes both the data records and their structure. The windowcontaining the results of the SPSS procedures you have performed is the SPSS Viewer.You may find it convenient to save this as an output file. It is okay to use the same nameyou used for your data because SPSS will supply the .spo extension to indicate that thesaved file is an output file. As you run various procedures, you may also choose to showthe SPSS syntax for these commands in a syntax window, and save the syntax in a separate.sps file. It is possible to run SPSS commands directly from syntax, though in this seriesof tutorials we will focus our attention on SPSS data and output files and use the pointand-click method to enter the necessary commands.
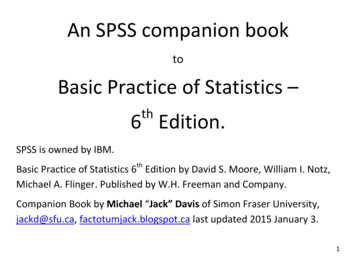
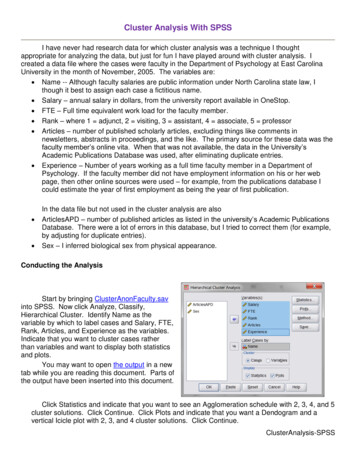
2A Hand Book on SPSS Research for Work1.2 Launching SPSSSPSS for Windows is launched from the Windows desktop. There are several waysto access the program, and the one you use will be based on the way your particularcomputer is configured. There may be an SPSS for Windows shortcut on the desktop orin your Start menu. Or you may have to click Start, All Programs to find the SPSS forWindows folder. In that folder, you will find the SPSS for Windows program icon.Once you have located it, click on the SPSS for Windows icon with the left mousebutton to launch SPSS. When you start the program, you will be given a blank datasetand a set of options for running the SPSS tutorial, typing in data, running queries, creatingqueries, or opening existing data sources (see Figure 1.1). For now, just click on Cancel toreveal the blank dataset in the Data Editor screen.Fig. 1.1: SPSS opening screen
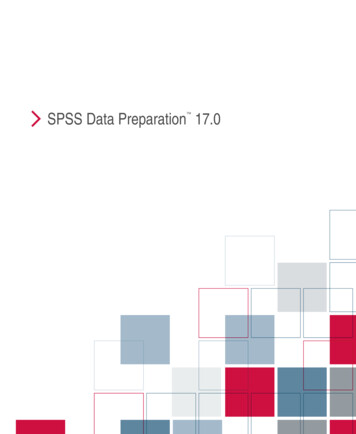
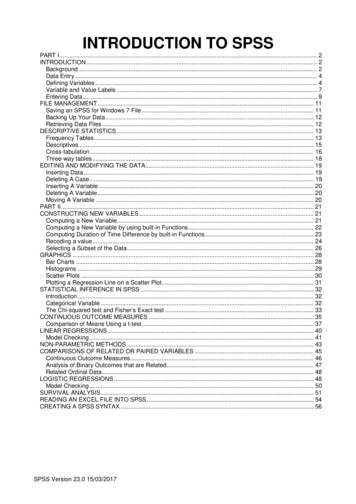
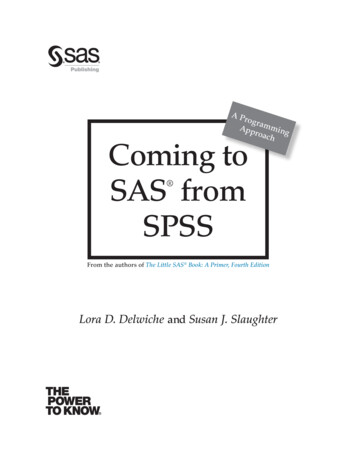
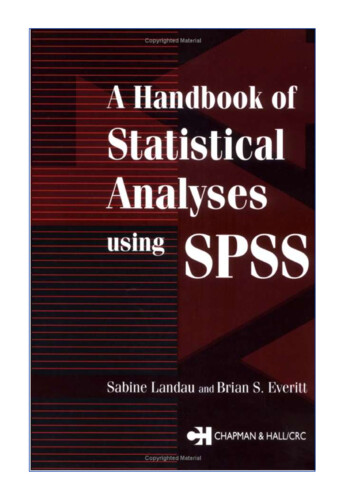
SPSS Windows and Files31.3 The SPSS Data EditorExamine the SPSS Data Editor’s Data View shown in Figure 1.2 below. You willlearn in 2nd chapter how to create an effective data structure within the Variable Viewand how to enter and manipulate data using the Data Editor. As indicated above, if youclick File, Save while in the Data Editor view, you can save the data along with theirstructure as a separate file with the .sav extension. The Data Editor provides the DataView as shown below, and also a separate Variable View. You can switch between theseviews by clicking on the tabs at the bottom of the worksheet-like interface.Fig 1.2: SPSS Data Editor (Data View)1.4 The SPSS ViewerThe SPSS Viewer is opened automatically to show the output when you run SPSScommands. Assume for example that you wanted to find the average age of 20 studentsin a class. We will examine the commands needed to calculate descriptive statistics inchapter-3, but for now, simply examine the SPSS Viewer window (see Figure 1.3). Whenyou click File, Save in this view, you can save the output to a file with the .spo extension.
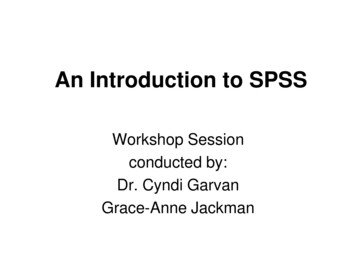
4A Hand Book on SPSS Research for WorkFig. 1.3: SPSS Viewer1.5 Syntax Editor WindowFinally, you can view and save SPSS syntax commands from the Syntax Editorwindow. When you are selecting commands, you will see a Paste button. Clicking thatbutton pastes the syntax for the commands you have chosen into the Syntax Editor. Forexample, the syntax to calculate the mean age shown above is shown in Figure 1.4Fig. 1.4: SPSS Syntax Editor
SPSS Windows and Files5Though we will not address SPSS syntax except in passing in these tutorials, youshould note that you can run commands directly from the Syntax Editor and save yoursyntax (.sps) files for future reference. Unlike earlier versions of SPSS, version 15, theversion illustrated in these tutorials, automatically presents in the SPSS Viewer the syntaxversion of the commands you give it when you point and click in the Data Editor or theSPSS Viewer (examine Figure 1.3 for an example).
6ChapterA Hand Book on SPSS Research for Work2Entering and Workingwith DataObjectives Create a data file and data structure. Compute a new variable. Select cases. Sort cases. Split a file.2.1 OverviewData can be entered directly into the SPSS Data Editor or imported from a variety offile types. It is always important to check data entries carefully and ensure that the dataare accurate. In this Chapter you will learn how to build an SPSS data file from scratch,how to calculate a new variable, how to select and sort cases, and how to split a file intoseparate layers.2.2 Creating a Data FileA common first step in working with SPSS is to create or open a data file. We willassume in this Chapter that you will type data directly into the SPSS Data Editor tocreate a new data file. You should realize that you can also read data from many otherprograms, or copy and paste data from worksheets and tables to create new data files.
Entering and Working with Data7Launch SPSS. You will be given various options, as we discussed in Chapter 1. SelectType in Data or Cancel. You should now see a screen similar to the following, which is ablank dataset in the Data View of the SPSS Data Editor (see Figure 2.1):Fig. 2.1: SPSS Data Editor - Data View2.3 Key Point: One Row per Participant, One Columnper VariableIt is important to note that each row in the SPSS data table should be assigned to asingle participant, subject, or case, and that no case’s data should appear on differentrows. When there are multiple measures for a case, each measure should appear in aseparate column (called a “variable” by SPSS). If you use a coding variable to indicatewhich group or condition was assigned to a case, that variable should also appear in aseparate column. So if you were looking at the scores for five quizzes for each of 20students, the data for each student would occupy a single row (line) in the data table, andthe score for each quiz would occupy a separate column.Although SPSS automatically numbers the rows of the data table, it is a very goodhabit to provide a separate participant (or subject) number column so that records can beeasily sorted, filtered, or selected. Best practice also requires setting up the data structurefor the data. For this purpose, we will switch to the Variable View of the Data Editor byclicking on the Variable View tab at the bottom of the Data Editor window. See Figure 2.2.
8A Hand Book on SPSS Research for WorkFig. 2.2: SPSS Data Editor - Variable View2.4 Example DataLet us establish the data structure for our example of five quizzes and 20 students.We will assume that we also know the age and the sex of each student. Although wecould enter “F” for female and “M” for male, most statistical procedures are easier toperform if a number is used to code such categorical variables. Let us assign the number“1” to females and the number “0” to males. The hypothetical data are shown 87768891239285958962101218683776463
Entering and Working with 391872.5 Specifying the Data StructureSwitch to the Variable View by clicking on the Variable View tab (see Figure 2.2above). The numbers at the left of the window now refer to variables rather thanparticipants. Note that you can specify the variable Name, the Type of variable, the variableWidth (in total characters or digits), the number of Decimals, a descriptive Label, labelsfor different Values, how to deal with Missing Values, the display Column width, howto Align the variable in the display, and whether the Measure is nominal, ordinal, orscale (interval and ratio). In many cases you can simply accept the defaults by leaving theentries blank. But you will definitely want to enter a variable Name and Label, and alsospecify Value labels for the levels of categorical or grouping variables such as sex or thelevels of an independent variable. The variable names should be short and should notcontain spaces or special characters other than perhaps underscores. Variable labels, onthe other hand, can be longer and can contain spaces and special characters.Let us specify the structure of our dataset by naming the variables as follows. Wewill also provide information concerning the width, number of decimals, and type ofmeasure, along with a descriptive label:1. Student2. Sex3. Age4. Quiz15. Quiz2
10A Hand Book on SPSS Research for Work6. Quiz37. Quiz48. Quiz5No decimals appear in our raw data, so we will set the number of decimals to zero. Afterwe enter the desired information, the completed data structure might appear as follows:Fig. 2.3: SPSS data structure (Variable View)Notice that we provided value labels for Sex, so we won’t confuse our 1’s and 0’slater. To do this, click on Values in the Sex variable row and enter the appropriate labelsfor males and females (see Figure 2.4).Fig. 2.4: Adding value labels
Entering and Working with Data11After entering the value and label for one sex, click on Add and then repeat the processfor the other sex. Click on Add after entering this information and then click OK.2.6 Entering the DataNow return to the data view (click on the Data View tab), and type in the data. Ifyou prefer, you may retrieve a copy of the data file by clicking the save data. Save thedata file with a name that will help you remember it. In this case, we used chapter 2.savas the file name. Remember that SPSS will provide the .sav extension for a data file. Thedata should appear as follows:Fig. 2.5: Completed data entry2.7 Computing a New VariableNow we will compute a new variable by averaging the five quiz scores for eachstudent. When we compute this new variable, it will be added to our variable list, and anew column will be created for it. Let us call the new variable Quiz Avg and use SPSS’s
12A Hand Book on SPSS Research for Workbuilt-in function called MEAN to compute it. Select Transform, and then Compute. TheCompute Variable dialog box appears. You may type in the new variable name, specifythe type and provide a label, and enter the formula for computing the new variable. Inthis case, we will use the formula:Quiz Avg MEAN (Quiz1, Quiz2, Quiz3, Quiz4, Quiz5)You can enter the formula by selecting MEAN from the Functions window andthen clicking on the variable names, or you can simply type in the formula, separatingthe variable names by commas.The initial Compute Variable dialog box with the target variable named Quiz Avgand the MEAN function selected is below. The question marks indicate that you mustsupply expressions for the computation.Fig. 2.6: Compute Variable screen
Entering and Working with Data13The appropriate formula is as follows:Fig. 2.7: Completed expressionWhen you click OK, the new variable appears in both the data and variable views(see below). As discussed earlier, you can change the number of decimals (numericalvariables default to two decimals) and add a descriptive label for the new variable.Fig. 2.8: New variable appears in Data View
14A Hand Book on SPSS Research for WorkFig. 2.9: New variable appears in Variable View2.8 Selecting CasesYou may want to select only certain cases, such as the data for females or forindividuals with ages lower than 20 years. SPSS allows you to select cases either by filtering(which keeps all the cases but limits further analyses to the selected cases) or by removingthe cases that do not meet your criteria. Usually, you will want to filter cases, but sometimes,you may want to create separate files for additional analyses by deleting records that donot match your selection criteria. We will select records for females and filter those recordsso that the records for males remain but will be excluded from analyses until we selectthem again.From either the variable view or the data view, click on Data, then click on SelectCases. The resulting dialog box allows you to select the desired cases for further analysis,or to re-select all cases if data were previously filtered. Let us choose “If condition issatisfied,” and specify that we want to select only records for which the sex of the participantis female. See the dialog box in the following figure.
Entering and Working with Data15Fig. 2.10: Select Cases dialogClick the “If.” button and enter the condition for selection. In this case we willenter the expression Sex 1. You can type this in directly, or you can point and click tothe entries in the dialog boxFig. 2.11: Select Cases expression
16A Hand Book on SPSS Research for WorkClick Continue, then Click OK, and then examine the data view (see Figure 2.12).Records for males will now have a diagonal line through the row number label, indicatingthat though still present, these records are excluded from further analyses.Fig. 2.12: Selected and filtered dataAlso notice that a new variable called Filter has been automatically added to your datafile. If you return to the Data menu and select all the cases again, you can use this filtervariable to select females instead of having to re-enter the selection formula. If you do notwant to keep this new variable, you can right-click on its column label and select Clear.Fig. 2.13: Filter variable added by SPSS
Entering and Working with Data172.9 Sorting CasesNext you will learn to sort cases. Let’s return to the Data, Select Cases menu andchoose “Select all cases” in order to re-select the records for males.We can sort on one or more variables, For example, we may want to sort the recordsin our dataset by age and sex. Select Data, Sort Cases:Fig. 2.14: Sort Cases optionMove Sex and Age to the “Sort by” window (see Figure 2.15) and then click OK.Fig. 2.15: Sort Cases dialog
18A Hand Book on SPSS Research for WorkReturn to the Data View and confirm that the data are sorted by sex and by agewithin sex (see Figure 2.16).StudentSexAgeQuiz 1Quiz 2Quiz 3Quiz 4Quiz 5Quiz Avg Fig. 2.16 Cases sorted by Sex and Age2.10 Splitting a FileThe last subject we will cover in this tutorial is splitting a file. Instead of filteringcases, splitting a file creates separate “layers” for the grouping variables. For example,instead of selecting only one sex at a time, you may want to run several analyses separatelyfor males and females. One convenient way to accomplish that is to split the file so thatevery procedure you run will be automatically conducted and reported for the two groups
Entering and Working with Data19separately. To split a file, select Data, Split File. The data in a group need to be consecutivecases in the dataset, so the records must be sorted by groups. However, if your data are notalready sorted, SPSS can do that for you at the same time the file is split (see Figure 2.17).Fig. 2.17: Split File menuNow, when you run a command, such as a table command to summarize averagequiz scores, the command will be performed for each group separately and those resultswill be reported in the same output (see Figure 2.18).Fig. 2.18: Split file results in separate analysis for each group
the SPSS syntax for these commands in a syntax window, and save the syntax in a separate.sps file. It is possible to run SPSS commands directly from syntax, though in this series of tutorials we will focus our attention on SPSS data and output files and use the point-and-click method to enter the necessary co