Transcription
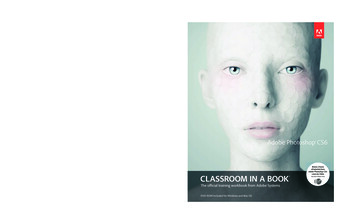
final spine 1.008"Adobe Photoshop CS6Learn to correct,enhance, and distortdigital photos; createimage composites;and prepare images forprint and the web.Compile and edit video,including transitionsand motion effects.Use content-aware toolsto seamlessly replaceor duplicate areas of animage. Create andmanipulate 3D imagesin Photoshop CS6Extended.The fastest, easiest, most comprehensive wayto learn Adobe Photoshop CS6Classroom in a Book , the best-selling series of hands-on software trainingworkbooks, helps you learn the features of Adobe software quickly andeasily. Classroom in a Book offers what no other book or training programdoes—an official training series from Adobe Systems Incorporated,developed with the support of Adobe product experts.What you need to use this book: Adobe Photoshop CS6 software, foreither Windows or Mac OS. (Software not included.)note: Classroom in a Book does not replace the documentation,support, updates, or any other benefits of being a registered owner ofAdobe Photoshop software. includes DVD-rom with lesson files andup to 2 hours of premium video training from Adobe Photoshop CS6:Learn by Video.For book updates, visit www.peachpit.com/pscs6cibBOOKSHELF CATEGORY:GRAPHIC DESIGN / IMAGE EDITINGAdobe Press books are published byPeachpit, Berkeley, CAPrinted and made in the USAwww.adobepress.combarbara binder,adobe certified instructorrocky mountain TrainingNote to reader:This hardcover version is the sameexact book as the paperback version(ISBN 0-321-82733-3).Us 54.99CANADA 57.99classroomin a book Adobe Photoshop CS6 Classroom in a Book contains 14 lessons. Thebook covers the basics of learning Adobe Photoshop and providescountless tips and techniques to help you become more productive withthe program. You can follow the book from start to finish or choose onlythose lessons that interest you.“The Classroom in a Bookseries is by far the besttraining material onthe market. Everythingyou need to master thesoftware is included:clear explanations ofeach lesson, step-bystep instructions, andthe project files forthe students.”Adobe Photoshop CS6classroom in a book Adobe Photoshop CS6classroom in a book Bonus 2 hoursof tutorials fromAdobe Photoshop CS6:Learn by Videoalso from Adobe PressThe official training workbook from Adobe SystemsDVD-ROM Included for Windows and Mac OS0133085198 APhotoshopCS6CIB BNCvr.indd 15/1/12 3:17 PM
Adobe Photoshop CS6classroom in a book The official training workbook from Adobe Systems
Adobe Photoshop CS6 Classroom in a Book 2012 Adobe Systems Incorporated and its licensors. All rights reserved.If this guide is distributed with software that includes an end user agreement, this guide, as well as thesoftware described in it, is furnished under license and may be used or copied only in accordance with theterms of such license. Except as permitted by any such license, no part of this guide may be reproduced,stored in a retrieval system, or transmitted, in any form or by any means, electronic, mechanical, recording, or otherwise, without the prior written permission of Adobe Systems Incorporated. Please note thatthe content in this guide is protected under copyright law even if it is not distributed with software thatincludes an end user license agreement.The content of this guide is furnished for informational use only, is subject to change without notice, andshould not be construed as a commitment by Adobe Systems Incorporated. Adobe Systems Incorporatedassumes no responsibility or liability for any errors or inaccuracies that may appear in the informationalcontent contained in this guide.Please remember that existing artwork or images that you may want to include in your project may beprotected under copyright law. The unauthorized incorporation of such material into your new workcould be a violation of the rights of the copyright owner. Please be sure to obtain any permission requiredfrom the copyright owner.Any references to company names in sample files are for demonstration purposes only and are notintended to refer to any actual organization.Adobe, the Adobe logo, Acrobat, the Adobe PDF logo, Classroom in a Book, Creative Suite, Flash,Illustrator, InDesign, Lightroom, Photoshop, and PostScript are either registered trademarks or trademarks of Adobe Systems Incorporated in the United States and/or other countries.Apple, Mac OS, Macintosh, QuickTime, and Safari are trademarks of Apple, registered in the U.S. andother countries. Microsoft, Windows, and Internet Explorer are either registered trademarks or trademarks of Microsoft Corporation in the U.S. and/or other countries. Autodesk, Google Earth, and all othertrademarks are the property of their respective owners.Adobe Systems Incorporated, 345 Park Avenue, San Jose, California 95110-2704, USANotice to U.S. Government End Users. The Software and Documentation are “Commercial Items,” as thatterm is defined at 48 C.F.R. §2.101, consisting of “Commercial Computer Software” and “CommercialComputer Software Documentation,” as such terms are used in 48 C.F.R. §12.212 or 48 C.F.R. §227.7202,as applicable. Consistent with 48 C.F.R. §12.212 or 48 C.F.R. §§227.7202-1 through 227.7202-4, asapplicable, the Commercial Computer Software and Commercial Computer Software Documentation arebeing licensed to U.S. Government end users (a) only as Commercial Items and (b) with only those rightsas are granted to all other end users pursuant to the terms and conditions herein. Unpublished-rightsreserved under the copyright laws of the United States. Adobe Systems Incorporated, 345 Park Avenue,San Jose, CA 95110-2704, USA. For U.S. Government End Users, Adobe agrees to comply with allapplicable equal opportunity laws including, if appropriate, the provisions of Executive Order 11246, asamended, Section 402 of the Vietnam Era Veterans Readjustment Assistance Act of 1974 (38 USC 4212),and Section 503 of the Rehabilitation Act of 1973, as amended, and the regulations at 41 CFR Parts 60-1through 60-60, 60-250, and 60-741. The affirmative action clause and regulations contained in the preceding sentence shall be incorporated by reference.Adobe Press books are published by Peachpit, a division of Pearson Education located in Berkeley,California. For the latest on Adobe Press books, go to www.adobepress.com. To report errors, please senda note to errata@peachpit.com. For information on getting permission for reprints and excerpts, contactpermissions@peachpit.com.Printed and bound in the United States of 3-3987654321
EBOOK READERS: FIND YOUR LESSON FILESThroughout this title you will see references to lesson or resource files on a disc.Please note that these files are available to eBook readers via high-speed download.Please click here to go to the last page in this eBook for the download location andinstructions.Adobe Photohshop CS6 Classroom in a Book includes the lesson files that you’ll needto complete the exercises in this book, as well as other content to help you learnmore about Adobe Photoshop CS6 and use it with greater efficiency and ease. Thediagram below represents the contents of the lesson files directory, which shouldhelp you locate the files you need.Peachpit Universal Mask updated 3/11/2011116 mm print area, 23 mm center hole; fits these manufacturers’ specs: CDI JVC and all previous vendorsColor Instructions2-color:Pantone 284 C (blue)Pantone 485 C (red)White flood: Yesheuntr ies. Windows iseither a re g i s te red trademar k or a trademar kof Microsof Cor porationintheU.S.anod/theU.S.andotrcorote rgis, rees .leApptriLesson filesedunincotherAdobe Photoshop CS6mark ofCLASSROOM IN A BOOK ncor porated . Macintosh i s atradeWINDOWS /MAC OS ar ks ofAd ob e Sys te m s IAVAILABLE VIA DOWNLOADEach lesson has its own folderinside the Lessons folder. Youwill need to download theselesson folders to your harddrive before you can begineach lesson.dem 2012 Adobe Systems IncorporatedAll rights reserved. Made in the USA.ndPhotoshoparetraISBN-13: 978-0-321-82733-3ISBN-10: 0-321-82733-305/12Ad o b e, theAd obeo,logCl as sroominaBook,aOnline resourcesLearn by Videobonus tutorialsA bonus 2-hour set of Adobe PhotoshopCS6: Learn by Video tutorials are included,from video2brain and Adobe Press. Learnby Video is one of the most criticallyacclaimed training products on Adobesoftware and is the only Adobe-approvedvideo courseware for the Adobe CertifiedAssociate Level certification.Links to Adobe CommunityHelp, product Help andSupport pages, AdobePress, Adobe certificationprograms, Adobe TV, andother useful online resourcescan be found inside a handyHTML file. Just open it inyour Web browser and clickon the links, including aspecial link to this book’sproduct page where you canaccess updates and bonusmaterial.
ContentsGetting Started 1About Classroom in a Book. . . . . . . . . . . . . . . . . . . . . . . . . . . . . . . . . . . 1What’s new in this edition. . . . . . . . . . . . . . . . . . . . . . . . . . . . . . . . . . . . 2What’s in Photoshop Extended. . . . . . . . . . . . . . . . . . . . . . . . . . . . . . . 2Prerequisites . . . . . . . . . . . . . . . . . . . . . . . . . . . . . . . . . . . . . . . . . . . . . . . . 3Installing Adobe Photoshop. . . . . . . . . . . . . . . . . . . . . . . . . . . . . . . . . 3Starting Adobe Photoshop. . . . . . . . . . . . . . . . . . . . . . . . . . . . . . . . . . . 4Copying the Classroom in a Book files. . . . . . . . . . . . . . . . . . . . . . . . 4Restoring default preferences. . . . . . . . . . . . . . . . . . . . . . . . . . . . . . . . 4Additional resources. . . . . . . . . . . . . . . . . . . . . . . . . . . . . . . . . . . . . . . . . 6Adobe certification . . . . . . . . . . . . . . . . . . . . . . . . . . . . . . . . . . . . . . . . . . 71Getting to Know the Work Area8Starting to work in Adobe Photoshop . . . . . . . . . . . . . . . . . . . . . . 10Using the tools . . . . . . . . . . . . . . . . . . . . . . . . . . . . . . . . . . . . . . . . . . . . 14Using the options bar and other panels. . . . . . . . . . . . . . . . . . . . . . 22Undoing actions in Photoshop. . . . . . . . . . . . . . . . . . . . . . . . . . . . . 26Customizing the workspace. . . . . . . . . . . . . . . . . . . . . . . . . . . . . . . . . 33Finding resources for using Photoshop. . . . . . . . . . . . . . . . . . . . . . 37Checking for updates. . . . . . . . . . . . . . . . . . . . . . . . . . . . . . . . . . . . . . . 372Basic Photo Corrections44Strategy for retouching . . . . . . . . . . . . . . . . . . . . . . . . . . . . . . . . . . . . 46Resolution and image size . . . . . . . . . . . . . . . . . . . . . . . . . . . . . . . . . . 47Getting started. . . . . . . . . . . . . . . . . . . . . . . . . . . . . . . . . . . . . . . . . . . . 48Adjusting the color in Camera Raw. . . . . . . . . . . . . . . . . . . . . . . . . 49Straightening and cropping the image in Photoshop . . . . . . . . 51ivContents
Replacing colors in an image. . . . . . . . . . . . . . . . . . . . . . . . . . . . . . . . 53Adjusting saturation with the Sponge tool. . . . . . . . . . . . . . . . . . 54Repairing areas with the Clone Stamp tool. . . . . . . . . . . . . . . . . . 55Using the Spot Healing Brush tool . . . . . . . . . . . . . . . . . . . . . . . . . . 57Applying a content-aware patch. . . . . . . . . . . . . . . . . . . . . . . . . . . . 58Applying the Unsharp Mask filter . . . . . . . . . . . . . . . . . . . . . . . . . . 60Saving the image for four-color printing. . . . . . . . . . . . . . . . . . . . . 613Working with Selections66About selecting and selection tools . . . . . . . . . . . . . . . . . . . . . . . . 68Getting started. . . . . . . . . . . . . . . . . . . . . . . . . . . . . . . . . . . . . . . . . . . . 69Using the Quick Selection tool . . . . . . . . . . . . . . . . . . . . . . . . . . . . . 69Moving a selected area . . . . . . . . . . . . . . . . . . . . . . . . . . . . . . . . . . . . 70Manipulating selections . . . . . . . . . . . . . . . . . . . . . . . . . . . . . . . . . . . . 71Using the Magic Wand tool. . . . . . . . . . . . . . . . . . . . . . . . . . . . . . . . . 78Selecting with the lasso tools . . . . . . . . . . . . . . . . . . . . . . . . . . . . . . 80Rotating a selection. . . . . . . . . . . . . . . . . . . . . . . . . . . . . . . . . . . . . . . . . 81Selecting with the Magnetic Lasso tool. . . . . . . . . . . . . . . . . . . . . . 82Cropping an image and erasing within a selection. . . . . . . . . . 844Layer Basics90About layers. . . . . . . . . . . . . . . . . . . . . . . . . . . . . . . . . . . . . . . . . . . . . . . . 92Getting started. . . . . . . . . . . . . . . . . . . . . . . . . . . . . . . . . . . . . . . . . . . . . 92Using the Layers panel. . . . . . . . . . . . . . . . . . . . . . . . . . . . . . . . . . . . . . 93Rearranging layers. . . . . . . . . . . . . . . . . . . . . . . . . . . . . . . . . . . . . . . . . 98Applying a gradient to a layer. . . . . . . . . . . . . . . . . . . . . . . . . . . . . 108Applying a layer style. . . . . . . . . . . . . . . . . . . . . . . . . . . . . . . . . . . . . 109Adding an adjustment layer. . . . . . . . . . . . . . . . . . . . . . . . . . . . . . . 113Updating layer effects . . . . . . . . . . . . . . . . . . . . . . . . . . . . . . . . . . . . 115Adding a border. . . . . . . . . . . . . . . . . . . . . . . . . . . . . . . . . . . . . . . . . . 116Flattening and saving files . . . . . . . . . . . . . . . . . . . . . . . . . . . . . . . . 118Adobe Photoshop cs6 Classroom in a Bookv
5Correcting and Enhancing Digital Photographs124Getting started. . . . . . . . . . . . . . . . . . . . . . . . . . . . . . . . . . . . . . . . . . . 126About camera raw files. . . . . . . . . . . . . . . . . . . . . . . . . . . . . . . . . . . . 129Processing files in Camera Raw. . . . . . . . . . . . . . . . . . . . . . . . . . . . 129Applying advanced color correction. . . . . . . . . . . . . . . . . . . . . . . 141Correcting digital photographs in Photoshop. . . . . . . . . . . . . . 151Correcting image distortion. . . . . . . . . . . . . . . . . . . . . . . . . . . . . . . 155Adding depth of field. . . . . . . . . . . . . . . . . . . . . . . . . . . . . . . . . . . . . 1586Masks and Channels166Working with masks and channels. . . . . . . . . . . . . . . . . . . . . . . . .168Getting started. . . . . . . . . . . . . . . . . . . . . . . . . . . . . . . . . . . . . . . . . . . 168Creating a mask . . . . . . . . . . . . . . . . . . . . . . . . . . . . . . . . . . . . . . . . . . 169Refining a mask. . . . . . . . . . . . . . . . . . . . . . . . . . . . . . . . . . . . . . . . . . . 170Creating a quick mask. . . . . . . . . . . . . . . . . . . . . . . . . . . . . . . . . . . . . 174Manipulating an image with Puppet Warp. . . . . . . . . . . . . . . . . 177Working with channels . . . . . . . . . . . . . . . . . . . . . . . . . . . . . . . . . . . 1787Typographic Design186About type. . . . . . . . . . . . . . . . . . . . . . . . . . . . . . . . . . . . . . . . . . . . . . . 188Getting started. . . . . . . . . . . . . . . . . . . . . . . . . . . . . . . . . . . . . . . . . . . 188Creating a clipping mask from type. . . . . . . . . . . . . . . . . . . . . . . . 189Creating type on a path. . . . . . . . . . . . . . . . . . . . . . . . . . . . . . . . . . . 194Warping point type. . . . . . . . . . . . . . . . . . . . . . . . . . . . . . . . . . . . . . . 196Designing paragraphs of type. . . . . . . . . . . . . . . . . . . . . . . . . . . . . 1978Vector Drawing Techniques206About bitmap images and vector graphics. . . . . . . . . . . . . . . . . 208About paths and the Pen tool. . . . . . . . . . . . . . . . . . . . . . . . . . . . . 209Getting started. . . . . . . . . . . . . . . . . . . . . . . . . . . . . . . . . . . . . . . . . . . 209Using paths with artwork . . . . . . . . . . . . . . . . . . . . . . . . . . . . . . . . . 210Creating vector objects for the background. . . . . . . . . . . . . . . . 218Working with defined custom shapes . . . . . . . . . . . . . . . . . . . . . 224Importing a Smart Object. . . . . . . . . . . . . . . . . . . . . . . . . . . . . . . . . 227viContents
9Advanced Compositing232Getting started. . . . . . . . . . . . . . . . . . . . . . . . . . . . . . . . . . . . . . . . . . . 234Assembling a montage of images . . . . . . . . . . . . . . . . . . . . . . . . . 234Applying filters . . . . . . . . . . . . . . . . . . . . . . . . . . . . . . . . . . . . . . . . . . . 243Hand-coloring selections on a layer . . . . . . . . . . . . . . . . . . . . . . . 246Applying Smart Filters . . . . . . . . . . . . . . . . . . . . . . . . . . . . . . . . . . . . 252Adding drop shadows and a border . . . . . . . . . . . . . . . . . . . . . . . 254Matching color schemes across images. . . . . . . . . . . . . . . . . . . . 256Automating a multistep task. . . . . . . . . . . . . . . . . . . . . . . . . . . . . . 258Stitching a panorama . . . . . . . . . . . . . . . . . . . . . . . . . . . . . . . . . . . . . 262Finishing the image. . . . . . . . . . . . . . . . . . . . . . . . . . . . . . . . . . . . . . . 26410 Editing Video268Getting started. . . . . . . . . . . . . . . . . . . . . . . . . . . . . . . . . . . . . . . . . . . 270Creating a new video project. . . . . . . . . . . . . . . . . . . . . . . . . . . . . . 271Animating text with keyframes. . . . . . . . . . . . . . . . . . . . . . . . . . . . 274Creating effects. . . . . . . . . . . . . . . . . . . . . . . . . . . . . . . . . . . . . . . . . . . 276Adding transitions. . . . . . . . . . . . . . . . . . . . . . . . . . . . . . . . . . . . . . . . 281Adding audio. . . . . . . . . . . . . . . . . . . . . . . . . . . . . . . . . . . . . . . . . . . . . 282Muting unwanted audio. . . . . . . . . . . . . . . . . . . . . . . . . . . . . . . . . . 283Rendering video. . . . . . . . . . . . . . . . . . . . . . . . . . . . . . . . . . . . . . . . . . 28411 Painting with the Mixer Brush288About the Mixer Brush. . . . . . . . . . . . . . . . . . . . . . . . . . . . . . . . . . . . 290Getting started. . . . . . . . . . . . . . . . . . . . . . . . . . . . . . . . . . . . . . . . . . . 290Selecting brush settings . . . . . . . . . . . . . . . . . . . . . . . . . . . . . . . . . . 291Mixing colors. . . . . . . . . . . . . . . . . . . . . . . . . . . . . . . . . . . . . . . . . . . . . 295Creating a custom brush preset . . . . . . . . . . . . . . . . . . . . . . . . . . . 298Mixing colors with a photograph. . . . . . . . . . . . . . . . . . . . . . . . . . 30012 Working with 3D Images308Getting started. . . . . . . . . . . . . . . . . . . . . . . . . . . . . . . . . . . . . . . . . . . 310Creating a 3D shape from a layer. . . . . . . . . . . . . . . . . . . . . . . . . . 310Manipulating 3D objects. . . . . . . . . . . . . . . . . . . . . . . . . . . . . . . . . . 312Adding 3D objects. . . . . . . . . . . . . . . . . . . . . . . . . . . . . . . . . . . . . . . . 314Adobe Photoshop cs6 Classroom in a Bookvii
Merging 3D layers to share the same 3D space. . . . . . . . . . . . . 318Positioning objects in a scene. . . . . . . . . . . . . . . . . . . . . . . . . . . . . 319Applying materials to 3D objects. . . . . . . . . . . . . . . . . . . . . . . . . . 326Lighting a 3D scene. . . . . . . . . . . . . . . . . . . . . . . . . . . . . . . . . . . . . . . 332Rendering a 3D scene. . . . . . . . . . . . . . . . . . . . . . . . . . . . . . . . . . . . . 33413 Preparing Files for the Web338Getting started. . . . . . . . . . . . . . . . . . . . . . . . . . . . . . . . . . . . . . . . . . . 340Creating slices. . . . . . . . . . . . . . . . . . . . . . . . . . . . . . . . . . . . . . . . . . . . 343Exporting HTML and images. . . . . . . . . . . . . . . . . . . . . . . . . . . . . . 349Using the Zoomify feature . . . . . . . . . . . . . . . . . . . . . . . . . . . . . . . . 354Creating a web gallery. . . . . . . . . . . . . . . . . . . . . . . . . . . . . . . . . . . . 35514 Producing and Printing Consistent Color360About color management. . . . . . . . . . . . . . . . . . . . . . . . . . . . . . . . . 362Getting started. . . . . . . . . . . . . . . . . . . . . . . . . . . . . . . . . . . . . . . . . . . 364Specifying color-management settings. . . . . . . . . . . . . . . . . . . . 364Proofing an image. . . . . . . . . . . . . . . . . . . . . . . . . . . . . . . . . . . . . . . . 365Identifying out-of-gamut colors. . . . . . . . . . . . . . . . . . . . . . . . . . . 366Adjusting an image and printing a proof. . . . . . . . . . . . . . . . . . . 368Saving the image as a CMYK EPS file. . . . . . . . . . . . . . . . . . . . . . . 370Printing . . . . . . . . . . . . . . . . . . . . . . . . . . . . . . . . . . . . . . . . . . . . . . . . . . 371INDEXviiiContents374
Getting StartedAdobe Photoshop CS6, the benchmark for digital imaging excellence, providesstrong performance, powerful image-editing features, and an intuitive interface.Adobe Camera Raw, included with Photoshop CS6, offers flexibility and controlas you work with raw images as well as TIFF and JPEG images. Photoshop CS6pushes the boundaries of digital image editing and helps you turn your dreamsinto designs more easily than ever before.About Classroom in a BookAdobe Photoshop CS6 Classroom in a Book is part of the official training seriesfor Adobe graphics and publishing software, developed with the support ofAdobe product experts. The lessons are designed to let you learn at your ownpace. If you’re new to Adobe Photoshop, you’ll learn the fundamental conceptsand features you’ll need to master the program. And if you’ve been usingAdobe Photoshop for a while, you’ll find that Classroom in a Book teachesmany advanced features, including tips and techniques for using the latestversion of the application and preparing images for the web.Although each lesson provides step-by-step instructions for creating a specificproject, there’s room for exploration and experimentation. You can followthe book from start to finish, or do only the lessons that match your interestsand needs. Each lesson concludes with a review section summarizing whatyou’ve covered.Adobe Photoshop cs6 Classroom in a Book1
What’s new in this editionThis edition covers many new features in Adobe Photoshop CS6, such as intuitive video editing tools, which make it easy to create and add effects to video clipsand still images; the Content-Aware Move tool, which lets you remove unwantedobjects or replicate existing portions of an image; simpler and more powerful 3Dcontrols (Photoshop CS6 Extended only); and the all-new Crop tool, providinggreater flexibility in cropping, straightening, and skewing an image. In addition,these lessons introduce you to erodible brush tips, new vector layers, lens-awareadjustments, paragraph styles, and more.New exercises and lessons cover: Using the Timeline panel, keyframes, and motion effects to create movie filesfrom video clips and still images within Photoshop. Creating and applying paragraph styles to text. Painting more realistic effects with erodible brush tips. Creating, positioning, and adding effects to objects in a 3D scene (PhotoshopCS6 Extended only).This edition is also chock-full of extra information on Photoshop features and howbest to work with this robust application. You’ll learn best practices for organizing,managing, and showcasing your photos, as well as how to optimize images for theweb. And throughout this edition, look for tips and techniques from one of Adobe’sown experts, Photoshop evangelist Julieanne Kost.What’s in Photoshop ExtendedThis edition of Adobe Photoshop CS6 Classroom in a Book works with the 3Dfeatures in Adobe Photoshop CS6 Extended—a version with additional functionsfor professional, technical, and scientific users, intended for those creating specialeffects in video or in architectural, scientific, or engineering images.Photoshop Extended features include: The ability to import 3D images and to edit individual frames or image sequencefiles by painting, cloning, retouching, or transforming them. Support for 3D files including the U3D, 3DS, OBJ, KMZ, and Collada fileformats created by programs such as Adobe Acrobat 9 Professional and GoogleEarth. See Lesson 12, “Working with 3D Images,” to learn about these features.2Getting started
Support for specialized file formats, such as DICOM, the most commonstandard for receiving medical scans; MATLAB, a high-level technicalcomputing language and interactive environment for developing algorithms,visualizing and analyzing data, and computing numbers; and 32-bit highresolution images, including a special HDR Color Picker and the capability topaint and layer these 32-bit HDR images.PrerequisitesBefore you begin to use Adobe Photoshop CS6 Classroom in a Book, you shouldhave a working knowledge of your computer and its operating system. Make surethat you know how to use the mouse and standard menus and commands, andalso how to open, save, and close files. If you need to review these techniques, seethe documentation included with your Microsoft Windows or Apple Mac OS Xdocumentation.Installing Adobe PhotoshopBefore you begin using Adobe Photoshop CS6 Classroom in a Book, make sure thatyour system is set up correctly and that you’ve installed the required software andhardware. You must purchase the Adobe Photoshop CS6 software separately. Forsystem requirements and complete instructions on installing the software, see theAdobe Photoshop CS6 Read Me file on the application DVD or on the web atwww.adobe.com/support. Note that some Photoshop CS6 Extended features,including all 3D features, require a video card that supports OpenGL 2.0.Photoshop and Bridge use the same installer. You must install these applicationsfrom the Adobe Photoshop CS6 application DVD (you cannot run the programsfrom the disc), or from the installation files you downloaded from Adobe, onto yourhard drive. Follow the onscreen instructions.Make sure that your serial number is accessible before installing the application.Adobe Photoshop cs6 Classroom in a Book3
Starting Adobe PhotoshopYou start Photoshop just as you do most software applications.To start Adobe Photoshop in Windows: Choose Start All Programs Adobe Photoshop CS6.To start Adobe Photoshop in Mac OS: Open the Applications/Adobe PhotoshopCS6 folder, and double-click the Adobe Photoshop program icon.Copying the Classroom in a Book filesThe Adobe Photoshop CS6 Classroom in a Book DVD includes folders containing allthe electronic files for the lessons in the book. Each lesson has its own folder; youmust copy the folders to your hard drive to complete the lessons. To save room onyour hard drive, you can install only the folder necessary for each lesson as you needit, and remove it when you’re done. Note: As youcomplete each lesson,you will preserve thestart files. In case youoverwrite them, youcan restore the originalfiles by recopyingthe correspondingLesson folder fromthe Adobe PhotoshopCS6 Classroom ina Book DVD to theLessons folder on yourhard drive.To install the lesson files, do the following:1 Insert the Adobe Photoshop CS6 Classroom in a Book DVD into your disc drive.2 Browse the contents and locate the Lessons folder.3 Do one of the following: To copy all the lesson files, drag the Lessons folder from the DVD onto yourhard drive. To copy only individual lesson files, first create a new folder on your harddrive, and name it Lessons. Then, drag the lesson folder or folders that youwant to copy from the DVD into the Lessons folder on your hard drive.Restoring default preferencesThe preferences file stores information about panel and command settings. Eachtime you quit Adobe Photoshop, the positions of the panels and certain command settings are recorded in the preferences file. Any selections you make in thePreferences dialog box are also saved in the preferences file.4Getting started
To ensure that what you see onscreen matches the images and instructions in thisbook, you should restore the default preferences as you begin each lesson. If youprefer to preserve your preferences, be aware that the tools, panels, and other settings in Photoshop CS6 may not match those described in this book.If you have custom-calibrated your monitor, save the calibration settings beforeyou start work on this book. To save your monitor-calibration settings, follow thesimple procedure described below.To save your current color settings:1 Start Adobe Photoshop.2 Choose Edit Color Settings.3 Note what is selected in the Settings menu: If it is anything other than Custom, write down the name of the settings file,and click OK to close the dialog box. You do not need to perform steps 4–6of this procedure. If Custom is selected in the Settings menu, click Save (not OK).The Save dialog box opens. The default location is the Settings folder, which iswhere you want to save your file. The default file extension is .csf (color settingsfile).4 In the File Name field (Windows) or Save As field (Mac OS), type a descriptivename for your color settings, preserving the .csf file extension. Then click Save.5 In the Color Settings Comment dialog box, type any descriptive text that willhelp you identify the color settings later, such as the date, specific settings, oryour workgroup.6 Click OK to close the Color Settings Comment dialog box, and again to closethe Color Settings dialog box.To restore your color settings:1 Start Adobe Photoshop.2 Choose Edit Color Settings.3 In the Settings menu in the Color Settings dialog box, select the settings file younoted or saved in the previous procedure, and click OK.Adobe Photoshop cs6 Classroom in a Book5
Additional resourcesAdobe Photoshop CS6 Classroom in a Book is not meant to replace documentationthat comes with the program or to be a comprehensive reference for every feature.Only the commands and options used
Adobe Photohshop CS6 Classroom in a Book includes the lesson files that you’ll need to complete the exercises in this book, as well as other content to help you learn more about Adobe Photoshop CS6 and use it with greater efficiency and ease. The diagram below represents the contents of

