Transcription
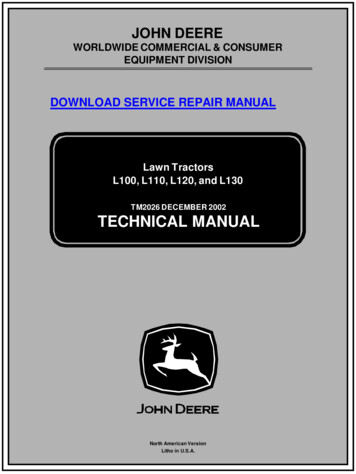
JOHN DEEREWORLDWIDE COMMERCIAL & CONSUMEREQUIPMENT DIVISIONDOWNLOAD SERVICE REPAIR MANUALLawn TractorsL100, L110, L120, and L130TM2026 DECEMBER 2002TECHNICAL MANUALNorth American VersionLitho in U.S.A.
www.monstermanuals.com
SAFETYHandle Fluids Safely - Avoid FiresRecognize Safety InformationBe Prepared For EmergenciesMIFThis is the saf ety-alert symbol. When you see this symbolon your machine or in this manual, be alert to the potentialf or personal injury.Follow recommended precautions and saf e servicingpractices.Understand Signal WordsMIFA signal word - DANGER, WARNING, or CAUTION - isused with the saf ety-alert symbol. DANGER identif ies themost serious hazards.DANGER or WARNING saf ety signs are located nearspecif ic hazards. General precautions are listed onCAUTION saf ety signs. CAUTION also calls attention tosaf ety messages in this manual. When you work around f uel, do not smoke or work nearheaters or other f ire hazards. Store f lammable f luids away f rom f ire hazards. Do notincinerate or puncture pressurized containers. Make sure machine is clean of trash, grease, anddebris. Do not store oily rags; they can ignite and burnspontaneously.Replace Safety Signs Be prepared if a f ire starts. Keep a f irst aid kit and f ire extinguisher handy. Keep emergency numbers f or doctors, ambulanceservice, hospital, and f ire department near your telephone.Use Care In Handling And Servicing BatteriesMIFReplace missing or damaged saf ety signs. See themachine operator’s manual f or correct saf ety signplacement.MIFSaf ety-1www.monstermanuals.com
SAFETYPrevent Battery Explosions Keep sparks, lighted matches, and open f lame awayf rom the top of battery. Battery gas can explode. Never check battery charge by placing a metal objectacross the posts. Use a volt-meter or hydrometer. Do not charge a f rozen battery; it may explode. Warmbattery to 16 C (60 F).such as earmuf f s or earplugs to protect againstobjectionable or uncomf ortable loud noises.Operating equipment saf ely requires the f ull attention of theoperator. Do not wear radio or music headphones whileoperating machine.Use Care Around High-pressure Fluid LinesAvoid High-Pressure FluidsPrevent Acid Burns Sulf uric acid in battery electrolyte is poisonous. It isstrong enough to burn skin, eat holes in clothing, andcause blindness if splashed into eyes.Avoid acid burns by:1. Filling batteries in a well-ventilated area.2. Wearing eye protection and rubber gloves.MIF3. Avoiding breathing f umes when electrolyte is added.Escaping f luid under pressure can penetrate the skincausing serious injury.4. Avoiding spilling or dripping electrolyte.5. Use proper jump start procedure.Avoid injury f rom escaping f luid under pressure by stoppingthe engine and relieving pressure in the system bef oredisconnecting or connecting hydraulic or other lines.Tighten all connections bef ore applying pressure.If you spill acid on yourself:1. Flush your skin with water.2. Apply baking soda or lime to help neutralize the acid.3. Flush your eyes with water f or 10 - 15 minutes.4. Get medical attention immediately.If acid is swallowed:1. Drink large amounts of water or milk.2. Then drink milk of magnesia, beaten eggs, or vegetableoil.Search f or leaks with a piece of cardboard. Protect handsand body f rom high pressure f luids.If an accident occurs, see a doctor immediately. Any f luidinjected into the skin must be surgically removed within af ew hours or gangrene may result. Doctors unf amiliar withthis type of injury should ref erence a knowledgeablemedical source. Such inf ormation is available f rom Deere &Company Medical Department in Moline, Illinois, U.S.A.Avoid Heating Near Pressurized Fluid Lines3. Get medical attention immediately.Wear Protective ClothingMIFMIFWear close f itting clothing and saf ety equipmentappropriate to the job.Prolonged exposure to loud noise can cause impairment orloss of hearing. Wear a suitable hearing protective deviceSaf etyFlammable spray can be generated by heating nearpressurized f luid lines, resulting in severe burns to yourselfand bystanders. Do not heat by welding, soldering, or usinga torch near pressurized f luid lines or other f lammablematerials. Pressurized lines can be accidentally cut whenheat goes beyond the immediate f lame area.-2www.monstermanuals.com
SAFETYParking SafelySupport Machine Properly and Use ProperLifting Equipment1. Stop machine on a level surf ace, not on a slope.2. Disengage PTO and stop attachments.3. Lower attachments to the ground.4. Lock park brake.5. Stop engine.6. Remove key.7. Wait f or engine and all moving parts to stop bef ore youleave the operator’s station.8. Close f uel shut-of f valve, if your machine is equipped.MIFService Machines SafelyIf you must work on a lif ted machine or attachment,securely support the machine or attachment.Do not support the machine on cinder blocks, ho llow tiles,or props that may crumble under continuous load. Do notwork under a machine that is supported solely by a jack.Follow recommended procedures in this manual.MIFTie long hair behind your head. Do not wear a necktie,scarf , loose clothing, or necklace when you work nearmachine tools or moving parts. If these items were to getcaught, severe injury could result.Remove rings and other jewelry to prevent electrical shortsand entanglement in moving parts.Use Proper ToolsLif ting heavy components incorrectly can cause severeinjury or machine damage. Follow recommendedprocedure f or removal and installation of components in themanual.Using High Pressure WashersDirecting pressurized water at electronic/electricalcomponents or connectors, bearings, hydraulic seals, f uelinjection pumps or other sensitive parts and componentsmay cause product malf unctions. Reduce pressure andspray at a 45 to 90 degree angle.Illuminate Work Area SafelyUse tools appropriate to the work. Makeshif t tools andprocedures can create saf ety hazards. Use power toolsonly to loosen threaded parts and f asteners. For looseningand tightening hardware, use the correct size tools. DONOT use U.S. measurement tools on metric f asteners.Avoid bodily injury caused by slipping wrenches. Use onlyservice parts meeting John Deere specif ications.Illuminate your work area adequately but saf ely. Use aportable saf ety light f or working inside or under themachine. Make sure the bulb is enclosed by a wire cage.The hot f ilament of an accidentally broken bulb can ignitespilled f uel or oil.Work In Clean AreaBefore starting a job:1. Clean work area and machine.2. Make sure you have all necessary tools to do your job.3. Have the right parts on hand.4. Read all instructions thoroughly; do not attemptshortcuts.Saf ety-3www.monstermanuals.com
SAFETYWork In Ventilated AreaAvoid Harmful Asbestos DustAvoid breathing dust that may be generated whenhandling components containing asbestos f ibers.Inhaled asbestos f ibers may cause lung cancer.MIFEngine exhaust f umes can cause sickness or death. If it isnecessary to run an engine in an enclosed area, removethe exhaust f umes f rom the area with an exhaust pipeextension.If you do not have an exhaust pipe extension, open thedoors and get outside air into the area.Components in products that may contain asbestosf ibers are brake pads, brake band and lining assemblies,clutch plates, and some gaskets. The asbestos used inthese components is usually f ound in a resin or sealed insome way. Normal handling is not hazardous as long asairborne dust containing asbestos is notgenerated.Avoid creating dust. Never use compressed air f or cleaning.Avoid brushing or grinding material containing asbestos.When servicing, wear an approved respirator. A specialvacuum cleaner is recommended to clean asbestos. If notavailable, apply a mist of oil or water on the materialcontaining asbestos. Keep bystanders away f rom the area.Service Tires SafelyWarning: California Proposition 65 WarningGasoline engine exhaust f rom this product containschemicals known to the State of Calif ornia to cause cancer,birth def ects, or other reproductive harm.Diesel engine exhaust and some of its constituents areknown to the State of Calif ornia to cause cancer, birthdef ects, and other reproductive harm.Remove Paint Before Welding or HeatingAvoid potentially toxic f umes and dust. Hazardous f umescan be generated when paint is heated by welding,soldering, or using a torch. Do all work outside or in a wellventilated area. Dispose of paint and solvent properly.Remove paint bef ore welding or heating: If you sand orgrind paint, avoid breathing the dust. Wear an approvedrespirator. If you use solvent or paint stripper, removestripper with soap and water bef ore welding. Removesolvent or paint stripper containers and other f lammablematerial f rom area. Allow f umes to disperse at least 15minutes bef ore welding or heating.MIFExplosive separation of a tire and rim parts can causeserious injury or death.Do not attempt to mount a tire unless you have the properequipment and experience to perf orm the job.Always maintain the correct tire pressure. Do not inf late thetires above the recommended pressure. Never weld or heata wheel and tire assembly. The heat can cause an increasein air pressure resulting in a tire explosion. Welding canstructurally weaken or def orm the wheel.When inf lating tires, use a clip-on chuck and extensionhose long enough to allow you to stand to one side andNOT in f ront of or over the tire assembly. Use a saf ety cageif available.Check wheels f or low pressure, cuts, bubbles, damagedrims or missing lug bolts and nuts.Saf ety-4www.monstermanuals.com
SAFETYAvoid Injury From Rotating Blades, AugersAnd PTO ShaftsDirect exposure to hazardous chemicals can cause seriousinjury. Potentially hazardous chemicals used with JohnDeere equipment include such items as lubricants,coolants, paints, and adhesives.A Material Saf ety Data Sheet (MSDS) provides specif icdetails on chemical products: physical and health hazards,saf ety procedures, and emergency response techniques.Check the MSDS bef ore you start any job using ahazardous chemical. That way you will know exactly whatthe risks are and how to do the job saf ely. Then f ollowprocedures and recommended equipment.Dispose of Waste ProperlyMIFKeep hands and f eet away while machine is running. Shutof f power to service, lubricate or remove mower blades,augers or PTO shaf ts.Service Cooling System SafelyImproperly disposing of waste can threaten theenvironment and ecology. Potentially harmf ul waste usedwith John Deere equipment include such items as oil, f uel,coolant, brake f luid, f ilters, and batteries. Use leakproofcontainers when draining f luids. Do not use f ood orbeverage containers that may mislead someone intodrinking f rom them. Do not pour waste onto the ground,down a drain, or into any water source. Inquire on theproper way to recycle or dispose of waste f rom your localenvironmental or recycling center, or f rom your John Deeredealer.Live With SafetyMIFExplosive release of f luids f rom pressurized cooling systemcan cause serious burns.Shut off machine. Only remove f iller cap when cool enoughto touch with bare hands. Slowly loosen cap to f irst stop torelieve pressure bef ore removing completely.Handle Chemical Products SafelyMIFBefore returning machine to customer, make sure machineis f unctioning properly, especially the saf ety systems. Installall guards and shields.MIFSaf ety-5www.monstermanuals.com
SAFETYSaf ety-6www.monstermanuals.com
SPECIFICATIONS & INFORMATION TABLE OF CONTENTSTable of ContentsFastener Torques. . 9Metric Fastener Torque Values. 9Metric Fastener Torque Value - grade 7 . 10Inch Fastener Torque Values . 10General Information. 12Gasoline . 12Gasoline Storage . 12Engine Oil . 12Engine Break-in Oil . 13Alternative Lubricants . 13Synthetic Lubricants. 14Lubricant Storage . 14Mixing Of Lubricants . 14Chassis Grease . 14Hydrostatic Transmission Oil . 14Serial Number Locations. 15Machine Product Identification Number . 15Engine Serial Number. 15Transaxle Serial Number. 15Specif ications & Inf ormation Table of Contents - 7www.monstermanuals.com
SPECIFICATIONS & INFORMATION TABLE OF CONTENTSSpecif ications & Inf ormation Table of Contents - 8www.monstermanuals.com
SPECIFICATIONS & INFORMATION FASTENER TORQUESFastener TorquesMetric Fastener Torque 124.8PropertyClassandHeadMarkings1012MIFClass 4.8Class 8.8 or 9.8Class 10.9Class 12.9Lubricated a Dry aLubricated a Dry aLubricated a Dry aLubricated aDry aSIZEN mlb-f tN mlb-f tN mlb-f tN mlb-f tN mlb-f tN mlb-f tN mlb-f tN mlb-f 800M243302504253106504758256009256751150 10001700 1250 13502300 1700 2150160027002000M339006751150 8501750130022001650250018503150 2350 2900215037002750M3611508501450 10752250165028502100320023504050 3000 3750275047503500DO NOT use these hand torque values if a dif f erent torquevalue or tightening procedure is given f or a specif icapplication. Torque values listed are f or general use onlyand include a 10% variance f actor. Check tightness off asteners periodically. DO NOT use air powered wrenches.When bolt and nut combination f asteners are used, torquevalues should be applied to the NUT instead of the bolthead.Shear bolts are designed to f ail under predetermined loads.Always replace shear bolts with identical grade.a “Lubricated” means coated with a lubricant such asengine oil, or fasteners with phosphate and oil coatings.“Dry” means plain or zinc plated (Yellow Dichromate Specification JDS117) without any lubrication.Fasteners should be replaced with the same class. Makesure f astener threads are clean and that you properly startthread engagement. This will prevent them f rom f ailingwhen tightening.Tighten toothed or serrated-type lock nuts to the f ull torquevalue.Ref erence: JDS - G200Specif ications & Inf ormation Fastener Torques - 9www.monstermanuals.com
SPECIFICATIONS & INFORMATION FASTENER TORQUESMetric Fastener Torque Value - grade 7SizeSizeSteel or GrayIron TorqueAluminumTorqueN mlb-ftN mlb-ftSteel or GrayIron TorqueAluminumTorqueM1288657052N mlb-ftN 14M1052384130Inch Fastener Torque Values51 or 2 bSAEGradeand HeadMarkings5.15.288.2No Marks2SAEGradeand NutMarkings58No MarksMIFGrade 1Grade 2bGrade 5, 5.1 or 5.2Grade 8 or 8.2Lubricated a Dry aLubricated a Dry aLubricated a Dry aLubricated aDry aSIZEN mlb-f tN mlb-f tN mlb-f tN mlb-f tN mlb-f tN mlb-f tN mlb-f tN mlb-f 2000340025501-1/210007251250 9259907251250 93022501650285021003600265045503350Specif ications & Inf ormation Fastener Torques - 10www.monstermanuals.com
SPECIFICATIONS & INFORMATION FASTENER TORQUESDO NOT use these hand torque values if a dif f erent torquevalue or tightening procedure is given f or a specif icapplication. Torque values listed are f or general use onlyand include a 10% variance f actor. Check tightness off asteners periodically. DO NOT use air powered wrenches.Shear bolts are designed to f ail under predetermined loads.Always replace shear bolts with identical grade.Fasteners should be replaced with the same grade. Makesure f astener threads are clean and that you properly startthread engagement. This will prevent them f rom f ailingwhen tightening.When bolt and nut combination f asteners are used, torquevalues should be applied to the NUT instead of the bolthead.Tighten toothed or serrated-type lock nuts to the f ull torquevalue.a “Lubricated” means coated with a lubricant such asengine oil, or fasteners with phosphate and oil coatings.“Dry” means plain or zinc plated (yellow dichromate Specification JDS117) without any lubrication.b “Grade 2” applies for hex cap screws (Not Hex Bolts) upto 152 mm (6 in.) long. “Grade 1” applies for hex capscrews over 152 mm (6 in.) long, and for all other types ofbolts and screws of any length.Ref erence: JDS - G200Specif ications & Inf ormation Fastener Torques - 11www.monstermanuals.com
SPECIFICATIONS & INFORMATION GENERAL INFORMATIONGeneral InformationGasolinec CAUTION: Avoid injury! Gasoline is HIGHLYFLAMMABLE, handle it with care.DO NOTrefuel machine while:indoors, always fill gas tank outdoorsmachine is near an open flame or sparksengine is running, STOP enginemifengine is hot, allow it to cool sufficiently firstsmokingHelp prevent fires:fill gas tank to bottom of filler neck onlybe sure fill cap is tight after fuelingclean up any gas spills IMMEDIATELYkeep machine clean and in good repair - free ofexcess grease, oil, debris, and faulty ordamaged partsany storage of machines with gas left in tankshould be in an area that is well ventilated toprevent possible igniting of fumes by an openflame or spark, this includes any appliancewith a pilot lightTo prevent fire or explosion caused by STATICELECTRIC DISCHARGE during fueling:ONLY use a clean, approved POLYETHYLENEPLASTIC fuel container and funnel WITHOUTany metal screen or filterTo avoid engine damage: DO NOT mix oil with gasoline ONLY use clean, fresh unleaded gasoline with anoctane rating (anti-knock index) of 87 or higher f ill gas tank at the end of each day's operation to helpprevent condensation f rom f orming inside a partially f illedtank keep up with specif ied service intervalsUse of alternative oxygenated, gasohol blended, unleadedgasoline is acceptable as long as: the ethyl or grain alcohol blends DO NOT exceed 10%by volume or methyl tertiary butyl ether (MTBE) blends DO NOTexceed 15% by volumeIMPORTANT: Avoid damage! DO NOT useMETHANOL gasolines because METHANOL isharmful to the environment and to your health.c CAUTI ON : Avoid injury! Californi a Proposi ti on65 Warning: Gasoline engine exhaust from thisproduct contains chemicals known to the Stateof California to cause cancer, birth defects, orother reproductive harm.Gasoline StorageIMPORTANT: Avoid damage! Keep all dirt, scale,water or other foreign material out of gasoline.Keep gasoline stored in a saf e, protected area. Storage ofgasoline in a clean, properly marked (“UNLEADEDGASOLINE”) POLYETHYLENE PLASTIC containerWITHOUT any metal screen or f ilter is recommended. DONOT use de-icers to attempt to remove water f rom gasolineor depend on f uel f ilters to remove water f rom gasoline.Use a water separator installed in the storage tank outlet.BE SURE to properly discard unstable or contaminatedgasoline. When storing machine or gasoline, it isrecommended that you add John Deere GasolineConditioner and Stabilizer (TY15977) or an equivalent tothe gasoline. BE SURE to f ollow directions on containerand to properly discard empty container.Engine OilUse the appropriate oil viscosity based on the expected airtemperature range during the period betweenrecommended oil changes. Operating outside of theserecommended oil air temperature ranges may causepremature engine f ailure.The f ollowing John Deere oil is PREFERRED:Specif ications & Inf ormation General Inf ormation - 12www.monstermanuals.com
SPECIFICATIONS & INFORMATION GENERAL INFORMATIONTURF-GARD - SAE 10W-30; PLUS-4 - SAE 10W-30;IMPORTANT: Avoid damage! After the break-inperiod, use the John Deere oil that is recommendedfor this engine.Other oils may be used if above John Deere oils are notavailable, provided they meet one of the f ollowingspecif ications: SAE 5W-30 - API Service Classif ication SG or higher; SAE 10W-30 - API Service Classif ication SG or higher; SAE 30 - API Service Classif ication SC or higher. BREAK-IN OILJohn Deere Dealers: You may want to cross-ref erence t hefollowing publications to recommend the proper oil for yourcustomers:Module DX,ENOIL2 in JDS-G135; Section 530, Lubricants & Hydraulics, of the John DeereMerchandise Sales Guide; Lubrication Sales Manual PI7032.SAE 5W-30 Engine Break-in OilIMPORTANT: Avoid damage! ONLY use a qualitybreak-in oil in rebuilt or remanufactured engines forthe first 5 hours (maximum) of operation. DO NOTuse oils with heavier viscosity weights than SAE 5W30 or oils meeting specifications API SG or SH,these oils will not allow rebuilt or remanufacturedengines to break-in properly.BREAK-IN ENGINE OIL.John Deere BREAK-IN ENGINE OIL is f ormulated withspecial additives f or aluminum and cast iron type enginesto allow the power cylinder components (pistons, rings, andliners as well) to “wear-in” while protecting other enginecomponents, valve train and gears, f rom abnormal wear.Engine rebuild instructions should b e f ollowed closely todetermine if special requirements are necessary.John Deere BREAK-IN ENGINE OIL is also recommendedf or non-John Deere engines, both aluminum and cast irontypes.The f ollowing John Deere oil is also recommended as abreak-in engine oil: TORQ-GARD SUPREME - SAE 5W-30.If the above recommended John Deere oils are notavailable, use a break-in engine oil meeting the f ollowingspecif ication during the f irst 5 hours (maximum) ofoperation: AIR TEMPERATUREMIFJohn Deere Dealers: You may want to cross-ref erence thefollowing publications to recommend the proper oil for yourcustomers:The f ollowing John Deere oil is PREFERRED: PREFERREDSAE 5W-30 - API Service Classif ication SE or higher. Module DX,ENOIL4 in JDS-G135; Section 530, Lubricants & Hydraulics, of the John DeereMerchandise Sales Guide; Lubrication Sales Manual PI7032.Alternative LubricantsConditions in certain geographical areas outside the UnitedStates and Canada may require dif f erent lubricantrecommendations than the ones printed in this technic almanual or the operator's manual. Consult with your JohnDeere Dealer, or Sales Branch, to obtain the alternativelubricant recommendations.IMPORTANT: Avoid damage! Use of alternativelubricants could cause reduced life of thecomponent.If alternative lubricants are to be used, it is recommendedthat the f actory f ill be thoroughly removed bef ore switchingto any alternative lubricant.Specif ications & Inf ormation General Inf ormation - 13www.monstermanuals.com
SPECIFICATIONS & INFORMATION GENERAL INFORMATIONSynthetic LubricantsSynthetic lubricants may be used in John Deere equipmentif they meet the applicable perf ormance requirements(industry classif ication and/or military specif ication) asshown in this manual.JDM J13E4NLGI Grade 2The recommended air temperature limits and service orlubricant change intervals should be maintained as shownin the operator’s manual.Avoid mixing dif ferent brands, grades, or types of oil. Oilmanuf acturers blend additives in their oils to meet certainspecif ications and perf ormance requirements. Mixingdif f erent oils can interf ere with the proper f unctioning ofthese additives and degrade lubricant perf ormance.Lubricant StorageAll machines operate at top ef f iciency only when cleanlubricants are used. Use clean storage containers tohandle all lubricants. Store them in an area protected f romdust, moisture, and other contamination. Store drums ontheir sides. Make sure all containers are properly markedas to their contents. Dispose of all old, used containers andtheir contents properly.Mixing Of LubricantsIn general, avoid mixing dif ferent brands or types oflubricants. Manuf acturers blend additives in their lubricantsto meet certain specif ications and perf ormancerequirements. Mixing dif ferent lubricants can interf ere withthe proper f unctioning of these additives and lubricantproperties which will downgrade their intended specif iedperf ormance.AIR TEMPERATUREMIFJohn Deere Dealers: You may want to cross-ref erence thefollowing publications to recommend the proper grease f oryour customers: Module DX,GREA1 in JDS-G135; Section 530, Lubricants & Hydraulics, of the John DeereMerchandise Sales Guide; Lubrication Sales Manual P17032.Hydrostatic Transmission OilChassis GreaseUse the f ollowing grease based on the air temperaturerange. Operating outside of the recommended grease airtemperature range may cause premature f ailures.These machines are equipped with a internal wet discbrake transmission.IMPORTANT: Avoid damage! ONLY use HY-GARD J20D oil in this transmission. Mixing of two viscositygrade oils is NOT RECOMMENDED. DO NOT usetype “F” automatic transmission fluid.The f ollowing John Deere grease is PREFERRED: NON-CLAY HIGH-TEMPERATURE EP GREASE JDM J13E4, NLGI Grade 2. Multi-Purpose SD Polyurea Grease Multi-Purpose HD Lithium Complex Grease Other greases may be used if above pref erred John Deeregrease is not available, provided they meet the f ollowingspecif ication: The f ollowing oil is RECOMMENDED:John Deere Standard JDM J13E4, NLGI Grade 2.HY-GARD J20D OILJohn Deere Dealers: You may want to cross-ref erence thefollowing publications to recommend the proper oil for yourcustomers: Module DX,ENOIL2 in JDS-G135; Section 530, Lubricants & Hydraulics, of the John DeereMerchandise Sales Guide; Lubrication Sales Manual PI7032.Specif ications & Inf ormation General Inf ormation - 14www.monstermanuals.com
SPECIFICATIONS & INFORMATION SERIAL NUMBER LOCATIONSSerial Number LocationsTransaxle Serial NumberMachine Product Identification NumberWhen ordering parts or submitting a warranty claim, it isIMPORTANT that the machine product identif icationnumber (PIN) and component serial numbers are included.The location of the PIN and component serial numbers areshown.MX9663Located on back-right side of transaxle.MX9661Located on right side of f rame.Engine Serial NumberMX9662Located on right side of engine.Specif ications & Inf ormation Serial Number Locations - 15www.monstermanuals.com
SPECIFICATIONS & INFORMATION SERIAL NUMBER LOCATIONSSpecif ications & Inf ormation Serial Number Locations - 16www.monstermanuals.com
ENGINE - 17 HP BRIGGS & STRATTON TABLE OF CONTENTSTable of ContentsSpecifications. 19General Specifications . 19Tests and Adjustments Specifications . 19Repair Specifications. 19Torque Specifications (Alphabetical) . 20Tests and Adjustments . 22Throttle Cable Adjustment. 22Fuel Shutoff Solenoid Test. 22Governor Adjustment - Static. 22Governor Adjustment - Dynamic. 23Governor Idle Adjustment . 24Slow Idle Carburetor Adjustment . 24Valve Clearance Adjustment . 25Armature Air Gap Adjustment. 26Cylinder Leakdown Test . 26Fuel and Air Repair . 28Upper Blower HousingRemoval and Installation. 28Air Cleaner Service . 28Carburetor Removal and Installation . 28Carburetor Disassembly . 29Carburetor Inspection . 31Carburetor Assembly . 31Breather Valve Service . 32Engine Repair. 33Engine Removal . 33Engine Installation . 34Cylinder Head Removal and Installation . 35Cylinder Head Inspection and Repair . 37Valve Removal . 37Valves Reface . 37Valves Installation . 38Governor Removal and Installation . 39Piston, Rings and Rod . 39Piston Inspection . 41Connecting Rod Inspection . 41Cylinder Bore Inspection . 43Cylinder Bore Honing . 43Cylinder Bore Cleaning . 44Resizing Cylinder Bore . 44Flywheel Removal and Installation. 45Crankshaft and Cam Gear Removal . 46Balance System
Keep a first aid kit and fire extinguisher handy. Keep emergency numbers for doctors, ambulance service, hospital, and fire department near your telephone. Use Care In Handling And Servicing Batteries Replace missing or damaged safety signs. See the machine operator’s m
