Transcription
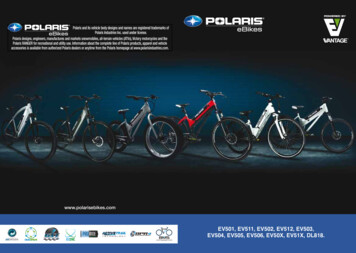
Polaris and its vehicle body designs and names are registered trademarks ofPolaris Industries Inc. used under license.Polaris designs, engineers, manufactures and markets snowmobiles, all-terrain vehicles (ATVs), Victory motorcycles and thePolaris RANGER for recreational and utility use. Information about the complete line of Polaris products, apparel and vehicleaccessories is available from authorized Polaris dealers or anytime from the Polaris homepage at 01, EV511, EV502, EV512, EV503,EV504, EV505, EV506, EV50X, EV51X, DL818.
Table of ContentsQuick Start.2COMPONENTS .4INTRODUCTION.7SAFETY.8PEDELEC AND S-PEDELEC BICYCLES. 12PRO RIDE BATTERY. 13Smart BATTERY CHARGER. 16DISPLAY – INFORMATION CENTER DASHBOARD. 18REGENERATION. 20Motor biosync. 21WARNINGRead, understand, and follow all of the instructionsand safety precautions in this manual and on allproduct labels.Failure to follow the safety precautions could result inserious injury or death.REPLACING A FLAT TIRE. 22TORQUE SPECIFICATIONS. 24TECHNICAL SPECIFICATIONS. 24Frame Dimensions. 26Warranty. 28DEALER SERVICE SCHEDULE. 29Handover documentation. 31Copyright 2015 EVantage 1
Quick StartCharging thePro Ride Battery1Installing thePro Ride BatteryPowering On thePolaris eBike1 Turn on the Pro Ride battery.Connect internal battery connectorlocated inside battery compartment, tothe battery itself and lock it using the 2metal prongs on the connector.1in2 Chargingframe2Chargingout of frame33CAUTION: Charge the battery in a dry place and ensure there is sufficient ventilation.Neither the battery nor the charger should be covered during charging. The chargingprocess gives off heat, which must escape or it could lead to overheating and a possible firehazard.IMPORTANT: FULLY CHARGE BATTERIES BEFORE FIRST USE.Li-Ion (Lithium-Ion) batteries must be fully charged immediately when they are receivedand after each use. Optimal Li-Ion battery performance is reached after 3-4 charging cycles.IMPORTANT: Always make sure the display and main power switch on the battery areturned OFF before charging or removing the battery. Leave battery at 50% charge levelor more for extended periods of inactivity.2FAULTCODE2Green LED signifies the chargeris connected to AC powerFULLY CHARGE UNIT FOR A FULL 6-8HOURS BEFORE YOUR FIRST RIDE.Troubleshooting34Turn on the IC Dashboard .Press the UP or DOWN buttonto scroll until the desiredassistance or regeneration modeis reached (use the arrows for UP& DOWN)Start pedal rotation for pedalassistance.WARNING: Please read and understand allsections of this User Manual before ridingyour pedelec bicycle.WARNING: The battery is very heavy, soensure that you do not drop it as this couldcause personal injury and/or damage the battery.WARNING: Remove the key from thekeyhole before riding. Replacement keys areavailable in case of loss upon registering online.CAUSECORRECTIVEMEASUREF01Internal error in themotorHave the hall sensor in theinternal motor checked byauthorized dealerF02Connection problem inthe motorCheck connections byauthorised dealerF03Cadence sensorCheck cadence sensorconnection by authoriseddealer or shift gears to reset.F04Internal motor errorCheck the internal drivecircuit in the motor by anauthorised dealer.F05Connection problemwith LCD displayCheck connections byauthorised dealer.F06Motor temperature toohigh (above 80 C)Allow the motor to cooldown by turning off theunit and continuing topedal without assistance.F07Power supplyconnectionCheck the connectionbetween the battery andmotor. Have authoriseddealer check battery.F08Temperature of batterypack too high (45 C)Allow the battery to cooldown by turning off theunit and continuing topedal without assistance.F09Temperature of batterypack too low(below 2 C)Allow the battery pack towarm up slowly in a warmlocation.F10Temperature sensorAutomatic sensor toindicate high motortemperature. Mostcases, eBike will remainoperational.F11Battery packconnectionCheck the connectionbetween the batterypack and the batterycompartment indowntube.F12One or more buttonson the LCD display arestuckCheck if any buttons arestuck or blocked fromdirt or debris. Clean asnecessary.F13Gear is not aligned inthe sensor box.Shift through gears whilepedalingF14Converter insidebattery overheatLet cool down for 5minutesF15Motor overheatLet cool down for 5minutes otherwise unit willshut off and switch to F06.F16Battery overheatwarning.Allow the battery to cooldown by turning off theunit and continuing topedal without assistance.F17Battery voltage leveltoo low. Unit is shutoff.Charge the unit fully for6-8 hrs3
COMPONENTS3817261616105917154eBike Components14Bicycle components9. Rear rack mount15121314. Rear derailleur1. Duo Drive motor5. In-frame charging port2. Pro Ride battery6. Battery safety lock10. Suspension forks15. Drop outs3. Information Center Dashboard display7. DuoDrive Motor quickdisconnect location11. Front tire quick release16. Reflectors X 24. BioSync cadence and gear sensor8. Dual hydraulic disc brake levers12. Chain stay and crank17. Head set13. Bottom bracket4115
Motor ComponentsINTRODUCTIONThank you for purchasing a Polaris electric bicycle powered by EVantage, andwelcome to our worldwide family of Polaris owners. We proudly produce anexciting line of electric bicycles and motor systems.IMPORTANT: Please read this Owner’s Manual before taking your first ride onyour electric bicycle. It is important to familiarize yourself with the controlsand features in order to best experience the ebike’s full performance potential. Werecommend that you keep the manual handy for future reference.NOTE: This is not intended to be a comprehensive repair, service or cycling manual. Pleasecontact your local Polaris /EVantage dealer for your service and maintenanceneeds.ABOUT THIS MANUALInformation CenterDashboard DisplayDuoDrive motor andcontrollerBioSync Cadence sensorPro Ride lithium batteryand battery/controllerThroughout this Owner’s Manual, you will find useful tips and important safety,performance, and maintenance information to ensure you safely enjoy all thefeatures your electric bicycle has to offer.Smart automatic charger67
SAFETYSafety DefinitionsThe following symbols, warnings and cautions are used throughout this manual: Always turn your system off before disconnecting the battery or pluggingin the charger to recharge the battery. Never turn the system on while thebattery is charging. Do not touch the charger with bare skin during charging. High temperaturesmay cause burns.WARNING: Indicates a potentially hazardous situation which could result inserious injury or death. Never cover the battery charger or place objects on top of it. This could resultin a fire or electric shock.CAUTION: Indicates a potentially hazardous situation which may result inminor or moderate injury, or is an alert against unsafe practices. Do not place the battery charger on uneven surfaces. Place the charger firmlyon a flat, stable, dry surface.CAUTION (used without the safety alert symbol): Indicates a situation which couldresult in serious damage to your bicycle and possible voiding of your warranty.IMPORTANT ELECTRIC BICYCLE SAFETY INSTRUCTIONSWARNING: To avoid serious injury or property damage: Polaris electricbicycles are intended only for ON ROAD use. All off road, stunt, or companionriding is not recommended and may void the warranty.IMPORTANT NOTE: It is especially important that you know and obey thelocal laws specifically pertaining to electric bicycles, which vary by state andcounty.IMPORTANT BATTERY AND CHARGER SAFETYINSTRUCTIONSWARNING: To avoid serious injury or property damage: Do not use the charger in high temperatures. Overheating or fire may result. Only use the battery charger in a dry location. Do not place the charger inwater or other liquids. Do not place or store the charger where it can fall or bepulled into a tub or sink. Do not clean the charger with a water spray or thelike. Never rotate the pedals while your bicycle is charging. The cord may wraparound the pedal or crank, causing damage to the cord, which could result inelectric shock or fire.CAUTION: To avoid damage to your bicycle or charger: Only use the original battery charger supplied with your Polaris bicycle. Always charge batteries in a cool, well-ventilated area to avoid overheating.Never charge batteries in direct sunlight. Do not apply pressure to the power cable or the charger plug. Always turn OFF battery and turn OFF display before disconnecting battery Be sure to insert the charger plug securely into a functioning AC mains wallsocket. Batteries should be stored in ambient temperatures above 10 C. Never touch the plug with wet hands. Never allow batteries to freeze (below 0 C) as this will result in permanentdamage. Keep the battery charger out of reach of children and pets. Never take apart or modify the battery charger. Never dispose of batteries in fire. This could cause an explosion and/or fire. Never connect the battery charger to appliances other than your Polaris bicycle. Do not use a plug or socket that is dirty, wet or dusty. Clean the plug with alint-free, dry cloth. Always remove the plug from the socket gently by the plug. Never pull thecord. Do not use this battery charger with an extension cord.CAUTION: To avoid possible injury or damage to your bicycle: Never attempt to open, disassemble or modify the battery charger. This couldresult in a fire or electric shock. There are no user-serviceable parts inside;and opening the battery charger will nullify your warranty.89
HELMETSCAUTION: To avoid possible injury, we strongly advisethat a properly fitting, ANSI or SNELL approved bicyclesafety helmet be worn at all times when riding your electricbicycle. The correct helmet should:–– be comfortable,–– be lightweight,–– have good ventilation,–– fit correctly,–– cover forehead, and.–– be securely strapped on. Night RidingCAUTION: To avoid possible injury, we recommend you ride at night onlywhen necessary. When doing so, take the following precautions: Use a properly functioning lighting set comprised of a white front lamp and ared rear lamp. If using battery powered lights, make sure batteries are well charged. Wear reflective and light coloured clothing to increase visibility. Exercise extra caution and use familiar roads with adequate street lighting ifpossible.Wet WeatherCAUTION: To avoid possible mild electric or irreversible damage to yourelectric bicycle, we recommend you do not ride in wet weather. This electricbicycle is not intended for use in water (such as damp roads, puddles, rain,streams, etc.). It is not intended for storing or parking in locations that are exposedto the natural elements. Never immerse the bike in liquids, as the electrical systemmay be damaged.Before your first ride, please consult the instruction manuals of the individualcomponent manufacturers, which were supplied with your bike or are available online.Your authorized dealer will be happy to answer any further questions you have afterreading this manual. Please ensure that your bike is ready for use and is adjusted to fityour body.That means:–– Set the position and fixture of the seat and handlebar.–– Check the assembly and settings of the brakes.–– Secure the wheels into the frame and fork.10–– Check the tire pressure.–– Check that the battery is properly secured.To ensure that you enjoy a safe and comfortable riding position, please allow yourauthorized dealer to set up your handlebar and stem.Adjust the seat to a safe and comfortable position for you.Allow your authorized dealer to set up the brakes so that the brake levers arealways within easy reach. Ensure that you know which lever operates which brake.WARNING! Before you switch the system on, ensure that the cover of themagnetic rubber cap is secure in place.WARNING! Modern braking systems might be more powerful or have adifferent functionality and behave differently than those that you are used to.Please take an initial test ride to familiarize yourself with the brakes in a safe, openspace before setting off on your first ride with the bike.Also remember that the effectiveness of brakes can be different than you are usedto in wet conditions or on slippery surfaces. Please take into account the possibilityof longer braking distances on slippery surfaces when riding.WARNING! Always apply the bicycle’s brakes before you set foot on the pedal!Both brake levers are integrated with an automatic motor cut-off switch.The motor drives switch. The motor drives as soon as you push the pedal. This force isunfamiliar and can lead to falls, danger or accidents in traffic, which could result in injury.General Preparation Practice operating and riding your bicycle in a quiet and safe place before youtake to public roads. Ensure that the wheels are securely fastened in the frame and fork. Check thatthe wheels and thru axles as well as all important nuts and bolts are secure. Lift your bicycle up slightly and drop it onto the ground from about 4cm in theair. If it rattles or makes any unusual noise, please ask a authorized dealer toidentify and fix the problem before you ride. Push the wheels forward with the brakes pulled. The back brake shouldcompletely prevent the back wheel from moving, while the front brake shouldlift the back wheel off the ground with its braking effect. The bicycle’s steeringshould not rattle under braking or exhibit any play. Check the air pressure in the tires. You will find instructions about correct tirepressures on the sides of the tires.11
PEDELEC AND S-PEDELEC BICYCLESPRO RIDE BATTERYAbout Pedelec and S-pedelec BicyclesPro Ride Battery SystemA pedelec (“pedal electric”) bicycle provides a top assisted speed up to 20 mph.Pedelec class e-bikes are regarded as bicycles, and, as such, the only regulationsthe rider needs to familiarize himself with are the standard local ordinances forsharing the road safely on a bicycle.S-Pedelec (“Schnell-Pedelec” or “Speedy-Pedelec”) bicycles provides a topassisted speed up to 28 mph. S-Pedelec ebikes are usually classified as mopeds.Depending on local jurisdiction, these ebikes may require registration andinsurance. The rider may also need to obtain a license and be required to weara helmet. Rules and regulations for operating an S-Pedelec bike may vary withjurisdiction.THROTTLE ENABLEDSome models come equipped with a throttle for pedaless power. To engage thethrottle, simply begin to pedal the bike, (this disengages the safety) and press thethrottle lever. Models not including a throttle, can have throttle added via the quickconnection on the handle bar. Throttles are all limited to a 20 mph speed, but willnot affect the overall pedal assistance speed. Please ask your dealer for moreinformation.Polaris eBike’s Advanced Battery Management Systemis designed by EVantage engineers and used exclusivelyfor Polaris eBikes. The software analyses the motor drivesystem for optimum battery efficiency and for the ultimate in rider performance.The BMS also records and displays valuable data on the entire motor and batterysystem for ease of service and maintenance.“Fuelling” the Polaris eBike is the EVantage ProRide lithium-ion batterysystem. This removable power pack is mounted in the down tube, providing thecenter of gravity necessary for trail riding and urban street riding. Each batterytakes 3 to 4 hours to charge using the Smart Charger system and also comeswith a battery status level indicator on both the battery and the IC DashboardDisplay. Thanks to the latest lithium-ion technologies and our engineered BatteryManagement Control System, these batteries are built for high durability and staminaduring those uphill climbs.Every Pro Ride battery is carefully manufactured and tested to ensure the highestdegree of quality. Each Li-ion cell is individually circuit protected and controlled tomaximize performance, reliability and ease of system diagnosis. The battery status(charge level) of the battery can be found on both the battery and the InformationCenter Dashboard.The Li-ion battery should always be stored for extended periods of time at 50% orgreater charge level.CAUTION: To avoid damage to your bicycle’s battery: Please read the instructions and check the battery before using the bicycle forthe first time. Do not let the battery freeze. Never recharge a frozen batteryCAUTION: The battery container should never be opened, as electric shock mayresult. Contact your authorised dealer should you suspect a battery malfunction.1213
TRANSPORTThe battery packs are subject to the Dangerous Goods Legislation requirements.Private users can transport battery packs by road without further requirements.When being transported by commercial users or third parties (e.g. via air transportor forwarding agency), special requirements on packaging and labelling must beobserved (e.g. ADR Regulations). For preparation of the item being shipped, anexpert for hazardous material can be consulted as required. Dispatch battery packsonly when the housing is undamaged. Tape or mask off open contacts and packup the battery pack in such a manner that it cannot move around in the packaging.Please also observe possibly more detailed national regulations. In case ofquestions concerning transport of the battery packs, please refer to an authorisedbicycle dealer. Bicycle dealers can also provide suitable transport packaging.DISPOSALBattery packs, accessories and packaging should be sorted forenvironmental-friendly recycling. Do not dispose of the battery packs intohousehold waste!Defective or used battery packs/batteries, must be collectedseparately and disposed of in an environmentally correct manner.Please return battery packs that are no longer usable to an authorisedPolaris eBike dealer.INSTALLING ANDREMOVING THE BATTERYInstallation:Step 1In-Frame ModelsInstalling:1. Connect internal battery connectorlocated inside battery compartment,to the battery and lock the connectorin place with the 2 metal prongs.2. Gently place battery inside batterycompartment until the battery issecurely in the compartment.3. Seal and lock the battery in placeusing the supplied key.Step 24. Turn ON battery5. Turn ON displayRemoving:1. a) Turn OFF displayb) Turn OFF battery2. Unlock the battery container withthe supplied key.3. Unlock the 2 metal prongs thatsecure the battery connectors.Step 34. Disconnect battery from adaptorlocated inside frame.1415
Smart BATTERY CHARGERCHARGING THE BATTERYWARNING! To avoid the risk of serious injury or property damage, observe allcautions and warnings outlined in the Safety section at the front of this manualwhen charging the battery.IMPORTANT: Your electric bicycle battery is delivered in a partially chargedstate. FULLY CHARGE UNIT FOR A FULL 6-8 HOURS BEFORE YOUR FIRST RIDE.Notes: We strongly recommend charging your battery after each ride in temperatures above0 C Avoid locations with limited ventilation.5. Charging LED IndicatorsBatteryChargerGreen solid LED Connected to AC powerBatteryRed 0-30%, Yellow 30-60%,Green 60-100%, lights will appear solidonce charge is complete.I.C. Display5 bars Full chargeSince the battery does not have a memory, it is not necessary to completely dischargethe battery before charging it again.The battery charger has a built-in shut-off feature when fully charged.IMPORTANT: Always make sure the display and the main battery power switchare turned OFF before charging or removing the battery.CAUTION: The battery container should never be opened. Doing so will void thewarranty.1. Make sure the display and the main battery power switch are in the off position.2. Battery can be charged in or out of the frame.6. When charging is complete, unplug the charger from the wall, as well as fromthe bicycle.Approximate Battery LifeIf used in accordance with the guidelines in this manual, the Li-Ion battery has anexpected life span of approximately 500 cycles for optimal use.3. Connect the battery charger to the AC power outlet.IMPORTANT: FULLY CHARGE BATTERIES BEFORE FIRST USE.Li-Ion (Lithium-Ion) batteries must be fully charged immediately when they arereceived and after each use. Optimal Li-Ion battery performance is reached after3-4 charging cycles.4. Connect the battery charger to the charging outlet located on the frame ordirectly to the battery.1617
DISPLAY – INFORMATION CENTER DASHBOARDIC Dashboard Control InstructionsPress power button ON the battery, then turn ON ICDashboard display.Press the UP or DOWN buttons to scroll up or down untilthe desired level is reachedSpeed 3 assist modeUtility 2 assist modeEco 1 assist modeThe IC Dashboard provides key riding information necessary for every rider.It displays speed, odometer, trip time, battery status and regeneration status.The display flashes REGEN whenever the motor is in regenerative function. Mostimportantly, EVantage has built-in software to automatically self diagnose itself. Itinforms the rider that troubleshooting may be required by displaying fault codes onthe IC dashboard should there ever be a motor, battery or display issue. The displayitself was built to be small in size, light in weight, and rain proof. The LED backlightallows for night time use of the display.ECO, UTILITY, AND SPEED ASSISTANCE LEVELSWhen the system is OFF, you are riding a conventional bicycle. To activateassistance, turn the system ON. The system activates at SPEED 3 level mode anddisplays current gear selection.Note:The console automatically switches OFF after 30 minute of inactivity.Warning SignalsWARNING Icon:In the event of a technical issue, the WARNING icon will display along with thefault code in questionREGEN–1–2km/h MPH-1 Perpetual Arc Regeneration / Active Trail– 2 Perpetual Arc Regeneration / Active TrailTo change the display from kilometres per hour to miles perhour, press, hold and release the UP button for 3 secondsand release.To scroll from odometer to trip distance and vice-versa,press (i) for 3 secondsOdom OdometerTrip Timed distance (automatically resets to zerowhen the eBike is turned OFF)To turn the LCD Backlight on/off, press and hold the“ ” button for 3 seconds*Note: When power on main battery is turned on, the current gear selectionwill be displayed on the IC dashboardIMPORTANT: If there is motor vibration felt during operation, this is due to the bikebeing in an inappropriate gear for the riding terrain, or weak pedal cadence.To correct adjust gear accordingly and increase pedal cadence.Empty Battery WarningIn the event the battery charge level becomes discharged, the empty battery iconwill flash before the motor turns OFF automatically.1819
REGENERATION MODEACTIVE ARCREGENERATIONRegeneration automatically activates when using the brakesor when pedaling above certain speeds in all modes.Pedelec: above 21 MPH(speed-pedelec): above 29 MPHPERPETUAL ARC When using the negative modes –1, –2, the motor acts as aREGENERATION generator and recharges itself while the rider is pedaling onflat or downhill. The motor will automatically provide pedal(PAR)assistance should the terrain require it. Using either PARmodes, the motor will be generating some resistance tocreate the wattage to recharge the Pro Ride Battery–1 Perpetual ARC Regeneration (PAR):The motor regenerates up to 50W.–2 Perpetual ARC Regeneration (PAR):The motor regenerates up to 100W.Note:REGEN will appear on the display when the battery is chargingMOTOR – BIOSYNC MOTOR TECHNOLOGYBioSync pedal assistance reads the power output of a rider resultingin a variable wattage motor system designed to provide the torquewhen climbing hills or conserve power for longer distance ranges.Feel the responsive pedelec power at your feet with BioSync’s pedalassistance.There are 5 different assistance settings to choose:ASSISTANCE LEVEL3: (Speed mode)2: (Utility mode)1: (Eco mode)–1: (Perpetual ARC Regeneration)Active Trail–2: (Perpetual ARC Regeneration)Active TrailPEDELEC SPEEDRANGE**Up to 20/25 mph*Up to 15 mphUp to 12 mphN/A20 miles35 miles50 milesN/AN/AN/ANote: Does not include Fat tire eBikes range which is up to 30miles in Mode 1*Depends on model.** Depends on weight, terrain and weather conditions.Perpetual RegenerationOur preferred riding mode is Regeneration mode (-1, -2) because a rider canregenerate power to the battery when pedaling, braking or speeding over 21/29MPH when going downhill. When going uphill, the DuoDrive motor will assistthe rider creating the perfect balance between decline regeneration and inclineacceleration. An additional feature is the Back-Pedal Regen, which allows therider to regen and slow down in curves by doing a short backpedal movement andcreating Regen on-demand.ACTIVE TRAIL TECHNOLOGYAutomatically delivers power when needed for acceleration up hills, and adjustsback to regeneration on flat or downhill.BACK PEDAL REGENThis electronic back pedal braking feature is utilized for slowing down the bike andcapturing the power in the system to recharge the battery.20Gear Speed TechnologyThe future of shifting gears on an eBike has arrived. At Polaris, we like speed andwe believe shifting gears should be an integral part of the speed acceleration anddeceleration process. Each gear on a Polaris eBike is programmed to provide theappropriate torque or acceleration based on the riding terrain and riding style. Asyou start pedaling, the burst of speed pickup is felt with each gear change to get youmoving fast. BioSync pedal assistance is our proprietary cadence sensor which readsthe cadence speed and power output. The instant pedal responsiveness is designedto provide the torque when climbing hills or conserve power for longer distancesINFLUENCES ON THE OPERATING RANGEThe operating range depends on many factors, such as:– Assistance level– Gear-switching ability– Bicycle tires and tire pressure,– Age and condition of the battery pack– Route profile (inclines) and road or path conditions and surfaces– Head wind and ambient temperature– Weight of the eBike, rider and equipment/luggage21
Motor and rear tire replacementReplacing the Rear TireStep 1Unfasten the two quick-disconnectcables connecting to the motorlocated on the rear chain stays.Step 2Remove safety plate on both sidesand rear derailleur.Step 3Loosen axle nuts on both sides.Carefully remove entire wheel fromrear drop outs.Step 4Perform needed repairs and reverseprocess. Be sure to install hardwarewith the correct torque settings asprovided.2223
TORQUE SPECIFICATIONSPro Ride Battery PackModel # EV010PRODUCTTORQUEDESCRIPTION SPECIFICATIONPRODUCTTORQUEDESCRIPTION SPECIFICATIONStem steerertube45 in-lbf (5 Nm)Rear derailleur70-88 in-lbf (8-10Nm)Stem handlebar45 in-lbf (5 Nm)Front wheel axle105 in-lbf (12 Nm)Seat collar55 in-lbf (6.2 Nm)Rear wheel axle133 in-lbf (15 Nm)Seat post saddlerails120 in-lbf (13.5Nm)Shifter25-30 in-lbf(2.8-3.4 Nm)Bottom bracket355-445 in-lbf(40-50 Nm)Head light26-45 in-lbf(3-5 Nm)Crank bolts336-363 in-lbf(38-41 Nm)Tail light9-18 in-lbf (1-2 Nm)Chain ring bolts104 in-lbf (12 Nm)Water bottle bolts 35 in-lbf (4 Nm)Disc brakecalliper bolts53 in-lbf (6 Nm)Kick stand bolt89 in-lbf (10 Nm) ETL/CE listed Smart batterychargerDisc brake rotorbolts35 in-lbf (4 Nm)Fender bolts35 in-lbf (4 Nm) Input: 100-240VAC, 50/60Hz, 1ABrake levers35 in-lbf (4 Nm)Fender stay bolts 35 in-lbf (4 Nm)TECHNICAL SPECIFICATIONS Pedal Assistance motor supportup to 20 MPH or 28 MPHdepending on model Size of Inframe battery: 15 x 4.5x 3.3 inches. The standard batteryversion is available in black, whiteand cream Up to 500 recharge cycle life,before battery diminishes to 80%capacity Battery weight: 9.5 lbs. Battery comes with key to lockonto bikeSmart ChargerModel # EV020 Charging time: max. 3-4h Size: 6 x 3 in Weight: 2 lbs. Output: 12VDC, 4A Indoor use onlyModel # EV040Model # EV030 EVantage Smart Controller 1 Battery version: Inframe On/off button; State of charge isshown directly on the battery packvia 3 color LEDInformation Center Dashboard DuoDrive Motor Rear hub, rated 750W 44V 6Ah Lithium Pro Ride Battery Torque: 40nm nominal / 50nmpeak Motor weight: 13 lbs. Battery status level Diagnostics Size: 3.8 x 1.9 x 1.4 inches Odometer Weight: 1 lbs. Trip time and trip distance The Information Center Display isreplaceable Speedometer Option: MPH or km/h Backlit LCDBioSync cadence sensor and gearModel # EV050 Current output Pedal speed24 Detects gear setting BioSync sensor weight: .1 lbsBioSync cadence gear sensor isreplaceable.25
Frame DimensionsStep over 500 mm (EV501, EV502)Hybrid 470 MM (EV503, EV504, EV505
recommend that you keep the manual handy for future reference. NotE: This is not intended to be a comprehensive repair, service or cycling manual. Please contact your local Polaris /eVantage dealer for your service and maintenance needs. ABoUt thIs MANUAL Throughout this owner’s Manual
