Transcription
Learn and Master Node.jsBy Ben Sparks in collaboration with Pablo Farias NavarroEnroll in our Full-Stack Web Development Mini-Degree to go from zero to professional JavaScriptdeveloper. Zenva Pty Ltd 2018. All rights reserved
Table of ContentsPart 1: Complete Beginner’s Guide to Node.jsWhat is Node.js?Tutorial source codeInstalling Node.jsUp and RunningExternal Files & ModulesCommon UsesHTTP ServerSummaryPart 2: How to Create a REST API with Node.js and ExpressWhat is a REST API?About the source codeNode.js online courseFirst Steps, Use the VerbsCreating a Leaderboard APIDocumentationAll finished, what’s next?Part 3: Node.js Quickies 1 – Working with MySQLWhy you so asynchronous?Part 4: Node.js Quickies 2 – Loading a CSV FileEnroll in our Full-Stack Web Development Mini-Degree to go from zero to professional JavaScriptdeveloper. Zenva Pty Ltd 2018. All rights reserved
Part 1: Complete Beginner’s Guide to Node.jsWhat is Node.js?Node.js is a c engine built to manipulate OS systems that is scripted using JavaScript. TheJavaScript engine is called V8, created by Google, and is the same engine that is used inChromium (the browser technology powering Google Chrome). In simpler terms, it’s a tool towrite server side applications using javascript.Often there can be confusion about what Node.js really is because in some ways it is verysimilar to Ruby, Python, PHP, LUA, or even Erlang. They are all c or c engines with bindingsto a scripting language that can be JIT (Just in Time) compiled. Unlike those however, Node.jsisn’t also the name of the scripting language, but instead creates bindings to javascript.Tutorial source codeYou can download the scripts from this tutorial here.Installing Node.jsThe easiest way to install Node.js is to just click on the “Install” button on the home page or grabthe pre-built installer or binary from the downloads page.Up and RunningOnce you’ve installed Node.js you should have a commandavailable in your terminal orcommand prompt. If you are on Windows, it will also install a Node.js Command Prompt windowinto your start menu. When you start the node executable you will be given a command promptwhere you can type JavaScript code to be evaluated. This is very similar to the console that isfound in the browser developer tools.It’s important to note, that unlike the browser, there is no DOM or even window object to workwith. You will find some familiar things such asandthat are not partEnroll in our Full-Stack Web Development Mini-Degree to go from zero to professional JavaScriptdeveloper. Zenva Pty Ltd 2018. All rights reserved
of the actual JavaScript language, but for the most part it’s core language that you are workingwith.What node does come built in with instead of the window object is an object called “process”. Infact, if you need to exit the node.js REPL (Read Eval Print Loop), then you need to call. In case that it isn’t obvious to you why there is no window object, well, it’sbecause there is no window! Only a process for the executeable that is managed by your OS.There are many useful attributes and methods attached to the process object such as nodeversion, the version of the v8 javascript engine, and environment variables.For now you can play around typing in javascript likeyou’ll want to do most of the time is load external js files and modules.but whatEnroll in our Full-Stack Web Development Mini-Degree to go from zero to professional JavaScriptdeveloper. Zenva Pty Ltd 2018. All rights reserved
External Files & ModulesNode can load external js files, typically you will load a js file to start up your application. Createa file called “script.js”, and put the following code inside.Node.js uses a CommonJS module loading system. Instead of putting all of your code into asingle js file you can load separate files using thekeyword. This is similar in a way toloading files using the script tag in the browser, except that the modules that are required areloaded from within other javascript files, and the script is not executed against the global context(window).There are many modules built in to the node executable for access to the low level things suchas networking and accessing the file system. When you are working with a built in module, youcan simplyit. For those developed by third parties, you need to download the file first.There are thousands of node modules out there, and so there is another program, NPM (NodePackage Manager) that is designed to help find and load them.Common UsesUltimately you can build absolutely any type of application you want using Node.js as the core.Since you have the full power of integrating low level c modules there are no restrictions.Developers have built applications to control drones, MMO Game servers, REST APIs, webbrowsers, you name it. Some of the most common applications that you’ll find (and likely want toEnroll in our Full-Stack Web Development Mini-Degree to go from zero to professional JavaScriptdeveloper. Zenva Pty Ltd 2018. All rights reserved
use Node.js for yourself) are HTTP Servers and build tools for software development(particularly web / javascript development).HTTP ServerThe absolute simplest HTTP server code is listed right on the home page of nodejs.org. Whilethe total basics are great, of course you’re going to want to do something a little morecomplicated and practical. Fortunately, there is a very popular library known as Express that ismeant to give you all the power of a complicated web server, but still make it simple to setupand get running.To install Express all it takes are a few simple steps. Create a folder for your project, or go intoan existing folder. If there isn’t already a node application initialized there, you can create oneusing. The tool will prompt you through a series of questions, you should be able tojust use the defaults for now, and then it will create a package.json file in your folder. This fileserves as the manifest for your application. Once your project has been initialized for node, thenrun:This will not only install the express package in the node modules folder, but adding theflag will add the entry to your package.json file as well. This is important because youcan easily distribute your application and simply reinstall any dependencies, this way you don’thave to store any of your dependencies in source control either. Later, when you want to install,you can simply runinside the folder, it will use the dependencies listed in the file.When developing even simple web pages with HTML5 features, you often need to host them viaa web server rather than simply opening the index.html file in your browser. Ajax requests andother advanced features are blocked from scripts running locally by the browser’s securitysandbox. It’s easy using Express to setup a simple static file server.Those lines will setup express to serve any files within the “public” folder (note, the folderrelative to the script). Any html, images, css, json, txt, etc will all be accessible viaEnroll in our Full-Stack Web Development Mini-Degree to go from zero to professional JavaScriptdeveloper. Zenva Pty Ltd 2018. All rights reserved
. The default page that it will look for is index.html. Now you can loadthings locally without running into cross domain issues (say if you wanted to open a json filelocally).Express is also handy to setup a REST API for your front end development projects. It’spossible to host your back end API of course, but it’s not always the case. Often times if you area front end developer, the service API may not be developed by you, or even using Node.js.This doesn’t have to slow down your development however, you can setup a mock server usingExpress relatively quickly and easily.You can of course respond to all of the HTTP verbs (GET, POST, PUT, DELETE, etc) as wellas use query string parameters and post payloads. This way you can setup the client code toexpect a certain API and simply swap out the host. You can also help out the service developerby letting them know what you are expecting on the front. With Express and Node.js you cancreate a fully featured and robust back end API and also do more traditional server side pagerendering. It just depends on how far you want to take it.SummaryNode.js is such an incredibly powerful tool with infinite possibilities, that we’ve just scratched thesurface of what you can do. If you like JavaScript programming there is no better choiceavailable right now to solve problems.Part 2: How to Create a REST API with Node.jsand ExpressIn this tutorial we will create a RESTful API to access leaderboard information. We’ll be able totrack players and scores for an unlimited number of boards. Whether you are developing agame or even just a website, chances are that you will want some way to work with your dataEnroll in our Full-Stack Web Development Mini-Degree to go from zero to professional JavaScriptdeveloper. Zenva Pty Ltd 2018. All rights reserved
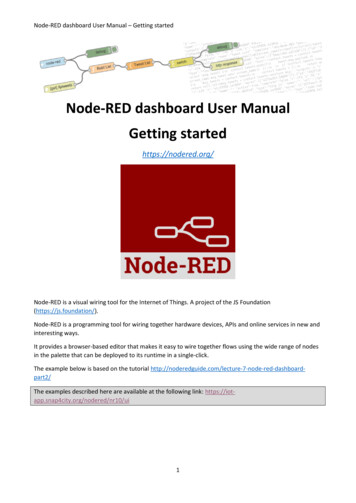
over HTTP. I’m going to show you how you can setup a server for this using node.js andexpress.What is a REST API?Chances are that if you’re interested in creating one, that you are familiar at least a little bit withwhat they are. If however, you are not, I will take a brief moment now to explain them to you.Sadly, a RESTful API is not going to helpyou get better sleep at night. REST standsfor Representational State Transfer and itis the way that web browserscommunicate.rest joke The HTTP protocoluses a set of verbs (GET, POST, PUT,DELETE, etc) to manipulate variousresources. Endpoints in a RESTful systemrepresent specific resources. Instead ofhaving something like“/api/getUserById?id 1234” whichrepresents an action, we can say“/api/users/1234” represents a specificuser. We use the HTTP verbs such as GETto define the action that we want to take ona particular resource.One of the big advantages to doing it this way is that you provide consistent behavior forapplications that will consume your API. You don’t have to provide them extensivedocumentation with your specific domain language, instead they can simply use HTTP as it wasintended.About the source codeAll of the source code to this tutorial is available here: Tutorial Source CodeThroughout the tutorial I will be using features from ES2015 (ES6) which is the latest version ofJavaScript. If you are not familiar with these features, I can recommend this free ebookExploring ES6. I’m only using features that are available in the latest stable version of node.js(as of this writing), nothing that needs to use a 3rd party “transpiler”.Enroll in our Full-Stack Web Development Mini-Degree to go from zero to professional JavaScriptdeveloper. Zenva Pty Ltd 2018. All rights reserved
While we will be exploring how to create a REST API using node.js, I won’t be covering thebasics of using node.js. If you are unfamiliar with those then you may want to check out one ofmy other tutorials the Beginner’s Guide to Node.js or Zenva also has a video course available:Node.js for Beginners.Node.js online courseCheck out Node.js from Zero to Hero on Zenva Academy if you are after a comprehensiveNode.js online course that can get you project-ready with this awesome tool.First Steps, Use the VerbsFirst things first, lets create a folder for our project and intitialize it for node.js using npm.Express is a web framework for node, and thus it can also be installed via npm.Express is a web server framework that provides a much higher abstraction from the raw HTTPcommunication available in node that makes it easy to host a web server. We’ll start by creatingthe “Hello World” of web servers, a simple one that doesn’t even host a web page, just sayshello. Every route in Express is a function that gets passed the request and response asarguments. In this simple example, we are just using the response to send out a plain textstring. It is also capable of sending complete html pages, json data, and more.Enroll in our Full-Stack Web Development Mini-Degree to go from zero to professional JavaScriptdeveloper. Zenva Pty Ltd 2018. All rights reserved
Now we can begin with REST with the most common verb, GET. We need to serve resources,so we’ll do just that, create an array of objects with some arbitrary data in them. We’ve alreadyseen get even in the first example, our resource was just a string “Hello World”. This time we’llget a little more complicated, when we request theurl, we’ll return the entire array.Using path variables, we can also request a specific resource (in this case by id). Path variablesare automatically placed into the params object of the request. Then we can simply use thevalue of that variable to retrieve the element from our array and return it. If we don’t find the itemin our array, we should send a 404 code, the standard HTTP code for “Not Found”. Now if weaccess our site usingwe should get our item.The next most common thing that we want to do with a REST API is create new resources. Thisis done primarily using the POST verb, the standard verb used with HTML forms to submit data.This request should have the same resource location as the entire collection that we used withGET, because we want to add an item to the collection. The data that we want to use topopulate the new item will be located in the body of the request. Here is what our POST requestlooks like in Express.Enroll in our Full-Stack Web Development Mini-Degree to go from zero to professional JavaScriptdeveloper. Zenva Pty Ltd 2018. All rights reserved
In order to make POST requests, we need some sort of client, we can’t just type a url into thebrowser (that’s just GET). For this, you could do several things, one obvious choice is to host awebsite with a good JavaScript client library like jQuery and make all of the requests through theconsole (or even write custom scripts). Another option that IMO is much easier, is to use anapplication like Advanced REST Client which is a Chrome extension (if you don’t use Chrome Iimagine there are others out there). Like I mentioned earlier we also could create a HTML pagewith a form on it, but that is not really the way that we access an API, it’s the way that we wouldbuild a website.Enroll in our Full-Stack Web Development Mini-Degree to go from zero to professional JavaScriptdeveloper. Zenva Pty Ltd 2018. All rights reserved
Another thing about POST requests when it comes to Express is that they can be sent inseveral different formats. The standard html form way to send data is in application/multipartform-data and the Ajax way of doing it is using application/json. Because Express doesn’t wantto make any assumptions about how you consume your requests, it doesn’t include a way toparse json automatically built it (the way that we are going to send data). For that we need toinstall a separate middleware module, the body-parser.After it is installed we can reference it in our file, and tell express to parse the body of POSTrequests into json for us. Finally, when we POST to theurl it should create an itemin our array. Once that is done, you should be able to reference it using the id that you posted.Enroll in our Full-Stack Web Development Mini-Degree to go from zero to professional JavaScriptdeveloper. Zenva Pty Ltd 2018. All rights reserved
We also want to be able to update existing records, and for that we use the PUT verb. This onecan be a little controversial, however you can also choose to support creating resources usingPUT as well. The main idea is that your path is to a specific resource in the collection (by id inour case), if that resource does not exist, you can still consider it like updating an emptyresource. In Express we use the put method and it is essentially the same as using POST. If wecreate a new resource we’ll return status code 201 (Created). If we are updating an existingitem we’ll return 204 (No Response) because any 200 code is successful, and 204 speaks foritself.Finally we want to be able to remove records from the collection. For this we’ll use the DELETEverb. In Express the method is also delete, in this case I’m calling it using bracket notationbecause IDEs tend to dislike the use of the delete keyword. Delete is the same path as the GETrequest, if the item doesn’t exist, we return 404 (Not Found), otherwise we remove it from ourarray and return 204 (No Response) indicating that it has been done and we have nothing elseto say about it.Enroll in our Full-Stack Web Development Mini-Degree to go from zero to professional JavaScriptdeveloper. Zenva Pty Ltd 2018. All rights reserved
Well, there you have it, a complete REST API Ok, well that was a simple and useless one,let’s build a more real world example now, a Leaderboard API for games.Creating a Leaderboard APIWriting all of your code in a single js file is fine for simple demos, but nothing that you want to doin real practice. The first thing that we’ll want to do to build a more serious API is to create afolder structure to separate our code into controllers and services. Services will handle thebusiness logic (validation, etc.) and the actual manipulation of data, and controllers will handleall of the interfacing with the HTTP API. Even though we are going to build a more complex APIthan our first example, I’m still not going to hook it up to a database this time. Because ourservices are separated from the controllers, we can more easily swap out services that interactwith a database rather than in-memory data structures later, all we have to do is keep the sameservice API.Enroll in our Full-Stack Web Development Mini-Degree to go from zero to professional JavaScriptdeveloper. Zenva Pty Ltd 2018. All rights reserved
There are three main objects that we’ll need to create for our leaderboards: Boards, Players,and Scores. Each board will track a ranking for a particular aspect of a game. It might be assimple as just “High Score” or it could be “Most Kills” or in the case of a golf game lowest scoreis better, and we can have a leaderboard for each hole as well as the entire match. We needplayers of course to know the name of who achieved the scores. Of course we also need totrack scores, they are what we use to rank the players on the leaderboard.Let’s start with the players, we’ll create a service class that will handle a collection (array) ofplayers, and all of the methods needed to manipulate that collection. Each element in thecollection needs to have a unique ID that we can use to look it up, if we were using a database,this would be some sort of GUID (globally unique identifier). Luckily, a package for node existsthat can generate these for us: node-uuid. We can install it using npm,and then we’ll reference it in our module. All of the methods in theservice should be fairly self explanatory, we have something for each of the verbs: GET, POST,PUT, and DELETE that the controller will be using. We only want there to ever be one instanceof our player service, so instead of exporting the class itself, we’ll export a new instance of it.Module files in node are only ever executed once, so this effectively gives us a singleton.Enroll in our Full-Stack Web Development Mini-Degree to go from zero to professional JavaScriptdeveloper. Zenva Pty Ltd 2018. All rights reserved
Next we’ll build the controller for the API endpoints for the players. The controller will use areference to the service, like I mentioned earlier, this makes it easy to swap out a completelydifferent service as long as it follows the same interface.In the constructor of our controller class we are going to take a reference to an Express Routerobject that we will hook our endpoints on to. In the registerRoutes method we are going to bindour REST verbs to the appropriate endpoints and corresponding class methods. Inside the classmethods you will see that the code is very similar to our earlier example with “resources”, weaccess the service to actually manipulate data, and these methods just handle the request andresponse.Enroll in our Full-Stack Web Development Mini-Degree to go from zero to professional JavaScriptdeveloper. Zenva Pty Ltd 2018. All rights reserved
Enroll in our Full-Stack Web Development Mini-Degree to go from zero to professional JavaScriptdeveloper. Zenva Pty Ltd 2018. All rights reserved
So far we have just been attaching everything to the main express app. Express however has aconcept of a Router which is basically a “mini-app”. Just like the app, we can define endpointswith all of the same functionality as the main app. We can then tell the main app to use ourrouter for a particular endpoint, and that will become the base path for our router’s endpoints.Enroll in our Full-Stack Web Development Mini-Degree to go from zero to professional JavaScriptdeveloper. Zenva Pty Ltd 2018. All rights reserved
This helps us produce modular code, and makes it so that when we pass in the router to ourcontroller class we don’t have to add the full path to each endpoint.The LeaderBoard service is going to be very similar to the player service. One thing to noteabout the leaderboard is that we need to track the “rankDirection” for each board. This is goingto just be a simple flag that lets us know which way to sort the scores for each board (high scoreis better? or lowest score?).Enroll in our Full-Stack Web Development Mini-Degree to go from zero to professional JavaScriptdeveloper. Zenva Pty Ltd 2018. All rights reserved
The controller for the boards is basically the same as the players controller. We wire up theendpoints to a router, calling the class methods which in turn utilize the service to manipulatethe data. The controller class interacts with the HTTP request and response objects to provideaccess for our verbs.Enroll in our Full-Stack Web Development Mini-Degree to go from zero to professional JavaScriptdeveloper. Zenva Pty Ltd 2018. All rights reserved
Enroll in our Full-Stack Web Development Mini-Degree to go from zero to professional JavaScriptdeveloper. Zenva Pty Ltd 2018. All rights reserved
Again, just like the controller for Players, the Boards controller needs to be added to the mainAPI Router.Then just like before, we’ll add a couple of boards for us to test things with, go back and removethem before you deploy your final service.The Scores are going to be a little different than the other two objects that we have beenworking with so far. Scores are stored in relation to a particular leaderboard, so the scoresservice is going to need a reference to the boards service in order to look up the boardinformation. When we get scores, we’re automatically going to sort the results based on therankDirection of the associated leaderboard. Also, we only need to add a score to the collectionif it is better than the player’s previous score. We’re only going to track their best score (inrelation to the leaderboard) not a history of every game session for that player.Enroll in our Full-Stack Web Development Mini-Degree to go from zero to professional JavaScriptdeveloper. Zenva Pty Ltd 2018. All rights reserved
Enroll in our Full-Stack Web Development Mini-Degree to go from zero to professional JavaScriptdeveloper. Zenva Pty Ltd 2018. All rights reserved
The Scores controller is similar to the other controllers, however because of the relationship tothe leaderboards, the endpoints are based off a specific leaderboard id.Enroll in our Full-Stack Web Development Mini-Degree to go from zero to professional JavaScriptdeveloper. Zenva Pty Ltd 2018. All rights reserved
The scores controller is added to the apiRouter in the same way as all of the other controllers.Again, we’ll add a few test data items so we can try out the scores without having to spend a lotof time adding them via the REST client every time we start the server.You may have noticed when we created the Scores controller, that we had to worry about (andrepeat) the “/leaderboards/:leaderboardId” portion of the route. Routers actually can help here,we can modularize our endpoints much more than they are now. Just like we can add a routerto handle a base url for the app, we can add a router to handle a base url for another router. Wecan refactor our code so that each controller only needs to know exactly about the resource thatit’s providing access to.Enroll in our Full-Stack Web Development Mini-Degree to go from zero to professional JavaScriptdeveloper. Zenva Pty Ltd 2018. All rights reserved
Separating out the version (v1) from the main apiRouter allows us to make “breaking” changesto our API later down the road, and simply increase the version. Since it’s all modular, we cando this even for just some of our resources, we don’t have to update the entire API to v2.Then we refactor the rest of the controllers similarly, now if we wanted to change the endpointfrom “/players” to “/gamers” in v2 we could! Routers are extremely powerful this way, and reallyhelp make your API be robust and forward thinking.DocumentationA large part of a successful API is being well documented. Generally as programmers however,we don’t really enjoy writing documentation. Plus, if we write just a markdown file, it can quicklybecome stale and need to be updated. On top of that, having static documentation isn’t thatgreat, the user still needs to use something like the Advanced REST Client to interact and tryout the API. It would be great to have the documentation be interactive, so that everything youneed to use an API is right there, and easy to follow. Fortunately, a tool has been created thatwill do this for you! It’s called Swagger, and while there are likely others, it’s one of the morepopular tools.Let’s start out by installing the node.js swagger tools.Now we need to configure our web app to use the swagger tools. They are a set of middlewarefunctions that we can pass to the express application.Enroll in our Full-Stack Web Development Mini-Degree to go from zero to professional JavaScriptdeveloper. Zenva Pty Ltd 2018. All rights reserved
Swagger uses a JSON configuration to describe our API to it so that it can build thedocumentation. There is extensive documentation on the Swagger Spec that you can read toreally flesh out a great service, there is also an online editor with examples that can help you getgoing more quickly. I used the examples to create a basic configuration for our API. I startedwith just the first GET request for the players collection.Enroll in our Full-Stack Web Development Mini-Degree to go from zero to professional JavaScriptdeveloper. Zenva Pty Ltd 2018. All rights reserved
Enroll in our Full-Stack Web Development Mini-Degree to go from zero to professional JavaScriptdeveloper. Zenva Pty Ltd 2018. All rights reserved
You can see that this is much nicer already than having to deal with the Advanced REST Clientgenerically, or interacting via a javascript library (if you’ve been doing that). Instead now wehave a beautiful website where we can just click a button to try our API live and gainunderstanding of how it is used.After that we simply need to go through and add configuration for each of our API endpointsuntil we have a fully documented service that looks like this.Enroll in our Full-Stack Web Development Mini-Degree to go from zero to professional JavaScriptdeveloper. Zenva Pty Ltd 2018. All rights reserved
Swagger has done all the work of creating a detailed and easy to use documentation site. Theusers of your API will surely appreciate this and consequently your API is more likely to gainpopularity and be adopted by the community.The online editor for Swagger actually has the capability of generating code from thedocumentation configuration files. Instead of building out the API and then documenting it likewe have here, next time you could try describing the API to the documentation and then lettingSwagger generate a Express (and others) based application for you!All finished, what’s next?Now we have a fully functional Leaderboard API, the next obvious step would be to wire up anapplication to use it. Additionally there are a few things that might be a high priority left such asAuthentication and Authorization using API keys, or wiring up the services to persist to adatabase rather than running in memory. You could add other fun features to the leaderboards,like user avatars, achievements, or even support multiple games.I’ll leave those things up to you to implement, you may have more ideas of your own. Pleasefeel free to leave a comment about your ideas, or let me know how and where you used thistutorial (I like to play games too!).Enroll in our Full-Stack Web Development Mini-Degree to go from zero to professional JavaScriptdeveloper. Zenva Pty Ltd 2018. All rights reserved
Part 3: Node.js Quickies 1 – Working with MySQLIn this tutorial I’ll give you a quick overview on how to work with MySQL and Node.js.Firstly, you need to include the mysql package in your package.json file, under “dependencies”.Make sure you run “npm install” to download all your project’s dependencies.Like with many things in life, you start by establishing a connection:This is how you can select data:How about updating data:Enroll in our Full-Stack Web Development Mini-Degree to go from zero to professional JavaScriptdeveloper. Zenva Pty Ltd 2018. All rights reserved
Why you so asynchronous?The main difference between working with MySQL in Node.js and other web applicationtechnologies such as PHP, is that in Node these calls are asynchronous. In PHP, once you do aquery, the script execution will stop until the database has responded to the query. In Node, onthe other hand, the query is an asynchronous call, so the script keeps on going.If you are doing many queries and the asynchronous nature of it becomes too complex it’s worthlooking into using Promises. I’ll cover promises using the Q package in another tutorial.You c
Part 1: Complete Beginner’s Guide to Node.js What is Node.js? Node.js is a c engine built to manipulate OS systems that is scripted using JavaScript. The JavaScript engine is called V8, created by Google, and is the same engine that is used in Chromium (the browser technology