Transcription
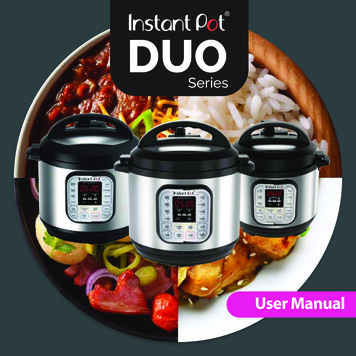
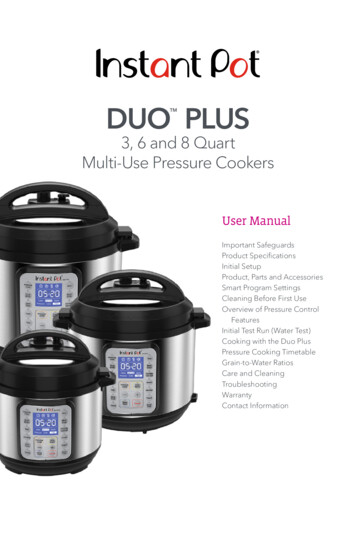
DUO PLUSTM3, 6 and 8 QuartMulti-Use Pressure CookersUser ManualImportant SafeguardsProduct SpecificationsInitial SetupProduct, Parts and AccessoriesSmart Program SettingsCleaning Before First UseOverview of Pressure ControlFeaturesInitial Test Run (Water Test)Cooking with the Duo PlusPressure Cooking TimetableGrain-to-Water RatiosCare and CleaningTroubleshootingWarrantyContact Information
Welcome to the world of Instant cooking.Thank you for welcoming us into your kitchen.Having families ourselves, we developed the Instant Pot Duo Plus pressurecookers to allow busy families and professionals alike to cook healthy,delicious meals more easily and in less time.We have partnered with chefs, authors and bloggers to compile a collectionof recipes that we hope you enjoy!Happy cooking,Robert J. WangFounder and Chief Innovation OfficerDownload the Instant Pot App Original Recipes New User Tips Getting Started Videos2
Table of ContentsIMPORTANT SAFEGUARDS. 5Special Cord Set Instructions.10Product Specifications.10Initial Setup. 11Product, Parts and Accessories. 12Control Panel. 15Smart Program Settings. 17Adjust and Save Pressure Cooking Temperature.17Adjust and Save Pressure Cooking Time.17Adjust and Save Non-Pressure Cooking Temperatures.17Adjust and Save Non-Pressure Cooking Time.17Cancel and Standby Mode.18Turn Sound On/Off.18Adjust Temperature Scale: Fahrenheit and Celsius.18Set a Delay Start Timer.18Automatically Keep Food Warm After Cooking.19Reheat Food or Keep Warm for Long Periods.19Reset Smart Programs to Factory Default Settings.19Status Messages.20Cleaning Before First Use. 21Overview of Pressure Control Features.22Pressure Cooking Lid . 22Quick Release Button. 23Steam Release Valve. 24Anti-Block Shield. 25Sealing Ring. 26Float Valve. 273
Table of ContentsCondensation Collector. 28Cooking with the Duo Plus.29Introduction to Pressure Cooking . 29Depressurizing the Cooker (Venting Methods). 31Natural Release (NR).31Quick Release (QR).3110-Minute NR. 32Initial Test Run (Water Test).33Using Pressure Cooking Smart Programs.34Pressure Cooking Settings. 37Pressure Cooking Tips. 39Pressure Cooking Timetable. 41Grain-to-Water Ratios.42Using Non-Pressure Cooking Smart Programs.43Slow Cook. 44Sauté . 45Yogurt. 46Sous Vide. 48Sous Vide Cooking Guidelines. 50Care and Cleaning. 52Troubleshooting.54Warranty. 57Contact Information. 594
IMPORTANT SAFEGUARDSWhen using electrical appliances, basic safety precautions should always befollowed:1.READ THE GETTING STARTED GUIDE AND ALL INSTRUCTIONS,SAFEGUARDS, AND WARNINGS BEFORE OPERATING THE APPLIANCE.FAILURE TO FOLLOW THESE SAFEGUARDS AND INSTRUCTIONS MAYRESULT IN INJURY AND/OR PROPERTY DAMAGE.2.Use only the Instant Pot Duo Plus lid with the Instant Pot Duo Plus pressurecooker base. Using any other pressure cooker lids may cause injury and/ordamage.3.To reduce the risk of pressure leakage, cook only in an authorized stainlesssteel Instant Pot inner pot. DO NOT use the appliance without the removableinner pot installed.4.Always operate the appliance on a stable, non-combustible, level surface.5.Do not use the appliance for anything other than its intended use. Failure tofollow these instructions may result in injury or property damage.6.For household use only. Do not use outdoors. Not for commercial use.7. CAUTION Do not place the appliance on or in close proximity to a hotgas or electric burner, or a heated oven. Heat from an external source willdamage the appliance. Failure to follow these instructions may result in injuryor property damage.8. CAUTION Do not use the appliance near water or flame. Keep out ofdirect sunlight. Failure to follow these instructions may result in injury orproperty damage.9. CAUTION Do not touch hot surfaces. Only use side handles for carryingor moving. Extreme caution must be used when moving the appliancecontaining hot liquids. Do not move the appliance when it is under pressure.10. The cooker base contains electrical components. To avoid electrical shock, donot put liquid of any kind into cooker base, and do not immerse power cord,plug, or the appliance in water or other liquid. Do not rinse the applianceunder tap.11. CAUTION Do not fill over PC MAX — 2/3 as indicated on the inner pot.When cooking foods that expand during cooking such as rice or driedvegetables, do not fill the inner pot over —1/2 line. Overfilling may cause a riskof clogging the steam release pipe and developing excess pressure.WARNINGRead this manual carefully and completely, and retain for future reference.Failure to adhere to safety instructions may result in serious injury or damage.5
IMPORTANT SAFEGUARDS12. WARNING This appliance cooks under pressure. Inappropriate use mayresult in burns, injury and/or property damage. Make certain the appliance isproperly closed before operating. Refer to Pressure Control Features—Pressure Cooking Lid.13. When cooking meat with skin (e.g. sausage with casing), the skin can swellwhen heated. Do not pierce the skin while it is swollen; this could result inscalding injury.14. CAUTION When pressure cooking food with a doughy or thick texture, ora high fat/oil content, contents may splatter when opening the lid. Pleasefollow recipe instructions for pressure release method. Refer to Depressurizingthe Cooker (Venting Methods).15. CAUTION Before each use, check the steam release valve/handle, steamrelease pipe, anti-block shield and float valve for clogging. Failure to do somay result in injury or property damage.16. DANGER Do not open the appliance until it has depressurized and allinternal pressure has been released. If the float valve is still up and/or the lid isdifficult to open, this indicates that the appliance is still pressurized—do notforce it open. Any pressure in the appliance can be hazardous. Refer toDepressurizing the Cooker (Venting Methods) for information on releasingpressure. Opening appliance while it is still pressurized may lead to suddenrelease of hot contents and may cause burns or other injuries.17. Do not use this appliance for deep frying or pressure frying with oil.18. Do not lean over or place your hands or face over the steam release valve/handle or float valve when the appliance is in operation or has residualpressure. Do not touch the metal portion of the lid when the appliance is inoperation; this could result in injury.19. Do not cover or obstruct the steam release valve/handle and/or float valvewith cloth or other objects. Obstructing the steam release valve/handle and/orfloat valve can create a safety issue and may cause injury.20. Turn the appliance off if steam escapes from the steam release valve/handleand/or float valve in a steady stream for longer than 3 minutes. There maybe residual pressure in the appliance. Allow the appliance to depressurizenaturally or release all excess pressure before opening. For more informationon how to release pressure, refer to Depressurizing the Cooker (VentingMethods).WARNING6Read this manual carefully and completely, and retain for future reference.Failure to adhere to safety instructions may result in serious injury or damage.
IMPORTANT SAFEGUARDS21. Turn the appliance off if steam escapes from the sides of the lid and ensuresealing ring is properly installed. Overview of Pressure Control Features—Sealing Ring for more information.22. To disconnect, select Cancel, then remove plug from power source.23. Unplug from the outlet when not in use, as well as before adding or removingparts or accessories, and before cleaning. To unplug, grasp the plug and pullfrom the outlet. Never pull from the power cord.24. Regularly inspect the appliance and power cord. Do not operate theappliance if the power cord or plug is damaged, or after the appliancemalfunctions or is dropped or damaged in any manner. For assistance, contactCustomer Care at support@instantpot.com or 1-800-828-7280.25. CAUTION Do not let the power cord hang over edges of tables orcounters, or touch hot surfaces or open flame, including the stovetop.26. CAUTION Spilled food can cause serious burns. A short power-supplycord is provided to reduce the hazards resulting from grabbing, entanglementand tripping. Keep the appliance and cord away from children. Never drape the power cord over edges of tables or counters. Never use below-counter power outlets, and never use with anextension cord.27. Intended for countertop use only. Keep the appliance on a stable, heatresistant platform. Do not place on anything that may block the vents on thebottom of the appliance. Do not place on a hot stove.28. CAUTION Do not use any accessories or attachments not authorized byInstant Brands Inc. The use of attachments not recommended by themanufacturer, may cause a risk of injury, fire or electric shock.29. CAUTION Before inserting the inner pot into the appliance, clean theouter surface of the inner pot and the heating element located on the innersurface of the outer pot with a clean, dry cloth. Ensure they are dry and free offood debris.30. Do not attempt to repair, replace, or modify components of the appliance, asthis may cause electric shock, fire or injury, and will void the warranty.WARNINGRead this manual carefully and completely, and retain for future reference.Failure to adhere to safety instructions may result in serious injury or damage.7
IMPORTANT SAFEGUARDS31. Do not tamper with any of the safety mechanisms, as this may result in injuryor property damage.32. Do not use the appliance in electrical systems other than 120 V/60 Hz forNorth America. Do not use with power converters or adapters.33. This appliance is NOT to be used by children or by persons with reducedphysical, sensory, or mental capabilities. Close supervision is necessary whenany appliance is used near children and these individuals. Children should notplay with this appliance.34. To prevent personal injury and damage to the appliance, only replace thesealing ring with an authorized Instant Pot sealing ring.35. The use of accessory attachments not recommended by the appliancemanufacturer may cause injuries.36. Proper maintenance is recommended after each use. Refer to Care andCleaning. Let the appliance cool to room temperature before cleaning orstorage.37. Never connect this appliance to an external timer switch or separate remotecontrol system.38. CAUTION DO NOT touch accessories during or immediately aftercooking. To avoid personal injury, Always use oven mitts when removing accessories, and to handle theinner pot. Always place hot accessories on a heat resistant surface or cookingplate. Use extreme caution when disposing of hot grease.Failure to follow these instructions may result in serious injury or propertydamage.39. Do not leave the appliance unattended while in use.40. CAUTION Extreme caution must be used when the inner pot contains hotoil, hot food, or hot liquids. Improper use, including moving the cooker base,may result in personal injury. Do not move the appliance while it is in use.41. Oversized foods and/or metal utensils must not be inserted into the inner potas they may cause risk of fire and/or personal injury.42. Do not store any materials in the cooker base or inner pot when not in use.WARNING8Read this manual carefully and completely, and retain for future reference.Failure to adhere to safety instructions may result in serious injury or damage.
IMPORTANT SAFEGUARDS43. Do not place any combustible materials in the cooker base or inner pot, suchas paper, cardboard, plastic, Styrofoam or wood.44. Do not use the included accessories in a microwave, toaster oven, convectionor conventional oven, or on a ceramic cooktop, electric coil, gas range, oroutdoor grill.45. The removable inner pot can be extremely heavy when full of ingredients.Care should be taken when lifting the inner pot from the cooker base to avoidburn injury.46. Use caution when removing the lid. Heat and steam escape as soon as the lidis removed. Never place your face, hands or exposed skin over the applianceopening where heat and steam escape when removing the lid.SAVE THESE INSTRUCTIONSWARNINGRead this manual carefully and completely, and retain for future reference.Failure to adhere to safety instructions may result in serious injury or damage.9
IMPORTANT SAFEGUARDSWARNINGTo avoid injury, read and understand instruction manual before using this machine.WARNINGElectrical shock hazard. Use grounded outlet only. DO NOT remove ground. DO NOT use an adapter. DO NOT usean extension cord. Failure to follow instructions can cause electric shock and/or death.WARNINGTHE FAILURE TO FOLLOW ANY OF THE IMPORTANT SAFEGUARDS AND THE IMPORTANTINSTRUCTIONS FOR SAFE USE IS A MISUSE OF YOUR APPLIANCE THAT CAN VOID YOUR WARRANTYAND CREATE THE RISK OF SERIOUS INJURY.Special Cord Set InstructionsAs per safety requirement, a short power supply cord (0.6 m to 0.9 m / 24 in. to35 in.) is provided to reduce the hazards resulting from entanglement and tripping.This appliance has a 3-prong grounding plug. To reduce the risk of electric shock,plug the power cord into a grounded (earthed) electrical outlet that is easilyaccessible.Product SpecificationsModel: Duo Plus Mini700 W120 V 60 Hz3 Quart /2.8 Litres8.80 lbs3.99 kgin: 11.5L 10.2W 10.9Hcm: 29.2L 25.9W 27.9HModel: Duo Plus 601000W120 V 60 Hz6 Quart /5.7 Litres11.8 lbs5.37 kgin: 13.4L 12.2W 12.5Hcm: 34L 31W 31.7HModel: Duo Plus 801200W120 V 60 Hz8 Quart /7.6 Litres15.57 lbs7.06 kgin: 14.8L 13.5W 14.5Hcm: 37.6L 34.3W 36.8HModel: Duo Plus Mini V2700 W120 V 60 Hz3 Quart /2.8 Litres8.80 lbs3.99 kgin: 11.5L 10.2W 10.9Hcm: 29.2L 25.9W 27.9HModel: Duo Plus 60 V21000W120 V 60 Hz6 Quart /5.7 Litres12.35 lbs5.60 kgin: 13.4L 12.2W 12.9Hcm: 33.5L 31W 33HModel: Duo Plus 80 V21200W120 V 60 Hz8 Quart /7.6 Litres15.57 lbs7.06 kgin: 14.8L 13.5W 14.5Hcm: 37.6L 34.3W 36.8HWARNING10Read this manual carefully and completely, and retain for future reference.Failure to adhere to safety instructions may result in serious injury or damage.
Initial Setup Read all the Important Safeguards before using the appliance. Failure to readand follow the Important Safeguards may result in damage to the appliance,property damage or personal injury. Use only the Instant Pot Duo Plus lid with the Instant Pot Duo Plus pressurecooker base. Using any other pressure cooker lids may cause injury and/ordamage. Remove all packaging material and accessories from within and around theappliance. Place the appliance on a stable, level surface, away from combustible materialand external heat sources. Do not remove safety warning stickers from lid or rating label from back ofcooker base. Follow Care and Cleaning instructions to clean the appliance before first use.CAUTIONDo not place the appliance on a stovetop. Heat from anexternal source will damage the appliance.Do not place anything on top of the appliance, and donot cover or block the steam release valve or anti-blockshield located on the appliance lid.11
Product, Parts and AccessoriesDuo Plus 3, 6 and 8 Quart Pressure CookersBefore using the Instant Pot Duo Plus, verify that all parts are accounted for.Top of LidSteam Release ValveFloat ValveQuick Release ButtonHandleLid Position MarkerLid FinsInstant Tip: The lid has been designed with lid finsthat fit perfectly inside the handles on the left andright sides of the cooker base to help keep yourcountertop dry!Bottom of LidLocking PinFloat Valve Silicone CapAnti-Block ShieldSteam Release Pipe(beneath anti-block shield)Sealing Ring RackSealing RingIllustrations are for reference only and may differ from the actual product.12
Product, Parts and AccessoriesInner PotStainless Steel Inner PotCooker BaseCondensation RimOuter PotCooker HandlesHeating Element(interior)Control PanelBase Power Socket(rear; 8 Quart is hardwired)Illustrations are for reference only and may differ from the actual product.13
Product, Parts and AccessoriesAccessoriesGlass Lid(Not included with all models of Duo Plus)Sealing Rings ( 2)(1x installed in lid)Steam Rack with Handles(6 and 8 Quart models only)Steam Rack(3 Quart model only)Condensation CollectorDetachable Power Cord(3 and 6 Quart models only)Illustrations are for reference only and may differ from the actual product.14
Control Panel741326651Time DisplayCountdown timer indicates cooking and Delay Start time in hour format:05:20 is 5 hours, 20 minutes.Keep Warm timer counts up.Display also shows Status Icons as described below, as well as Status Messages.2Pressure FieldIndicators illuminate to indicate Low or High pressure level.3Less – Normal – MorePressure cooking: 3 preset time options.Non-Pressure cooking: 3 temperature levels.4LED IndicatorsIlluminate to indicate the active Smart Program and settings selected.15
Control Panel5Smart Program SettingsPressure LevelKeep Warm / buttonsDelay StartCancelSee Smart Program Settings for more information.6Smart ProgramsPressure Cooking: Pressure Cook Soup/Broth Meat/Stew Cake (Not available on Duo Plus Mini) Egg Rice Bean/Grain (Not available on Duo Plus Mini) Porridge/Oatmeal Steam SterilizeNon-Pressure Cooking: Slow Cook Sauté Yogurt Sous Vide Keep Warm7Status IconsElement is heatingPressure cooking in progressKeep Warm On/OffSound OnSound Off16
Smart Program SettingsAdjust and Save Pressure Cooking TemperatureSelect a pressure cooking Smart Program, then press Pressure Level to togglebetween High (10.2–11.6 psi) and Low (5.8–7.2 psi) pressure levels.Note: A higher pressure results in higher cooking temperature.When cooking begins, the pressure level you selected is saved and rememberedthe next time the Smart Program is selected.The cooking temperature may be adjusted at any time during pressure cooking bypressing Pressure Level, but adjustments made after cooking has begun will notbe saved.Adjust and Save Pressure Cooking TimeSelect a pressure cooking Smart Program, then press the Smart Program buttonagain to cycle through the Less, Normal and More cooking time options.If desired, use the / buttons to further customize the time.When cooking begins, your customizations are saved and remembered the nexttime the Smart Program is selected.The cooking time may be adjusted at any time during pressure cooking, butadjustments made after cooking has begun will not be saved.Adjust and Save Non-Pressure Cooking TemperaturesSelect a non-pressure cooking Smart Program, then press the Smart Programbutton again to cycle through the Less, Normal and More cooking temperaturelevels.When cooking begins, the temperature level is saved and remembered the nexttime the Smart Program is selected.The cooking temperature may be adjusted at any time during non-pressurecooking by pressing the Smart Program button, but adjustments made aftercooking has begun will not be saved.Adjust and Save Non-Pressure Cooking TimeSelect a non-pressure cooking Smart Program, then use the / buttons toadjust the cooking time.The cooking time may be adjusted at any time during non-pressure cooking, butadjustments made after cooking has begun will not be saved.17
Smart Program SettingsCancel and Standby ModeWhen the cooker is plugged in but not in operation, the display reads OFF toindicate Standby mode.Press Cancel to stop a Smart Program at any time. The cooker returns toStandby mode.Turn Sound On/OffSound On: When in Standby, press and hold button until displayindicates S On.Sound Off: When in Standby, press and hold button until displayindicates SOFF.Note: Audible safety alerts (beeps) cannot be turned off.Adjust Temperature Scale: Fahrenheit and CelsiusPress both and buttons simultaneously twice. Default temperature unit will bedisplayed.Press the button repeatedly, to toggle between F and C.Note: Temperature is only displayed within the Sous Vide Smart Program.Set a Delay Start TimerDelay Start can be set to a minimum of10 minutes or a maximum of 24 hours.1. Select a Smart Program and adjust the settings as you desire, then pressDelay Start.Note: Once Delay Start has been selected, there is no way to return to the cookingsettings. To adjust Smart Program settings, press Cancel and enter new selections.2. When the hours field flashes, use the / buttons to adjust the delay time.E.g., 02:00 indicates that cooking will start after 2 hours.3. Press Delay Start again to toggle to the minutes field and follow the sameprocess as the previous step.4. Delay Start begins automatically after 10 seconds and the timer counts down.5. When Delay Start ends, the Smart Program begins, and the display indicates On.Delay Start is not available with the Sauté, Sous Vide or Yogurt Smart Programs.18
Smart Program SettingsAutomatically Keep Food Warm After CookingThe Keep Warm setting turns on automatically after cooking on all SmartPrograms except Sauté, Sous Vide and Yogurt.When automatic warming begins, the timer begins counting from 00:00 toindicate the time passed, up to 10 hours.To turn automatic warming off, press Keep Warm. The LED above the button dimsto indicate that it is off.Reheat Food or Keep Warm for Long PeriodsWhen in Standby, select Keep Warm. Press Keep Warm again to cycle throughLess, Normal and More warming temperature levels.Use the / buttons to set a warming timer up to 99 hours and 50 minutes.Keep Warm begins automatically after 10 seconds.When Keep Warm completes, the display indicates End.Reset Smart Programs to Factory Default SettingsReset Individual Smart ProgramsWith the cooker in Standby mode, press and hold one Smart Program button untilthe cooker returns to Standby and displays OFF.The Smart Program’s pressure level, cooking time and temperature are restored tothe factory default setting.Reset All Smart ProgramsWith the cooker in Standby mode, press and hold Cancel until the cooker beeps.All Smart Program pressure levels, cooking times and temperatures are restoredto the factory default setting.19
Status MessagesIndicates that the cooker is in Standby mode.Indicates that the pressure cooker lid is not properly secured ormissing.Indicates that the cooker is in Preheat mode.Display timer indicates one of the following: When a Smart Program is running, the display timer countsdown to indicate the cooking time remaining in the SmartProgram. When Delay Start is running, the display timer counts downuntil the Smart Program begins. When Keep Warm is running, the display timer counts up toindicate how long food has been warming.Indicates that the Rice Smart Program is running.Indicates that the Yogurt Smart Program is in the pasteurizingcycle (i.e., the Yogurt Smart Program is set to More).Indicates that the Sauté Smart Program has reached cookingtemperature and food may be added to the inner pot.Indicates that a Smart Program has ended and Keep Warm is off.Indicates overheating in the cooking chamber. Refer toTroubleshooting.Indicates that an error has occurred. Refer to Troubleshooting.20
Cleaning Before First UseRemove the inner pot from the cooker base and wash it with hot water and dishsoap. Rinse with warm, clear water and use a soft cloth to dry the outside of theinner pot.Note: The inner pot is dishwasher safe.Wipe the heating element with a soft cloth to ensure there are no stray packagingparticles present before returning the inner pot to the cooker base.Note: Before cooking, always ensure the heating element is clean and dry before insertingthe inner pot into the cooker base. Failure to do so may damage the cooker.The inner pot is an integral part of product safety. Food must be placed in theinner pot, and never directly in the cooker base.To avoid personal injury or damage to the appliance, replace a deformed ordamaged inner pot. Use only authorized Instant Pot inner pots made for thismodel when cooking.CAUTIONWARNINGTo avoid risk of personal injury and/or property damage, as well as damage to thecooker, do not pour food or liquid into cooker base.Do not fill the inner pot higher than the PC MAX — 2/3 (Pressure Cooking Maximum), as indicated on the inner pot.Exercise extreme caution when cooking and venting food such as applesauce, cranberries,pearl barley, oatmeal, split peas, noodles, etc., as these foods may foam, froth, or spatter, andmay clog the steam release pipe and/or steam release valve. Do not fill the inner pot higherthan the — 1/2 line when cooking these foods.21
Overview of Pressure Control FeaturesPressure Cooking LidThe stainless steel lid included is necessary for most cooking processes, andis essential for pressure cooking. Always ensure to use the Duo Plus pressurecooking lid with the Duo Plus cooker base.When plugged in, the cooker plays a jingle when the lid is opened and closed.Open and Remove the LidGrip the lid handle and turn it counter-clockwise to align the symbol on the lidwith thesymbol on the rim of the cooker base, then lift the lid up and off thecooker base.CloseOpenClose the Lidsymbol on the cooker base, and lowerAlign the symbol on the lid with thethe lid onto the track. Turn the lid clockwise until the symbol on the lid alignssymbol on the cooker base.with theClose22Open
Overview of Pressure Control FeaturesThe pressure cooking lid automatically seals for easy pressure cooking, but doesnot lock into place when closed. The lid can be removed during Pre-heating butlocks into place once the cooker has pressurized.Refer to Overview of Pressure Control Features–Float Valve for inform
Feb 11, 2020 · 17. Do not use this appliance for deep frying or pressure frying with oil. 18. Do not lean over or place your hands or face over the steam release valve/ handle or float valve when the appliance is in operation or has residual pressure. Do not touch the metal portion of the lid when the ap