Transcription
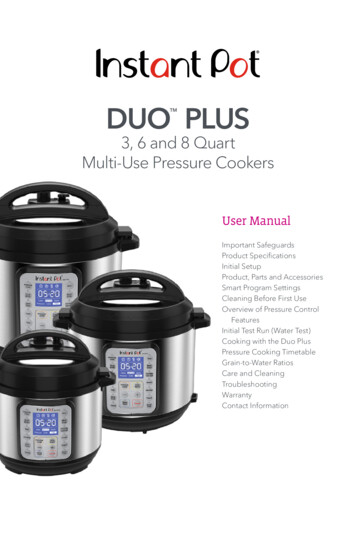
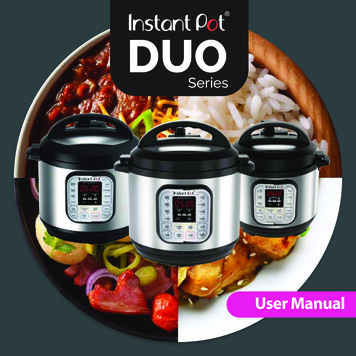
DUOSeriesUser Manual
Table of ContentsImportant SafeguardsOverviewControl and Features2-567 - 11Getting Started12 - 14Pressure Cooking15 - 17Non-Pressure Cooking18 - 21Cooking and Safety Tips22Care and Cleaning23Troubleshooting24 - 26Warranty27 - 28Pictures in manual are for reference only. Please refer to actual product.
Important SafeguardsSAVE THESE INSTRUCTIONSWhen using pressure cookers, basic safety precautions should always be followed.1) Do not touch hot surfaces of pressure cooker. Use side handles for carrying.2) Do not place the cooker on or near a hot gas or electric burner, or in a heated oven.3) Intended for countertop use only.4) Do not use pressure cooker for anything other than intended use.5) Never deep fry or pressure fry in the cooker with oil.6) Do not let cord hang over edge of table or counter, or touch hot surfaces.7) Do not use cooker in electrical systems other than 110-120V /60Hz for North America.8) Do not operate cooker with damaged cord or plug, or after the cooker malfunctionsor has been damaged in any manner.9) Do not open the unit until the cooker has cooled and all internal pressurehas been released. If the float valve is still up or the lid is difficult to turn, it is anindication that the cooker is still pressurized - do not force it open.Please see “Getting Started” pages 12-14.10) For all pressure cooking programs, the total amount of pre-cooked food and liquid inthe inner pot should not pass the 2/3 line. When cooking food that expands duringcooking such as rice, beans or vegetables, food should not pass the 1/2 line.Overfilling may risk clogging the steam release resulting in excess pressure. This may alsocause leakage, personal injuries, or damage to the cooker. These fill level warnings do notapply to non-pressure cooking programs.2Please read this manual carefully and retain for future reference.
Important Safeguards11) Make sure the steam release handle is in the Sealing position during all pressurecooking programs.12) This appliance should not be used by children; by individuals whose physical, sensory ormental abilities prevent safe use of the appliance; or by individuals with limitedknowledge of how to use a pressure cooker. Close supervision is needed when using thisappliance near these individuals.13) Do not immerse the cooker base in water. To protect against electrical shock, do notimmerse the cord, power plug, or cooker in any liquid.14) Always attach plug to the cooker first, then plug cord into the wall outlet. To disconnect,press Cancel, then remove plug from the wall outlet. Unplug from power outletwhen not in use and before cleaning. Allow the cooker to cool before putting on ortaking off parts, and before cleaning.15) For household use only. Not intended for outdoor use.16) Do not attempt to move the pressure cooker when it is operating under pressure orcontaining hot liquids.17) This appliance cooks under pressure. Improper use may result in scalding injuries.Make certain the lid is properly closed before operating. Caution: To reduce the risk ofelectric shock, cook only in removable containers. See “Getting Started” pages 12-14.18) Use of accessories and parts that are not branded Instant Pot nor recommended by theInstant Pot Company may cause the cooker to malfunction. Cook only in Instant Pot stainless steel or ceramic non-stick inner pots for best results. Other brands may nothave the correct curvature to match the heating element.Please read this manual carefully and retain for future reference.3
Important Safeguards19) Be aware that certain foods, such as applesauce, cranberries, pearl barley, oatmeal orother cereals, split peas, noodles, macaroni, rhubarb, or spaghetti can foam, froth,sputter, and clog the steam release. These foods should not be cooked underpressure cooking settings unless as directed in Instant Pot cooker recipes.20) Always check the steam release valve, float valve and anti-block shield for cloggingbefore use.21) Always make sure the sealing ring rack is completely set in the groove on the inside ofthe sealing ring.When in operation or releasing pressure DO NOT placeunprotected skin over the steam release valve.Do not move cooker whenit is in operationDo not force lid open when the float valve is UP.Make sure the float valve is DOWN when you open the lid.4Please read this manual carefully and retain for future reference.
Important SafeguardsWARNING: Spilled food can cause serious burns. Keep appliance and cord away fromchildren. Never drape cord over edge of counter, never use power outlet below counter,and never use with an extension cord.Special Cord Set InstructionsAs per UL safety requirements, a short power supply cord (0.6 m to 0.9 m) is provided toreduce the hazards resulting from entanglement and tripping.This appliance has a 3-prong grounding plug. To reduce the risk of electric shock, plug thepower cord into a grounded (earthed) electrical outlet that is easily accessible.SpecificationsModelModelPowerSupplyDUO MiniIP-DUO60 V3IP-DUO80 V2RatedPowerVolumeInner PotDimensionsProduct DimensionsProductDimensionsWeight3 quart19.8x12.7cm7.8x5 in.ProductDimensions29x25.5x28.5cmWeight3.9 kg1000 W6 quart15.7x 23.9cm6.2 x 9.4 in.33 x 31 x 32 cm13 x 12.2 x 12.6 in.6.75 kg14.8 lbs1200 W8 quart17.5 x 26.4 cm6.9 x 10.4 in37.6 x 33.8 x 36.1 cm14.8 x 13.3 x 14.2 in8.21 kg18 lbs700 W120V 60HzVolumeVolume11.4x10x11.2 in.8.6 lbsPlease read this manual carefully and retain for future reference.5
OverviewLid handleSteam releasehandleFloat valveLidLid positionmarkerLid finAnti-block shieldTo install:Position the anti-blockshield in place andpush downStainless steelinner potCookerhandleExterior potHeating elementControl panel6Cooker baseTo remove:Using your thumb, push the side of theanti-block shield towards the lid rim andlift up with some effort. The anti-blockshield should pop out
Control and FeaturesPerfect cooking resultswith built-in automaticprogramsControl Panel for the DUO SeriesThe control panel of your Instant Pot DUO Mini/60/80 consists of a LEDdisplay,cooking program keys, operation keys, /- keys to adjust time, and aKeep Warm and Cancel key.Note that the Duo Mini does not have the Poultry and Multigrain programs.Cooking program keysPressure indicatorsMode indicatorsTime DisplayLED Display /- keys to adjusttimeOperation Keys.(See next page for details)7
Control and FeaturesControl Panel for the DUO SeriesInstant Pot is a programmed smart cooker that has preset cooking times for different foodingredients and cooking methods. It also remembers your most recent settings per cookingprogram for a more personalized cooking experience. To return to the factory defaultsettings, press Cancel to return the cooker to standby mode displaying OFF, 1) for individualcooking programs reset, press and hold the cooking program key until the cooker beeps, or2) for global reset, press and hold the Cancel key until the cooker beeps.Sound ON/OFFPress and hold the - Keyfor 3 seconds to turnsound OFF.Press and hold the keyfor 3 seconds to turnsound ONThe Pressure Level keytoggles between Highand Low pressuresettings for pressurecooking programsThe Keep Warm key turnsthe Auto Keep Warmfunction ON and OFFThe Cancel key endsa cooking program at anytime, or resets thecooker to factory defaultsettings by pressing andholding this key until thecooker beepsThe Delay Start key setsthe delay time before acooking program starts.The Pressure Level key has no effect on non-pressure cooking programs: Slow Cook, Sauté and Yogurt.8
Control and FeaturesCooking Program lowCookModesSuggested UsesNotes for UsersLessSoup without meat.NormalSoup with meat.MoreRich bone broth.The soup/broth remainsclear due to lack of boilingmotion under pressurecooking.LessSoft texture.NormalVery soft texture.MoreFall-off-the bone meat texture.LessLess soft texture.NormalSoft texture.MoreVery soft texture.LessSoft texture.NormalVery soft texture.MoreFall-off-the-bone texture.LessCorresponds to Low settingin some temperaturecontrolled slow cookers.NormalCorresponds to Mediumsetting in some temperaturecontrolled slow cookers.MoreChoose different modesbased on the meat texturedesired.Choose different modesbased on the bean texturedesired.Choose different modesbased on the meat texturedesired.Non-pressure cookingprogram. You may also usethe Instant Pot glass lid asan option.Corresponds to High settingin some temperaturecontrolled slow cookers.9
Control and FeaturesCooking Program OptionsProgramsRiceSuggested UsesNotes for UsersLessAl dente white rice.NormalNormal texture white rice.MoreSofter texture white rice.Automated cookingprogram. LED displays‘Auto’. The /- keys will notwork in this program.LessWild rice, brown rice, mungbeans, etc.NormalWild rice, brown rice, mungbeans, etc.MoreTough grains or a mixture ofgrains and beans.Program includes 45minutes of warm watersoaking time prior to 60minutes of pressurecooking.LessOatmeal.NormalWhite rice porridge/congee.MoreRice porridge/congee withvarious rices and beans.DO NOT use Quick Releaseas thick liquid will spatterout and block the steamrelease valve. See page 17.LessVegetables.NormalFish and Seafood.MoreMeat.LessSimmering, thickening andreducing liquids.NormalPan searing.MoreStir-frying or browning hoose different modesbased on the type of grainsand the desired texture.Use the steam rackprovided to elevate foodabove the water. Use QuickRelease method to preventfood from overcooking.NEVER have the lid on whensautéing. Maximum time is30 minutes as a safetyprecaution.
Control and FeaturesCooking Program OptionsProgramsYogurtPressureCook1ModesSuggested UsesNotes for UsersLessJiu Niang, a sweet fermentedglutinous rice dessert.Default fermentation time is24:00 hours. You can adjusttime based on your recipe.NormalFermenting milk whenmaking yogurt.‘Yogt’ will be displayed onthe screen whencompleted.MorePasteurizing milk whenmaking yogurt.‘boiL’ will be displayed onthe screen.LessManual programming ofpressure level and cookingtime according to yourfavourite recipes or cookinghabits.Press the Pressure Levelkey to adjust pressurelevels and the / - keys tochange cooking time.NormalMorePoultry and Multigrain cooking programs are not available on Duo Mini.Pressure Cooking Programs:Working Pressure:Low Pressure: 5.8 - 7.2 psi (40 - 50 kPa); High Pressure: 10.2 - 11.6 psi (70 - 80 kPa)Pressure Release Pressure Limit: 15.22psi (105kPa)Working Temperature: 115 C - 118 C (239 F 244 F)Non-Pressure Cooking Programs:Keep Warm function: 63 - 78 C (145 172 F);Slow Cook function: Less mode: 82-87.8 C / 180-190 F; Normal mode: 87.8-93 C / 190-200 F;More mode: 93-99 C / 200-210 F;Sauté function: Less mode: 135 -150 C (275 -302 F); Normal mode: 160 -176 C (320 -349 F);More mode: 175 - 210 C (347 - 410 F)11
Getting Started1Read warning cards and warning labels. Remove all packaging materials and removablewarning cards from the cooker and accessories.2Clean the inner pot, lid and accessories with water and detergent before the first use.3Install the condensation collector at the rear of the cooker by aligning the top of the collectorwith the guides on the cooker and press in.4Place the steam release handle on the lid.The steam release handle does not lock tight into the lid but will fit loosely.12
Getting StartedBefore using your Instant Pot :1To remove the lid, hold the handle, turn the lid counterclockwise and lift.abc2Remove the inner pot from the cooker.3Add food and liquids to the inner pot as the recipe directs. If required, place thesteam rack on the bottom of the inner pot first. Always add at least 18 fl oz / 500 mLof liquid for minimum liquid requirement. See “Cooking and Safety Tips” on page 22.4Wipe the outside of the inner pot dry. Make sure there is no food debris on thebottom side of the inner pot nor on the cooking element.5Put the inner pot back into the cooker. Rotate slightly to ensure that it is seatedcorrectly.6Make sure the sealing ring rack is completely set in the groove on the inside of thesealing ring. Ensure there is no deformation on the sealing ring rack. Do not attemptto repair a deformed ring rack. Please contact the customer care team.7To place lid, reverse Step 1. Place the lid on the cooker, align themark on the lidwith the(unlock) mark and turn clockwise to the(lock) mark.13
Getting Started Make sure the steam release valve, float valve and anti-block shield are cleanand free of debris. After putting the lid on, make sure the float valve on lid top drops down. Do not put the lid on for the Sauté program.Initial Test RunTo familiarize yourself with the Instant Pot and check if the cooker is working properly:1Add 3 measuring cups of water into the inner pot ( 25 fl oz / 750 mL).2Close the lid. Turn the steam release handle to Sealing position.3Press the Steam button and press the / - keys to adjusttime to 2 minutes.The preheating cycle will start after 10 seconds and the cooker with display On. Traces ofsteam will release until the float valve pops up. The Steam program will begin whenworking pressure is reached. After the cooking cycle has completed, the cooker will beepand switch to Keep Warm mode if the Auto Keep Warm function is ON.14*If you have any questions or concerns, please refer to the troubleshooting guide on pages24 - 26, or call the customer care team. Contact information on page 24.*
Pressure CookingThe following are all pressure cooking programs: Soup/Broth, Meat/Stew, Bean/Chili,Poultry1, Rice, Multigrain1, Porridge, Steam, and Pressure Cook. Do not fill the inner pot more than 2/3 full. For food that expands during cooking suchas rice or dried vegetables, do not fill the inner pot more than 1/2 full. After the cooking process has started, you can press Cancel at any time to end the program.The cooker then goes to standby mode.1Follow the steps in “Getting Started” pages 12 - 14.2Position the steam release handle to Sealing.3Connect the power cord. The LED displays OFF, indicating that thecooker is in standby mode.4Select a pressure cooking program: Soup/Broth, Meat/Stew, Bean/Chili, Poultry1, Rice,Multigrain1, Porridge, Steam, or Pressure Cook.1Poultry and Multigrain cooking programs are not available on DUO Mini.15
Pressure Cooking56Optionally, personalize pressure cooking programs as follows:To do this .Press this button.Followed by these steps.Change the cooking timeCooking ProgramKeySelect between three preset cooking times,Less, Normal and More by pressing thecooking program key repeatedly /-Add/subtract time; press and hold forfaster changesChange the cooking pressurePressure LevelSelect either High or LowSet the delayed cooking timeDelay Start1. Use the / - buttons to set the hours2. Press Delay Start again3. Use the / - buttons to set the minutes10 seconds after choosing the settings, the cooker beeps 3 times and displays On toindicate that the cooker has entered preheating cycle. If using Delay Start, the DelayStart light indicator will light up and 10 seconds later, the delay timer will start to countdown. When count down is finished, cooking will start and LED will display On for thepreheating cycle. Depending on the amount of food and its temperature, the preheatingcycle can last from a few minutes to 40 minutes or more . As the cooker heats up andpressure builds, the float valve rises. When working pressure is reached, the cooker entersthe pressure cooking cycle and displays the remaining cooking time.When the cooking cycle has finished, the cooker beeps andenters the Keep Warm mode if the Auto Keep Warm functionis turned ON. The LED displays the elapsed time (such as L0:02).If Cancel is not pressed, the cooker will turn OFF after 10 hours.16**Users can switch Auto Keep Warm ON/OFF, adjust pressure level and cooking time atany time during the cooking process.
Pressure Cooking7Release the pressure using one of the following methods (refer to recipe):Natural Release: Allow the cooker to cool down naturally until the float valve drops down.This may take 10 to 40 minutes, or even more, depending on the amount of food in thecooker. Place a wet towel on the metal part of the lid to speed up cooling (do not cover thesteam release).Quick Release: Turn the steam release handle to the Venting position to let steam outuntil the float valve drops down. Never pull out the steam release handle while releasingsteam, as escaping steam is extremely hot and can cause scalding. When cooking food withlarge liquid volume or starch content, immediately turn the steam release handle back tothe Sealing position at the first sign of spattering. Quick Release should ALWAYS be closelyattended.Do not place hand oversteam release valve8Do not lean face overcooker when it is in operation orreleasing steam/pressurePress Cancel. The LED displays OFF, indicating that the cooker is in standby mode.Open the lid. Make sure the float valve is down before opening the lid.17
Non-Pressure CookingThe following are all non-pressure cooking programs: Sauté, Slow Cook, Yogurt andKeep Warm.Sauté1Connect the power cord. The LED displays OFF, indicating that the cooker is on standby.2Select the Sauté program.3To change the cooking temperature, press Sauté key repeatedly to togglebetween Less (for simmering or thickening sauce), Normal (for regular browning), andMore (for stir-frying or blackening meat).10 seconds after choosing the settings, the cooking process will start.The cooker will beep 3 times and the LED displays On to indicate thatthe cooker has entered the preheating cycle. When the workingtemperature is reached, the LED displays Hot.4Add food to the inner pot and sauté.5When you have finished sautéing the food, press Cancel. The LED displays OFF, indicatingthat the cooker is in standby mode. Do not use the pressure cooker lid during Sauté program. There will be warning alertsand the display will flash. A glass lid with a venting hole may be used. As a safety precaution, the cooker automatically enters standby mode after 30 minutes ifyou have not pressed Cancel.18
Non-Pressure CookingSlow Cook1You may use the Instant Pot glass lid as an option. If using the pressure cooking lid, makesure the steam release handle is turned to Venting.2Connect the power cord. The LED displays OFF, indicating that the cooker is on standby.3Select the Slow Cook program. Optionally, modify the slow cooking program as follows:To do this .Press this button.Followed by these steps.Change the cooking time /-Add / subtract timeChange the cookingtemperatureCooking ProgramKeySelect between three preset cookingtemperatures, Less, Normal and More bypressing the cooking program keyrepeatedlySet the delayed cookingtimeDelay Start1. Use the / - buttons to set the hours2. Press Delay Start again3. Use the / - buttons to set the minutes10 seconds after choosing the settings, the cooking program will start. The cooker willbeep 3 times and the cooker will enter the cooking cycle. The LED will display theremaining cooking time. If using Delay Start, the light indicator will light up and 10 secondslater, the delay timer will start to count down. Cooking begins when count down is finished.19
Non-Pressure Cooking5When the cooking cycle has finished, the cooker will beep and enter the Keep Warmmode if the Keep Warm program is turned ON. The LED will display the elapsed time(such as L0:02). If Cancel is not pressed, the cooker will turn OFF after 10 hours.6If the lid is on, remove it by turning counterclockwise and lifting.7Press Cancel. The LED displays OFF, indicating that the cooker is in standby mode.Yogurt1Pasteurize Milka) Add milk to the inner pot.b) Select the Yogurt program.c) Press the Yogurt key repeatedly to select the More mode. 10 secondsafter choosing the settings, the heating process will begin. The cooker will beep3 times and the LED will display boiL.d) When finished, the cooker will beep and the LED will display Yogt.If making yogurt in smaller containers: add 1 cup/250 ml of water to the inner pot, placethe steam rack in the inner pot and put the containers on top of the steam rack, close thelid, select the Steam program and use the / - buttons to set time to 2 minutes. Makesure the steam release handle is in Sealing position when running the Steam program asthis is a pressure cooking program. When complete, use the natural release method (page17) and continue with steps 2 to 4.*The advantages of pasteurizing milk are to 1) kill pathogens and harmful bacteria, and 2)denature milk proteins for easier absorption by the body.20
Non-Pressure Cooking2Cool Milka) Remove the inner pot and place it on a wire rack.b) Allow the milk to cool to 115 F/46 C. Test the milk temperature with a thermometer.3Add Starter Culturea) Add starter culture to the warm milk in the inner pot.b) Replace the inner pot and close the lid.The steam release handle can be left in Venting or Sealing position.4Ferment Yogurta) Select the Yogurt program and adjust to Normal mode.b) Press / - to set fermentation time.c) When finished, the cooker will beep and the LED will display Yogt.21
Cooking and Safety Tips Extreme caution should be taken when moving the steam release handle to theVenting position. Keep hands and face away from the steam release openings. Failureto comply may result in scalding or serious injury. Do not attempt to open the lid until pressure inside the cooker is completely released.As a safety feature, until the float valve drops down the lid is locked and cannot beopened. Do not force lid open. When opening the lid, the inner pot may adhere to the lid. This is caused by vacuumdue to cooling. Make sure the steam release handle is in the Venting position and allthe steam is released. If the float valve is stuck, move the steam release handle to the Venting position. Onceall the steam is released, push the float valve down with a pen or long utensil. Always add at least 18 fl oz. / 500 ml of water or other liquids so enough steam can begenerated to cook under pressure. These include cooking sauces, wine, beer, stocks,juices of fruits and vegetables. Oils, oil-based sauces and thick cooking sauces do nothave enough water content and will not account for the required liquid volume. Time to pressure and cooking time will vary according to the temperature andquantity of the ingredients. Food that is cold or frozen will take longer to cook than foodthat is at room temperature. When using the Delay Start program, allow sufficient cooling down time before serving. The Delay Start program is not recommended for porridge, oatmeal or other foamyand thick liquids. Cooking progresses should be monitored when cooking these foods.22
Care and CleaningUnplug your Instant Pot and let it cool to room temperature before cleaning. All Instant Pot inner pots, pressure cooker lids, glass lids, and accessories aredishwasher safe. Remove the inner pot and lid, and wash with detergent. Rinse with clear water andwipe dry with a soft cloth. Wipe the inner cooker base rim and slot with dry cloth to prevent rusting of theexterior cooker rim. Remove the sealing ring and anti-block shield from the underside of thelid. Wash with warm, soapy water, rinse with clear water and wipe dry with a softcloth. The sealing ring must always be properly positioned on the underside of the lid. Clean the outer body with a damp soft cloth or sponge. Never use harsh chemical detergents, scouring pads or powders on any of the partsor components. Periodically check that the steam release valve and float valve are in good workingorder and free of debris.23
TroubleshootingIf you experience any problems with the cooker, need technical assistance or productreturn information, please contact the Instant Pot support team using the methodsbelow: Create a support ticket: www.InstantPot.com/support/ Email: support@instantpot.com Call 1-800-828-7280 ext 2 for the customer care team.You can also find tips, videos and FAQs on www.InstantPot.com/faq/The issues in the following tables do not always indicate a faulty cooker. Please examinethe cooker carefully before contacting the support team.1ProblemPossible reasonSolutionDifficulty with closing the lidSealing ring not installedproperlyPosition the sealing ringFloat valve in the popped-uppositionSlightly press the float valvedownwardDifficulty with opening the lid Pressure inside the cooker2Float valve stuck at thepopped-up position due todebris or stickiness fromfood24Position the steam releasehandle to the ventingposition to release theinternal pressure. Open thelid after the pressure iscompletely releasedEnsure steam is completelyreleased by turning steamrelease handle to Ventingposition, Press the float valvelightly with a long utensil.Open the lid cautiously andclean the float valve and lidbefore the next use.
TroubleshootingProblemPossible reasonSolutionSteam leaks from the sideof the lidNo sealing ringInstall the sealing ringSealing ring damagedReplace the sealing ringFood debris attached to thesealing ringClean the sealing ringLid not closed properlyOpen then close the lidagainFood debris on the floatvalve silicone sealClean the float valve siliconesealFloat valve silicone ringworn- out or missingReplace the float valvesilicone ringToo little food or water ininner potAdd water according to therecipeFloat valve obstructed bythe lid locking pinClose the lid completely, see“Getting Started” sectionSteam release valve not insealing positionTurn the steam releasehandle to the sealingpositionPressure control failsContact supportDisplay flashes “Lid”Lid is not in the correctposition for the selectedprogramClose the lid for pressurecooking or open the lid forsautéingDisplay remains blank afterconnecting the power cordBad power connection or nopowerInspect the power cord toensure a good connection,check if the power outlet isactiveCooker’s electrical fuse hasblownContact support34Steam leaks from floatvalve for over 2 minutesFloat valve unable to rise5678Steam comes out fromthe steam releasevalve non-stop25
TroubleshootingPossible reasonSolutionC1Faulty temperature sensorContact supportC2Faulty temperature sensorContact supportC5Temperature is too highbecause inner pot is notplaced into the cooker baseInsert the inner potproperlyTemperature is too highbecause there is no water ininner potPut food and water in theinner potProblemAll LEDs flash with acode appearing onscreen and thewarning beep is ON910C6Faulty pressure sensorC6HFaulty HIGH pressure sensorC6LFaulty LOW pressure sensorRice is half cooked or toohardContact supportToo little waterAdjust dry rice and waterratio according to recipeLid opened too earlyAfter cooking cyclecompletes, leave the lid onfor 5 more minutes11Rice is too softToo much waterAdjust dry rice and waterratio according to recipe12The cooker beeps 5 timesand displays ‘burn’ messageafter the cooking programstarted.Indication of overheating.The cooker has reduced theheating temperature, andmay not reach cookingpressureStarch deposits at thebottom of the inner potmight have clogged heatdissipation. Stop the cookerand inspect the bottom ofthe inner potOccasional ticking or lightcracking soundThe sound of power switching and expanding pressureboard when changingtemperatureThis is normalBottom of the inner pot iswetWipe bottom of the innerpot dry before cooking1326
WarrantyLimited WarrantyThis Limited Warranty is effective for one year from the date of original consumer purchase. Proof of originalpurchase date and, if requested by an authorized Instant Pot Company (“IPC”) representative, return of yourappliance as IPC may direct at IPC’s expense, is required to obtain service under this Limited Warranty.When this appliance is operated and maintained in accordance with written instructions attached to orfurnished with the product, Instant Pot Company will pay for either (i) repair labor to correct defects inmaterials or workmanship that existed when this appliance was purchased or (ii), at its sole and exclusivediscretion, replace the appliance for a period of one (1) year from the date of purchase. In the event that yourappliance is replaced, the Limited Warranty on the replacement appliance will expire at the original date (i.e.12 months from the original purchase date).This Limited Warranty extends only to the original purchaser and use of the appliance in the United States ofAmerica and Canada. This warranty does not cover units that are used outside of the United States ofAmerica and Canada.Any modification or attempted modification to your appliance may interfere with the safe operation of theappliance and will void this Limited Warranty. This Limited Warranty does not apply in respect of anyappliance or any part thereof that has been altered or modified from its factory settings unless suchalterations or modifications were expressly authorized by an IPC representative.IPC is not responsible for shipping costs related to warranty service, save and except for shipping costsassociated with the return of your appliance as provided herein.Limitation and ExclusionsThe liability of IPC, if any, for any allegedly defective appliance or part shall in no circumstances exceed thepurchase price of a comparable replacement appliance.This Limited Warranty does not cover:1. Damage resulting from accident, alteration, misuse, abuse, neglect, unreasonable use, use contrary to theoperating instructions, normal wear and tear, commercial use, improper assembly, disassembly, failure toprovide reasonable and necessary maintenance, fire, flood, acts of God or repair by anyone unless directedby an Instant Pot Representative.2. Repairs where your appliance is used for other than normal, single-family household use or when it is usedin a manner that is contrary to published user or operator instructions.3. Use of unauthorized parts and accessories, or repairs to parts and syste
Jan 24, 2018 · 2) Do not place the cooker on or near a hot gas or electric burner, or in a heated oven. 3) Intended for countertop use only. 4) Do not use pressure cooker for anything other than intended use. 5) Never deep fry or pressure fry in the cooker with oil. 6) Do not let cord h