Transcription
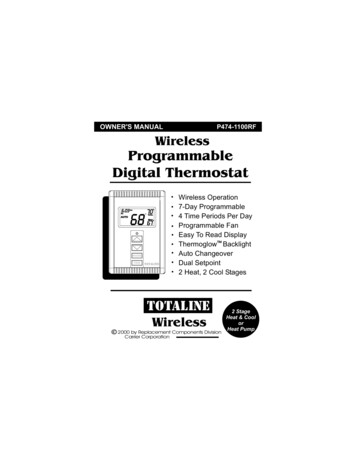
OWNER'S MANUALP474-1100RFWirelessProgrammableDigital ThermostatMODEFANTOTALINEWireless Operation7-Day Programmable4 Time Periods Per DayProgrammable FanEasy To Read DisplayThermoglow BacklightAuto ChangeoverDual Setpoint2 Heat, 2 Cool StagesTOTALINEWireless2000 by Replacement Components DivisionCarrier Corporation2 StageHeat & CoolorHeat Pump
Table Of ContentsFRONT PANELDISPLAYQUICK START Set the clock and goBASIC OPERATIONPROGRAMMING 4 Time PeriodsADVANCED SETUPABOUT ADVANCED OPERATIONWARRANTY23568121620CAUTIONFollow P474-1100REC Installation Instructionsbefore proceeding.SET THERMOSTAT TO MODE “OFF” PRIOR TOCHANGING SETTINGS IN SETUP OR RESTORINGFACTORY DEFAULTS.TOTALINEP474-1100RFFCC ID MUH-T10013This device complies with Part 15 of the FCC rules.Operation is subject to the following two conditions:(1) this device may not cause harmful interference,and (2) this device must accept any interferencereceived, including interference that may causeundesired operation.Important: To assure proper operation use onlyAA LITHIUM batteries.Page 1
Front Panel1523FANTOTALINE1Liquid Crystal Display2Up/Down Buttons3Mode Button4Fan Button5Transmission Indicatorwith ThermoglowPage 24
Display12110:12:00SMTWTFS788Am ProgramOn SetupLockedPm88AUTOOFFNight6Morning DayEvening8Fan OnoCOOL88HEAT o411431Mode IndicatorsSelects the operation mode of the equipment.HEAT - indicates the heat mode.COOL - indicates the air conditioning mode.AUTO - indicates the system will automaticallychangeover between heat and cool modesas the temperature varies.OFF - indicates the entire system is turned off.PROGRAM ON - indicates the stored programis enabled to run. Page 6.2Clock with Day of the WeekIndicates the current time and day. This clock isalso used to program the timer periods. Page 5.3Room Temperature DisplayIndicates the current room temperature.4Desired Set TemperatureIndicates desired room temperature(s). Page 7.Page 3
Display6Morning, Day, Evening & Night IndicationIndicates the program time period. Page 8-11.7Setup IndicationIndicates the thermostat is in the programmingmode. Page 12.8Fan Operation IndicationFan On - indicates constant, continuous fanoperation.When Fan On is not lit - indicates the fan willonly operate when necessary to heat orto cool. Page 7.10Locked IndicationLocked appears after the right combination ofbuttons are pressed, rendering the buttonsinoperative. Page 17.Page 4
Quick Start Set the Clock and GoMODEFAN:12:00Press the Mode button.While holding the Mode,press the Fan button for2 seconds to enter Setupscreens.AmSetupiDuring Setup & Programming:Pressing the Mode buttonselects different flashing items.(Represented in dark black)Pressing the Up and Downbuttons will modify the flashingselection.PressSetup2To adjust theclock or Day useMODESbuttons.Press both Mode andFan buttons asabove to return tonormal operation.MODEFANThe Thermostat is preprogrammed from thefactory to operate 1 or 2 Stage equipment* withoutthe need for further programming. To optimize theinstallation of this thermostat follow the instructionsin the Advanced Setup section.* The thermostat is not preprogrammed from thefactory to operate electric heat or heat pumpsystems. To control these systems, follow thesteps in the Wireless Receiver Instructions.Page 5
Basic OperationSelect ModeThe HEAT setting indicates thetemperature the room has toreach before the furnace willturn on to heat the room.The COOL setting indicates thetemperature the room has toreach before the air conditionerwill turn on to cool the room.AUTO will automatically selectheat or cool based on roomtemperature demand.Program On will activate thestored timer operation.(Morning, Day, Evening& Night Periods)OFF indicates both heatingand air conditioningsystems are turned PmProgramOnPmDay:12:00MOFFPmPage 66972HEAT oPressMODEoCOOLPressMODE72oCOOL69HEAT o73PressMODEoCOOL70HEAT oPressMODE
Basic OperationSelect Desired Temperature:12:00MAUTO70Pm72oIn any mode, adjust thedesired Set TemperaturewithCOOL69HEAT obuttons.Pressing the up/down buttons in Auto mode will adjust both the heat and coolset temperatures simultaneously.Pressing the up/down buttons in Heat or Cool modes will adjust only theheat or cool set temperature.FanOperation:12:00SFan On65PmPressFAN85oCOOL55HEAT oFan On indicates constant fan operation.This feature is active even if the thermostatis set to Off.Page 7
Programming4 Time Periods(Unit # 1 only)Time period programming is only available onUnit Number 1.MODEPress the Mode button. While holding the Mode,press the Up button for 2 seconds to entertime period programming.Use the back cover ProgrammingWorksheet to help with this section.MSelect the day of week(M - S)PressMODEAdjust the start timefor Morning.7M:30AmStartMorningPressMODEAdjust the coolingsetpoint for Morning.(35 - 99 )7M:30Am74oCOOLMorningPressMODEAdjust the heatingsetpoint for Morning.(35 - 99 )7M:30AmMorning74oCOOL72HEAT oContinuedPage 8PressMODE
ProgrammingAdjust the start timefor Day.4 Time PeriodsI0M:30AmStartDayPressMODEAdjust the coolingsetpoint for Day.I0M:30(35 - 99 )75AmoCOOLDayPressMODEAdjust the heatingsetpoint for Day.(35 - 99 )I0M:3075AmoCOOL73HEAT oDayPressMODEAdjust the start timefor Evening.5M:30PmStartEveningPressMODEAdjust the coolingsetpoint for Evening.5M:30Pm75oCOOL(35 - 99 )PressEveningMODEContinuedPage 9
ProgrammingAdjust the heatingsetpoint for Evening.(35 - 99 )4 Time Periods5M:3075PmoCOOL73HEAT oEveningPressMODEAdjust the start timefor Night.I MI :30PmStartNightPressMODEAdjust the coolingsetpoint for Night.I MI :30Pm78oCOOLNight(35 - 99 )PressMODEAdjust the heatingsetpoint for Night(35 - 99 )I MI :30AmNight78oCOOL70HEAT oPressMODEContinuedPage 10
Programming4 Time PeriodsThe copy command becomes available afterprogramming the entire previous day.YesSelect Yes or No to copythe previous day’sprogram to this day.No:18:noTcopyIf No is selected:If Yes is selected:PressMODESelecting Yes, then pressing mode will copy theprevious day’s program and then will ask thesame copy question again. If yes is selectedeach time, this routine will repeat.PressMODEIf No is selected, as in previous steps, flashing prompts for input will appear forthe 4 time periods for the next day.Page 11
Advanced SetupMODEPress the Mode button andrelease.MODETHEN IMMEDIATELY pressthe Mode button again andwhile holding the Mode,press the Fan button.When this screen appearsFAN:12:00AmSetupIDO NOT RELEASE THE BUTTONS.Hold down Mode and Fan for anadditional 7 seconds to enter Setupscreens beyond step #2.:12:00AmNOTE: Each step # is located atthe top right corner of thedisplay for easy reference.SetupAdjust the time of dayclock.IPressTip: To change hours quickly, press andhold the Fan button in and pressthe up or down buttons.MODESetupSelect the day of theweek.M2PressMODELeave this setup stepin the OFF mode only.Off2oSetupOnOFF3ePressMODEContinuedPage 12
Advanced SetupSelect the House Codenumber. The receivermust also use this samenumber for properoperation.Select the Unit IDnumber. If more than1 thermostat is used,each will need a differentUnit ID number.HcUn86Adjust the deadbandfrom 1 - 6 degrees.Note: Available onlyon Unit ID #1.Adjust the minimumdifference betweencooling & heatingsetpoints.81f(0 - 6 )Select the cycles perhour limit.d cycles per hourlimit defeated.d1 d defeat 5 min.Compressor lockout.(d, d1, 2 - ESetup7COOLHEATPressMODESetupNote: Available onlyon Unit ID #1.48cyContinuedPage 13PressMODE
Advanced SetupLIOn SetupOnSelect the display backlight always On, or Offafter 8 seconds.Off9PressMODEAdjust the programmablefan timer.0 - 60 minutes.0:00 offNote: Available onlyon Unit ID #1.:0:00SetupI0PressFan OnMODESetupCfSelect thermostatoperation in degreesFahrenheit or Centigrade.FIIPressMODEPress the Mode button.While holding in the Mode, press the Fanbutton for 2 seconds to leave the Setupscreens. If no buttons are pressed, thedisplay will leave the setup screens after30 seconds.Page 14FAN
Advanced SetupAdvanced Setup TableStep #123*456**78**910**11DescriptionRangeTime of day clock setDay of the weekZoning UseHouse CodeUnit NumberDeadband or Temperature swingForced minimum difference heat/coolCycles per hourThermoglow BacklightProgrammable FanFahrenheit or CentigradeFactory Default24 hourSun - SatOff / On0 - 631 - 4/1 - 161-60-6d, d1, 2 - 6Off / On0:00 - 0:60F/C* For proper thermostat operation this setup step shouldremain in the OFF position.** Available on Unit Number 1, only.Page 1512:00 AmMondayOffO1226Off0:00F
About Advanced Features & OperationMEMORY BACKUP - In the event of a power loss, thethermostat will retain the stored program settings withoutexternal power or batteries.2 STAGE OPERATION - The 2nd Stage of heat or cool isturned on when (1) the 1st Stage has been on for aminimum of two minutes, and (2) the temperature spreadfrom the setpoint is equal to or greater than: the setpointplus the deadband, plus 2 degrees.CoolingHeating2 degrees2nd Stageturn on1st Stageturn onDeadBandHeatSetpointDeadBandCoolSetpoint2 degrees1st Stageturn on2nd Stageturn onMINIMUM HEAT/COOL SETPOINT DIFFERENCE - The Heatand Cool setpoints will not be allowed to come any closerto each other than the value set in Advanced Setup step# 7, on page 13. This minimum difference is enforcedduring Auto changeover and Program On operation.PROGRAMMABLE FAN - If the Programmable Fan timer isset to a value other than 0, the fan will run for thepreprogrammed amount of time, page 14, step# 10.The Programmable Fan timer will start the fan at the topof each hour. The Programmable Fan may be activeeven if the thermostat mode is Off.Page 16
About Advanced Features & OperationKEYPAD LOCK - To prevent unauthorized use of the thermostat,the front panel buttons may be disabled. To disable, or‘lock’ the keypad, press and hold in the Mode button.While holding the Mode button in, press the Up and Downbuttons in together. The Locked icon will appear on thedisplay.:12:00WPress all 3 forKeypad LockoutMODEProgramOnLocked70Pm85oCOOL55HEAT oTo unlock the buttons, again press and hold the Modebutton. While holding the Mode button in, press the Upand Down buttons in together. The Locked icon willdisappear from the display.Page 17
About Advanced Features & OperationDUAL SETPOINT BEHAVIOR - The adjustable setpoint rangeis: 35 - 99 degrees in Fahrenheit and 7 - 35 degrees inCentigrade. When in the modes Heat or Cool, thisadjustable range is unhampered.When adjusting any Auto mode, including programmingtime periods, the thermostat will not allow the Heatsetpoint to get closer to the Cool setpoint than thevalue programmed as the minimum difference instep 7, page 13.When entering the Auto mode from Cool, the Heat andCool setpoints will remain spread apart by the amountthat they were adjusted, prior to entering Auto.For example: If the Cool setpoint was set to 80 whilein the Cool mode and the Heat setpoint was adjusted to70 while in the Heat mode, upon entering the Auto modethe Heat and Cool setpoints would be 80 and 70. Bothsetpoints would then move up and down together, (in thisexample spread by 10 degrees), by pressing the up ordown buttons.To move the Heat and Cool setpoints closer together,enter the Cool or Heat mode by pressing the Mode button,then adjust the setpoint(s) closer together. Heat is limitedto how close it can come to Cool by step 7, page 13.Page 18
About Advanced Features & OperationFACTORY DEFAULTS - If, for any reason it is desirable toreturn all stored settings back to the factory defaultsettings, press the Mode button. While holding the Modebutton in, press the Down button for 2 sec. All icons willappear. Press and hold in the Fan button until Fdappears. This resets all factory settings. To return to normaloperation press the Mode button twice.CALIBRATION - Press the Mode button. While holding theMode button in, press the Down button for 2 seconds.All icons will appear. Press the Mode button once more.At this point use the Up and Down buttons to calibrateroom temperature, if needed. Press the Mode button toreturn to normal operation. NOTE CAUTION ON PAGE 1.LOW BATTERY WARNING - When the AA Lithium batteriesreach a preset low power state, the display will flash theLow Battery icon. After this icon appears change thebatteries within a few weeks. Use only AA Lithiumbatteries for proper operation.Battery Eliminator (optional accessory) - Use only theTotaline accessory (P474-0800) for proper operation.3vdc, 50ma output, negative center conductor.Page 19
WarrantyOne-Year Warranty - This Product is warranted to be free from defects in material andworkmanship. If it appears within one year from the date of original installation, whether or notactual use begins on that date, that the product does not meet this warranty, a new orremanufactured part, at the manufacturer’s sole option, to replace any defective part will beprovided without charge for the part itself; PROVIDED the defective part is returned to thedistributor through a qualified servicing dealer.THIS WARRANTY DOES NOT INCLUDE LABOR OR OTHER COSTS incurred for diagnosing,repairing, removing, installing, shipping, servicing or handling of either defective parts orreplacement parts. Such costs may be covered by a separate warranty provided by the installer.THIS WARRANTY APPLIES ONLY TO PRODUCTS IN THEIR ORIGINAL INSTALLATIONLOCATION AND BECOMES VOID UPON REINSTALLATION.LIMITATIONS OF WARRANTIES – ALL IMPLIED WARRANTIES (INCLUDING IMPLIEDWARRANTIES OF FITNESS FOR A PARTICULAR PURPOSE AND MERCHANTABILITY) AREHEREBY LIMITED IN DURATION TOT THE PERIOD FOR WHICH THE LIMITED WARRANTYIS GIVEN. SOME STATES DO NOT ALLOW LIMITATIONS ON HOW LONG AN IMPLIEDWARRANTY LASTS, SO THE ABOVE MAY NOT APPLY TO YOU. THE EXPRESSEDWARRANTIES MADE IN THIS WARRANTY ARE EXCLUSIVE AND MANY NOT BE ALTERED,ENLARGED, OR CHANGED BY ANY DISTRIBUTOR, DEALER, OR OTHER PERSONWHATSOEVER.ALL WORK UNDER THE TERMS OF THIS WARRANTY SHALL BE PERFORMED DURINGNORMAL WORKING HOURS. AL REPLACEMENT PARTS, WHETHER NEW ORREMANUFACTURED, ASSUME AS THEIR WARRANTY PERIOD ONLY THE REMAININGTIME PERIOD OF THIS WARRANTY.THE MANUFACTURER WILL NOT BE RESPONSIBLE FOR:1. Normal maintenance as outlined in the installation and servicing instructions or ownersmanual including filter cleaning and/or replacement and lubrication.2. Damage or repairs required as a consequence of faulty installation, misapplication, abuse,improper servicing, unauthorized alteration or improper operation.3. Failure to start due to voltage conditions, blown fuses, open circuit breakers or otherdamages due to the inadequacy or interruption of electrical service.4. Damage as a result of floods, winds, fires, lightning, accidents, corrosive environments orother conditions beyond the control of the Manufacturer.5. Parts not supplied or designated by the Manufacturer, or damages resulting from their use.6. Manufacturer products installed outside the continental U.S.A., Alaska, Hawaii, andCanada.7. Electricity or fuel costs or increases in electricity or fuel costs from any reason whatsoeverincluding additional or unusual use of supplemental electric heat.8. ANY SPECIAL INDIRECT OR CONSEQUENTIAL PROPERTY OR COMMERCIALDAMAGE OF ANY NATURE WHATSOEVER. Some states do not allow the exclusion ofincidental or consequential damages, so the above may not apply to you.This warranty gives you specific legal rights, and you may also have other rights which may varyform state to state.Page 20
Programming Worksheetsee page 8DAY PERIOD START TIME COOL URDAYSUNDAYDayEveningNightMorningCopy MonTueDayNoEveningYesNightMorningCopy TueWedDayNoEveningYesNightMorningCopy WedThuDayNoEveningYesNightMorningCopy ThuFriDayNoEveningYesNightMorningCopy FriSatDayNoEveningYesNightMorningCopy SatSunDayNoEveningYesNightPrinted on recycled paper.P/N 88-209 Rev. 1Form: OG-P474-08Catalog: 53P4-747
reach before the air conditioner will turn on to cool the room. OFF indicates both heating and air conditioning systems are turned off. AUTO will automatically select heat or cool based on room temperature demand. Program wOn il ac tv eh stored timer operation. (Morning, Day, Evening & Nigh