Transcription
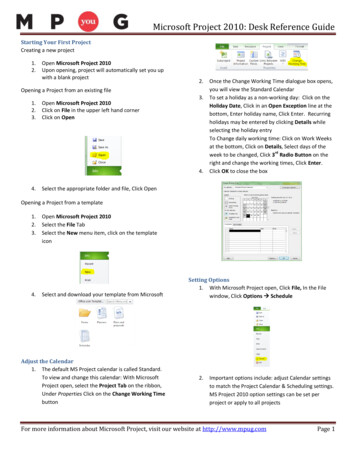
Microsoft Project 2010: Desk Reference GuideStarting Your First ProjectCreating a new project1.2.Open Microsoft Project 2010Upon opening, project will automatically set you upwith a blank project2.Opening a Project from an existing file1.2.3.Open Microsoft Project 2010Click on File in the upper left hand cornerClick on Open3.4.4.Once the Change Working Time dialogue box opens,you will view the Standard CalendarTo set a holiday as a non-working day: Click on theHoliday Date, Click in an Open Exception line at thebottom, Enter holiday name, Click Enter. Recurringholidays may be entered by clicking Details whileselecting the holiday entryTo Change daily working time: Click on Work Weeksat the bottom, Click on Details, Select days of therdweek to be changed, Click 3 Radio Button on theright and change the working times, Click Enter.Click OK to close the boxSelect the appropriate folder and file, Click OpenOpening a Project from a template1.2.3.4.Open Microsoft Project 2010Select the File TabSelect the New menu item, click on the templateiconSelect and download your template from MicrosoftAdjust the Calendar1. The default MS Project calendar is called Standard.To view and change this calendar: With MicrosoftProject open, select the Project Tab on the ribbon,Under Properties Click on the Change Working TimebuttonSetting Options1. With Microsoft Project open, Click File, In the Filewindow, Click Options Schedule2.Important options include: adjust Calendar settingsto match the Project Calendar & Scheduling settings.MS Project 2010 option settings can be set perproject or apply to all projectsFor more information about Microsoft Project, visit our website at http://www.mpug.comPage 1
Microsoft Project 2010: Desk Reference GuideSet the Project Start Date and apply the ProjectCalendar1. Project Project Information2. Enter Project Start Date or Project Finish date3. Select the Project Calendar, Click OKWorking with TasksTurn on the Project Summary Task1. With Microsoft Project Open and with the Ganttchart view showing Click Format tab on the ribbonbar2.Check the checkbox labeledProject Summary TaskTip: Outline numbering is automatically updated.To see the Outline values insert the WBS columninto the table. Right click on the Task Namecolumn Insert Column WBSAlter Task Scheduling Type1.Tasks may be scheduled in Automatic or Manualscheduling mode. To alter the Task Scheduling Modevalue per task: Click in the Task Mode column for atask and change mode selection2.To change the scheduling mode for future enteredtasks: At the bottom left of the Gantt chart view clickon New Tasks: and select to change futurescheduling modeEntering in a New Task1.2.Click the Task Tab on the ribbon barClick the Summary button in the Insert section ofthe ribbon bar to insert a new summary task anddetail taskEnter Task DurationsEstimate task durations and enter value in the Durationcolumn3.Click the Task button to insert a new detail taskCreate an Outline StructureTip: It’s a good idea to keep your duration in the same format.Example: If you start in number of days, all tasks should belisted in number of days.Click a detail task; click on the Task tab and in the Schedulesection click on the Indent button to indent a task under asummary taskFor more information about Microsoft Project, visit our website at http://www.mpug.comPage 2
Microsoft Project 2010: Desk Reference GuideCreate Relationships between TasksCreating relationships between tasks will create the timelineof the project.Select the task you would like to create a relationshipbetween tasks and then Click the Link button on the Taskribbon bar:Assign a Resource to a task1.Select the Task Tab Gantt Chart2.Select the Resource Name box for the Task you wantto assign the ResourceClick on the dropdown arrow and place a checkmark to theleft of the Resource Name you would like to assign to thetask. Multiple Resources may be selectedView all Task and Resource assignments for a ProjectTo view Resources and their assignments, Click on the ViewTab Under the Resource View section click on the ResourceUsageNOTE: A best practice is to link detail and milestone tasksonlyWorking with ResourcesEnter a Resource1.2.With Microsoft Project Open, Click on the View Tabon the ribbon bar and select Resource Sheet underResource Views1.To View Tasks and the Resources Assigned, ClickTask UsageClick on the Resource Tab on the ribbon and selectAdd Resources under InsertAssign a Calendar to a Task3.4.Select the type of Resource you want to addEnter the Resource’s Name, Type, Max Units, andStandard Rate. The Resource Calendar will defaultto be the same as the Project Calendar - alter ifnecessary (Add other information as needed)NOTE: When a task needs to be performed outside of thenormal working hours of the Project Calendar, a TaskCalendar may be assigned to alter the timeframe for anindividual task1.2.3.To assign a Task Calendar, With Microsoft Projectopen, Select the Gantt ViewSelect the Task you wish to assign the calendarUnder the Task Tab in the ribbon, Select theInformation buttonTip: In the Team Planner view in MSP Pro 2010 you can see at a glancewhat tasks have been assigned to resources. With a simple dragging motionyou can change existing assignments to over allocated resources or assigncurrently unassigned tasks to available resources.4.Select the Advanced tab and change the Calendar inthe Calendar dropdown menuFor more information about Microsoft Project, visit our website at http://www.mpug.comPage 3
Microsoft Project 2010: Desk Reference GuideWorking with ViewsSelecting a View1.2.3.When the dialogue box opens, click on the Newbutton4.Define whether you want a Single View orCombination View and click on OKWhen the view definition dialogue box opens, Nameyour new view, select the Screen you want it to bedisplayed in and Click OKWith Microsoft Project Open, Select the View TabUnder the Task View and Resource View sections,select the appropriate view you wish to use5.Tip: Add Key Milestones to the Timeline ViewTip: The best view to see slippage between baseline vs.actual work is the Detail Gantt -15Project-Tips-for-NewUsers.aspxThe default view in Project 2010 is a combination of the Gantt Chartview with the Timeline view layered above it.1. In the Gantt chart, click the task or milestone you want to add tothe Timeline view. 2. Right-click the milestone, and then click Addto Timeline.Change the way the data is viewed1.2.With Project Open, Select the View TabIn the Data section, edit the filter by selectingvarious settings from the dropdown arrowsa. Highlight – Highlights a certain selection oftasksb. Filter – Filters out all tasks not pertaining tothe subjectc. Group – Groups tasks together based oncriteriaAdding a Timeline1.2.To add a timeline to your project, click on the ViewTabUnder the Split View section, select the checkboxtitled TimelineCreating a New View1.2.With Microsoft Project open, click on the View TabUnder the Task View section, click on the drop downarrow title Other Views and click on More Views3.The timeline will then appear under the ribbon.For more information about Microsoft Project, visit our website at http://www.mpug.comPage 4
Microsoft Project 2010: Desk Reference GuideManaging a ProjectTip: There are technically 11 sets of baseline fields in thesystem, Baseline and Baselines 1-10. The Baseline field is thedefault used when you first set a baseline. When a baseline isupdated, you may optionally select one of the other 10 sets ofBaseline fields or update the current Baseline rts-Updatingthe-Baseline.aspxReportingCreate a Project ReportWith Microsoft Project open, select the Project Tab1.Under the Reports section, Click on Reports2.Each box selected will give access to multiplereportsSetting a Baseline1.2.With Microsoft Project Open, select the Project TabUnder the Schedule section, click on Set Baseline3.The Set Baseline dialogue box will openSelect the Baseline you wish to set4.Create a Visual Report1. Click on Visual Reports, under the Project tabSelect whether the Baseline will be for the Entire Projector just for Selected Tasks Click OKEntering Progress Using Percent Complete1.2.3.4.2.When the Create a report Dialogue opens, select thedesired report from the tabs and Click View.3.Your report will open in either Microsoft Excel orMicrosoft Visio depending on the selected reportWith Microsoft Project Open and in the TrackingGantt chart view, select the Task Name columnClick on a task you wish to updateOn the Task Tab click the appropriate updatepercentage for the task in the Schedule sectionNote the update values tothe right of the Ganttbars in the TrackingGantt chart viewTip: % Complete represents the percentage of task duration that's complete.% Work Complete is the percentage of task work hours that are complete.And you probably know that time can pass without a corresponding amountof work getting done. When the percent duration is updated, the percentageof work completed is updated Insider-Tracking-ProjectProgress.aspxFor more information about Microsoft Project, visit our website at http://www.mpug.comPage 5
Microsoft Project 2010: Desk Reference GuideKeyboard ShortcutsActionShortcutCreate a new ProjectCtrl NOpen a ProjectCtrl OSave a ProjectCtrl SInsert a New TaskInsertAssigns Resources boxAlt F10Open Microsoft HelpF1Open the Find dialogue boxCtrl FUndoCtrl ZPrintCtrl PSpell CheckF7Click on a task, Opens the Task InformationShift F2Select Auto ScheduleCtrl Shift ASelect Manual ScheduleCtrl Shift MIndent a taskAlt Shift Right ArrowOutdent a taskAlt Shift Left ArrowClose Active Project WindowCtrl WSwitch to the next Project WindowCtrl F6Maximize the Project WindowCtrl F10CopyCtrl CLink TaskCtrl F2PasteCtrl VRemove All Tasks FiltersF3For more information about Microsoft Project, visit our website at http://www.mpug.comPage 6
Open Microsoft Project 2010 2. Upon opening, project will automatically set you up with a blank project Opening a Project from an existing file 1. Open Microsoft Project 2010 2. Click on File in the upper left hand corner 3. Click on Open 4. Select the appropriate folder and file, Click Open Opening a Project