Transcription
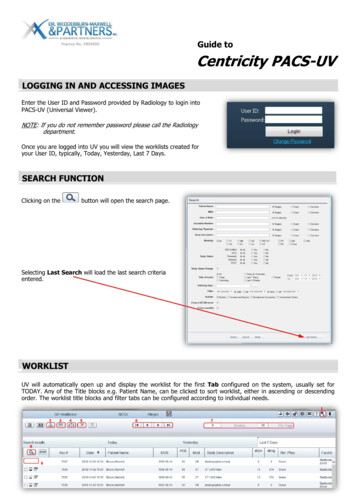
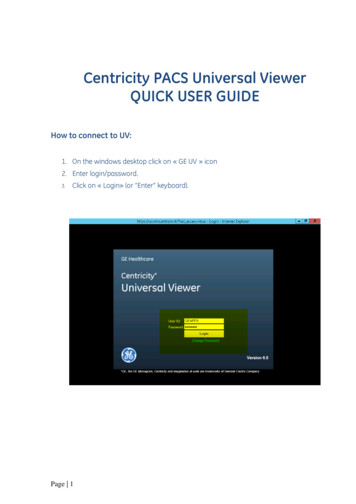
Centricity PACS Universal ViewerQUICK USER GUIDEHow to connect to UV:1. On the windows desktop click on « GE UV » icon2. Enter login/password.3.Click on « Login» (or “Enter” keyboard).Page 1
Exam worklistSearching toolThe user can switch between the predefined worklists « CT » « MR» « CR/DX » by using the leftmouse buttonPerform a quick search on the hole database based on 3 criteria:“ Patient name, Patient ID or Accession number”.Perform an advanced manual search using more criteria « modality,date, referring physician etcPage 2
Exam worklistWorklist icons:Select or deselect one or several examsBlack monitor to open the exam. The icon switches to RED if the exam is already openedby another userReport icon. White if no report, YELLOW a note has been entered, GREEN a report hasbeen validated.Exam status icon: if checked in green it means that the exam is flagged as DICTATEDRight clickon an exam in the list to open the worklist menu :Compare two or more selected examsDisplay all patient priorsTag the exam status as DICTATEDAssign/Detach the exam to a private or a common worklist.Page 3
To display an exam, use a one click2D ViewerPage 4on the exam line
NAVIGATORFirst icon on the toolbarPage 5
Total exam number for this Patient. Patient Timeline « Patient priors»Information on the exam just bellow Drag & DropTo display the series, drag and drop theimage from the navigator to the viewportor inside the red thumbnail which reflectsthe screen divisionsInformation on the exam just bellow To display a prior exam in thenavigator, perform a left mouse click onthe folder in the patient Timeline.Patient TimelineOpen TimelineWhen the folder icon switches to full grey, the exam isloaded in the navigatorPerform a left mouse double click to remove the exam fromthe navigatorIf the exam date is underlined it means that itcontains a radiology report that you can displayby clicking on the date itselfPage 6
TOOLBARMOUSE GZOOMPanSelectMagnifyTriangulationIMAGE DISPLAY:Mouse modes:accessible also in the series menu Right click on the imagesNavigator display « N »SCROLL « D »Hanging protocolsContrast « W »Zoom « Z »Screen divisionsPan « P »SRP: Smart ReadingProtocolsSelection Mode: Select one or severalimages « Ctrl »MagnifyTriangulation « T »Triangulation to display the same 3Dposition on all the planesPS: The selected tool will be kept active by default,At each time select the scroll mode as defaultBARRE ’OUTILSPage 7
Measure et Annotate:Measurements menuAnnotations menuaccessible also in the series menu Rightclick on the imagesaccessible also in the series menu Rightclick on the imagesThe most frequently used tools are present permanently onthe toolbar.Use the trash icon to delete annotations andmeasurementsSynchronization, Cross reference:Cross Reference displays the reference plane of theactual series on the other planesUsed for synch. Link and unlink the series depending onthe synch options defined in the Synch menu (on the mainmenu)Page 8
TOOLBAR« MIP,MinIP », MPR 3D :ThicknessModify the slice thickness « MIP,MinIP »:Page 9MPR 3D
MPR 3D :Standard MPR:MPR Multi Oblique :The differentreconstructionsAxial, Sagittal,CoronalSlice: Number of slicesSpacing: Slice spacing intervalThickness: Slice thicknessExport: Save the createdseriesPage 10
IMAGESArrows: Access to theprevious/next series.Quick Cycle: Get to the next seriesby continuing scrolling at the endof the seriesIndicates if a synchronizationbetween images is activeAll the yellow annotationson the images areinteractive: Activates the basicmouse modes (zoom,scroll, windowing). By clicking on the datethe user opens the examselector which displaysthe hole patient priors.Page 11
IMAGESRight click menu on the imagesReturn 2D : : Retrurns to the 2D viewer after openeing a 3D MPRPreset Window : Predifined presets for windoing and contrastMouse mode : Scroll, Zoom, Contrast, PanQuality Control : Delete, reject, reconciliate imagesExport/Save : Save/Export images through different toolsFlip/Rotate:Page 12
Key image Two ways to create key images: Automatically: when the user deposits a measurementor annotation. Manually: by selecting the keyboard shortcut « S ».Page 13
Export/Save images in different formats:Right click on the image to open the series menu, select export/save menu and click on SaveImage: The user can then export the image under several extensions JPEG, Dicom, AVI.Exit the exam and return to the worklist: Exit the PACS Application:Page 14or « Escape keyboard » .
Keyboard ShortcutsPage 15
Page 16
Centricity PACS Universal Viewer QUICK USER GUIDE How to connect to UV: 1. On the windows desktop click on « GE UV » icon 2. Enter login/password. 3. . Dicom, AVI. Exit the exam and return to
