Transcription
English
Cristina Bachmann, Heiko Bischoff, Christina Kaboth, Insa Mingers,Matthias Obrecht, Sabine Pfeifer, Kevin Quarshie, Benjamin SchütteThis PDF provides improved access for vision-impaired users. Pleasenote that due to the complexity and number of images in this document,it is not possible to include text descriptions of images.The information in this document is subject to change without noticeand does not represent a commitment on the part of Steinberg MediaTechnologies GmbH. The software described by this document issubject to a License Agreement and may not be copied to other mediaexcept as specifically allowed in the License Agreement. No part of thispublication may be copied, reproduced, or otherwise transmitted orrecorded, for any purpose, without prior written permission bySteinberg Media Technologies GmbH. Registered licensees of theproduct described herein may print one copy of this document for theirpersonal use.All product and company names are or trademarks of theirrespective holders. For more information, please visitwww.steinberg.net/trademarks. Steinberg Media Technologies GmbH, 2016.All rights reserved.
5Introduction56788Welcome!About the Documentation and the HelpKey CommandsConventionsHow You Can Reach Us9System Requirements and Installation91012131316System RequirementsInstalling the ProgramActivating Your LicenseRegistering Your SoftwareHardware InstallationSetting up Your System4ENGLISHTable of Contents
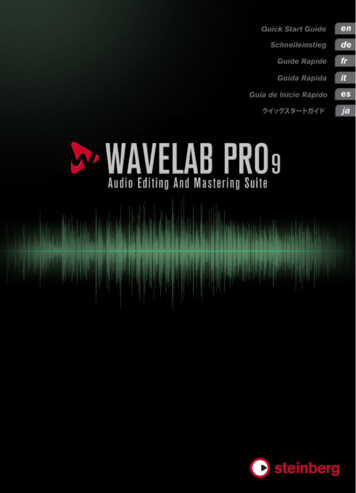
Welcome!Congratulations and thank you for purchasing the most creative editingand mastering solution available today - Steinberg WaveLab Pro 9. Formore than 20 years WaveLab has constantly pushed back theboundaries of what is possible in mastering and audio editing byincluding features carefully crafted for mastering facilities, musicstudios, sound designers, journalists and broadcasters.Featuring the most comprehensive and intuitive feature set in the longWaveLab product history, WaveLab Pro 9 reinvents audio refinementonce again. Mastering and editing workflows become more creativethan ever before. The new user interface of WaveLab follows thepopular ribbon concept, with multiple functions logically grouped undera ribbon tab. This way, WaveLab's powerful editing, processing andrendering functions are on hand at any time and are located right abovethe waveform. WaveLab Pro 9 also includes revolutionary mid/sideediting and processing capabilities. You can now split an audio trackinto the mid and side signal, allowing you to assign any of your favoriteplug-ins to each of the signals and to perform sophisticated editing andprocessing operations.One of the most creative features in WaveLab Pro 9 is MasterRig.MasterRig is a comprehensive mastering suite providing 8 plug-in slotsthat can be loaded with all-new 4-band effects such as Compressor,Limiter, Saturator, Imager and dynamic EQ. Additionally, MasterRig'snew 8-band equalizer allows for sophisticated sound enhancementwhile the new Resampler improves quality when converting audiomaterial to other sample rates. WaveLab Pro 9 is also prepared toconnect to other Steinberg products such as Cubase and Nuendo byproviding possibilities for a seamless exchange of audio material withthese popular digital audio workstations.5ENGLISHIntroduction
WaveLab Pro 9 also provides a plethora of tools for professional radioand broadcast engineers. Best-known for its comprehensive selectionof precise metering and analyzing tools, the feature set ofWaveLab Pro 9 includes a EBU-compliant loudness metering andnormalizing system.Completed by a redesigned master channel including full mid/side andleft/right capabilities, a new window-docking system as well as manyfurther enhancements, WaveLab Pro 9 raises the quality of your audiomaterial dramatically and sets new standards for creative mastering.Don't forget to register at MySteinberg and get access to onlinesupport offers and additional exclusive services. We would also bedelighted if we could welcome you as a member of the WaveLabcommunity. The WaveLab online forum can be reached viawww.steinberg.net/forum.See you around!Your Steinberg WaveLab TeamAbout the Documentation and the Help To open the help in the program, select Help Contents. To open the Operation Manual in PDF format, select Help PDFDocumentation, or navigate to the installation folder. The PDFdocuments are located in the Documentation folder.NOTETo read the PDF documents, a suitable PDF reader application must beinstalled on your computer.6ENGLISHIntroductionAbout the Documentation and the Help
ENGLISHIntroductionKey CommandsQuick Start GuideThis is the document that you are reading. It covers the following areaswithout going into details: System requirements, installation procedure, and licenseactivation. Setting up your system.Operation ManualThe Operation Manual is the main WaveLab Pro referencedocumentation, with detailed descriptions of operations, parameters,functions, and techniques.Key CommandsMany of the default key commands use modifier keys, some of whichare different depending on the operating system.For example, the default key command for Undo is [Ctrl]-[Z] onWindows and [Command]-[Z] on Mac OS X. When key commandswith modifier keys are described in this manual, they are shown with theWindows modifier key first, in the following way: [Win modifier key]/[Mac modifier key]-[key]EXAMPLE[Ctrl]/[Command]-[Z] signifies: press [Ctrl] on Windows or [Command]on Mac OS X, then press [Z].Similarly, [Alt]/[Option]-[X] signifies: press [Alt] on Windows or [Option]on Mac OS X, then press [X].7
ENGLISHIntroductionConventionsConventionsIn our documentation, we use typographical elements and mark-ups tostructure information.How You Can Reach UsOn the Help menu, you find items linking to additional information.The menu contains links to various Steinberg web pages. Selecting amenu item automatically launches your web browser and opens thepage. On these pages, you can find support and compatibilityinformation, answers to frequently asked questions, information aboutupdates and other Steinberg products, etc. This requires a workingInternet connection.8
System RequirementsWindows 7/8.x/10 — OS X 10.10/10.11 Intel or AMD dual-core CPU 4 GB RAM 4 GB free HD space 1920 x 1080 display resolution (minimum: 1024 x 768) USB port for USB-eLicenser (license management) OS compatible audio hardware DVD ROM dual-layer drive Internet connection required for activation, account setup, andpersonal/product registration. Additional downloads may berequired for the installation.For recommended systems and support of future operating systems,please refer to the Support section on our website www.steinberg.net.9ENGLISHSystem Requirements andInstallation
Installing the ProgramYou have two possibilities to install your program, via the Start Centerapplication or manually.Launching Installation via the Start CenterFrom the Start Center application you can easily install your programand inform yourself about the package contents. For Steinberg software delivered with an installation medium, theStart Center launches automatically as soon as you insert the discin your computer’s DVD drive, provided that autorun is activated. For Steinberg software downloaded from the Internet, the StartCenter launches when you double-click the downloaded file.PROCEDURE1.In the Start Center, select your language.2.Click Install.3.Follow the instructions on screen.Launching Installation ManuallyIf you do not want to install the program via the Start Center, you caninstall it manually. On Windows systems, double-click the file “Setup.exe” and followthe instructions on screen. On Mac OS X systems, double-click the file WaveLab 9.pkg andfollow the instructions on screen.10ENGLISHSystem Requirements and InstallationInstalling the Program
ENGLISHSystem Requirements and InstallationInstalling the ProgramUSB-eLicenserOperation of Steinberg software often requires a USB-eLicenser, ahardware copy protection device.The USB-eLicenser is a USB device on which your Steinberg softwarelicenses are stored. All hardware-protected Steinberg products use thesame type of device, and you can store several licenses on one device.Also, licenses can – within certain limits – be transferred betweenUSB-eLicensers.If your Steinberg software product does not include a USB-eLicenser,you can purchase one through the Steinberg online shop.In the eLicenser Control Center, you can activate new licenses andcheck which licenses are installed on your USB-eLicenser. Afterinstallation of your Steinberg application, the eLicenser Control Centercan be opened via the Start menu on Windows systems or theApplications folder on Mac OS X systems.If you are using other copy-protected Steinberg products, you maywant to transfer all licenses for your applications to one USB-eLicenser,thus using up only one USB port of your computer. See the eLicenserControl Center Help for information on how to transfer licensesbetween USB-eLicensers.11
Activating Your LicenseYou must activate your license. If your USB-eLicenser already containsan activated license, you can skip this section.PREREQUISITEMake sure that you have a working Internet connection.If you purchased your product via the Steinberg online shop, you alsoreceived an e-mail with a license activation code. Use this code todownload your license to your USB-eLicenser.If your product was delivered on an installation medium, the productpackage may contain an empty USB-eLicenser and the EssentialProduct License Information sheet with an activation code.PROCEDURE1.Plug your USB-eLicenser into a USB port of your computer.2.Start the eLicenser Control Center software.3.Click the Enter Activation Code button.4.Enter your activation code, and click Next.RESULTThe license is downloaded to your USB-eLicenser and activated.12ENGLISHSystem Requirements and InstallationActivating Your License
Registering Your SoftwareRegister your product at the MySteinberg online customer portal. As aregistered user, you are entitled to technical support, you gain accessto exclusive offers such as software updates and upgrades, and more.PREREQUISITEMake sure that you have a working Internet connection.PROCEDURE1.Start your software.2.Select Help Register Now.3.Follow the instructions on screen to register at MySteinberg.An online registration form opens in your web browser.Hardware InstallationInstalling the Audio Hardware and its DriverPROCEDURE1.2.Install the audio hardware and related equipment on the computer,as described in the hardware documentation.Install the driver for the audio hardware.A driver is a piece of software that allows a program to communicate witha certain piece of hardware. In this case, the driver allows WaveLab Proto use the audio hardware. Depending on the operating system of yourcomputer, there are different types of drivers that can be used.13ENGLISHSystem Requirements and InstallationRegistering Your Software
ENGLISHSystem Requirements and InstallationHardware InstallationDedicated ASIO DriversProfessional audio hardware often comes with an ASIO driver writtenespecially for the device. This allows for direct communication betweenWaveLab Pro and the audio hardware. As a result, the devices withspecific ASIO drivers can provide lower latency (input-output delay),which is crucial when monitoring audio via WaveLab Pro or using VSTinstruments. The ASIO driver may also provide special support formultiple inputs and outputs, routing, synchronization, etc.ASIO drivers are provided by the audio hardware manufacturers. Makesure to check the manufacturer’s web site for the latest driver versions.IMPORTANTIf your audio hardware comes with a specific ASIO driver, we stronglyrecommend that you use this.Mac OS X Drivers (Mac only)If you are using a Macintosh computer, make sure that you are using thelatest Mac OS X drivers for your audio hardware. Follow the instructionsof the manufacturer to install the driver.Audio CardsWaveLab Pro works with any multimedia computer compatible audiocard. However, the audio quality varies dramatically between cards.For professional use of WaveLab Pro we recommend that you get acard with the highest possible specifications. However, if you useWaveLab Pro to edit files for use with other hardware, such as a harddisc based recording system using its own audio converters, any loss14
in audio quality that you experience when listening to the files inWaveLab Pro, due to deficiencies in the audio card, does not affect thefinal audio files.For professional use we recommend that you get a card capable ofplaying back files in 24-bit resolution.SurroundTo use the surround capabilities of audio montages in WaveLab Pro,you need an ASIO compatible audio card with multiple inputs andoutputs. In a surround configuration, each WaveLab channel can berouted to separate outputs and inputs on the audio card.Testing the Audio HardwareTo make sure that the audio device works as expected, perform thefollowing tests. Use any software included with the hardware to make sure that youcan record and play back audio without problems. If the hardware is accessed via a standard operating system driver,try playing back audio using the standard audio application of thecomputer, for example, Windows Media Player or Apple iTunes.15ENGLISHSystem Requirements and InstallationHardware Installation
Installing a MIDI Interface or USB MIDI KeyboardAlthough many USB MIDI keyboards and MIDI interfaces are plug&playdevices, you may have to install a dedicated device driver. Follow theinstallation procedure described in the documentation that came withthe device.NOTEYou should also check the web site of the manufacturer for the latestdriver updates.Setting up Your SystemSelecting the Driver for Your Audio DevicePREREQUISITEBefore you can set up the routing for your audio signals and startrecording, you need to make sure that the correct ASIO driver isselected.PROCEDURE1.Select File Preferences VST Audio Connections.2.On the Audio Device menu, select the driver that you want to use.RELATED LINKS“Hardware Installation” on page 1316ENGLISHSystem Requirements and InstallationSetting up Your System
Setting Up the VST Audio ConnectionsThe VST Audio Connections tab allows you to set up the routing ofinput and output signals between WaveLab Pro and your audiohardware. Depending on the selected driver, the setting up process canbe different.PREREQUISITESelect the driver for your audio device.PROCEDURE1.Select File Preferences VST Audio Connections.2.Select the Playback tab, and select and name the audio portsused for playback.3.Select the Recording tab, and select and name the audio portsused for recording and input monitoring.4.If you are using an ASIO driver, select the ASIO Plug-ins tab, andselect the audio ports used by the ASIO plug-ins.5.Optional: If you are using an ASIO driver, click the Control Panelbutton and make additional settings.6.Click OK.17ENGLISHSystem Requirements and InstallationSetting up Your System
Deutsch
Cristina Bachmann, Heiko Bischoff, Christina Kaboth, Insa Mingers,Matthias Obrecht, Sabine Pfeifer, Kevin Quarshie, Benjamin SchütteDiese PDF wurde für die Verwendung von Screenreader-Softwareoptimiert. Beachten Sie, dass es aufgrund der Komplexität und großenAnzahl von Bildern in diesem Dokument nicht möglich ist, alternativeBildbeschreibungen einzufügen.Die in diesem Dokument enthaltenen Informationen können ohneVorankündigung geändert werden und stellen keine Verpflichtungseitens der Steinberg Media Technologies GmbH dar. Die hierbeschriebene Software wird unter einer Lizenzvereinbarung zurVerfügung gestellt und darf ausschließlich nach Maßgabe derBedingungen der Vereinbarung (Sicherheitskopie) kopiert werden.Ohne ausdrückliche schriftliche Erlaubnis durch die Steinberg MediaTechnologies GmbH darf kein Teil dieses Handbuchs für irgendwelcheZwecke oder in irgendeiner Form mit irgendwelchen Mittelnreproduziert oder übertragen werden. Registrierte Lizenznehmer desProdukts dürfen eine Kopie dieses Dokuments zur persönlichenNutzung ausdrucken.Alle Produkt- und Firmennamen sind oder Marken derentsprechenden Firmen. Weitere Informationen hierzu finden Sie aufder Steinberg-Website unter www.steinberg.net/trademarks. Steinberg Media Technologies GmbH, 2016.Alle Rechte vorbehalten.
ie Dokumentation und die HilfeTastaturbefehleKonventionenSo können Sie uns erreichen25Systemanforderungen und ngHardware-InstallationSystem einrichten20DEUTSCH21
EinleitungDEUTSCHWillkommen!Herzlichen Glückwunsch und vielen Dank, dass Sie sich zum Kauf derweltweit kreativsten Masteringsoftware entschieden haben - SteinbergWaveLab Pro 9. Seit mehr als 20 Jahren definiert WaveLab dasMastering und den Audioschnitt stets neu und bietet viele Funktionen, dieperfekt auf die Bedürfnisse von Musik- und Masteringstudios, SoundDesignern, Journalisten und Broadcast Unternehmen zugeschnitten sind.WaveLab Pro 9 beinhaltet nicht nur das umfangreichste und zugleichintuitivste Feature-Set, das es für WaveLab jemals gab. Es setzt einmalmehr Maßstäbe, wenn es um die Klangverbesserung IhrerAudioaufnahmen geht und verleiht dem Mastering und derAudiobearbeitung einzigartige kreative Möglichkeiten. WaveLab's neueBedienoberfläche basiert auf dem populären "Ribbon" Konzept, dasgleichartige Features zu einer Funktionsgruppe zusammenfasst. Aufdiese Weise sind WaveLab's mächtige Bearbeitungs-, Processingund Rendering-Funktionen jederzeit im Zugriff und befinden sich direktoberhalb der Wellenform. Darüber hinaus beinhaltet WaveLab Pro 9revolutionäre Mitte/Seite (M/S) Bearbeitungs- und ProcessingFunktionen. Auf diese Weise können Sie den M/S Anteil IhrerAudiodateien darstellen und nicht nur tiefgehende Bearbeitungenvornehmen, sondern auch ihre favorisierten Plug-Ins auf dieseSignalbereiche anwenden.Das vielleicht kreativste Feature in WaveLab Pro 9 ist MasterRig. Dieseumfangreiche Mastering Suite beinhaltet 8 Plug-In Slots, welche mitneuen 4-Band Effekten wie Kompressor, Limiter, Saturator, Imager oderdem Dynamischen EQ bestückt werden können. Ein zusätzlicher 8-BandEqualizer wird auch den anspruchsvollsten Anforderungen gerecht,während der neue Resampler kompromisslose Qualität bei derKonvertierung von Audio Material in andere Sample Raten gewährleistet.21
EinleitungDie Dokumentation und die HilfeDas Feature Set von WaveLab Pro 9 wird abgerundet durch den neugestalteten Master Kanalzug, der u.a. Mitte/Seite und Links/RechtsMonitoring Möglichkeiten bietet, ein intuitives Docking System sowieweitere Verbesserungen, welche die Qualität Ihres Audiomaterials undIhre Kreativität beim Mastern dramatisch steigern.Wenn Sie sich außerdem auf www.steinberg.de unter MySteinbergregistrieren, erhalten Sie Zugriff auf Online Support Angebote undweitere exklusive Serviceleistungen. Darüber hinaus würden wir unsfreuen, Sie als weiteres Mitglied unserer WaveLab-Communitybegrüßen zu dürfen. Das WaveLab Online-Forum ist unterwww.steinberg.net/forum zu erreichen.Wir freuen uns auf Sie,Ihr Steinberg-WaveLab Team.Die Dokumentation und die Hilfe Um die Hilfe im Programm zu öffnen, klicken Sie auf Hilfe Inhalte. Um das Benutzerhandbuch im PDF-Format zu öffnen, wählen SieHilfe PDF-Dokumentation oder öffnen Sie denInstallationsordner. Die PDF-Dokumente befinden sich im OrdnerDocumentation.HINWEISDamit Sie die PDF-Dokumente lesen können, muss ein PDF-Reader aufIhrem Computer installiert sein.22DEUTSCHWaveLab Pro 9 ist außerdem darauf ausgerichtet, Audiodaten direkt mitanderen Steinberg Produkten wie Cubase und Nuendo auszutauschen.Im Funktionsumfang von WaveLab Pro 9 befindet sich außerdem eineVielzahl von Features, die im Bereich Radio und Broadcast genutztwerden, darunter präzise Pegel- und Analysetools, wie
WaveLab Pro 9 also provides a pletho ra of tools for professional radio and broadcast engineers. Best-known for its comprehensive selection of precise metering and analyzing tools, the feature set of WaveLab Pro 9 includes a EBU-compliant loudness metering and normalizing system. Completed b
