Transcription
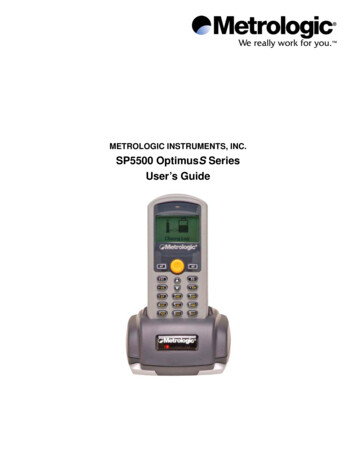
METROLOGIC INSTRUMENTS, INC.SP5500 OptimusS SeriesUser’s Guide
Copyright 2005 by Metrologic Instruments, Inc. All rights reserved. No part of this work may be reproduced,transmitted, or stored in any form or by any means without prior written consent, except by reviewer,who may quote brief passages in a review, or provided for in the Copyright Act of 1976.Products and brand names mentioned in this document are trademarks of their respectivecompanies.
Table of ContentsIntroductionProduct Overview .4Scanner and Accessories.4General Features and CharacteristicsMultifunctional Keypad .6The LCD Screen .7The Lithium Battery .7InstallationGetting Started .8Basic Operation.9Communication and Data Setup.9Data Upload . 11System Module .12System Menu Options .12Application.15Programming the Terminal .15Programming the communication cradle .15Troubleshooting .16Specifications .17Contact Information and Office Locations .19Safety Notices.21ii
IntroductionProduct OverviewThe SP5500 OptimusS Portable Data Terminals are robust and versatile scanning devices designed toprovide exceptional performance, while enduring the demands of everyday use. The lithium-ionrechargeable battery provides the Optimus with more than 100 hours of operation. It is supported by aresourceful set of development tools, including a Windows-based program builder, “C” compiler, and“BASIC” compiler. The OptimusS has a fully integrated laser for scanning all 1D bar code symbologies,completely enclosed by the protective ergonomic housing. The built-in functionality of the Optimusmakes it an excellent choice for numerous applications. In addition, when combined with the optionalBluetooth module it is the ideal solution for real time applications such as inventory control, shop floormanagement, warehousing operations, and distribution operations.Key Product Features Up to 2 MB RAM capable of storing over 100,000 recordsEasy to use Optimizer program builder and download softwareAuto-backlit LCD displayAudible and visual indicationsBuilt-in laser bar code scan engine capable of scanning all 1D bar code symbologies.Powered by rechargeable Lithium-ion batteryUpload/download data via RS232 and USB interfaces (optional modem)Scanner and AccessoriesMETROLOGIC PARTNUMBERS.PART DESCRIPTIONSP5502-6OptimusS laser batch unit with 2MB RAMSP5535-6OptimusS laser Bluetooth unit with 2MB RAMMI5500-614OptimusS Charging/Communication cradle4
General Features and Characteristics149523867Figure 1. Scanner FeaturesITEM NO.Figure 3. Product LabelDESCRIPTION1Red Output Window (Laser Aperture)2Safety and Product label (Figure 3)3Speaker for audible indicators4LCD display5Multi-functional Keypad6Charging and communication contacts7IR Communication port8Battery Compartment release9Scan Button162345Figure 2. Cradle FeaturesITEM NO.DESCRIPTION1Safety and Product label2RS232 communication port3Power Adapter port4LED power indicator5LED Transmission indicator6Rubber footpadsFigure 4. Optimus and Cradle5
General Features and CharacteristicsMultifunctional Keypad45637281Figure 5.Keypad FeaturesITEM NO.KEY HA( )8FUNCTION(FN)DESCRIPTIONPower On/Off. To prevent an accidental power down, it requires about 1.5 sec ofcontinuous pressing to turn On/Off the power.Alphanumeric These 10 keys can be used for either alpha characters ornumerical input. (See Item 8 for further description of key operation)Back Space This key can be used to toggle back one space or if pressed downlonger than one second, a clear code will be sentEnter. There are two enter keys on the side of the scan key. Normally the enterkeys are used for command execution or input confirmation.Scan a bar code. Pressing this button will trigger the scanner to read a bar codeEscape. This key is used to stop and exit current operationArrow.The two arrow keys located below the Scan key are used to toggle up anddown between menu selections.The toggle key for Alphabet/Numeral input.When the system is in alpha-mode, a small icon will be shown in the lower rightcorner of the display. Each numeric key can be used to generate one of the threecapital letters located on that number key. For example, numeral 2 can be used toproduce A, B, or C. Pressing the same key twice within one second, will producethe letter B. Pressing the same key without halting longer than one second, willallow the user to toggle through the three letters. When the key has beendepressed for longer than one second or another key has been pressed, the unitwill send the real key code to the application program.The function key.This key cannot be activated alone; it must be pressed with one of the numerickeys at the same time. For example, FN 1 generates function #1, FN 2generates function #2, etc (up to 9 functions). Also, this key can be combined withthe UP/DOWN arrow keys to adjust the contrast of the LCD. And when this key iscombined with the ENTER key, it will turn ON/OFF the backlight.6
General Features and CharacteristicsThe LCD ScreenThe LCD screen of the OptimusS Portable Data Terminal displays program settings, operationalparameters, data collected, and much more. The display is a graphical LCD with the followingcharacteristics:y Display area of 64 pixels x 100 pixelsy Resolution:y Maximum of 8 lines x 16 charactersy Minimum of 4 lines x 12 charactersy Displays alpha-characters, numbers, and symbolsy Automated back lightThe Lithium-Ion BatteryThe OptimusS Portable Data Terminal includes alithium-ion rechargeable battery pack. The battery isinserted (See Getting Started for battery installation)into the battery compartment of the Optimus andrecharges with Optimus in the cradle and in chargingmode.Figure 6 Lithium-Ion Battery7
InstallationGetting StartedThe OptimusS Portable Data Terminal (PDT) requires minimal effort to begin functional operation fordata collection in any application. In order to get started the unit must have a fresh battery inserted intothe battery compartment.1. Access the battery compartment by removing the battery cover (See Figure 7). To remove thecover, press the cover release down and slide the cover away form the unit.2. Insert the Li-ion battery into the battery compartment, battery information side up and batterycontacts to the bottom, at an angle with the battery contacts inserted first.3. Push the Li-ion battery the remainder of the way into the compartment. The battery will fitsnuggly into place.4. Close the battery compartment by sliding the battery cover toward the scan head until thecover locks into place.31Item No.Description1Li-ion battery2Battery contacts3Battery cover2Figure 7 Battery Compartment Features5. Turn the unit over, so the keypad is visible and hold down the power button .6. The LCD graphical display will display a menu and an audible indicator will sound to signifythat the Optimus has been powered up properly.7. Using the arrow keys select the Run Program option.8. Scan a bar code.Note: The OptimusS comes with a default program loaded that allows users to scan items and entertheir quantity. For information on how to create these programs, please refer to the Optimizermanual.8
InstallationBasic OperationIn order for the Optimus to operate properly, an application program must be loaded onto the PDT. It ispossible for the Optimus to power up without at active application. On power up if the Optimus has noapplication program loaded, then the following Application Program menu options will appear on thedisplay:MENU OPTIONS.DownloadActivateUploadDESCRIPTIONThis option allows the user to download application programs (*.SHX), BASIC run-time(bas.ops.shx), BASIC programs (*.SYN) or font files to the terminal. There are 6 residentlocations and one Active Memory. A maximum of 7 programs can be downloaded to theterminal. The application program downloaded to the Active Memory will be the only activateprogram running. In order to activate one of the other programs, immediately afterdownloading, input a name for the program desired or just press the enter key to keep itscurrent name if one is applicable. This will enable the user to download the program. Theapplication program’s type, name, and size will be shown on the list of programs whenentering the Download or Activate menu of the Program Manager. The file type is a smallletter that follows the program number (01 06), it can be either ‘b’, ‘c’ or ‘f’ which representsBASIC program, C program or font file respectively. The program name is up to 12characters and the program size is in units of K bytes.NOTE: In order to delete a program, select the program designated for deletion. From theprogram information screen, press the Alpha/Function key, then zero.This option will enable the use to activate one of the resident programs. In order toaccomplish this, the user must copy one of the 6 resident programs to the Active Memory.Upon activation of the new program the original program in the Active Memory will bereplaced. Note: A font file cannot be activated, and a BASIC program cannot be activated ifthe BASIC run-time does not exist.The Upload option gives the user additional method for retrieving an application program. Itallows a user to transmit the application programs to a host PC or another terminal. Thisfunction also allows a terminal to be cloned without going through a PC.Selecting and successfully completing one of these three menu options will enable the OptimusS tobegin functional operation.Communication and Data Collection SetupThe OptimusS Series has various ways of communicating with a host device. Depending on the modelof Optimus, it can communicate via RS232, USB, or via a wireless Bluetooth connection. The twomodels available are the OptimusS Batch (SP5502) and OptimusS/Bluetooth (SP5535). These twomodels have various ways of data collection as well. Depending on the model it may store the data onthe terminal itself or transmit live data back to a host device.The SP5502 stores data in the unit and has the ability to utilize a RS232 or USB connection tocommunicate to a host device for both application program downloads and data uploads. The SP5502includes either a USB or RS232 cable. In order to begin an application download or data transfer thefollowing steps would need to be followed.1. Remove the Optimus cradle, the power supply, and either the USB or RS232 cable from the box.2. Plug the power supply into a power outlet and insert the other end into the cradle. The red LEDon the cradle will illuminate if the power supply is connected correctly.9
Installation3. Follow steps a and ba. For the RS232 cable plug the 9 pin serial connector into a serial port on the host device.Plug the opposite end into the communication port of the cradle.b. For the USB cable plug the USB end of the cable into an appropriate communication porton the host device and the opposite end of the cable into the communication port of thecradle*.4. Power up the Optimus and select the Utilities option.5. This will open additional menu options. Select the Transfer Files option.6. Select Get Program on the next menu. The unit is now ready to download an applicationprogram.7. Place unit in cradle and download the appropriate application program.8. Once the Optimus has received the application program the unit is ready for scanning andcollecting data.The Optimus Bluetooth is similarly setup, but the Bluetooth capability makes it necessary to take a fewadditional steps. Prior to downloading applications and transferring files an operation known asBluetooth pairing must be performed. Bluetooth pairing is what happens when two Bluetooth enableddevices agree to communicate with one another. When this happens, the two devices join what is calleda trusted pair. When one device recognizes another device in an established trusted pair, each deviceautomatically accepts communication, bypassing the discovery and authentication process thatnormally happen during Bluetooth interactions. To setup the Bluetooth pairing follow steps 1-8.1. With Optimus powered off press and hold the 7, 9, and power keys. The System Module menuwill appear on screen.2. Using the arrows select the Bluetooth Menu option.3. Select Pairing Test from the list of options that appears using the arrow keys. The message“Inquiring Please wait” will appear on the display.4. The name of Bluetooth enabled devices will appear on the display. Using the arrow keyshighlight the appropriate host device name and press the enter key to select that device.5. The menu will appear on the display. Select the Serial Port** option. And enable the appropriateserial port options.6. Press “ESC” to start Bluetooth pairing.7. Successful pairing has been completed when “Connect OK!! Update Freq. Devices” appears onthe display. Additionally the display on the Bluetooth enabled host device will have notificationpopup that indicates a Bluetooth device has been connected.8. Power off the Optimus.Upon completion of the pairing process, and depending on the active application program, the user willbe able to begin data transmission via the Bluetooth communication.It is important to note that when setting up the Optimus for Bluetooth pairing, that ifthe host device has enabled Bluetooth security settings, then the Optimus mustmatch those settings in order for the pairing to be successfully completed.*A software driver is required for proper installation. The driver is included with the installation CD provided with eachOptimus. In addition the driver can be downloaded from http://www.metrologic.com.** It is important to note that this method of BT pairing is for “Serial Port Profile” only. To connect to the BT accesspoint, please contact Metrologic representative.10
InstallationData Upload1. To transfer the data collected select the Utilities option.2. Select the Transfer Files option on the next menu and then the Send Files option.3. Re-insert the Optimus unit into the cradle and upload the data to the host device.The OptimusSBT Bluetooth model is similarly connected to the host device and programmed however,there are some key differences in the data collection process. The OptimusSBT Bluetooth supportstransmission of data wirelessly and as such has the capability of communicating that data in twodistinctive methods, Network Emulation and Serial Emulation.Network Emulation: Because of the wireless capability of the Optimus Bluetooth it has the capability totransmit data wirelessly to a Bluetooth equipped access point. An access pointthat exists and is connected to a Local Area Network (LAN) allows users to collectand transmit data in real time, minimizing time lost to transfer data to a hostdevice.Serial Emulation: Serial Emulation is another manner in which the wireless capable OptimusBluetooth can transmit data and upload an application program. With SerialEmulation the Optimus Bluetooth can transmit wirelessly to any Bluetooth devicethat supports Serial Port Profile (SPP). The SPP supported device also allowsusers to download an application program to the OptimusSBT Bluetoothwirelessly.It is important to note that plugging the Optimus into a serial port or USB port on thehost device does not guarantee communication with the Optimus. Ensure that thecommunication port on the host device is not populated by another device.Confirm that the communication settings on both the host device and the Optimuscorrespond prior to a program download or data upload. The communication portsettings on the host device to verify are the download/upload method, port number,and baud rate (For further detail see the Optimizer User’s Guide).11
InstallationThe System ModuleThe system module on the Optimus is another useful tool included with the Optimus. It providesinformation about the Optimus and access to the system menu for configuring the Optimus. In order toaccess the system module, follow the instructions below:1. With the Optimus powered off press down and hold the 7, 9, and power button.2. An audible indicator will sound to indicate that the Optimus is powered on.3. The Optimus will display the system menu.The system menu will list a number of options: InformationSettingsTestsMemoryPowerLoad ProgramNote: The different OptimusS models may have varying menu options.System Menu OptionsDepending on the application program that is active on the Optimus, there are number of settings andoptions that may be selected for both setup and testing. The tables show a number of those settingsand their descriptions.InformationThe Information option provides information about the Optimus including: Hardware VersionSerial NumberManufacturing DateApplication Program VersionHardware Configurations12
InstallationSettingsSETTINGClockBacklight ON PeriodCPU SpeedPowering Off the TerminalPower On OptionsKey ClickSystem PasswordDESCRIPTIONDEFAULTSet date and time for the system.Set the duration for the keyboard/LCD backlightN/Athe light goes off after 20secondsSet CPU running speed. There are five speeds available:Full speed, half speed, quarter speed, eighth speed andsixteenth speed.Set time threshold for automatically power off when nooperation is taking place during that specified period. If thisvalue is set to zero, this function will be disabled.There are two possible selections: Program Resume, whichstarts from the program being used during the last sessionbefore the last power-off; and Program Restart, which startswith a new program.Select a tone for the beeper or disable the beeper when theuser presses a key button.Set a password to protect the user from entering the systemmenu.Full speed10 minutesProgram ResumeEnableno password is setTestsThe OptimusS has numerous tests available to the user for both operation and diagnostics. Dependingon the application program that is in the active memory will determine which tests can be performed andare available to the user.
Pressing this button will trigger the scanner to read a bar code 6 ESC Escape. This key is used to stop and exit current operation 7 ARROW Arrow.The t wo arrow keys locate d belo w the Scan key are u sed to toggle up and down between menu selections. ALPHA( ) The toggle key for Alphabet/Numeral input.