Transcription
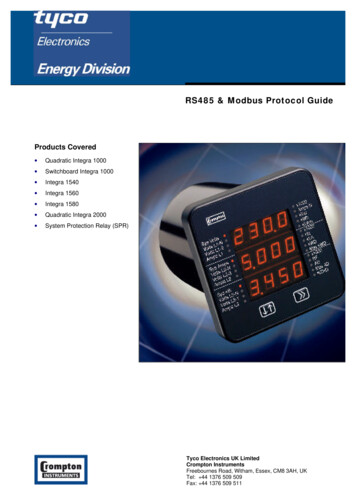
PRECISION MEASURINGINSTRUMENTS(PMI)Facilitator Guide
TABLE OF CONTENTSINTRODUCTIONPAGE 1PROGRAMME PMI-1 TO PMI-6SUMMARY PMI-1SUMMARY PMI-2SUMMARY PMI-3SUMMARY PMI-4SUMMARY PMI-5SUMMARY PMI-6PAGE 3PAGE 4PAGE 5PAGE 6PAGE 7PAGE 8MODEL ANSWERSLEARNER EXERCISE PMI-1LEARNER EXERCISE PMI-2LEARNER EXERCISE PMI-3LEARNER EXERCISE PMI-4LEARNER EXERCISE PMI-5LEARNER EXERCISE PMI-6PAGE 9PAGE 10PAGE 12PAGE 14PAGE 15PAGE 16CRITERION TESTPMI-2PMI-3PMI-4PMI-5PMI-6PAGE 18PAGE 19PAGE 20PAGE 21PAGE 23BLANK CRITERION TESTSPMI-2PMI-3PMI-4PMI-5PMI-6PAGE 24PAGE 25PAGE 26PAGE 27PAGE 29PROGRAMME PMI-7SUMMARYPAGE 30MODEL ANSWERSLEARNER EXERCISE 1LEARNER EXERCISE 2LEARNER EXERCISE 3LEARNER EXERCISE 4LEARNER EXERCISE 5PRACTICAL EXERCISECRITERION TEST CHECK LISTPAGE 32PAGE 33PAGE 34PAGE 35PAGE 36PAGE 37PAGE 39
PROGRAMME PMI-8SUMMARYPAGE 40MODEL ANSWERSLEARNER EXERCISE 1LEARNER EXERCISE 2LEARNER EXERCISE 3LEARNER EXERCISE 4LEARNER EXERCISE 5LEARNER EXERCISE 6CRITERION TEST PMI-8CRITERION TEST CHECK LISTPAGE 42PAGE 43PAGE 44PAGE 45PAGE 47PAGE 50PAGE 51PAGE 52CONTACT DETAILS:https://techav.co.zainfo@techav.co.za
INTRODUCTIONPrecision Measuring is a skill that must be mastered by all aspirant engineering students.This series is designed upon "Learner-Controlled" principles currently being adopted bymost industrialised nations.THE PACKAGE COMPRISESo The Facilitator Guide and Criterion Tests.o Video Programme.o The Learner Guide.It is strongly recommended that learners learn the subject matter in the sequential order ofcontents. Programmes PMI-1 and PMI-2 being PREREQUISITE for the subsequentprogrammes.CONTENTS OF SUBJECT MATTER1.VIDEO PROGRAMMEPMI-1"An overview of micro-measuring".PMI-2"Using, reading and maintaining outside micrometers".PMI-3"Using, reading outside micrometers over 25 mm".PMI-4"Using and reading inside micrometers".PMI-5"Using and reading micrometer depth gauges".PMI-6"Using and reading vernier callipers".2.INSTRUCTOR NOTESThese are contained within this manual and are designed to provide an overview tothe content of the video programme as quick reference in the case of student /learner questions.3.LEARNER WORKBOOK (EXERCISES)Each learner should complete his / her own copy at the end of each lesson(video).The Instructor should check each learner's completed exercise for evaluation andcorrection. Corrected exercises are to be returned to the learner to be retained byhim / her as Reference Notes.4.CRITERION TESTSThese should be completed by the learner WITHOUT reference to any notes or videoinput and marked by a competent person. It is suggested that only two attempts beallowed for completing a CRITERION.Back to Table of Contents1
Any learner not able to gain 100% on the second attempt should re-do theprogramme from the beginning.HOW TO USE THIS PACKAGEThe package may be used as a "stand alone" training system or integrated into your existingcourses.Programme No. PMI-1 is an Introductory lesson to incoming ("raw") learners, and should beviewed initially by all learners.Programme No. PMI-2 is Mandatory and if not viewed in sequence will affect the output ofprogrammes PMI-3, PMI-4 and PMI-5.Programme No. PMI-6 can be used independently.EVALUATIONWhen the learner(s) have successfully completed this package they will be able todemonstrate the following to any instructor or journeyman:o The ability to take external measurements with micrometers to an accuracy of 0,01mm.o The ability to take internal measurements with inside micrometers to an accuracy of0,01 mm.o The ability to take depth readings up to 2,00 mm with an accuracy of0,01 mm.o The ability to take external, internal and depth readings with a Vernier Calliper to anaccuracy of 0,02 mm.Back to Table of Contents2
PROGRAMME PMI-1AN OVERVIEW OF MICRO-MEASURINGTEACHING OBJECTIVETo provide new engineering learners with the necessary "conceptual" information of theneed for "precision-measuring".TRAINING AIDS REQUIREDo 1 x 300 mm Engineer's steel rule.ESTIMATED LEARNER TIME REQUIREDApproximately 30 minutes.SUMMARY OF SUBJECT MATTERo Standard units of linear measure including: Metre. Centimetre. Millimetre. Sub millimetre. Engineer's steel rule.o Importance of careful measuring.o Need for careful handling of precision tools.o Standard method of expressing dimensions.Back to Table of Contents3
PROGRAMME PMI-2USING, READING AND MAINTAINING METRIC OUTSIDE MICROMETERSTEACHING OBJECTIVETo provide the necessary theoretical input and practical demonstration that will enableselected engineering learners to use, read and maintain conventional metric outsidemicrometers up to 25 mm.TRAINING AIDS REQUIREDo 1 x 0-25 mm Outside micrometer.o Assorted machined components both flat and round not exceeding 25 mm.ESTIMATED LEARNER TIME REQUIREDApproximately 3 hours.SUMMARY OF SUBJECT MATTERo Parts and functions of typical micrometer (outside).o Methods of holding and "feeling".o Principles of reading the main scale.o Principles of reading the thimble scale.o Obtaining an overall (combined) reading.o Principles of maintaining micrometers.Back to Table of Contents4
PROGRAMME PMI-3READING MICROMETERS OVER 25 mmTEACHING OBJECTIVETo provide the necessary theoretical input and practical demonstration that will enableselected engineering learners to use, read and adjust outside micrometers that read above25 mm to a maximum 100 mm.TRAINING AIDS REQUIREDo 1 x 25 - 50 Fixed micrometer.o 1 x 50 - 75 Fixed micrometer.o 1 x 75 - 100 Fixed micrometer.o 1 x 0 - 100 Adjustable micrometer.o Assorted work pieces up to 100 mm.ESTIMATED LEARNER TIME REQUIREDApproximately 3 hours.SUMMARY OF SUBJECT MATTERo Fixed types of micrometers up to 100 mm.o "Ranges" of readings with fixed types.o Checking accuracy with setting gauges.o Contents of adjustable micrometer "kits".o Changing an anvil.o Checking reading against setting gauges.o Adjusting for zero ("standard" settings).o Using and reading adjustable type.Back to Table of Contents5
PROGRAMME PMI-4USING AND READING INSIDE MICROMETERSTEACHING OBJECTIVETo provide the necessary theoretical input and practical demonstration that will enableselected engineering learners to use, read and adjust a conventional "inside micrometer" upto 200 mm.TRAINING AIDS REQUIREDo 1 x 50-75 Inside micrometer with extensions.o Assorted work pieces: Round bores. Square bores.ESTIMATED LEARNER TIME REQUIREDApproximately 3 hours.SUMMARY OF SUBJECT MATTERo Typical applications for inside micrometer.o Parts / functions of inside micrometer.o Measuring "ranges".o Techniques of using the micrometer.o Checking overall accuracy.o Reading the instrument.Back to Table of Contents6
PROGRAMME PMI-5USING AND READING THE DEPTH MICROMETERTEACHING OBJECTIVESTo provide the necessary theoretical input and practical demonstration that will enableselected engineering learners to use and read a conventional depth gauge micrometer witha maximum range of 175 - 200 mm.TRAINEE AIDS REQUIREDo 1 x 0-25 Body and extension rod kit - 200 mm.o Assorted work pieces to measure depths.ESTIMATED LEARNER TIME REQUIREDApproximately 3 hours.SUMMARY OF SUBJECT MATTERo Typical applications for depth reading.o Parts and functions of depth micrometer.o Rods (extensions) and changing rods.o Handling / using techniques.o Reading the instrument.Back to Table of Contents7
PROGRAMME PMI-6USING AND READING VERNIER CALIPERSTEACHING OBJECTIVETo provide the necessary theoretical input and practical demonstration that will enableselected engineering learners to use and read a (0,02) metric vernier calliper.TRAINING AIDS REQUIREDo 1 X 0 - 150 mm Conventional vernier calliper.o Assorted machined work pieces for external, internal and depth measurements.ESTIMATED LEARNER TIME REQUIREDApproximately 2 hours.SUMMARY OF SUBJECT MATTERo Overview of typical applications.o Vernier calliper parts and functions.o Method of handling the vernier.o Gauging external, internal and depth readings.o Reading the instrument.o Examples of reading.Back to Table of Contents8
MODEL ANSWERSLEARNER EXERCISE PMI-1AN OVERVIEW TO MICRO-MEASURING1.2.3.4.5.6.7.8.9.10.The Standard Measuring unit is the Metre.A centimetre is exactly 1/100 of a metre.A tenth of a centimetre is called a millimetre.Engineering conventions express all linear measurements in metres andmillimetres only.The term centimetre is used for expressing the dimensions of domestic items.A steel rule is inaccurate for measuring dimensions under one millimetre.A micrometer is used to measure accuracies up to 1/100 of a millimetre.Dropping or bumping precision measuring instruments may cause them toread inaccurately.Micro measurements should include two decimal places when writing themdown.The letters mm should usually be included when writing down your reading.Back to Table of Contents9
MODEL ANSWERSLEARNER EXERCISE PMI-2USING, READING AND MAINTAINING METRIC MICROMETERS1.Label the parts in the diagram below.ANVILSLEEVESPINDLETHIMBLERACHETDATUM LINESPINDLE LOCKFRAME2.3.4.5.The fully closed reading on a 25 mm micrometer is 0,00 mm.The fully open reading is 25,00 mm.Each division below the datum line represents 1,00 mm.The reading shown is 12,00 mm.6.This reading is 6,00 mm.7.Each division above the datum line represents 0,50 mm.Back to Table of Contents10
8.This micrometer is set at 6,00 0,50 6,50 mm.9.10.11.12.Two full turns of the thimble opens the micrometer one division which represents1,00 mm.The thimble has 50 divisions.Each division on the thimble represents 0,01 mm.This micrometer is set to 0,09 mm.13.This micrometer is set to 0,43 mm.14.This reading is 7 0 0,04 7,04 mm.15.This reading is 11,00 0,50 0,38 11,88 mm.Back to Table of Contents11
MODEL ANSWERSLEARNER EXERCISES PMI-3USING AND READING OUTSIDE MICROMETERS OVER 25 mm1.2.3.45.6.7.8.9.10.A 25 - 50 micrometer has a minimum reading of 25 mm and a maximum reading of50 mm.The measuring "range" of any outside micrometer is 25,00 mm.When taking a reading off a fixed micrometer you must always remember toinclude the minimum opening figure.Micrometer standards should be checked from time to time using a settinggauge.Don't hold a setting gauge in your hand as this will cause it to expand, giving rise toinaccurate readings.An adjustable outside micrometer is supplied in kit form and includes settinggauges, anvils and adjusting wrenches.When not in use, all loose parts should be stored in the box.An adjustable micrometer should always be checked against a setting gaugewhenever an anvil is changed.When taking a reading on an adjustable micrometer you must always remember toinclude what in the final reading?The minimum reading of the setting gauge.What is the full reading on the micrometer shown below?57,00 mm.Back to Table of Contents12
11.What is the total reading on the micrometer shown below?84,00 mm.12.What reading total is given on the 'adjustable' micrometer illustrated?50,00 2,00 0,45 52,45 mm.Back to Table of Contents13
MODEL ANSWERSLEARNER EXERCISES PMI-4USING AND READING INSIDE MICROMETERS1.2.3.4.5.6.The "reading" range of the internal micrometer shown in the video is10,00 mm.The most important thing to remember when determining a reading is to include theminimum length of the extension rod.A spacing collar, if utilised, adds 12,00 mm to the total reading.The inside micrometer, before use, should be checked for accuracy using anoutside micrometer.To adjust an inside micrometer the anvil must be turned in or out on the extensionrod.What is the total reading shown below?178,36mm.Back to Table of Contents14
MODEL ANSWERSLEARNER EXERCISES PMI-5USING AND READING THE DEPTH MICROMETER1.2.3.4.5.6.A depth micrometer is used to determine such dimensions as shoulders, ledges andprotrusions.A "standard" rod allows a range of between 0,00 mm and 25,00 mm.All un-used items of the depth micrometer should be kept in the storage box toavoid loss.It is important that all work piece surfaces are clean and free of burrs.In order to establish which measuring rod must be used a rough measurement canbe taken using a steel rule or a vernier calliper.What is the total reading shown below?9,60 mm.Back to Table of Contents15
MODEL ANSWERSLEARNER EXERCISES PMI-6USING AND READING VERNIER CALIPERSNAME: DATE:1.2.There are two commonly used vernier callipers, namely, those with an accuracy of0,05 mm and those with an accuracy of 0,02 mm.Label the part names on this diagram below.3.Write in the main beam read readings.Back to Table of Contents16
4.Write in the vernier scale readings.5.Write in the combined readings.Back to Table of Contents17
CRITERION TEST PMI-2READING AND USING METRIC MICROMETERSNAME: DATE:INSTRUCTIONSAnswer all questions then hand in the completed test to your Instructor / Course Controller.Fill in the readings (taken from a 0 - 25 mm micrometer).MARKED BY: TOTAL OBTAINED:Back to Table of Contents18
CRITERION TEST PMI-3READING MICROMETERS OVER 25 MMNAME: DATE:INSTRUCTIONSAnswer all questions then hand in the completed test to your Instructor / Course Controller.The readings below are taken from a 0 - 100 mm adjustable micrometer. Fill in the FULLreadings only.1.Anvil used:0,87 mm.-0 - 25 mm.2.Anvil used:31,08 mm.-25 - 50 mm.3.Anvil used:84,88 mm.-75 - 100 mm.MARKED BY: TOTAL OBTAINED:Back to Table of Contents19
CRITERION TEST PMI-4READING INSIDE-MICROMETERSNAME: DATE:INSTRUCTIONSAnswer all questions then hand in the completed test to your Instructor / Course Controller.Note each reading shown.1.130,35 mm.2.83.80 mm.3.77,00 mm.4.185,00 mm.MARKED BY: TOTAL OBTAINED:Back to Table of Contents20
CRITERION TEST PMI-5READING DEPTH-MICROMETERSNAME: DATE:INSTRUCTIONSAn
PMI-5 "Using and reading micrometer depth gauges". PMI-6 "Using and reading vernier callipers". 2. INSTRUCTOR NOTES . These are contained within this manual and are designed to provide an overview to the content of the video programme as quick reference in the case of student / learner questions. 3. LEARNER WORKBOOK (EXERCISES) Each learner should complete his / her own copy at the end
