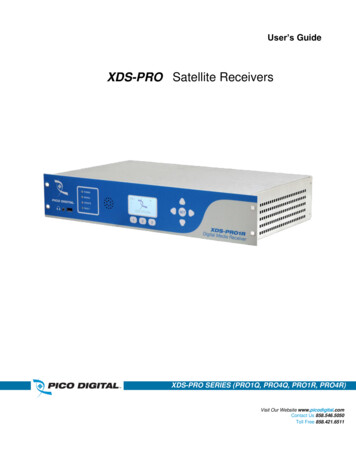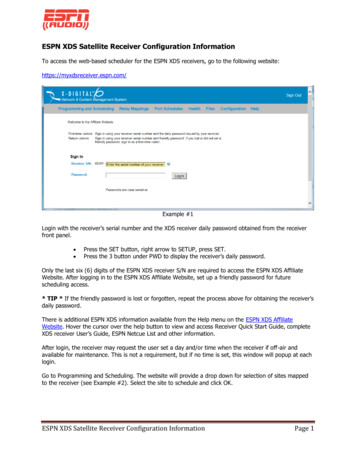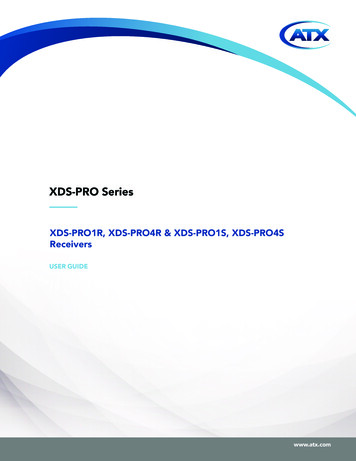
Transcription
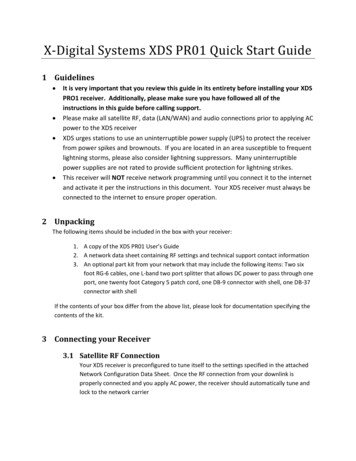
X-Digital Systems XDS PR04P Quick Start Guide1 Guidelines It is very important that you review this guide in its entirety before installing your XDSPRO4P receiver. Additionally, please make sure you have followed all of theinstructions in this guide before calling support.Please make all satellite RF, data (LAN/WAN) and audio connections prior to applying ACpower to the XDS receiverXDS urges stations to use an uninterruptible power supply (UPS) to protect the receiverfrom power spikes and brownouts. If you are located in an area susceptible to frequentlightning storms, please also consider lightning suppressors. Many uninterruptiblepower supplies are not rated to provide sufficient protection for lightning strikes.This receiver will NOT receive network programming until you connect it to the internetand activate it per the instructions in this document. Your XDS receiver must always beconnected to the internet to ensure proper operation.Appendix A at the bottom of this document contains a front panel menu map that canhelp you navigate through the XDS receiver settings and configuration2 UnpackingThe following items should be included in the box with your receiver:1. A copy of this XDS PR04P Quick Start Guide2. A network data sheet containing RF settings and technical support contact information3. An optional parts kit from your network3 Connecting your Receiver3.1 Satellite RF ConnectionYour XDS receiver is preconfigured to tune itself to the settings specified in the attachedNetwork Configuration Data Sheet. Once the RF connection from your downlink isproperly connected and you apply AC power, the receiver should automatically tune andlock to the network carrier1327 R830002-1062Rev AXDS PRO4P Quick Start GuidePage 1 of 115/6/2010
3.1.1CablingWhen connecting your receiver we recommend using the included cable andsplitter or something of equivalent rating. If you are using preexisting splittersand wiring, please make sure the cables are RG-6 and that the splitter is ratedfor L-Band frequencies (950-2150 MHz). Use of lower rated equipment canresult in roll off and significantly degraded signal quality.3.1.2LNB VoltageYour receiver was shipped from the factory with the LNB voltage disabled bydefault. If you need the receiver to drive the LNB on your dish, you can enable itafter you have powered it up from the Network Setup section of the front panel.Please see Appendix A for details.3.2 Internet ConnectionThe XDS PRO4P receiver requires a broadband connection that is always on. Thebroadband connection is used by the network to remotely troubleshoot, send content tothe internal storage, send commercial playback schedules, retrieve as-played logs ofcommercial insertions, and stream live audio to the receiver.3.2.1Connecting the Receiver to your LANIf you elect to place the receiver on your local network inside of your firewall,you will connect a patch cable from your internal switch or router to the portlabeled LAN-1. The receiver is set by default to obtain an IP address via DHCP.If your network does not have a DHCP server, you will need to assign it a staticaddress through the front panel. Please see section 4.2.2 for details onmanually assigning IP addresses.3.2.2Connecting the Receiver to the WANIf you would like your receiver to access the internet directly through a DMZconnection or outside of your firewall, you will connect a patch cable to the portlabeled LAN-2 on the back of the receiver. To assign a static IP address to theWAN, please see section 4.2.2.1327 R830002-1062Rev AXDS PRO4P Quick Start GuidePage 2 of 115/6/2010
3.3 Connecting the Audio PortsThe analog audio outputs of the PRO4P receiver is routed through the DB-9 connectorlabeled Audio-A through Audio-D on the rear panel. The table below details the wiringpin out for the ports:Pin123456789SignalL OUT GroundL OUT (*)GroundR OUT L OUTGround (*)L OUT- (*)R OUT-(*) - These additional output pins are provided for StarGuide receivercompatibility.Your receiver will be delivered with a parts kit that will include four mating DB-9connectors with shells. Please see the XDSPRO4P User’s Guide for detailedspecifications on the audio output.3.4 Relay ClosuresThe receiver has two DB-37 connectors labeled Relay-A and Relay-B on the rear panel.These connectors contain sixteen relay/contact closures that can drive externalautomation systems. The tables below detail the pin out for the ports:1327 R830002-1062Rev AXDS PRO4P Quick Start GuidePage 3 of 115/6/2010
Relay A – DB37MPinFunction1Relay 1A2Relay 2A3Relay 3A4Relay 4A5Ground6Relay 5A7Relay 6A8Relay 7A9Relay 8A10Ground11Relay 9A12Relay 10A13Relay 11A14Relay 12A15NC TxData16Relay 13A17Relay 14A18Relay 15A19Relay onRelay 1BRelay 2BRelay 3BRelay 4BGroundRelay 5BRelay 6BRelay 7BRelay 8BRelay 9BRelay 10BRelay 11BRelay 12BGroundRelay 13BRelay 14BRelay 15BRelay 16BNARelay B – DB37MPinFunction1Relay 1A2Relay 2A3Relay 3A4Relay 4A5Ground6Relay 5A7Relay 6A8Relay 7A9Relay 8A10Ground11Relay 9A12Relay 10A13Relay 11A14Relay 12A15Ground16Relay 13A17Relay 14A18Relay 15A19Relay onRelay 1BRelay 2BRelay 3BRelay 4BGroundRelay 5BRelay 6BRelay 7BRelay 8BRelay 9BRelay 10BRelay 11BRelay 12BGroundRelay 13BRelay 14BRelay 15BRelay 16BNAIf your automation system can read text cues directly, the cue serial stream is availablefrom pins 15 and 10. The NC TxData pin is RS-232 data with no flow control orhandshaking. By default, the baud rate is set to 9600 bps, eight data bits, no parity, andone stop bit.The parts kit included with your receiver will include two mating DB-37 connectors withshells. Full electrical specifications for the relay closures can be found in the XDS PRO4PUser’s Guide.4 Verification of FunctionalityOnce all of the connections have been made, you may connect AC power to the receiver and beginverification of the receiver functionality.4.1 Verify the receiver is tuned and locked to the network carrierOnce the satellite is properly connected and the receiver is powered up the receiver isconfigured from the factory to tune and lock to your network’s carrier. Please verify asfollows:1327 R830002-1062Rev AXDS PRO4P Quick Start GuidePage 4 of 115/6/2010
4.1.1Acquiring LockQuick verification of the tuner status can be done from the front panel of thereceiver. If the green LED labeled as Signal is lit, the receiver is locked to asatellite carrier. However, this does not guarantee that the receiver is locked tothe correct carrier. You can navigate to the Tuner section of the front panel toverify that the frequency and symbol rate match the values specified in theincluded Network Data Sheet. Additionally, you can manually change the valuehere if your receiver does not automatically lock. 4.1.2At the main screen with the network logo, press the SET key, thenthe left or right arrow keys to reach Setup. Press SET.Press the left or right arrow keys to reach Tuner. Press SET.Press the left or right arrow keys to reach Frequency. Press SET.Check Network Data Sheet for FrequencyUse the four arrow keys and the SET key to set the frequency to thevalue on the Network Data Sheet packed with your receiver.Press the left or right arrow keys to reach Symbol Rate. Press SET.Check Network Data Sheet for Symbol RateUse the four arrow keys and the SET key to set the symbol rate tothe value on the Network Data Sheet packed with your receiver.Signal QualityOnce the tuner is locked and the correct carrier is verified, the quality of thesignal should be verified to ensure reliable service. On the starting screen of thefront panel the receiver displays the Eb/N0 (shown as EB) and AG (automaticgain shown as AG) values from the tuner. The EB value should be above 7 andAG should fall between 40 and 60. If your values do not fall within these ranges,please verify proper dish orientation and RF wiring.4.2 Verify IP connectivity to the NOCIn order for the NOC to send programming and schedule information to your receiver, itmust be able to communicate with the receiver over the internet.4.2.1NOC Connection TestUnder the Network Setup section of the front panel there is a tool called TestNOC that will allow you to verify internet connectivity to the NOC. Press the 2softkey that is labeled NOC to initiate the test.After the test completes you will either see ‘Successfully Connected to NOC’ or‘Cannot Connect to NOC!’ If your receiver is able to connect, your settings arecorrect and you are ready to proceed with the next tests. On the other hand, ifyour receiver is unable to connect, you will need to adjust your IP settings until1327 R830002-1062Rev AXDS PRO4P Quick Start GuidePage 5 of 115/6/2010
the test is successful. You may need to check settings on the receiver or in yournetwork including any switches, routers or firewalls. The receiver will need tobe able to communicate on TCP port 80 to the internet. Please see the nextsection if you need to assign the receiver a static IP address or configure a proxyserver.4.2.2Assigning a Static IP AddressAssigning a static IP address to either the LAN or WAN can be done from theNetwork Setup section of the front panel. This section allows DHCP to betoggled, a gateway to be specified, a static IP address to be set for the LAN orWAN port, or an HTTP proxy server and port to be specified. When specifying IPaddresses, use the Up/Down keys to adjust the numerical values and theLeft/Right keys to move between octets. The SET key will save the specifiedaddress. Once all adjustments are complete, run the TEST NOC again to makesure the receiver is able to successfully connect to the NOC. Please seeAppendix A for help on navigating through the front panel menus.4.3 Verify Audio ReceptionOnce the receiver is locked to the network carrier, you can verify audio functionality asfollows:4.3.1Verify Audio ReceptionFrom the factory your receiver is configured to play out the Test Channel foryour network on all audio ports, however, your network may ship the receiverwith current programming and authorizations active. Even if this is the case, theTest Channel can be used to verify audio reception as well as verify properwiring to the rear DB-9 connector.Connect a set of headphones (or use front panel speaker) and verify you canhear the Test Channel.To manually program the XDS receiver speaker/headphone to output the TestChannel: 1327 R830002-1062Rev AAt the main screen with the network logo, press the SET key, thenthe left or right arrows to reach Audio Ports. Press SET.Press the left or right arrows to reach Headphones. Press SET.Press the left or right arrows to reach Program. Press SET.Use the up and down arrows to find the network’s Test Channel.Press SET.XDS PRO4P Quick Start GuidePage 6 of 115/6/2010
The Test Channel is intended to check receiver operation; it does NOT indicate thatyou can receive regular network programming. You must complete all installationand activation steps including a fulltime internet connection to receive programaudio. Your PRO4P receiver must ALWAYS be connected to the internet.4.3.2Verify Audio PortsEach DB-9 connector carries one radio program stream, either mono or stereo.If the program is mono, the same audio appears on the left and right pin pairs.In most cases, the left and right sides of a stereo channel are no longer used tocarry unrelated mono programs.To manually program the XDS receiver to output the Test Channel on a desiredaudio port: At the main screen with the network logo, press the SET key, thenthe left or right arrows to reach Audio Ports. Press SET.Press the left or right arrows to select the Audio Port (letter A, B, Cor D). Press SET.Press the left or right arrows to select Program. Press SET.Use the up and down arrows to find the Test Channel. Press SET.Verify that you can hear the Test Channel through all receiver ports.5 Verification of Programming and ActivationYou can edit and activate the programming schedule of your receiver through the Affiliate websiteof your network. The URL for this site is provided on the Network Data Sheet.To login you will use the serial number of your receiver as the username and a password generatedby the receiver. The password can be found as follows: On the front panel in the Setup section where the serial number is displayed press the 3soft key to show the daily password.Use this password along with your receiver serial number to log in to the Affiliate website5.1 Setup from the Affiliate WebsiteOnce logged in to the Affiliate website, the following adjustments should be made prior toactivation:1. Set a friendly password: This will be a persistent password that will allow you to log into the site without finding the daily password each day2. Adjust Time Zone: In addition to the proper time zone for your location, please makesure your daylight savings settings are correct1327 R830002-1062Rev AXDS PRO4P Quick Start GuidePage 7 of 115/6/2010
3. Review Schedule: In the XDS system each program, not each channel, is permissionedand labeled for station use. Therefore, instead of tuning to a channel to find a program,you will schedule the programs to appear on each output port based on the stationsthat have received authorization(s). You will need to review your schedule beforeactivating your receiver. For detailed instructions on using the scheduler, please seethe PRO4P User’s Guide.Note: This receiver is equipped with digital storage that allows a ‘tape delay’ of livenetwork programming per your affiliate agreement. You can use this capability toschedule your receiver with a combination of live and delayed programming. The User’sGuide contains a full explanation of the scheduler4. Review Relay Mappings: The receiver will be preconfigured by the network with thedefault relay mappings. Please review and modify as desired to connect the receiverwith your automation equipment.5. Approve Setup and Activate: Once you have reviewed all of the settings above, pressthe Update button. Within a few minutes, the NOC will send the updated programmingto your receiver and the Update LED on the front panel will turn off.6 Support Contact InformationIf you have any problems with the steps in this guide, please call the Technical Services contactspecified in the Network Configuration Data Sheet. The support staff will be able to assist you insetup and verification.7 Full User’s GuideThis Quick Start Guide is not a full equipment manual. To download the XDS PRO4P User’s Guide,please see the Help tab of the Affiliate website where all documents related to receiver operationcan be found. Please note that the User’s Guide may periodically change to reflect changes insoftware features.8 USB PortThe Front Panel USB port is not implemented at this time. Please DO NOT plug in any device at thistime.1327 R830002-1062Rev AXDS PRO4P Quick Start GuidePage 8 of 115/6/2010
9 VU MetersVU meters are available on the receiver by selecting: Left or Right key on the front panelPress the 1 softkey which is labeled as VUPress the Up key to exit10 Modem ConnectionIf you are unable to obtain a broadband connection in your area, please contact Technical Servicesfor your network to discuss the possibility of using a modem connection instead.1327 R830002-1062Rev AXDS PRO4P Quick Start GuidePage 9 of 115/6/2010
APPENDIX A – XDS RECEIVER MENU TREE:EBAGXDSPRO4PXDS PRO4StatusSpeaker VolumeA --------------------- B --------------------- 16C --------------------- dBD --------------------- -------------------------- 0VUMUTEXDS PRO4SetupActive FaultsOKSetupSerial NumberXDSP-0300000SetupM&C Ports115200,None,8,1XDS PRO4Audio PortsSetupNetworkAudio Port A-DZAAA-FMTest ChannelPWDFault nesMonitor Port ASetupFactory DefaultsSetupRebootSetupRelaysAudio Port A-DProgramCLREnvironmentTEMP:44 ‘CFAN:LOWRPM:2475LockPower Status1.2V 1.20 3.3V-3.325.0V 5.05 12V 11.8620V 21.26Storage – CFTotal: 7693Avail: 3412Used: 55%MBMBFIXStorage – HDDTotal: 75117Avail: 70656Used: 5%MBMBFIXSetupTunerSetupFrequency1040000 kHzSetupFEC2/3Storage may be damaged!FMTSetupSymbol Rate5000000 spsAudio Port A-DSettingsStereoSetupRelay A (Top R1-R16)0000000000000000Audio Port A-DPAD/AsyncRepair StorageFIXAudio Port A-DSpotsSetupLNBV PowerONSetupRelay B (Lower R1-R16)Audio Port A-DStationZAAA-FM0000000000000000ESCEDITSetup USBStatusNo DeviceSetup USBInsert DeviceSetup USBRecover from USBSetup USBRemove DeviceSetup NetworkDHCPONSetup NetworkLAN Address192.168.1.100Setup NetworkLAN Subnet255.255.255.0Setup NetworkGateway192.168.1.1Setup NetworkWAN Subnet255.255.255.254Setup NetworkWAN Address0.0.0.0Setup NetworkDNS (1/3)192.168.1.1DELADDSetup NetworkProxy192.168.1.2 : 80Setup NetworkTEST NOCPINGNOCESCSetup USBBackup to USBSetup NetworkNASSetup NASAccount A/B1327 R830002-1062Rev ASetup NASAccount A/B TypeSMBSetup NASAccount A/B URN//192.168.1.101/shareSetup NASAccount A/B Pathaudio/XDS PRO4P Quick Start GuidePage 10 of 11Setup NASAccount A/B UserdefaultSetup NASAccount A/B Passpassword5/6/2010
Important NoticeFCC ComplianceTHIS DEVICE COMPLIES WITH PART 15 OF THE FCC RULES. OPERATION OF THIS DEVICE IS SUBJECT TO THE FOLLOWING TWO CONDITIONS: (1) THIS DEVICE MAYNOT CAUSE HARMFUL INTERFERENCE; AND (2) THIS DEVICE MUST ACCEPT ANY INTERFERENCE RECEIVED, INCLUDING INTERFERENCE THAT MAY CAUSEUNDESIRED OPERATION.UL and CSA ComplianceTHE XDS-PRO DVB SATELLITE RECEIVER WAS TESTED ACCORDING TO UL 60950-1:2003 AND CSA C22.2 NO. 60950-1:2003. THIS DEVICE MEETS THESAFETY AND TEST REQUIREMENTS OF THE TEST SPECIFICATIONS, AND WAS FOUND TO BE IN COMPLIANCE WITH PROTECTION AIMS OF THE APPLICABLE ECDIRECTIVES AND THE REQUIREMENTS OF THE STANDARDS. THE XDS-PRO DVB SATELLITE RECEIVER MAY BE MARKED WITH THE TUV MARK AS SHOWNBELOW; CERTIFICATE NO. U8 07 01 62269 001Warning!Approved external telecom power cross protection must be incorporated into the finalinstallation in accordance with Annex NAC of UL/CSA standard 60950-1. Failure tocomply may result in a fire or electric shock hazard and will void regulatorycompliance certification.Acknowledge of TrademarksAny product or corporate names used herein may be trademarks or registered trademarks, and are only used for identificationand explanation, without intent to infringe. Any terms mentioned or used that are known trademarks or service marks havebeen appropriately capitalized and italicized. X-Digital Systems, Inc. cannot attest to the accuracy of this information. Use of aterm in this document should not be regarded as affecting the validity of any trademark or service mark.Patent PendingX-Digital Systems, Inc., DVB Satellite Receiver – Patents PendingDisclaimerThis document is intended to provide information about the “XDS-PRO4P DVB Satellite Receiver”. Every effort has been madeto make this document as complete and accurate as possible, but no warranty or fitness is implied. The information is providedon an “as is” basis and X-Digital Systems shall have neither liability nor responsibility to any person or entity with respect to anyloss or damages arising from the information contained in this document.1327 R830002-1062Rev AXDS PRO4P Quick Start GuidePage 11 of 115/6/2010
3 Connecting your Receiver 3.1 Satellite RF Connection Your XDS receiver is preconfigured to tune itself to the settings specified in the attached Network Configuration Data Sheet. Once the RF connection from your downlink is properly connected and you apply AC power, the receiver should automatically tune and lock to the network carrierFile Size: 773KB

