Transcription
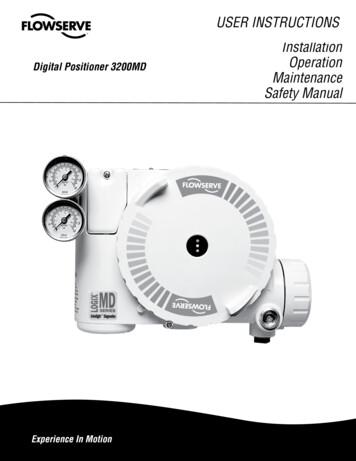
FCD LGAIM0058-00USER INSTRUCTIONs Digital Positioner 3200MD3200MD afety ManualInstallation, Operation and Maintenance Instructions
User instructions - Digital Positioner 3200MD LGENIM0059-03 07/10 Contents1234567Terms Concerning SafetyGeneral InformationUnpacking and Storage3.1 Unpacking3.2 Storage3.3 Pre-installation InspectionLogix 3200MD Positioner Overview4.1 Specifications4.2 Positioner Operation4.3 Detailed Sequence of Positioner OperationsMounting and Installation5.1 Mounting to Valtek Linear Mark One Valves5.2 Mounting to Standard Valtek Rotary Valves5.3 Optional Valtek Rotary Mounting Procedure5.4 Tubing Positioner to ActuatorWiring and Grounding Guidelines6.1 4-20 mA Command Input Wiring6.2 Grounding Screw6.3 Compliance Voltage6.4 Cable Requirements6.5 Intrinsically Safe BarriersStartup7.1 Logix 3200MD Local Interface7.2 Initial DIP Switch Settings Operation7.3 Operation of Configuration DIP Switch Settings7.4 Setup of the Cal Dip-Switch for the Quick Calibrationoperating mode.7.5 QUICK-CAL Operation7.6 Local control of valve position7.7 Factory Reset7.8 Command Reset7.9 Version number checking7.10 Logix 3200MD Status Condition7.11 ValveSight Configuration and Diagnostic Software andHART 375 Handheld 61617171717171889101112131415162Maintenance and Repair218.1 Driver Module Assembly218.2 Regulator238.3 Checking or Setting Internal Regulator Pressure248.4 Spool Valve258.5 Spool Valve Cover258.6 Stem Position Sensor268.7 Main PCB Assembly278.8 Pressure Sensor Board278.9 Customer Interface Board28Optional Hardware299.1 Vented Design299.2 HART Modem309.3 4-20 mA Analog Output Board30Requirements for Safety Integrity3210.1 Fail Safe State3210.2 Safety Function3210.3 Fail Safe State Response Time3210.4 Diagnostic Annunciation and Response Time3210.5 Maximum Achievable SIL3310.6 Model Selection and Specification of Flowserve 3200MDPositioner3310.7 Installation3310.8 Firmware Update3310.9 Required Configuration Settings3310.10 Reliability Data3310.11 Lifetime Limits3310.12 Proof Testing3410.13 Maintenance3410.14 Repair and Replacement3410.15 Training Requirements34Parts List35Logix 3200MD Spare Parts Kits37Logix 3200MD Mounting Kits3813.1 Valtek Mounting Kits3813.2 Logix O.E.M. Mounting Kits3913.3 NAMUR Accessory Mounting Kit Part Numbers39Frequently Asked Questions40How to Order41Troubleshooting42
User instructions - Digital Positioner 3200MD LGENIM0059-03 07/10 1Terms Concerning SafetyThe safety terms DANGER, WARNING, CAUTION and NOTE areused in these instructions to highlight particular dangers and/or to provide additional information on aspects that may not bereadily apparent.!DANGER: Indicates that death, severe personal injury and/or substantial property damage will occur if proper precautions are not taken.0WARNING: Indicates that death, severe personal injury and/or substantial property damage can occur if proper precautions are not taken.01WARNING: Substitution of components may impair intrinsicsafety.CAUTION: Indicates that minor personal injury and/or property damage can occur if proper precautions are not taken.NOTE: indicates and provides additional technical information, whichmay not be very obvious even to qualified personnel. Compliance with other, not particularly emphasized notes, with regard totransport, assembly, operation and maintenance and with regard totechnical documentation (e.g., in the operating instruction, productdocumentation or on the product itself) is essential, in order to avoidfaults, which in themselves might directly or indirectly cause severepersonal injury or property damage.2General InformationThe following instructions are designed to assist in unpacking,installing and performing maintenance as required on Valtek Logix 3200MD digital positioners. Series 3000 is the term used for allthe positioners herein; however, specific numbers indicate featuresspecific to model (i.e., Logix 3200 indicates that the positioner hasHART protocol). See Logix 3200MD Model Number table in thismanual for a breakdown of specific model numbers. Product usersand maintenance personnel should thoroughly review this bulletinprior to installing, operating, or performing any maintenance on thevalve.Separate Valtek Flow Control Products Installation, Operation,Maintenance instructions cover the valve (such as IOM 1 or IOM 27)and actuator (such as IOM 2 or IOM 31) portions of the system andother accessories. Refer to the appropriate instructions when thisinformation is needed.To avoid possible injury to personnel or damage to valve parts,WARNING and CAUTION notes must be strictly followed. Modifyingthis product, substituting non-factory parts or using maintenanceprocedures other than outlined could drastically affect performanceand be hazardous to personnel and equipment, and may void existing warranties.WARNING: Standard industry safety practices must be adhered towhen working on this or any process control product. Specifically,personal protective and lifting devices must be used as warranted.3Unpacking and Storage3.1Unpacking1. While unpacking the Logix 3200MD positioner, check thepacking list against the materials received. Lists describing thesystem and accessories are included in each shippingcontainer.2. When lifting the system from the shipping container, positionlifting straps to avoid damage to mounted accessories. Systemswith valves up to six inches may be lifted by actuator lifting ring.On larger systems, lift unit using lifting straps or hooks throughthe yoke legs and outer end of body.0WARNING: When lifting a valve/actuator assembly withlifting straps, be aware the center of gravity may beabove the lifting point. Therefore, support must be givento prevent the valve/actuator from rotating. Failure to doso can cause serious injury to personnel or damage tonearby equipment.3. In the event of shipping damage, contact the shipperimmediately.4. Should any problems arise, contact a Flowserve Flow ControlDivision representative.3.2StorageControl valve packages (a control valve and its instrumentation)can be safely stored in an enclosed building that affords environmental protection; heating is not required. Control valve packagesmust be stored on suitable skids, not directly on the floor. Thestorage location must also be free from flooding, dust, dirt, etc.3.3Pre-installation InspectionIf a valve control package has been stored for more than one year,inspect one actuator by disassembling it per the appropriate Installation, Operation, and Maintenance Instructions (IOM) prior to valveinstallation. If O-rings are out-of-round, deteriorated, or both, theymust be replaced and the actuator rebuilt. All actuators must thenbe disassembled and inspected. If the actuator O-rings are replaced,complete the following steps:3
User instructions - Digital Positioner 3200MD LGENIM0059-03 07/10 1. Replace the pressure-balance plug O-rings.2. Inspect the solenoid and positioner soft goods and replace asnecessary.4Logix 3200MDPositioner OverviewThe Logix 3200MD digital positioner is a two-wire 4-20 mA input digitalvalve positioner. The positioner is configurable through the local userinterface. The Logix 3200MD utilizes the HART protocol to allow twoway remote communications with the positioner. The Logix 3200MDpositioner can control both double- and single-acting actuators withlinear or rotary mountings. The positioner is completely powered bythe 4-20 mA input signal. Start up current must be at least 3.6 mAwithout AO card or 3.85 mA with AO card.4.1SpecificationsTable I: Electrical SpecificationsPower SupplyCompliance VoltageEffective ResistanceTwo-wire, 4-20 mA10.0 to 30.0 VDC10.0 VDC @ 20 mATable II: ValveSight Suite Software SpecificationsComputerMinimum Pentium processor running Windows 95, 98,NT, 2000, XP, 32 MB total memory (64 MB recommended), 30 MB available hard disk space, CD-ROMdrivePorts1 minimum available with 8 maximum possible. (Canalso communicate via PCMCIA and USB connections)HART ModemRS-232/PCMCIA card/USBHART FilterMay be required in conjunction with some DCShardwareHART MUXMTL 4840/ELCON 2700Table III: Environmental ConditionsStandardOperating Temperature RangeLow-4 to 176 F(-20 to 80 C)-40 to 176 F(-40 to 80 C)Transport and StorageTemperature Range-40 to 176 F (-40 to 80 C)Operating Humidity0 - 100% non-condensingNote: The air supply must conform to ISA Standard ISA 7.0.01 (a dewpoint at least 18 degrees Fahrenheit below ambient temperature, particlesize below five microns—one micron recommended—and oil content notto exceed one part per million).495 Ω @ 20 mA TypicalAdd 20 Ω when HART communication activeTable IV: Physical SpecificationsCommunicationsHART ProtocolHousing Material Cast, powder-painted aluminum, stainless steelMinimum OperatingCurrent3.6 mA without AO boardSoft GoodsBuna-N / FlorosiliconeMaximum Voltage30.0 VDCWeight8.3 pounds (3.9 kg) aluminum20.5 pounds (9.3 kg) stainless steel3.85 mA with AO boardTable V: Positioner Specifications4Deadband 0.1% full scaleRepeatability 0.05% full scaleLinearity 0.5% (rotary), 0.8%, (sliding stem) full scaleAir Consumption 0.3 SCFM (0.5 Nm3/hr) @ 60 psi (4 barg)Air Capacity12 SCFM @ 60 psi (4 barg) (0.27 Cv)
User instructions - Digital Positioner 3200MD LGENIM0059-03 07/10 Table VII: Hazardous Area CertificationsNotified BodyCertificationOption-10ApprovalEntity ParametersExplosionproof:Class I, Div 1, Groups B,C,DDust Ignition Proof:Class II, III, Div 1, Groups EFGTemperature CodeEnclosureRatingT6 Tamb 60ºCNEMA4XT4 Tamb 85ºCT5 Tamb 55ºCNEMA4XInstall per NEC Article501-4 when barriers arenot used.T4 Tamb 85ºCT5 Tamb 55ºCNEMA4XNot Applicable-25º Ta 40ºCType4XT4 Tamb 80ºCType4XNot Applicable(See Warning No. 1, 2)Intrinsically Safe:Class I, II, III, Div 1, Groups A,B,C,DClass 1, Zone 0, AEx ia IIC-10(See Warning No. 2,3)-10-10Non-Incendive:Class I, Div 2, Groups A,B,C,D(See Warning No. 2)Explosionproof:Class I, Div 1, Groups B,C,DClass II, Div 1, Groups E,F,GClass IIIVmaxImaxPmaxCiLi 30 Volts 100mA 800mW 30 nF 0(refer to control drawing No.198736)(See Warning No. 1, 2)Intrinsically Safe:Class I, II, III, Div 1, Groups A,B,C,D 10VmaxImaxPmaxCiLi 30 Volts 100mA 800mW 30 nF 0(See Warning No. 2, 3) (refer to control drawing No.198736)10Non-Incendive:Class I, II, Div 2, Groups A,B,C,DNot RequiredT4 Tamb 80ºCType4X-28Explosionproof (Flameproof):II 2 GDEx d IIB H2Ex tD A21 T95ºCNot RequiredT5 (T -40ºC to 80ºC)IP65T4 (Tamb -40ºC to 85ºC)T5 (Tamb -40ºC to 55ºC)(Ta -400C to 800C)IP65(See Warning No. 2)(See Warning No. 1, 2)8x-28ATEXIntrinsically Safe:II 1 GDEx ia IICEx ia IID 20 T950 C(See Warning No. 2, 3)-28Ui 30 VoltsIi 100mAPi 800mWCi 30 nFLi 0Co 36 nFNon-Incendive:II 3 GEx nL nA IICEx tC A22 T950CNot RequiredT4 Tamb -40ºC to 85ºC)T5 Tamb -40ºC to 55ºC)(Ta -400C to 800C)IP65Explosionproof (Flameproof):Ex d IIB H2Not RequiredT5 (Tamb -20ºC to 55ºC)T5 (Tamb -40ºC to 80ºC)IP65UiIiPiCiLiT4 (Tamb -40ºC to 85ºC)IP65Not RequiredT5 (-40ºC Ta 80ºC)IP65Ui 30 VdcIi 100mAPi 800mWCi 30 nFLi 0Co 36 nHT5 (-40ºC Ta 55ºC)T4 (-40ºC Ta 85ºC)IP65(See Warning No. 2)-16IECEx-21-06(See Warning No. 1, 2)Intrinsically Safe:Ex ia IICExplosionproof (Flameproof):BR-Ex d IIB H2(See Warning No. 1, 2)Intrinsically Safe:BR- Ex ia IIC-06(See Warning No. 2, 3)(See Warning No. 2, 3) 30 Vdc 100mA 0.8W 30 nF 00 WARNINGS:1. In order to maintain the explosionproof certifications do not remove or loosen covers during operation.2. To avoid the possibility of static discharge clean only with a damp cloth.3. The positioner must be connected to suitable rated intrinsically safe equipment, and must be installed in accordance with intrinsically safe installation standards.5
User instructions - Digital Positioner 3200MD LGENIM0059-03 07/10 the command source. The command source can be accessed withValveSight software, the HART 375 communicator, or other hostsoftware.Table VI: 4 to 20 mA Analog Output SpecificationsPotential Range of Rotation40 - 95 Power Supply Range12.5 to 40 VDC, (24 VDC typical)Maximum Load Resistance (ohms)(Supply voltage - 12.5) / 0.02Current Signal Output4-20 mALinearity1.0% F.S.Repeatability0.25% F.S.Hysteresis1.0% F.S.Operating Temperature-40 to 176 F, -40 to 80 C4.2Whether in Analog or Digital Source, 0% is always defined as thevalve closed position and 100% is always defined as the valve openposition. In Analog Source, the 4-20 mA signal is converted to apercentage. During loop calibration, the signals corresponding to0% and 100% are defined.Positioner OperationThe Logix 3200MD positioner is an electric feedback instrument.Figure 1 shows a Logix 3200MD positioner installed on a doubleacting linear actuator for air-to-open action.The Logix 3200MD receives power from the two-wire, 4-20 mAinput signal. However, since this positioner utilizes HART communications, two sources can be used for the command signal:Analog and Digital. In Analog source, the 4-20 mA signal is used forthe command source. In Digital source, the level of the input 4-20mA signal is ignored and a digital signal, sent via HART, is used asThe input signal in percent passes through a characterization/limits modifier block. The positioner no longer uses CAMs or othermechanical means to characterize the output of the positioner. Thisfunction is done in software, which allows for in-the-field customeradjustment. The positioner has three basic modes: Linear, EqualPercent ( %) and Custom characterization. In Linear mode, the inputsignal is passed straight through to the control algorithm in a 1:1transfer. In Equal Percent ( %) mode, the input signal is mapped toa standard 30:1 rangeability % curve. If Custom characterizationis enabled, the input signal is mapped to either a default % outputcurve or a custom, user-defined 21-point output curve. The customuser-defined 21-poi
5.1 Mounting to Valtek Linear Mark One Valves 8 5.2 Mounting to Standard Valtek Rotary Valves 9 5.3 Optional Valtek Rotary Mounting Procedure 11 5.4 Tubing Positioner to Actuator 11 6 Wiring and Grounding Guidelines 12 6.1 4-20 mA Command Input Wiring 13 6.2 Grounding Screw 13 6.3 Compliance Voltage 13 6.4 Cable Requirements 13 6.5 Intrinsically Safe Barriers 14 7 Startup 14 7.1 Logix 3200MD .