Transcription
MCL-TechnologiesMCL Developer Kit Quick StartGuideV2.0Copyright MCL-Technologies 2019All Rights Reserved
Contents1.MCL-Mobility Platform architecture. 22.Setting up your MCL-Mobility Platform account . 33.Setting up MCL-Designer (adding a Development Station) . 44.Setting up MCL-Net (Pairing a Server) . 45.Setting up your device (MCL-Agent). 56.Setting up your device (MCL-Client) . 61
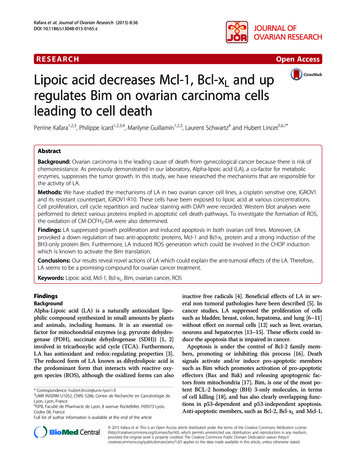
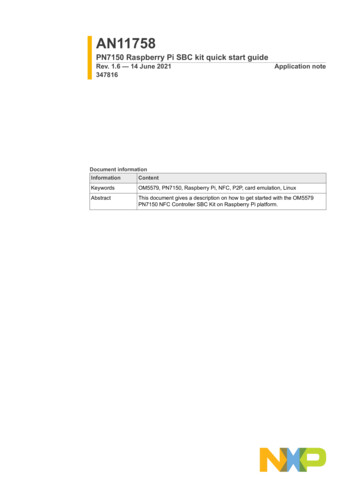
1. MCL-Mobility Platform architectureThe image below displays the available services and the products associated to the MCL-Mobility Platformand V4 components.For more information, check the following:MCL-Mobility Platform architectureMCL Collection2
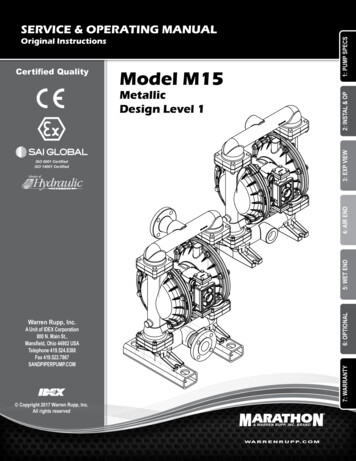
2. Setting up your MCL-Mobility Platform accountOnce you receive your MCL-Mobility Platform Subscription and create your account, you are ready to createthe first Site in the Admin Dashboard.For more information on adding a Site, check the MCL-Mobility Platform User Guide.In your Site Dashboard, create Device Groups so you can, later, add devices to the Site.For more information on creating a Device Group, check the MCL-Mobility Platform User Guide.3
3. Setting up MCL-Designer (adding a Development Station)Download MCL-Designer V4 here.Read MCL-DesignerV4 User Guide here.Once installed, run MCL-Designer and use the provided information (Activation PIN) to activate theDevelopment Station in your MCL-Mobility Platform account.Access the Admin Dashboard and add a Development Station.For more information on adding a Development Station, check the MCL-Mobility Platform User Guide.4. Setting up MCL-Net (Pairing a Server)Download MCL-Net here.Read MCL-Net User Guide here.Once installed, use the provided information to pair MCL-Net installed in your PC with the MCL-MobilityPlatform account.Access the Account Dashboard and pair a Server.For more information on pairing a Server, check the MCL-Mobility Platform User Guide.4
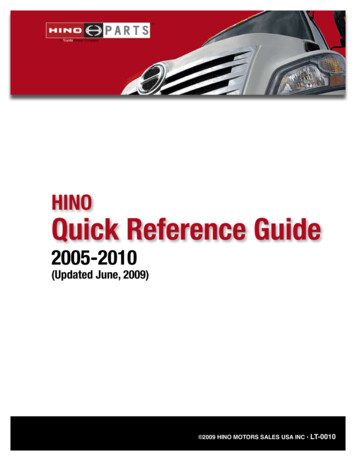
5. Setting up your device (MCL-Agent)Once you have created Device Groups, you are ready to set up your devices in the Site:Start by downloading the appropriate MCL-Device Agent for your device here keeping in mind your device’sManufacturer, model and OS.Copy the CAB (APK, in case of an Android device) to your device and install it. Make sure the device isconnected to a network with Internet access.Run the MCL-Agent, and access“Staging” menu option.(located on the screen's upper right corner) to access the App DesktopWhenever possible you should always use the Automatic Pairing/Staging option to pair devices.For more information on pairing, check the following:Adding a device/Staging a deviceAccess your Site Dashboard to continue the pairing process and there go to Device Groups.During the pairing process, go to a previously created Device Group details page and select “Pairing” in orderto pair the device into that device group.After pairing your device, remember to change its status to “Enabled”.For more information on changing device status, check the MCL-Mobility Platform User Guide.At this point, the device is connected to your MCL-Mobility Platform account but you are still required toinstall MCL-Client so you can run the applications you created in MCL-Designer.5
6. Setting up your device (MCL-Client)Once the pairing is concluded, you need to create a Configuration and to deploy it, in order to have MCLClient installed in your device.A Configuration is a container that includes specific MCL firmware, applications and/or other resources to bedeployed to your devices (which must be included in a Device Group).Access your Site Dashboard to create a Configuration.For more information on creating a configuration, check the MCL-Mobility Platform user Guide.A Deployment is the task that sends the assigned Configurations to your devices (which are included in aspecific Device Group).Access your Site Dashboard to plan a Deployment.For more information on creating a Deployment, check the MCL-Mobility Platform user Guide.Make sure the device is connected to an external power source so the Deployment can start.6
4 3. Setting up MCL-Designer (adding a Development Station) Download MCL-Designer V4 here. Read MCL-DesignerV4 User Guide here. Once installed, run MCL-Designer and use the provided information (Activation PIN) to activate the Development Station in your MCL-Mobility Platform account. Access the Admin Dashboard and add a Developmen