Transcription
Microsoft Excel for Beginnerstraining@health.ufl.edu
Microsoft Excel for Beginners2.0 hoursThis is a basic computer workshop. Microsoft Excel is a spreadsheet program. We use it tocreate reports that need calculations and charts. In this workshop we will learn how to movearound and work inside the spreadsheet.Vocabulary . 1Status Bar Modes . 1Keyboard Navigation . 2Ribbon . 2Clipboard . 2Formatting Cells . 3Cells Structures . 4Inserting . 4Deleting . 5Cell Size (Row Height/Column Width) . 5Fill Handle . 6Building an Equation . 6Type in the exact cell address . 6Use the mouse to point to the cell address . 7Mathematical Operations . 7AutoSum. 7Exercise 1: Customers . 8Resizing Columns . 8Freeze Panes (Lock Titles to Top of Page) . 8Format . 9Exercise 2: Quarter Total . 10Fill Handle. 10Format . 10Chart . 10Exercise 3: Items by Quarter . 11Insert Rows. 11Merged Title . 11Fill Handle Across . 11Total Row (AutoSum) . 11Exercise 4: Sales Report . 12Format . 12Math . 12Grand Total . 12Updated: 1/16/2018
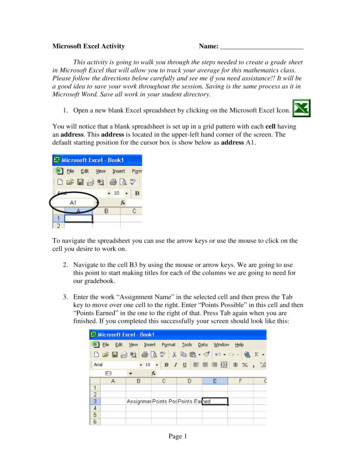
VocabularyMicrosoft Excel is a spreadsheet program. We use it to create reports that need calculations and charts.1. An Excel file is called a Workbook.-Default title is Book12. Ribbon broken into Tabs (Home, Insert, Page Layout )-Tabs broken into groups (Clipboard, Font, Alignment)3. Name box (left) and formula bar (right)-Name box shows address of current cell-Formula bar shows contents of current cell4. Columns Headings are Lettered, Rows Headings are Numbered-Columns of a building, rows of chairs5. Worksheet navigation buttons, Worksheet tabs-Sheet16. Status bar-Excel behaves differently depending on the current "mode"123456Status Bar Modes‐ Ready mode. This means nothing is being entered or edited on the spreadsheet.‐ Enter mode. This mode is when you are doing data entry, just typing in the contents.‐ Edit mode. Edit the contents of the current cell. Double‐click on a cell with data in it, or click insidethe formula bar for this mode.‐ Point mode. Used when linking to cell addresses within a formula or from an Excel dialog window.1
Keyboard NavigationKeyReadyEnterEnterEditPointMove DownAccept changes and move downMove UpAccept changes and move upTabMove RightAccept changes and move rightShift‐TabMove LeftAccept changes and move LeftShift‐EnterArrow KeysMoves to another cellMoves betweencharacters in cellPoints to anaddress of a cellHomeMoves to first columnMoves to the frontof the line in the cellPoints to cell incolumn ACtrl‐HomeMoves to the beginning cell of theworksheet (A1)Points to thebeginning of theworksheetRibbonThe images of Excel in this packet were copied from a wide screen monitor. With the wide screen theribbon is stretched across the window and I can see all the buttons. If you are working on a narrowerwindow, Excel will try to clump the groups together and the layout may look a little different than theones shown here, but all the buttons will be there.Here we can see how the font group is now three buttons high, and how some of the buttons like Cutand Copy have lost their text labels.ClipboardCut, Copy and Paste are clipboard features built into Windows. The clipboard is a temporary storageplace for pictures and data. The Windows clipboard can only store one item at a time. Microsoft Officehas a Multi‐Clipboard that can store 24 items, but the Paste button and the shortcuts for the Pasteoption only correspond to the most recently copied item. The clipboard pane must be displayed to beable to use this feature.Cut – Copies selection to the clipboard. If the selection is text or an image, it willdisappear. If it’s a cell, Excel waits until you paste it to delete the original cell.Copy – Copies selection to the clipboard.Paste – Retrieves most recent text/object on the clipboard.2
Formatting CellsThe most formatting options are found on the Home Tab. All the options can be found in the FormatCells window. This contains several tabs to help us format the contents of our spreadsheet. This windowcan be opened by using theMore Options button at the end of the Format, Alignment and Numbergroups. You can also use the Keyboard Shortcut – Ctrl‐1 or choose Format Cells from the right‐clickshortcut menu.Font1. Font – Sets the font of the selected cell(s). Fonts aredifferent ways to show the same letters.123 42.Font Size – Sets the size of the letters (the font). Largernumbers give larger fonts.3.Increase Font – Increases the font size4.Decrease Font – Decreases the font size5.Bold – Makes the selected cell(s) Bold6.Italic – Makes the selected cell(s) Italicized7.Underline – Makes the selected cell(s) Underlined. The drop down has a double underline.8.Borders – Adds and removes borders for the selected cell(s). The drop down has More Borders 9.Fill Color – Changes the background color of the selected cell(s).56 78910 1110. Font Color – Changes the color of the font of the selected cell(s).11. More Options – This button will open the Format Cells dialog window.Alignment1. Top Align – Vertically aligns to the top of the cell.1234678952.Middle Align – Vertically aligns to middle of the cell.3.Bottom Align – Vertically aligns to the bottom ofthe cell.4.Orientation – Rotates the contents of the cell tothe currently displayed option.5.Wrap Text – Displays contents on multiple lines within the cell's column width.6.Align Text Left – Horizontally aligns the contents to the left side of the column.7.Center – Horizontally aligns the contents to the center of the cell.8.Align Text Right – Horizontally aligns the contents to the right side of the cell.9.Decrease Indent – Decreases the space between the text and the cell border101110. Increase Indent – Increases the space between the text and the cell border11. Merge and Center – Joins selected (adjacent) cells into one cell and centers the result. If there isdata in more than one cell, Excel will only keep the information from the upper left cell.12. More Options – This button will open the Format Cells dialog window to the Alignment Tab.312
1Number1.Number Format – Allows you to change the way numeric values aredisplayed on the spreadsheet. The drop down arrow gives you a list ofthe most common formats, including a More Number Formats option.2.Currency Style – Sets the selected cell(s) to the Currency Style, thisstyle keeps the dollar signs on the left side of the cell, and thenumber on the right side. The drop down arrow gives you a list ofother currency formats, such as the Euro ( ).2345673.Percent Style – Sets the selected cell(s) to the Percent Style, this style has zero decimal places.Keyboard shortcut ‐ Ctrl‐Shift‐%. This button can be reset through Cell Styles on the Home Tab.4.Comma Style – Sets the selected cell(s) to the Comma Style, this style has a comma for everythousand and two decimal places. This button can be reset through5.Increase Decimal – Increases the number of decimal places showing to the right of the decimal.6.Decrease Decimal – Decreases the number of decimal places showing to the right of the decimal.7.More Options – This button will open the Format Cells dialog window to the Number Tab.Cells StructuresThere are a set number of cells within a Microsoft Excel worksheet. In the Ribbon versions (2007 andlater) there are 16,384 columns and 1,048,576 rows. As you insert and delete structures, you are notreducing the number of cells, merely shifting where your data lies on the defined worksheet. Thinkabout moving a painting around on a wall. You're not changing the wall, just the position of the painting.InsertingWe use Insert to make new cells, columns, and rows.Excel determines what you are trying to insert based on your selection. If a full column is selected, Excelwill assume you mean a full column and it will skip the Insert window.You can insert a cell, row, or column by doing one of thefollowing: Press Shift ‐ Ctrl ‐ on the keyboard (ctrl plus) or from the Home tab, in the Cells group, choose Insert or open the Right‐click menu and choose insert.‐ To insert multiple at once, select the number ofcells/rows/columns you would like to insert and follow thesteps above.‐ The size and format of the new space is determined by the previous row or column.‐ This will push the existing cells, columns, or rows to the right or down to make room for the new cells.4
DeletingWe use Delete to remove cells, columns, and rows. Exceldetermines what you are trying to delete based on yourselection. You can delete a cell, row, or column by doing one ofthe following: Press Shift ‐ Ctrl ‐ ‐ on the keyboard (Ctrl Minus) or from the Home tab, in the Cells group, choose Delete or open the Right‐click menu and choose insert.‐ To delete multiple at once, select the number of cells/rows/columns you would like to delete andfollow the steps above.‐ This will completely remove the structure, formatting and all, and the rows/columns/cells will shiftinto this place. If you only intended to delete the contents not the cells, undo and use the ClearContents option instead.Cell Size (Row Height/Column Width)You cannot resize one cell; the structure is dependent on the entire row and column where it resides.The Row Height and Column Width settings can be found under the Format menu in the Cells group ofthe Home tab.Adjusting with the MouseWhen we resize we are growing away from the left.To resize the column, place your mouse cursor between the lines of thecolumn headings. The current column heading is in a box; all you need todo is resize the box to make it wider. Put your mouse along the right sideof the heading box until y
16.01.2018 · Microsoft Excel for Beginners 2.0 hours This is a basic computer workshop. Microsoft Excel is a spreadsheet program. We use it to create reports that need calculations and charts. In this workshop we will learn how to move around and work inside the spreadsheet.
