Transcription
Webex MeetingsReference Guide
Table of ContentsIntroduction . 4Why Use Webex Meetings? .4Meeting Types .4Activating your Webex Host Account . 5Logging in to Webex . 5Personal Meeting Room. 6Customizing your Personal Meeting Room . 6Beginning your Meeting. 7Connecting your Audio and Video . 7Meeting Session Window Overview . 9Menu Toolbar . 10Content Area . 11Meeting Controls . 12Panels. 12Assigning a Presenter . 13Sharing Content . 14Share your Screen . 15Sharing Multimedia. 16Share File . 18Share an Application . 19Share Whiteboard . 20Using Annotation Tools . 21Share iPhone/iPad Screen (Mac only) . 23Leaving/Ending a Meeting .24Scheduling a Meeting .24Starting or Joining a Meeting . 27Joining by a Browser . 27Joining from Webex . 29Starting from Webex . 30Office ofTechnology ServicesOTS TrainingOTS Publication: wx49 2/19/2021 training@towson.edu 2021 Towson University. This work is licensed under theCreative Commons Attribution-NonCommercial-NoDerivs License.Details available at http://www.towson.edu/OTStraining
From your Outlook Calendar . 31From your Email . 32Joining from your iPad. 33Insights. 34Webex Meetings Desktop App .35Downloading from the TU Software Center . 35Downloading from Cisco Webex . 36Using the Webex Meetings Desktop App . 37Recording your Session . 38Viewing and Sharing Recordings . 40Office ofTechnology ServicesOTS TrainingOTS Publication: wx49 2/19/2021 training@towson.edu 2021 Towson University. This work is licensed under theCreative Commons Attribution-NonCommercial-NoDerivs License.Details available at http://www.towson.edu/OTStraining
Webex: Reference GuideIntroductionWebex Meetings is a web-based collaborative technology service that allows users to share resources (documents,desktop, web browser, applications, etc.) remotely and communicate with each other using voice, video and textchat. You may participate in a Webex webinar using VoIP (voice over internet protocol) or the telephone for audio.Participants must have a headset with a microphone, or speakers with a microphone to use VoIP.Note: Though participants may use web cameras, they are not required.Why Use Webex Meetings? advisor/advisee interaction collaboration with research colleagues interviews guest lectures and presenters communicate with service units collaborate with colleagues across campus or across the country meet online to share files, info, and expertise record a meeting consultations conferences with outside agencies and vendors off-site meetingsMeeting Types Personal Meeting Rooms– Available at all times and can be accessed by sharing the host's unique andpersonal URL. Meeting Center– Hosts can arrange a time for a meeting - the meeting uses a one-time link that a host mayemail to participants.4
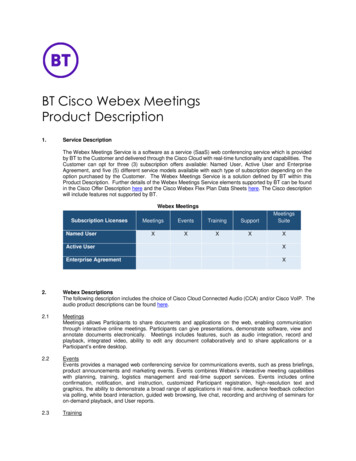
Webex: Reference GuideActivating your Webex Host AccountIn order to start using Webex to host a meeting, you will first need to activate using your TU NetID and password.You will only need to complete this process once. Follow the steps below to get started:1.Open your preferred web browser and navigate to towson.edu/webex.2. Scroll down to the Activation and Login section and click the activate link.Figure 13.Log in using your NetID (Username) and Password.Figure 24.Follow the steps on your browser screen and once you have an activated account, you can login.Logging in to Webex1.Open your preferred web browser and navigate to towson.webex.com.2. Click the Sign In button in the upper right-hand corner.Figure 33.From the Towson University Authenticated Login page, enter your Username (NetID) and Password.4.Click Login.5
Webex: Reference GuidePersonal Meeting RoomAfter logging in, your Personal Meeting Room appears by default. Located in the Home Page, your Personal Roomis your own virtual conference/meeting space that is always available to you 24/7. You can share your personalURL with someone to start an instant meeting with them. A Personal Room includes the following benefits: Your Personal Room has an unchanging url personalized to you; your URL, video address, and call-innumbers never change. Participants can use a variety of different ways to join your meeting including through the desktop, throughtheir web browser, or on a mobile device or video system. It provides a virtual waiting room or lobby where people wait if they try to join your Personal Room meetingahead of time or if you have chosen to lock your Personal Room (i.e, back-to-back meetings).Figure 4Customizing your Personal Meeting Room1.To change your profile picture, hover over the circle in the middle of the screen and click Change. You cantake a photo from your webcam by clicking Take Photo or upload an image from your files by clicking Upload.Figure 56
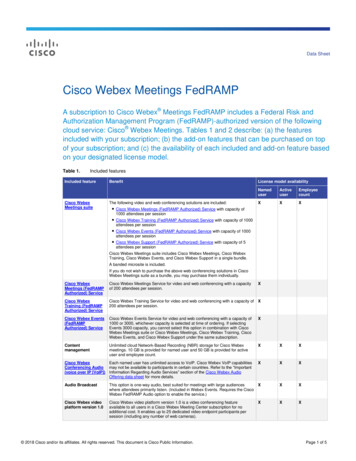
Webex: Reference GuideBeginning your MeetingYou can toggle between using the desktop app or the web app to start a meeting by clicking the drop downarrow beside start a meeting and selecting either of the options (If you do not chose, the default is Use desktopapp).Figure 62. Click the Start a Meeting button to begin your meeting.Figure 7Connecting your Audio and VideoWhen you join a Webex meeting, audio and video may be turned off. Click the audio and video icon to ensure theyare on. By default, Webex will select the video source available.Figure 81.Click the drop-down menu beside Use computer audio to select one of the following options:Figure 9 Call In – Webex provides a toll-free and toll number for you to call. Use computer audio – Webex uses VoIP (voice over internet protocol) to transmit your voice throughyour computer. Select this if you are using a microphone on your computer. (Note: this option isselected by default)oTest your microphone levels by clicking Test speaker and microphone on the right bottomcorner. (Note: the settings icon will show once you hover your mouse over the option.)Figure 107
Webex: Reference Guide Don’t connect to audio – This option will disable the use of any audio device. You will only have thevideo source available to you.Figure 112. Connect to video system - Located at the bottom left corner, this option will allow you to connect to themeeting using a Webex Device such as a Webex Board or Webex Desk Device (provided by the university).Figure 123.Once you have made your audio and video selections, click the Start meeting button.Figure 138
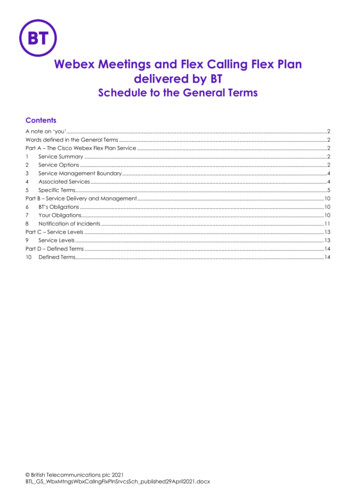
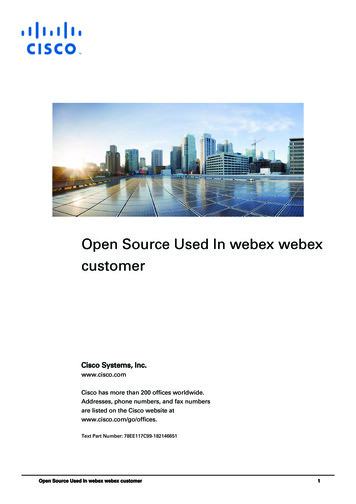
Webex: Reference GuideMeeting Session Window OverviewThe meeting session window is comprised of the following components and areas:Menu ToolbarThe Menu Toolbar is where you can access many of the meeting session’s toolsand functions. This is located at the top of the window.Content AreaThe Content Area is used to display presentations, documents, video,whiteboards, and web content. This is located below the Menu Toolbar.Meeting ControlsThe Meetings Controls are a set of buttons used to run your meeting. This islocated at bottom of the window.PanelsThe Panels are where the names of participants and the chat are shown. Theseare located to the right of the Content Area.Figure 149
Webex: Reference GuideMenu ToolbarThe Menu Toolbar is located at the top of the window and contains many of the tools and functions for yourmeeting session.Figure 15FileUsed for saving, opening, or transferring files during the meeting. Additionally, it is used for endingor leaving a sessionEditUsed for editing shared content while using the Content AreaShareUsed for sharing your desktop, a file, an application, the whiteboard, web content, and a webbrowserViewCommands used to change the display while using the Content Area such as rotating, zooming,or expanding to a full screen view, etc.Audio &VideoUsed to join a teleconference or to set up your audio connectionParticipantCommands pertain to controlling participants’ privileges including assigning privileges, audiocontrol, expelling participants, etc.MeetingCommands pertain to the overall meeting including recording and restricting access, etc.BreakoutSessionsUsed for splitting participants into separate smaller groups either manually or automatically.HelpProvides information and help within the Meeting SessionYou can choose to hide the Menu Toolbar by clicking the arrow beside Hide menu bar right above the Menu Bar.Figure 1610
Webex: Reference GuideContent AreaThe Content Area allows for live collaboration with attendees using your computer screen, files (including video),and applications. When sharing, you have a variety of controls within the sharing icon tray.Figure 17PauseFreeze the sharing screen for attendeesShareBegin another sharing optionAssignAssign an attendee as the presenter, pass keyboard and mouse control, and allow attendees toannotate your current screenMuteMute your audioVideoStop sharing your video source while sharing your screenRecorderRecord your current Meeting SessionBreakoutSessionsAssign participants to separate roomsParticipantsShow the Participants panelChatShow the Chat panelAnnotateAnnotate your current screenMoreVarious other commands such as accessing the notes panel, lock and ending the meeting, etc.11
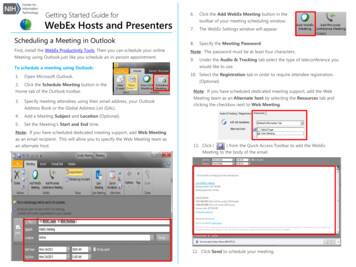
Webex: Reference GuideMeeting ControlsThe Meeting Controls are used to conduct your meeting and control your audio/video connection, content sharing,and recording,Mute your MicrophoneVideo Connection/Stop your video – Setup your video connectionShare Content – Share content including your desktop, a file, an application,the whiteboard, web content, a web browser, and an iPhone/iPad (Mac only)Recorder – Record your meetingBreakout sessions – Enable breakout groupsShow/Hide the Participant PanelShow/Hide the Chat PanelMore Options – Take notes, lock your meeting, send invitations and reminders,and setup your audio connectionLeave/End MeetingPanelsThe panels on the right side of the meeting window are flexible. You may open, close, expand or minimize them. Ifyou wish to make the content area bigger, you can change how wide all of the panels are by clicking and draggingthe side border of the panels.1.Enable/Disable Participants Panels by clicking the show/hide the participant panel button in the MeetingControls section. You may manually change them under View Panels at the top of the window.Note: By default, you are only able to see the Participants and the Chat panel12
Webex: Reference Guide2. Beside each panel’s title bar, there is an arrow. Click on this arrow to minimize or maximize a panel.Figure 183.Minimized panels are located at the bottom right of the meeting window. Only the title bar of a minimized panelwill be visible. To restore a minimized panel, click on the arrow beside the panel’s title.Assigning a PresenterBy default, anyone in your meeting can share content. You can disable this and only allow the Presenter to sharecontent.1.Click the Participant tab in the Menu Toolbar.2. Click Anyone Can Share to deselect it.Figure 193.To assign a presenter, click and drag the Webex icon to another participant in the meeting. You can at anytime change the presenter back to yourself.Figure 2013
Webex: Reference GuideSharing Content1.Within your Webex session, there is a Share Content button in the Meeting Controls section. Click this buttonto open a sharing menu with a number of options described below:Figure 212. At the top of the Share Content window, there is a drop-down menu, giving you the option to choose specificoptimization for what you are presenting. The options you have are as follows: Optimize for text and images: Optimizes your content sharing with the highest resolution and claritypossible. This is ideal if you are presenting documents, presentations, applications, or web sites with textand images. Optimize for motion and video: Optimizes your content sharing with a higher frame rate increasing thefluidity and smoothness of the content but sacrifices some resolution. This is ideal if you are presentingvideos or any sort of animations.Figure 2214
Webex: Reference GuideShare your ScreenYou can share the entire content of your computer screen which includes any application, window, and filedirectories currently open. Attendees will see all mouse movements.1.Click the Share Content button in the Meeting Controls. Click Screen 1 in the window. If you are utilizingmultiple monitors, all of the available screens to share will appear here.Figure 232. To stop sharing your desktop, hover your mouse at the top of your screen. The sharing icon tray will slidedown. Click the Stop Sharing button.Figure 2415
Webex: Reference GuideSharing MultimediaMultimedia such as YouTube can be shared to give the viewers personal control of the video’s playback. The videoshared must be on the internet, and you must have the link to the video or web address to the video file.Note: Multimedia sharing is not supported on all devices that may join a Webex meeting, some mobile devices maynot be able to view videos entirely.To share a video in this format, click the Share tab at the top and click Share Multimedia.Figure 25Enter the URL for your video in the text box that appears and press OK.Figure 2616
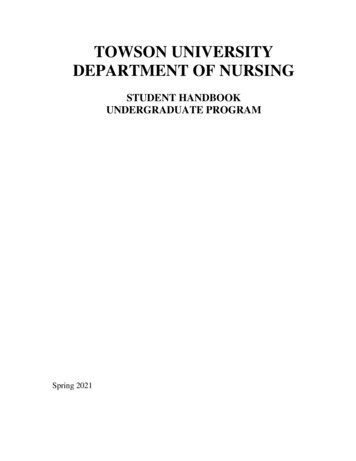
Webex: Reference GuideThe Multimedia Viewer will now appear on the right side under the Participants and Chat windows, and thevideo will automatically start. Participants can stop and start their videos individually.Figure 27To close the Viewer, press the “x” icon.Note: If the video is playing when the viewer is closed, it will continue to play in the background.Figure 28To re-open the Viewer, click the Panel options button on the bottom right next to the Participants and Chatbuttons, then click Multimedia Viewer.Figure 2917
Webex: Reference GuideShare FileThis option is ideal for presenting information that you do not need to edit during the meeting. You may share mostany type of file including videos. Attendees do not need to have the application to view it.1.Click the Share Content button in the Meeting Controls, scroll down to see more sharing options. Click ShareFile in the window.Figure 302. The Share File window will open. Navigate to the file you wish to share. Select the file and then click the Openbutton.3.The file will appear in the Webex meetings session window, and drop-down menu at the top of the contentwindow with the name of
Webex Meetings is a web-based collaborative technology service that allows users to share resources (documents, desktop, web browser, applications, etc.) remotely an