Transcription
How to Host WebEx MeetingsInstructions for ConnSCU Faculty and Staff using ConnSCU WebExTable of ContentsHow Can Faculty and Staff Use WebEx? . 3Inviting Meeting Participants . 3Tips before Starting Your Meeting . 3Start a WebEx Meeting . 4The Quick Start Window . 5Presentation Options . 6Whiteboard . 6Share Your Meeting Window . 8Share Your Desktop or Applications. 8Share Files . 9Sharing a Video File with Attendees . 9Sharing Web Content . 10Sharing Web Browser . 10Give “Presenter Privileges” to a Meeting Participant.11Set Participant Privileges .11Have Participants “Raise their Hand” .12Expel a Participant and/or Restrict Access to a Meeting .12Audio for WebEx Hosts and Participants .14Audio Options for Meetings . 14Call Me . 14I Will Call In . 14Call Using Computer. 14Muting Your Own—or a Participant’s—Microphone or Phone . 14Use the Chat Tool ting.asp
Usage/Attendance Reports for Meetings You Host .15How to Turn Off Desktop Alerts in Outlook .162
How Can Faculty and Staff Use WebEx? WebEx is an online conferencing tool that has proven useful for both staff and faculty in theConnSCU system. It enables you to meet with students or colleagues from wherever you are,home or office, as long as you have Internet access on your computer or have the WebExmobile app installed for your iPhone, iPad, Android, or Blackberry. If you can get online, youcan collaborate with others online, and share data, presentations, online demonstrations, etc. Faculty can use WebEx to bring guest speakers into their classrooms, hold virtual office hours,provide one-on-one or group tutorials, participate in committee work and much more. You caneven record lectures or meetings with WebEx. For information on how to request a Host account, WebEx Roles, etc., please visit theConnecticut State Colleges and Universities IT Support Center Webex aspInviting Meeting Participants To help your participants successfully join the meeting and use WebEx tools, direct them tothis webpage for Meeting xForAttendees.asp If you are planning to track attendance at your meetings: Tell those you invite IN ADVANCEthat when they Join the meeting, they must enter both their first and last name. The meetingattendee name cannot be changed by either the Host or attendee once the meeting hasbegun; the attendee actually needs to leave the meeting and then rejoin with a differentname.Tips before Starting Your Meeting Turn off “Desktop Alerts” in Microsoft Outlook! If you are using Microsoft Outlook andyour “Mail” options are set to display new mail as a desktop alert on your taskbar, we stronglyrecommend you turn this setting OFF! If you do not do this, even if you are not displaying yourOutlook email when you share your screen, participants in your WebEx meeting will see everynew email you receive while you are hosting the meeting! (Instructions for “How to Turn OffDesktop Alerts in Outlook” are included in the table of contents in this document.) Close any extraneous applications that you o not want to accidentally share during yourmeeting, such as email, online chat tools, or other documents you might be working on. Send “Attending a Meeting FAQ” link to those who have never attended a WebEx meeting. Put up a “do not disturb” sign outside the space where you are running the meeting. Enter the meeting room five minutes early. If it’s a meeting, ask someone else to take notes. Leave time for Q&A at the end. Meetings automatically terminate 30 minutes after thescheduled meeting end time, so be sure to give yourself enough time for Q&A. Hosts willreceive a 5 minute warning prior to meeting termination. If you are planning to record the meeting, be sure to let all participants know!Keep these considerations in mind:oYou may need to remind participants that the meeting is being recorded for later use ifthe questions or comments get off-topic.3
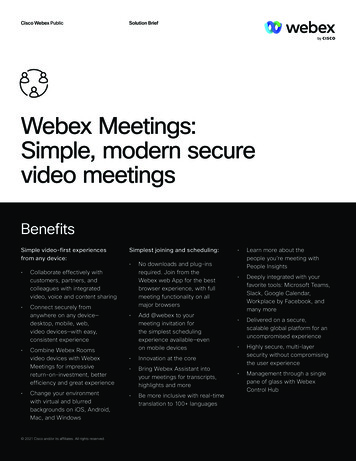
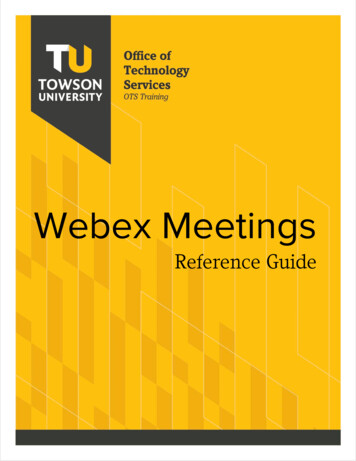
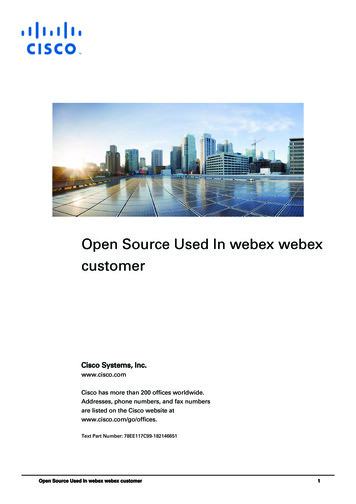
oSometimes recording a meeting, classroom session, or training session has the effectof inhibiting participation or questions, since participants may not want others whoview the recording later to hear their questions.Start a WebEx Meeting To start a meeting simply log into https://ctedu.webex.com/ using your Host account. If you are using your Personal Room, click “Start Meeting”. If you scheduled the meeting, click “My Meetings” and navigate to the date and click “Start.”4
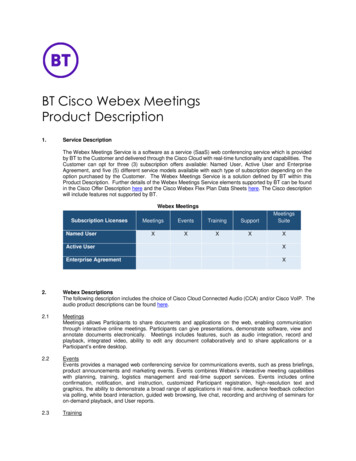
To start a meeting from an Outlook Calendar item, click the embedded link or copy/paste itinto your web browser’s address bar.The Quick Start Window When you launch a WebEx Meeting you will initially see the WebEx Quick Start Window. Take some time to explore the menu items, buttons, and tabs, which contain many differentoptions and tools that you can make use of in your meetings. When you schedule a meeting, you are automatically the Host of the meeting, and youcan start the meeting. However, depending upon your meeting settings, participants mayhave joined your meeting before you actually start it. Once you start the meeting, you are also the Presenter by default, so if you choose toshare your desktop, an application, or a file, your participants will see what you present. Thereare a number of different options available for presenting information in your meeting. Thefollowing is not a comprehensive list, but these are the most common options used.5
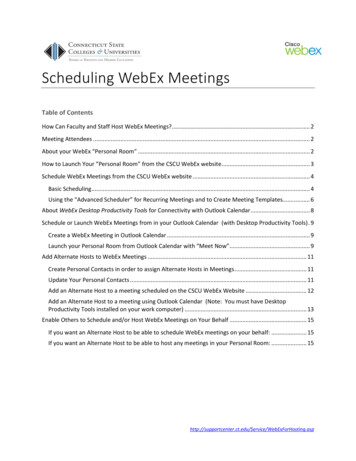
Presentation OptionsThere are a number of different ways that you can share information in WebEx—experiment a littleand you’ll discover them all! To get you started though, here are the most popular:Whiteboard While participants are logging in, but before the meeting has begun, you might want toset up a Whiteboard and type in some introductory information that all participants willsee as soon as they join the meeting. As long as you are seeing that whiteboard tab,participants will see what you have typed as they come into the meeting.6
If you are planning to record the meeting, this is a good time to add a note to that effect,so that everyone who is entering the meeting immediately sees this information. You can enable all participants to annotate whiteboards by clicking the menu itemParticipants Assign Privileges, or you can right-click on a particular participant andchange their role to allow that one person to annotate. You can have multiple Whiteboards open during a meeting, you can renamewhiteboards, and you can save them as PDFs by clicking the “File” menu item andselecting “Save All” or “Save As.”7
Share Your Meeting WindowSometimes at the beginning of a meeting, one or more participants may be having some troublelocating something on their screen after they’ve joined the meeting. For example, they may notknow how to find their audio options or know where to look for the Chat panel. To help them out,it’s often helpful if the Host shares his/her Meeting Window. Once the participant is back on track,use one of the other sharing methods below to share other types of content.1. Select Share from the menu, then My Meeting Window.2. When you no longer need to share your Meeting Window, just click Stop Sharing buttonon your Control Palette.Share Your Desktop or Applications1. To share everything that you open on your computer desktop, or just a single application(such as one web browser), click the Quick Start tab and then click either the ShareScreen button or three dots below it to select a specific application.2. If you share only a specific application, participants will see a pattern when you click outof that application. If you share your desktop, they will see everything as you moveacross applications, windows, etc.3. Once you have shared your desktop or an application, the WebEx Control Palette willdisplay (usually at the top of your screen). If you mouse over the green tab you will see a8
number of options.4. If you move your mouse off the green tab the Control Palette will automatically collapse.Share FilesIf you just want to share a single file (so participants will see nothing else except just that file), justgo to the menu and select Share File (including video).Sharing a Video File with AttendeesIf you have a video file on your computer that you wish to share with participants during ameeting and you want them to hear the sound from the video file.IMPORTANT NOTE: Attendees using some mobile devices (such as Android phones) willnot be able to view this kind of shared media!1. Select Share File (Including Video) .2. The video will display in a new tab with the name of the file.3. When you click the “play” icon in the center, the video will display and attendees willhear the audio.9
Sharing Web ContentThis option enables participants to interact independently with Web pages. Participants canexperience media effects on Web pages, including video and sound. However, Web Contentsharing does not let you guide participants to other Web pages.IMPORTANT NOTE: Attendees using some mobile devices (such as Android phones) will not beable to view this kind of shared media!For example if you wanted to have everyone watch (and listen to) a YouTube video during themeeting, this would be the option to use. Here’s how:1. From within your WebEx meeting, click the Share menu and select Web Content:2. Copy the direct link to the YouTube video that you want to share (or the link to other webbased content) and then paste it into the Address field and click OK.3. The web content will then display in a new Whiteboard tab titled “watch” and when youclick to play it, the system audio will play through for attendees.Sharing Web BrowserSharing a Web browser lets you annotate while guiding participants around the web pages andsites. However, during Web browser sharing, participants cannot view or experience anymultimedia effects on a Web page, such as Flash animations or streaming audio and video.10
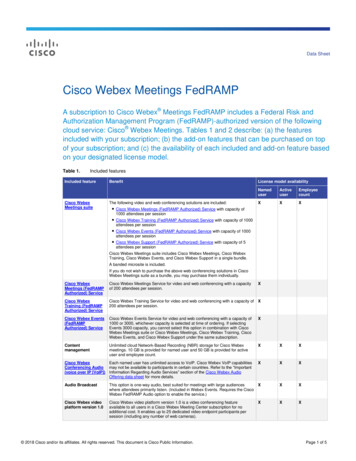
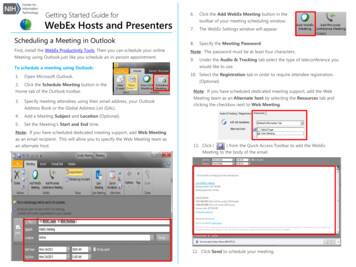
Give “Presenter Privileges” to a Meeting ParticipantSometimes during a meeting, the Host may wish to give Presenter privileges to one of the participants,so they can show a presentation or file, or share the contents of their desktop with the rest of thegroup. In other cases, you may wish to start a “One-click” meeting to do a quick one-on-one meetingwith a student or colleague, to provide tutoring or have a private discussion.Sometimes the process of passing presenter privileges is referred to as “passing the ball” to someoneelse in the meeting.IMPORTANT NOTE: Be sure to remind the participant that before sharing, they should close anythingthat they don’t want others to see, such as open files, websites, email, text or online chat boxes, etc.!Here’s how to make someone else the Presenter:1. Either drag the little blue and green ball to another person’s name, or right-click on a person’sname in the Participants panel, select Change Role To and then select Presenter.Important Note: Do NOT ever make the other person the Host! Then you lose control of themeeting.2. When Presenter privileges are turned over to a participant, they will see a You are now thepresenter message flash on their screen.3. In order for the participant to share their screen, they must be sure that they are in theWebEx meeting window and that they click on the Quick Start tab. Then they can click theShare Screen icon (or they can choose to share only a specific file or application if theywish).Set Participant Privileges If the host in the meeting goes to the menu and selects Participant Assign privileges andthen clicks the Participant tab, they have a variety of options. We strongly recommend that you do NOT give participants these privileges:oControl shared applications, web browser, or desktop remotely: Giving a participantaccess to a desktop that is being shared by another person also gives them remoteaccess to the other user’s operating system and files, etc.11
oRecord a meeting: Only the Host should have the ability to record meetings.Have Participants “Raise their Hand”Sometimes the Host of the meeting will ask participants to “Raise their hand” to indicate theirpreferences or feedback on a question. Here’s how! At the bottom of the Participants palette, everyone will see a “Raise Hand” button. When they click that, the Host will see how everyone has responded.Expel a Participant and/or Restrict Access to a MeetingYou can expel an Attendee from a meeting (for example, if his/her behavior is inappropriate orthey have somehow managed to get into a meeting they should not be in. You can also restrictaccess to a meeting once it has started so no one else can join.12
To expel an attendee: Click the person’s name in the Participant list, then from the menu,select Participant then Expel. To Restrict Access to additional attendees once a meeting has started: Select Meetingfrom the menu, then select Restrict Access. No one else will be able to join the meetingat that point. This is useful if you are doing a presentation and latecomers would bedisruptive.13
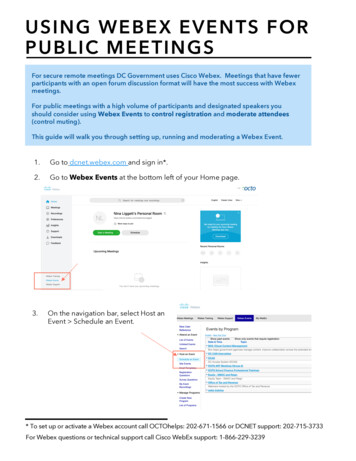
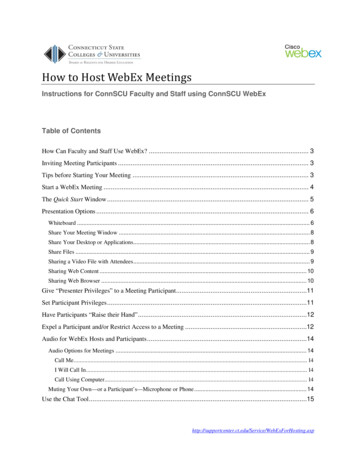
Audio for WebEx Hosts and ParticipantsAudio Options for MeetingsCall Me Click this button, enter the phone number of thephone you wish to use to participate in themeeting’s audio, and WebEx will call it. This doesnot have any toll charges to you.I Will Call In A dialog box will provide a phone number, accesscode and attendee ID. NOTE: Regular long-distance phone charges willapply if you are calling from a home or cell phone,based on your phone plan.Call Using Computer This option enables audio information to betransmitted online. Use this option only if you havea microphone and speakers on the computer youare using, or a headset with a microphone. Thisoption does not have any toll charges. You can also test your speaker and mic from thisdialog box.Muting Your Own—or a Participant’s—Microphone or Phone1. Click the little green tab to display the toolbarpalette and click the Mute Me button when anapplication or the presenter’s desktop is being shared. You can also display the Participantslist from this dropdown panel so you can mute others in the meeting.2. Clicking the mute icon to the right of a name can also beused.3. Hosts can mute any participant by clicking the mute iconnext to the person’s name; typically if there is a lot ofbackground noise from that person’s environment.4. If you are using a built-in mic (for example, on a laptop),press the Ctrl key while you’re speaking. This mutesyour speakers so the feedback from them doesn’t cause a distracting digital delay.5. If you are calling in by phone, never put the WebEx call on “Hold”—if your organization hasbackground “hold” music, everyone on the call will hear it. The host will probably “mute” youand neither of you will necessarily know that when you return to the call.14
Use the Chat Tool When you begin a new WebEx meeting, keep in mind that attendees cannot see chatposts that are posted prior to the time when they joined the WebEx meeting. So if youpost “introductory” information for attendees (i.e., a reminder about the phone line to call intoor how to use VoIP, or troubleshooting info) into chat during the time when people are enteringthe meeting, be sure to “repost” the information periodically as people enter the meeting room. You can copy and paste URLs into the Chat window and they become live hyperlinks.For example, if you wanted participants to check out and bookmark a website after themeeting, simply copy and paste the URL into the Chat window and let them know to click it—itwill open in their web browser in a new window.Usage/Attendance Reports for Meetings You HostHosts can easily view usage for meetings they schedule and run, such as attendance, duration, andmore across all your meetings. You can generate a report for any dates up to three months prior totoday.1. Go to https://ctedu.webex.com/ and log in using your Host account.2. Click on MyWebEx and then on My Reports.3. Click on Usage Report and enter the parameters to run your report.4. To view Attendance information, simply click each Topics title. You can Print or Export thedata for any report.15
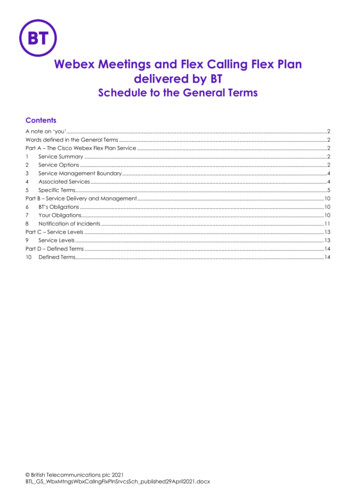
How to Turn Off Desktop Alerts in OutlookEven if you have Microsoft Outlook minimized on your taskbar, it is important that you realize that ifyou have new email message delivered and “desktop alerts” turned on, meeting attendees will be ableto SEE AND READ both your new incoming email subject and part of the message text!It is strongly recommended that Hosts and Presenters turn off “Desktop Alerts” in MicrosoftOutlook, and leave it off so you don’t forget to turn it off later.1. In Microsoft Outlook (the native application, not Outlook Web Access), click File, thenOptions.16
2. Click Mail in the sidebar of the dialog box, then in the Message Arrival section; deselectShow an envelope icon in the taskbar.3. Click OK to save your changes.17
Faculty can use WebEx to bring guest speakers into their classrooms, hold virtual office hours, provide one-on-one or group tutorials, participate in committee work and much more. You can even record lectures or meetings with WebEx. For information on how to request a Host a cco